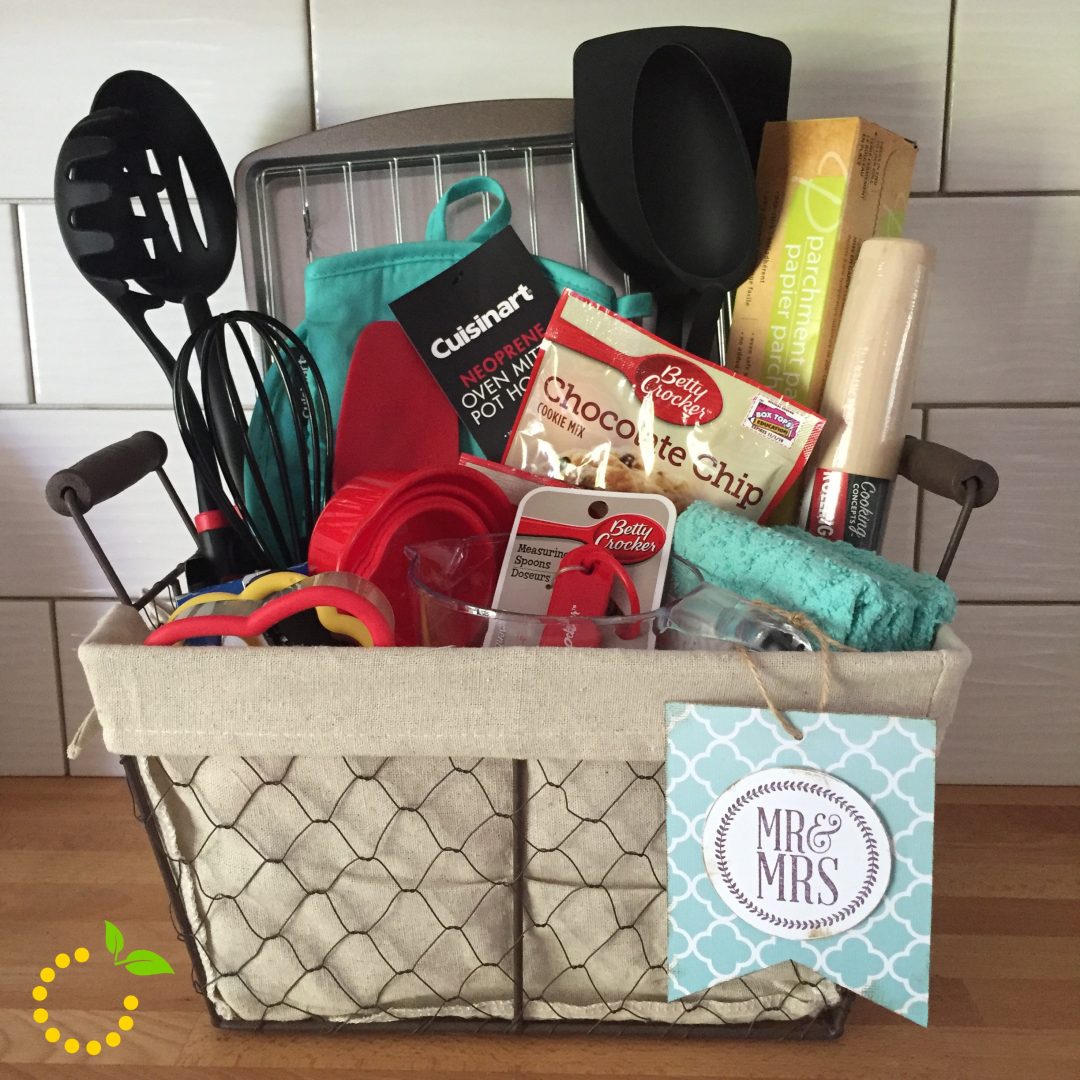
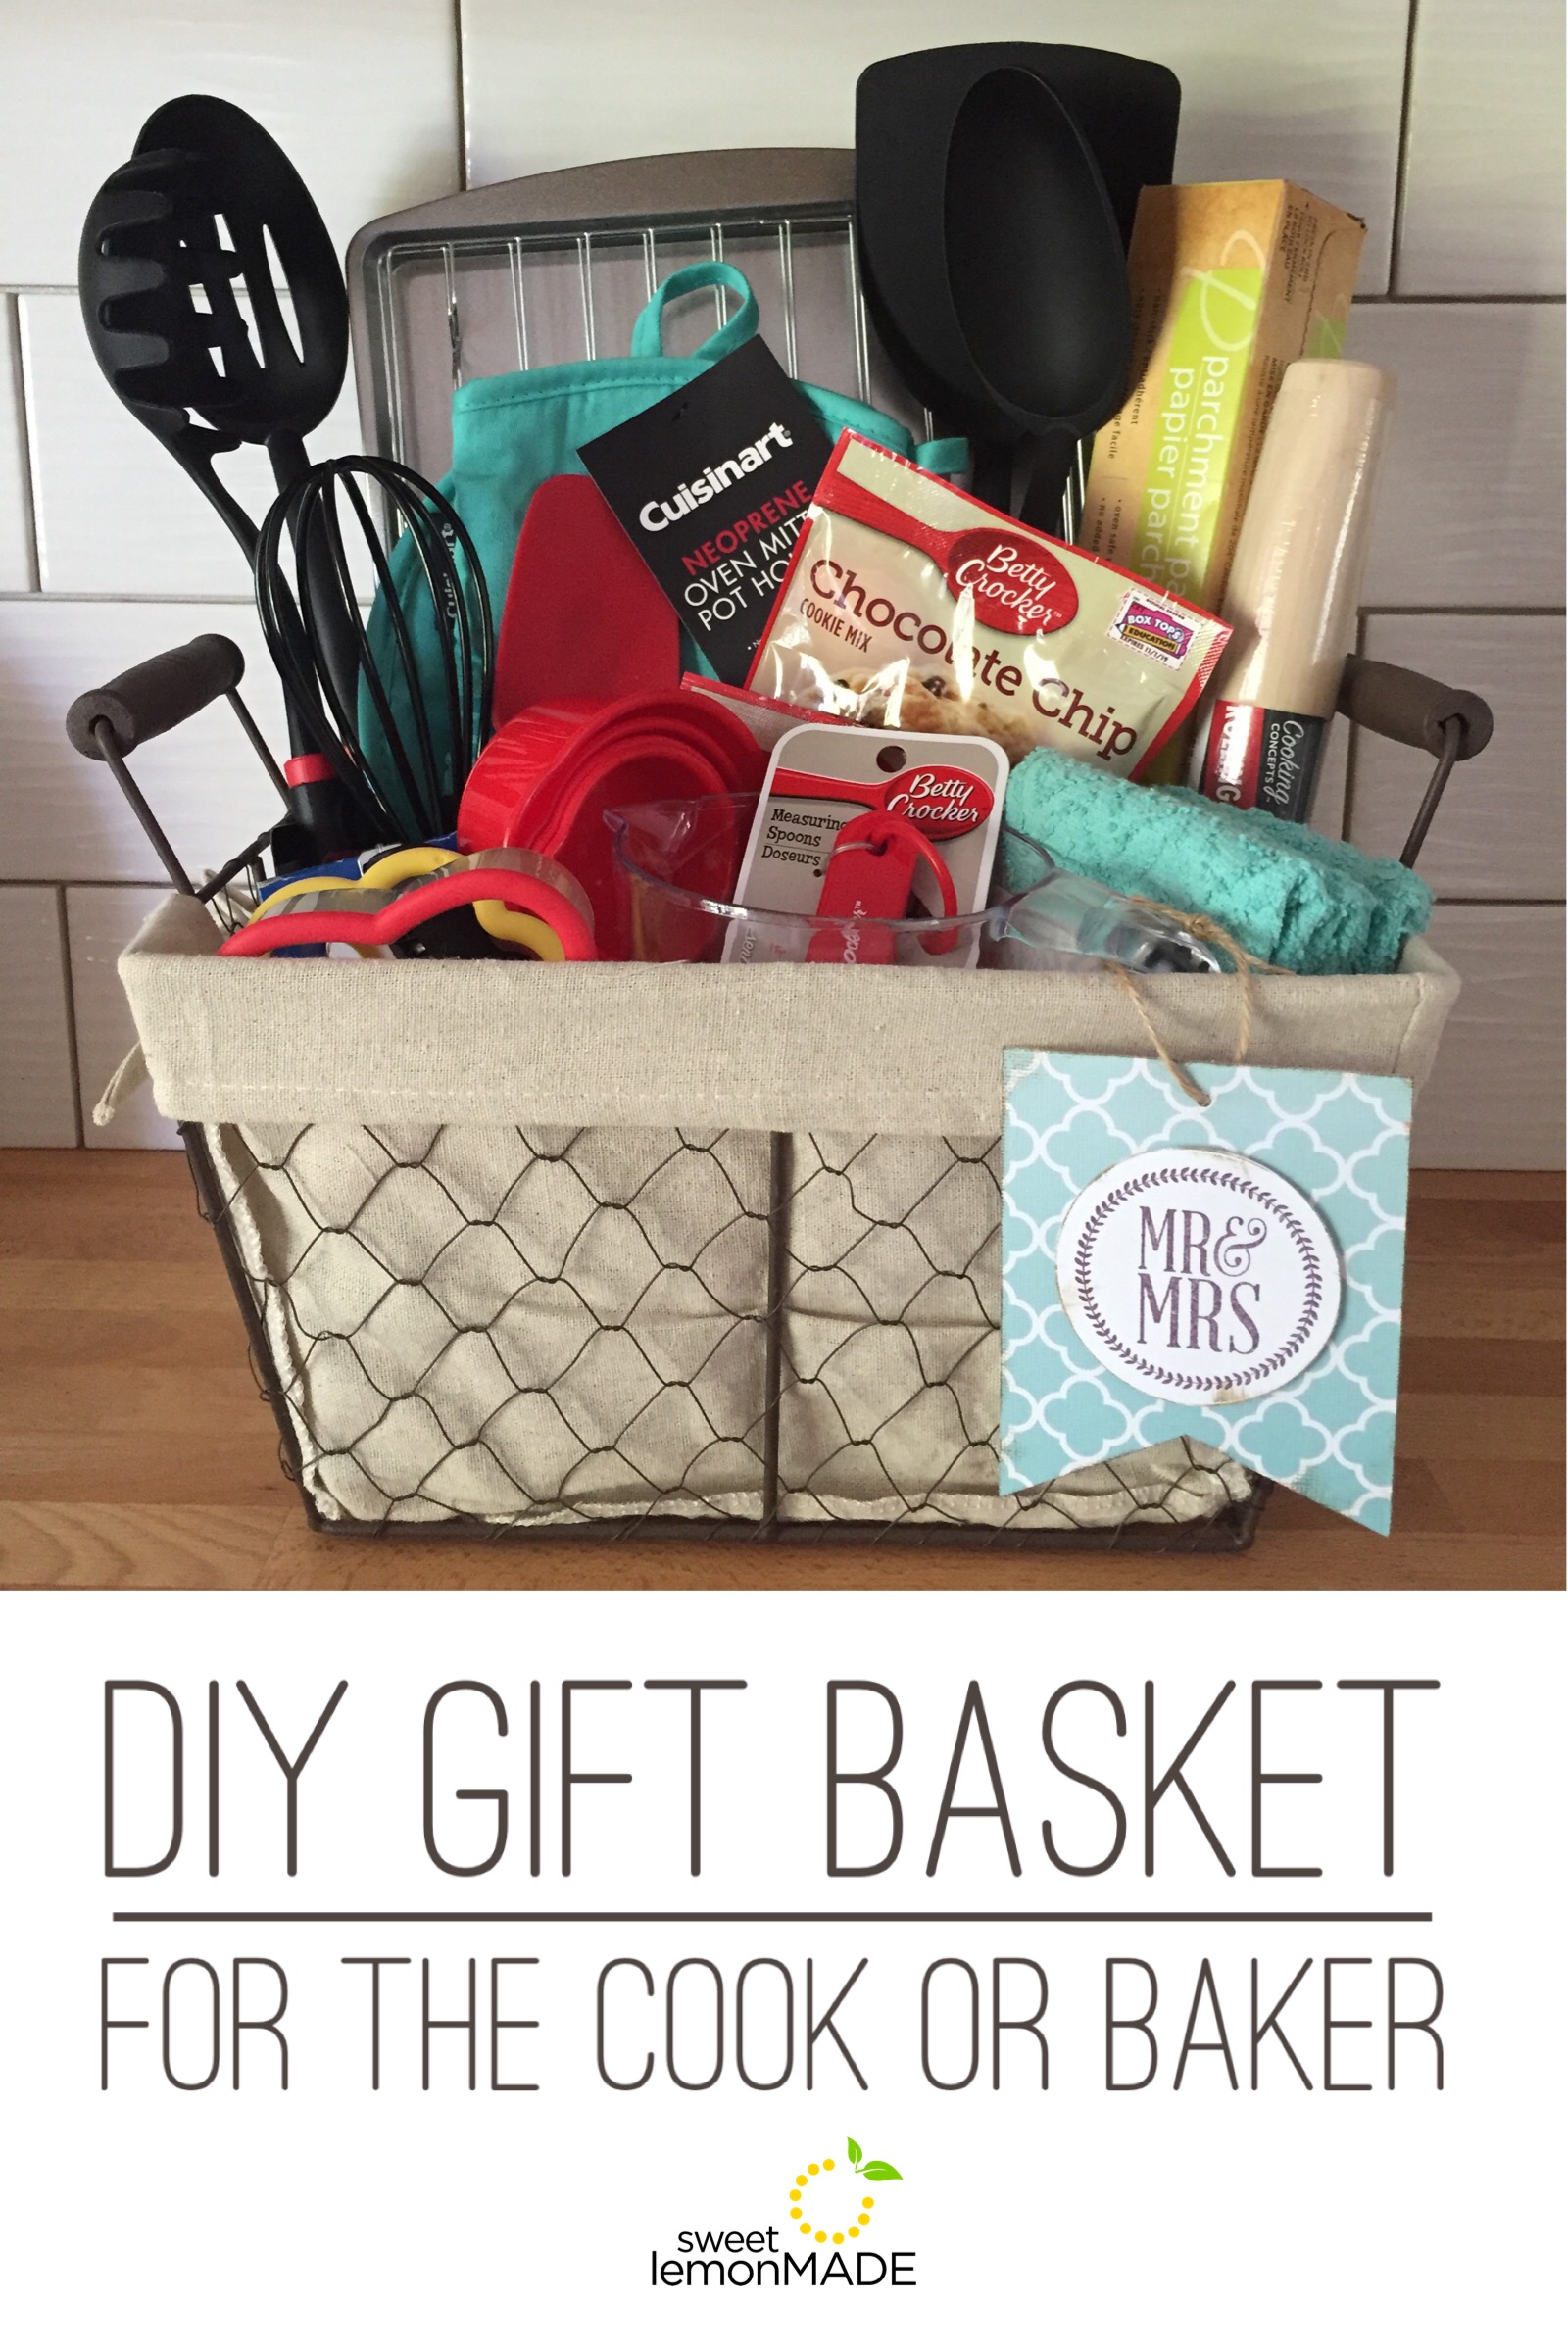
I’ve got a great DIY gift basket idea that can be given as a birthday gift, wedding gift, or for that student headed off to college. Even though this basket was made specifically for a wedding gift, I think the bakers and cooks in your life would love to receive this gift basket! If you are giving it to a baker friend, swap out a few of the items to suit like swapping out some of the kitchen utensils for cupcake liners, piping bags and tips, or sprinkles. And maybe the recipient of this basket will bake you some special treats or invite you over for some dessert! 🙂
Head to your favorite store (aka Target…my favorite store) or if you are on a budget, the dollar store has great kitchen items too. Once you’ve got all of your items find a basket or container to fit everything and get to filling up that basket! For a list of items I bought for this basket—checkout the list below.
Gift basket items:
Rolling pin
Half size baking sheet
Cooling rack
Spatula
Parchment paper
Cookie mix
Measuring cups (for dry and liquid ingredients)
Measuring spoons
Cookie cutters
Oven mitt
Dish towels
Bowl scrapper
assortment of other kitchen utensils (to fill basket)
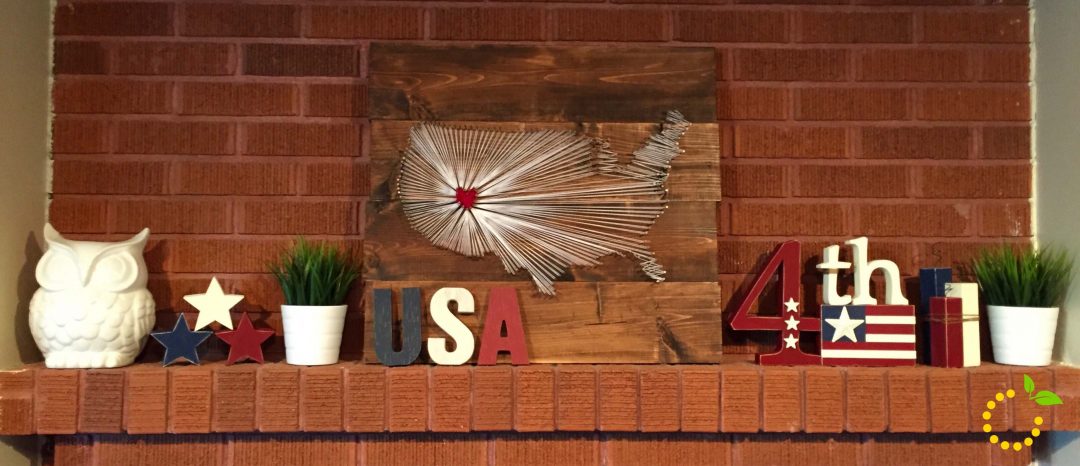
The 4th of July is right around the corner and if you are looking for some decorating ideas to spruce up your mantel, I’ve got a few crafts and DIYs to share with you! DON’T HAVE A MANTEL? Don’t worry…you can recreate these decor ideas using a shelf or bookcase in your house. You can also decorate a console table you may have in your entryway or in your living room. The possibilities are endless!
I designed this 4th or July mantel with a big statement piece, a DIY string art of the USA. I have wanted to do a string art piece for a long time but, could never decide on what to do until I saw Wendy from The Paisley Pickle making one at a friends house. Just a warning…this string art project is not for the faint-hearted crafter. This project takes patience and time. But, once it’s finished you will be thrilled with the results! I am! And I love the finished project even though it tested my patience. Look below for all of the materials needed and instructions on how to make your own the string art.
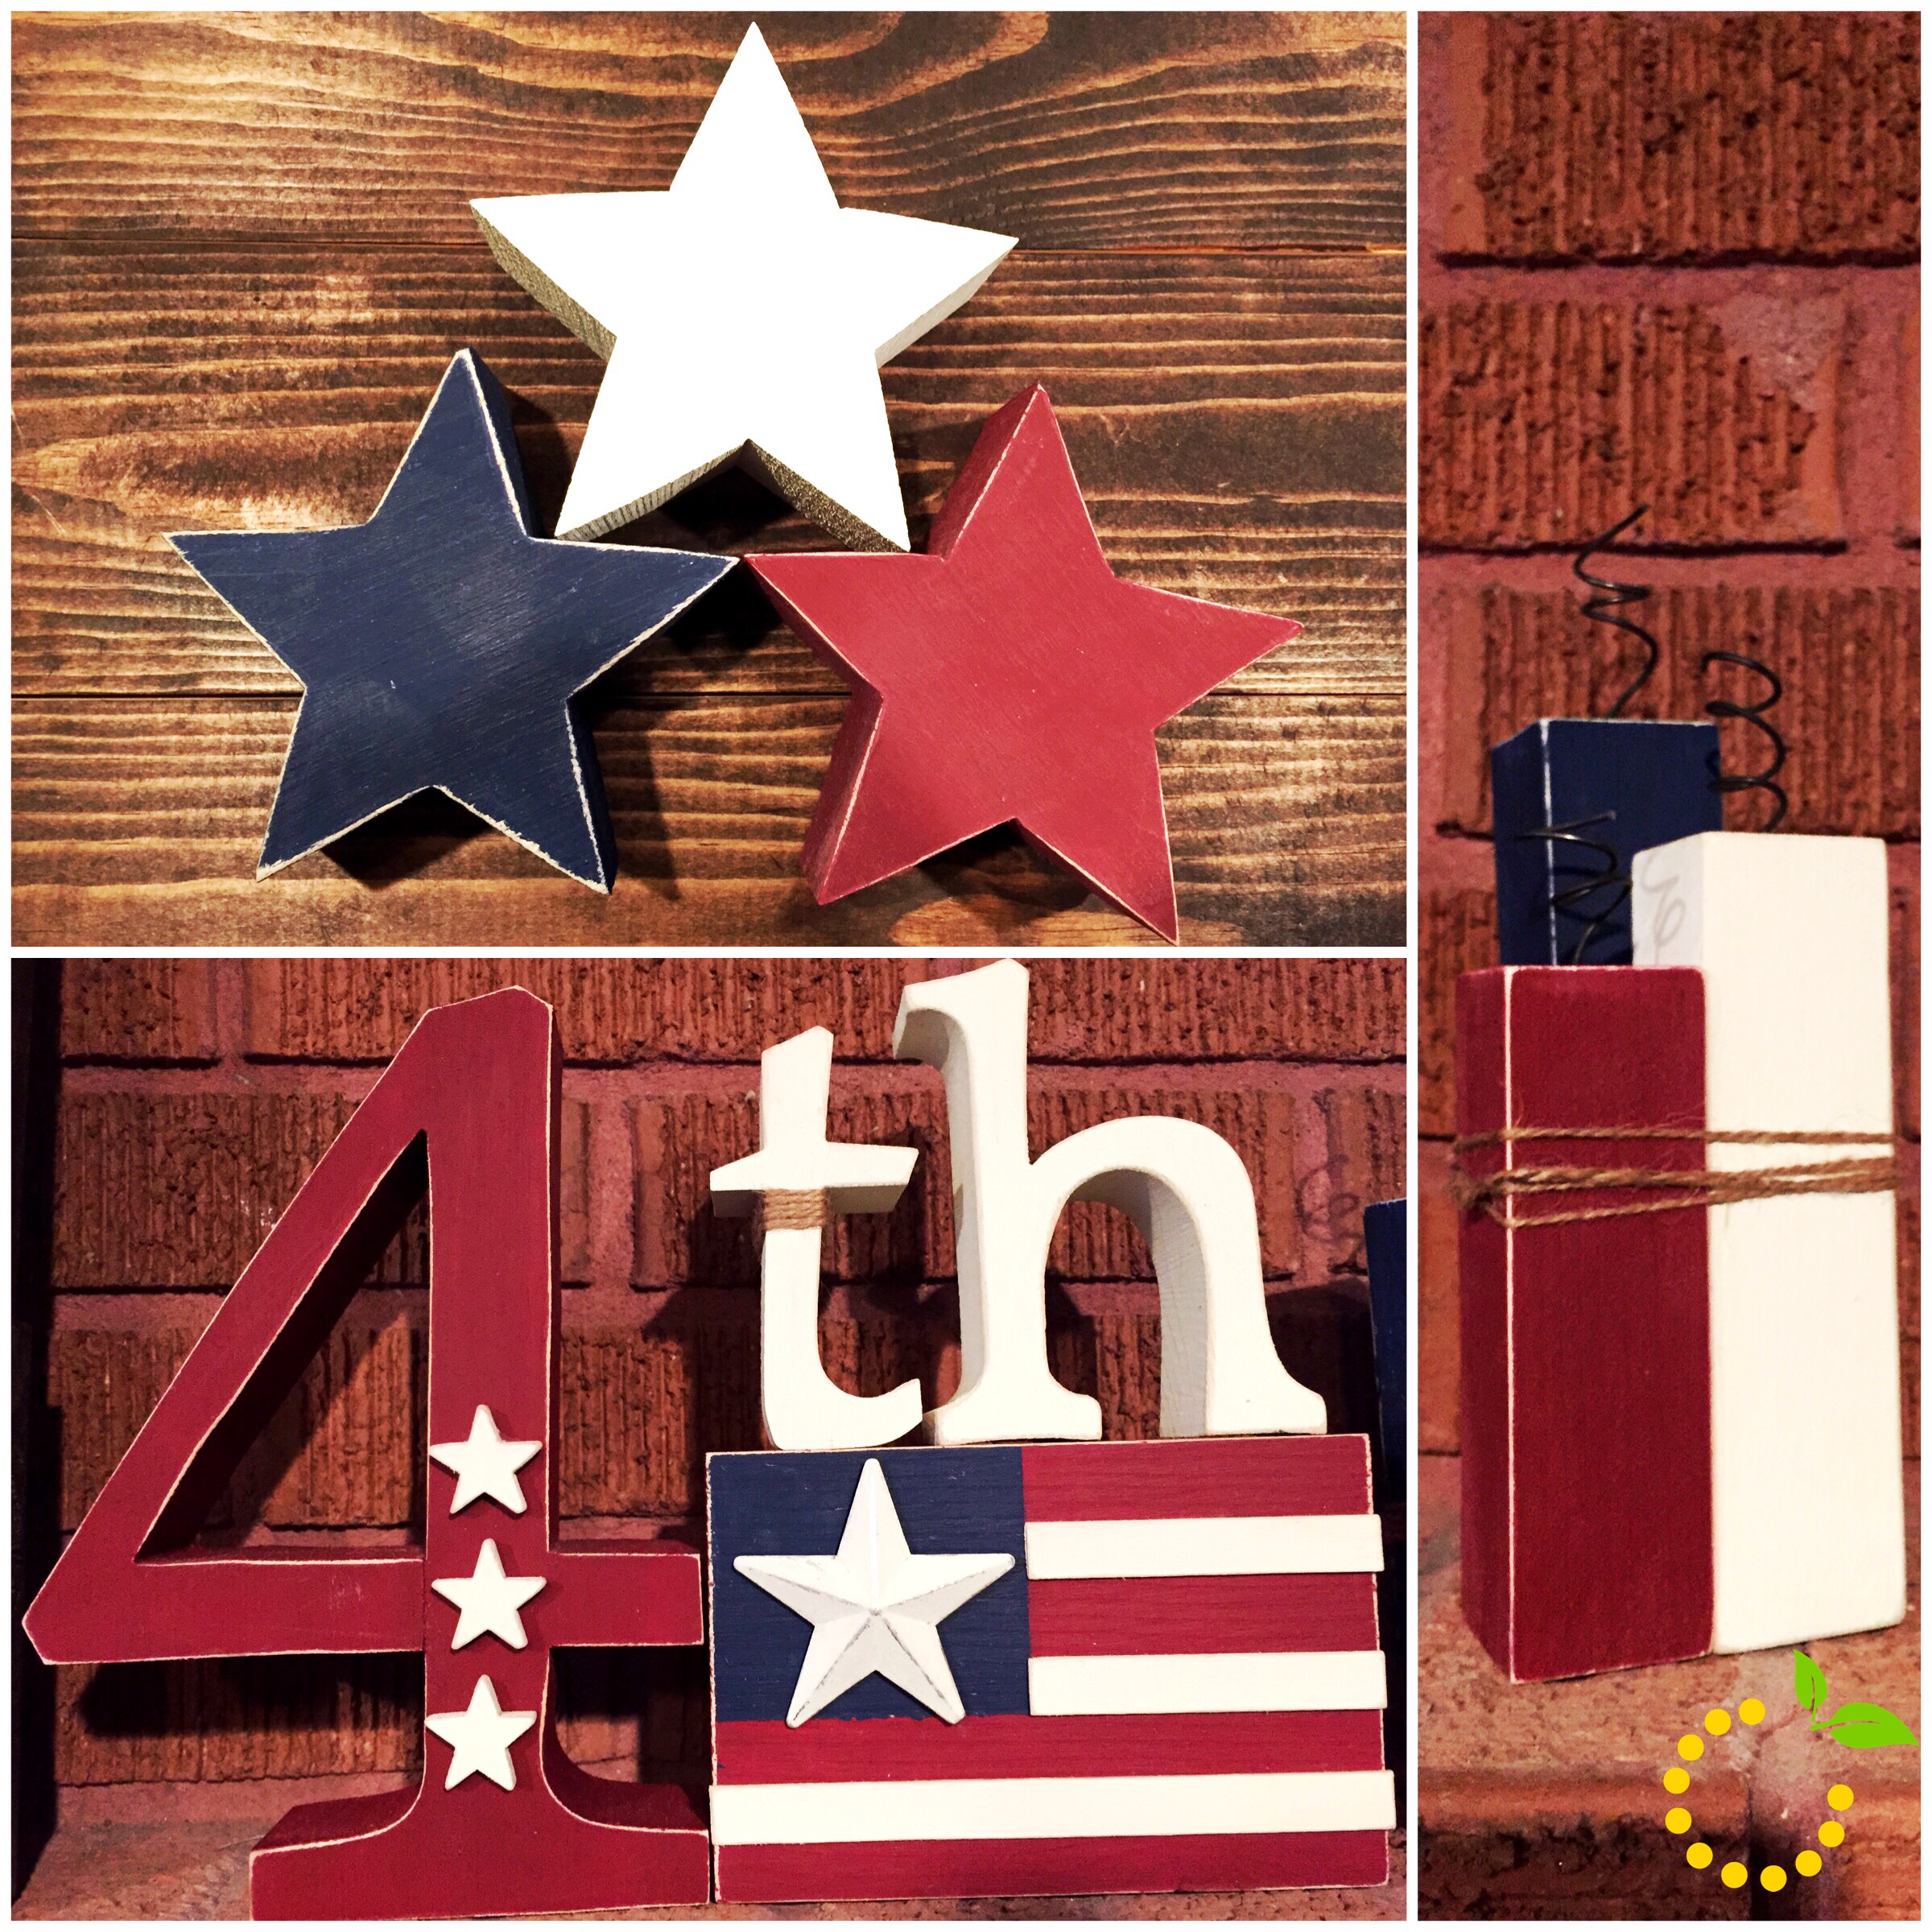
The wood stars, firecrackers, and 4th & flag can be purchased from the Wood Connection. The wood pieces come unfinished and can be decorated and painted however you like. I painted and distressed mine and added a few embellishments to some of the pieces to give them some dimension. And the USA letters were from Target’s dollar spot section.
DIY How To—USA Map String Art
Materials Needed:
4 wood boards that are 24″ x 5″ and 2 boards/pieces to nail to the back to hold it together.
String – I used DMC Baroque Crochet Cotton for the white string and DMC Embroidery Floss for the red string
Box of nails (you will want a nail with a decent head so the string won’t pop off)
Stain – I used Rustoleum stain in Kona
Cheesecloth and vinyl gloves (for staining)
USA map template (Get it printed at Office Max or your local print shop and ask them for an engineer print.)
Step 1: Cut and nail together wood planks
Step 2: Stain your wood board.
Step 3: Print out the map template.
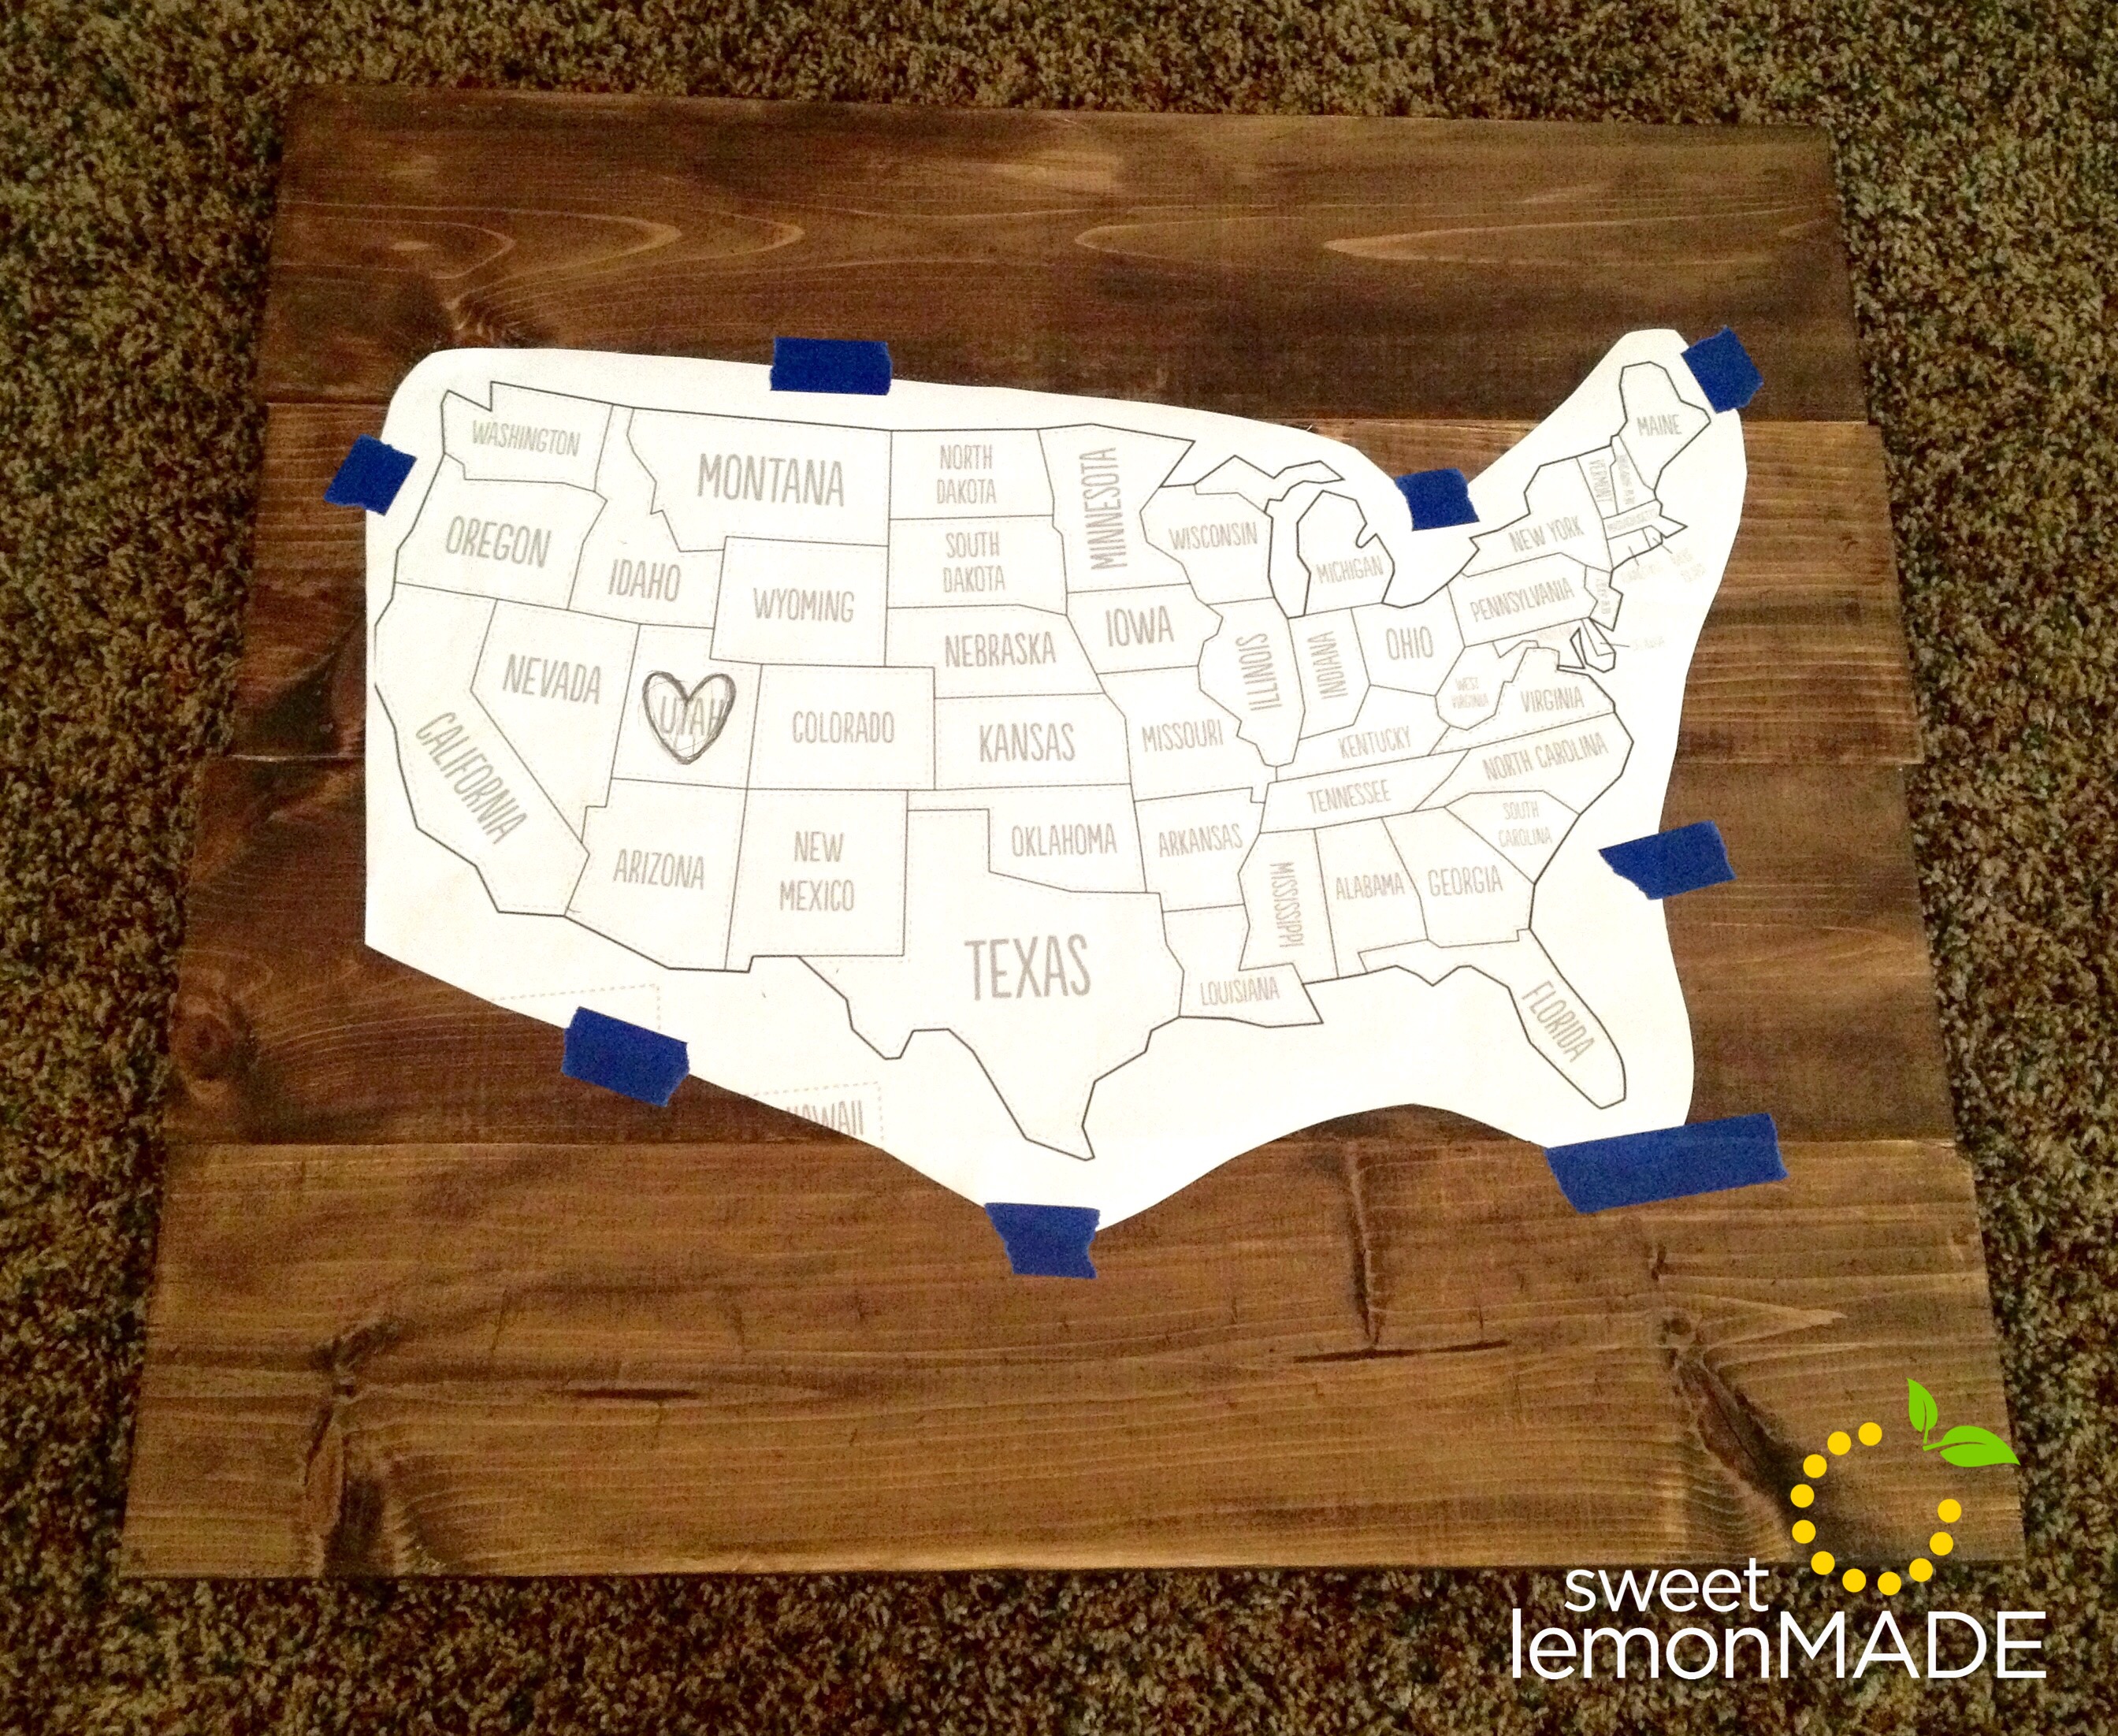
Step 4: Once your stain is dry, cut out the template and tape it to your board.
Step 5: Time to get the hammer out! Nail around the entire outline of the map – I spaced out the nails about an inch apart. (Warning: this step is the hardest and longest. Don’t get discouraged.)
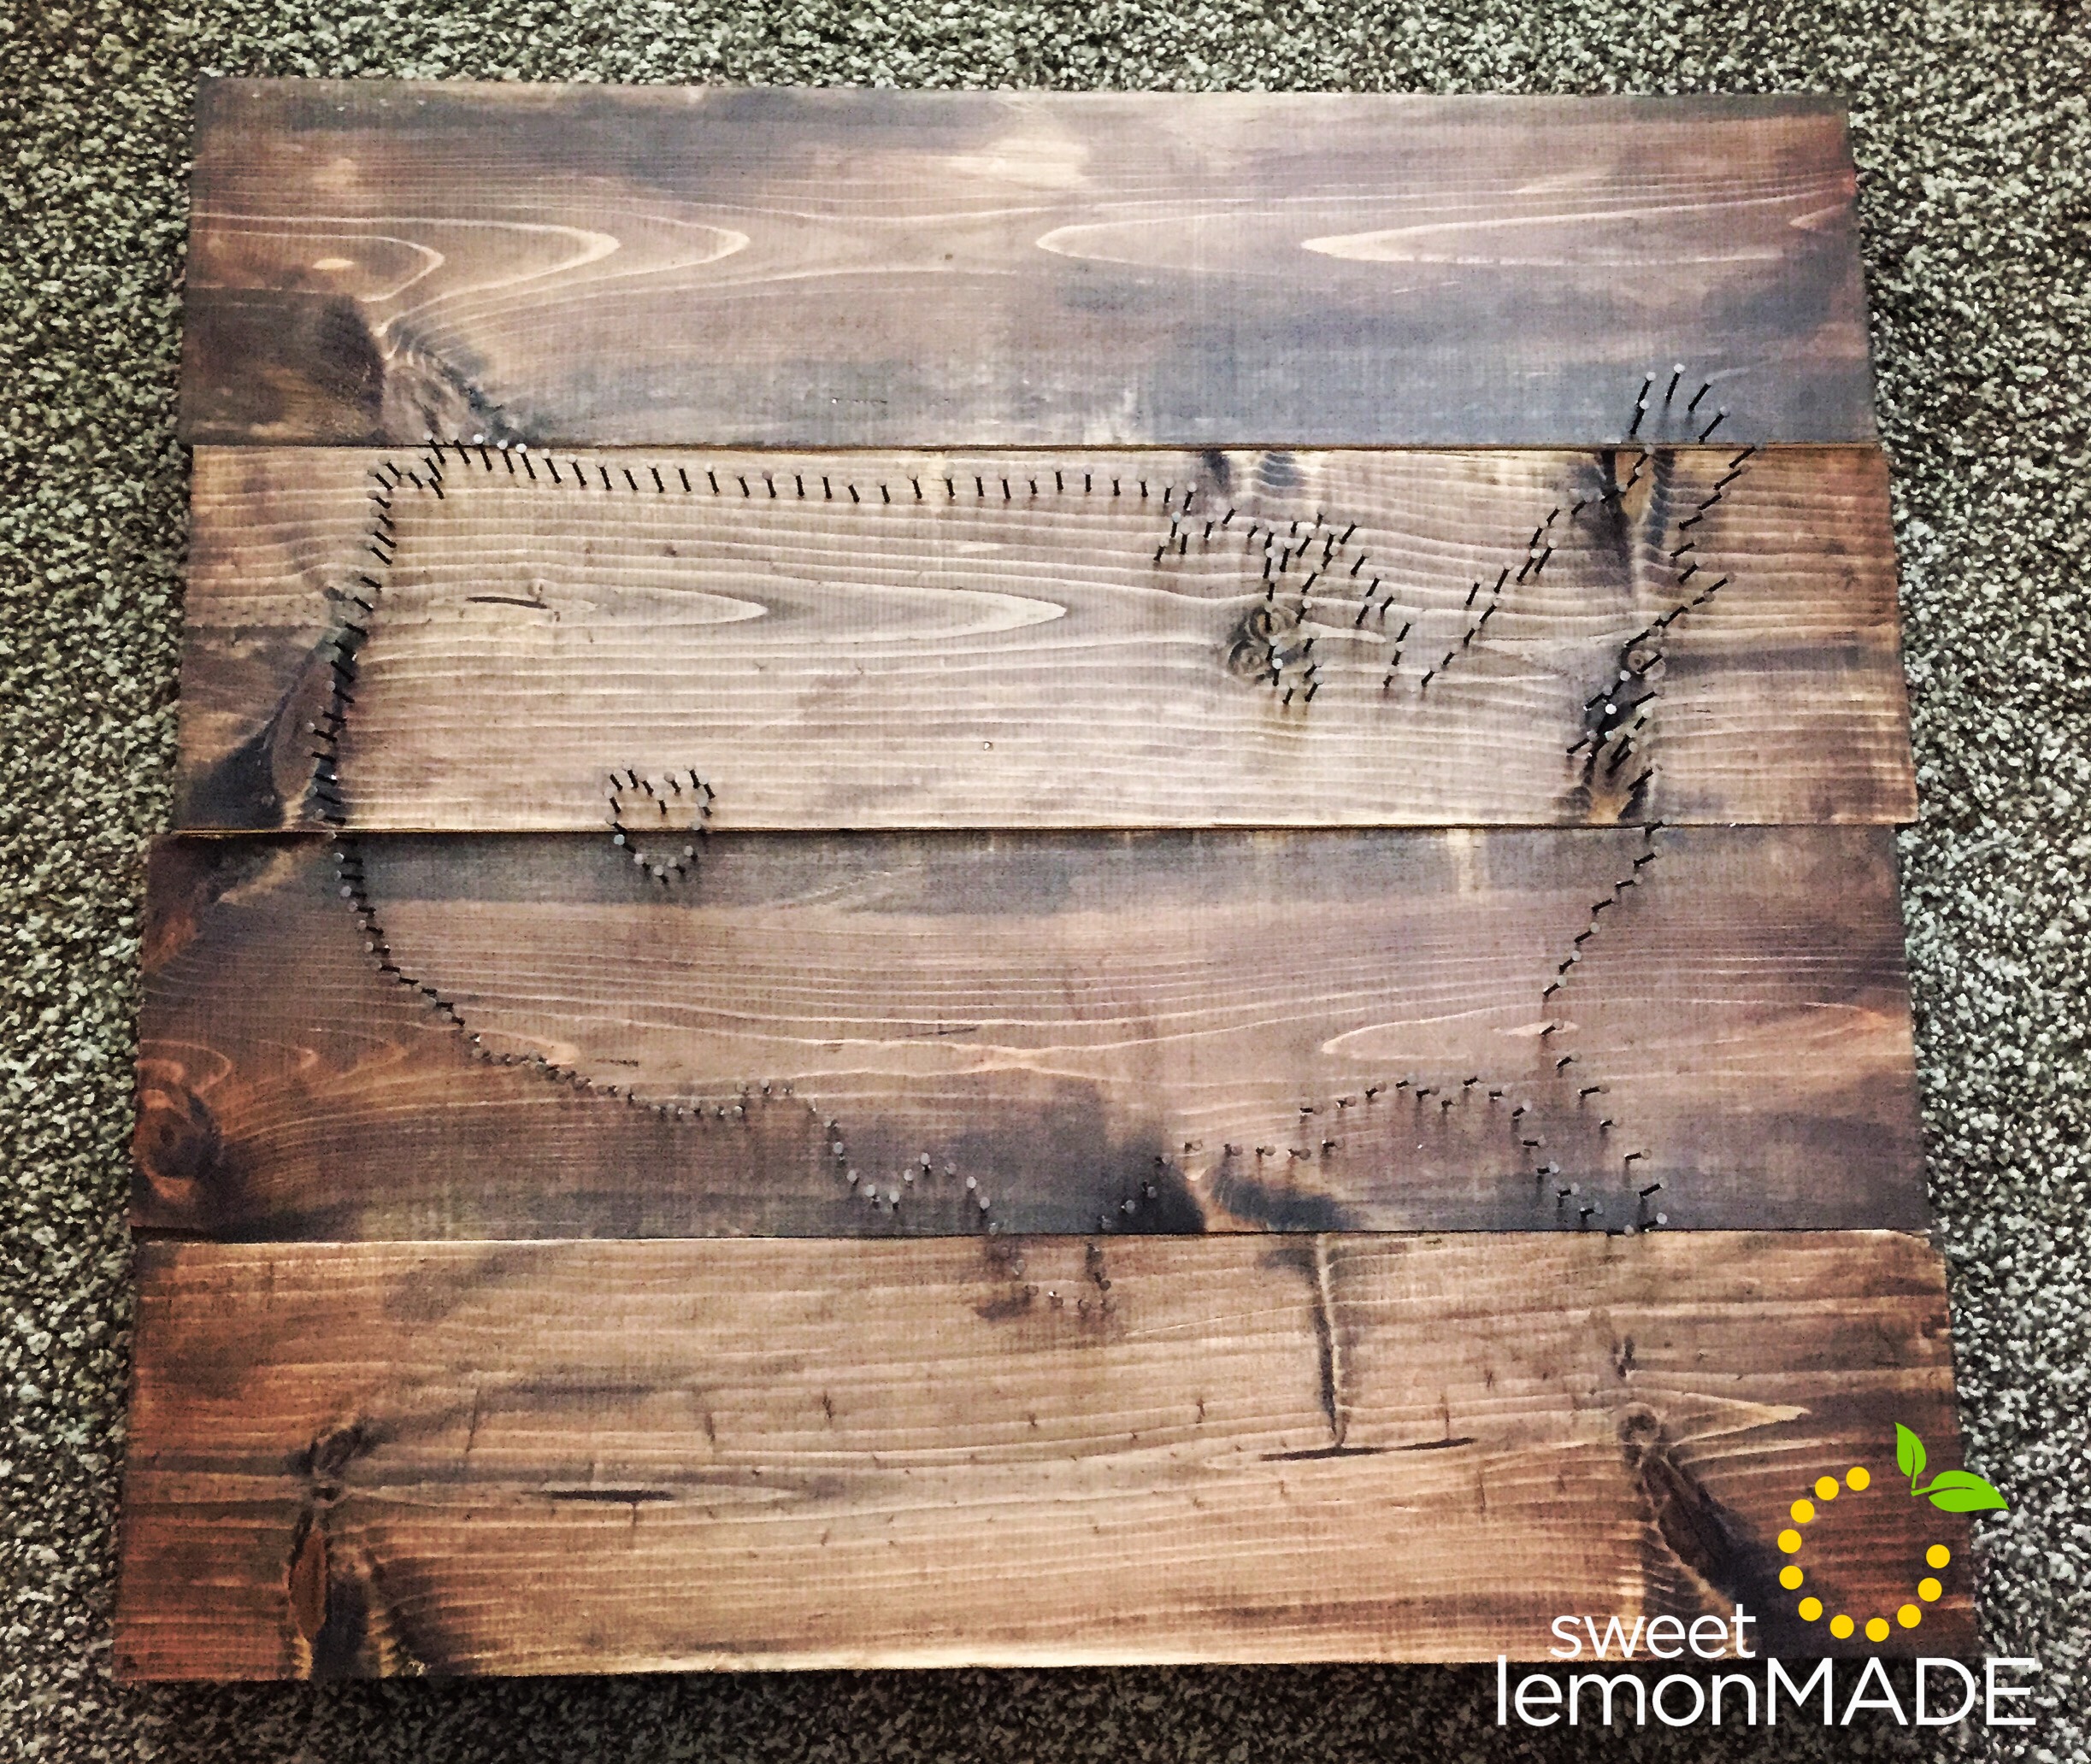
Step 6: Once all of your nails are in, remove the paper template.
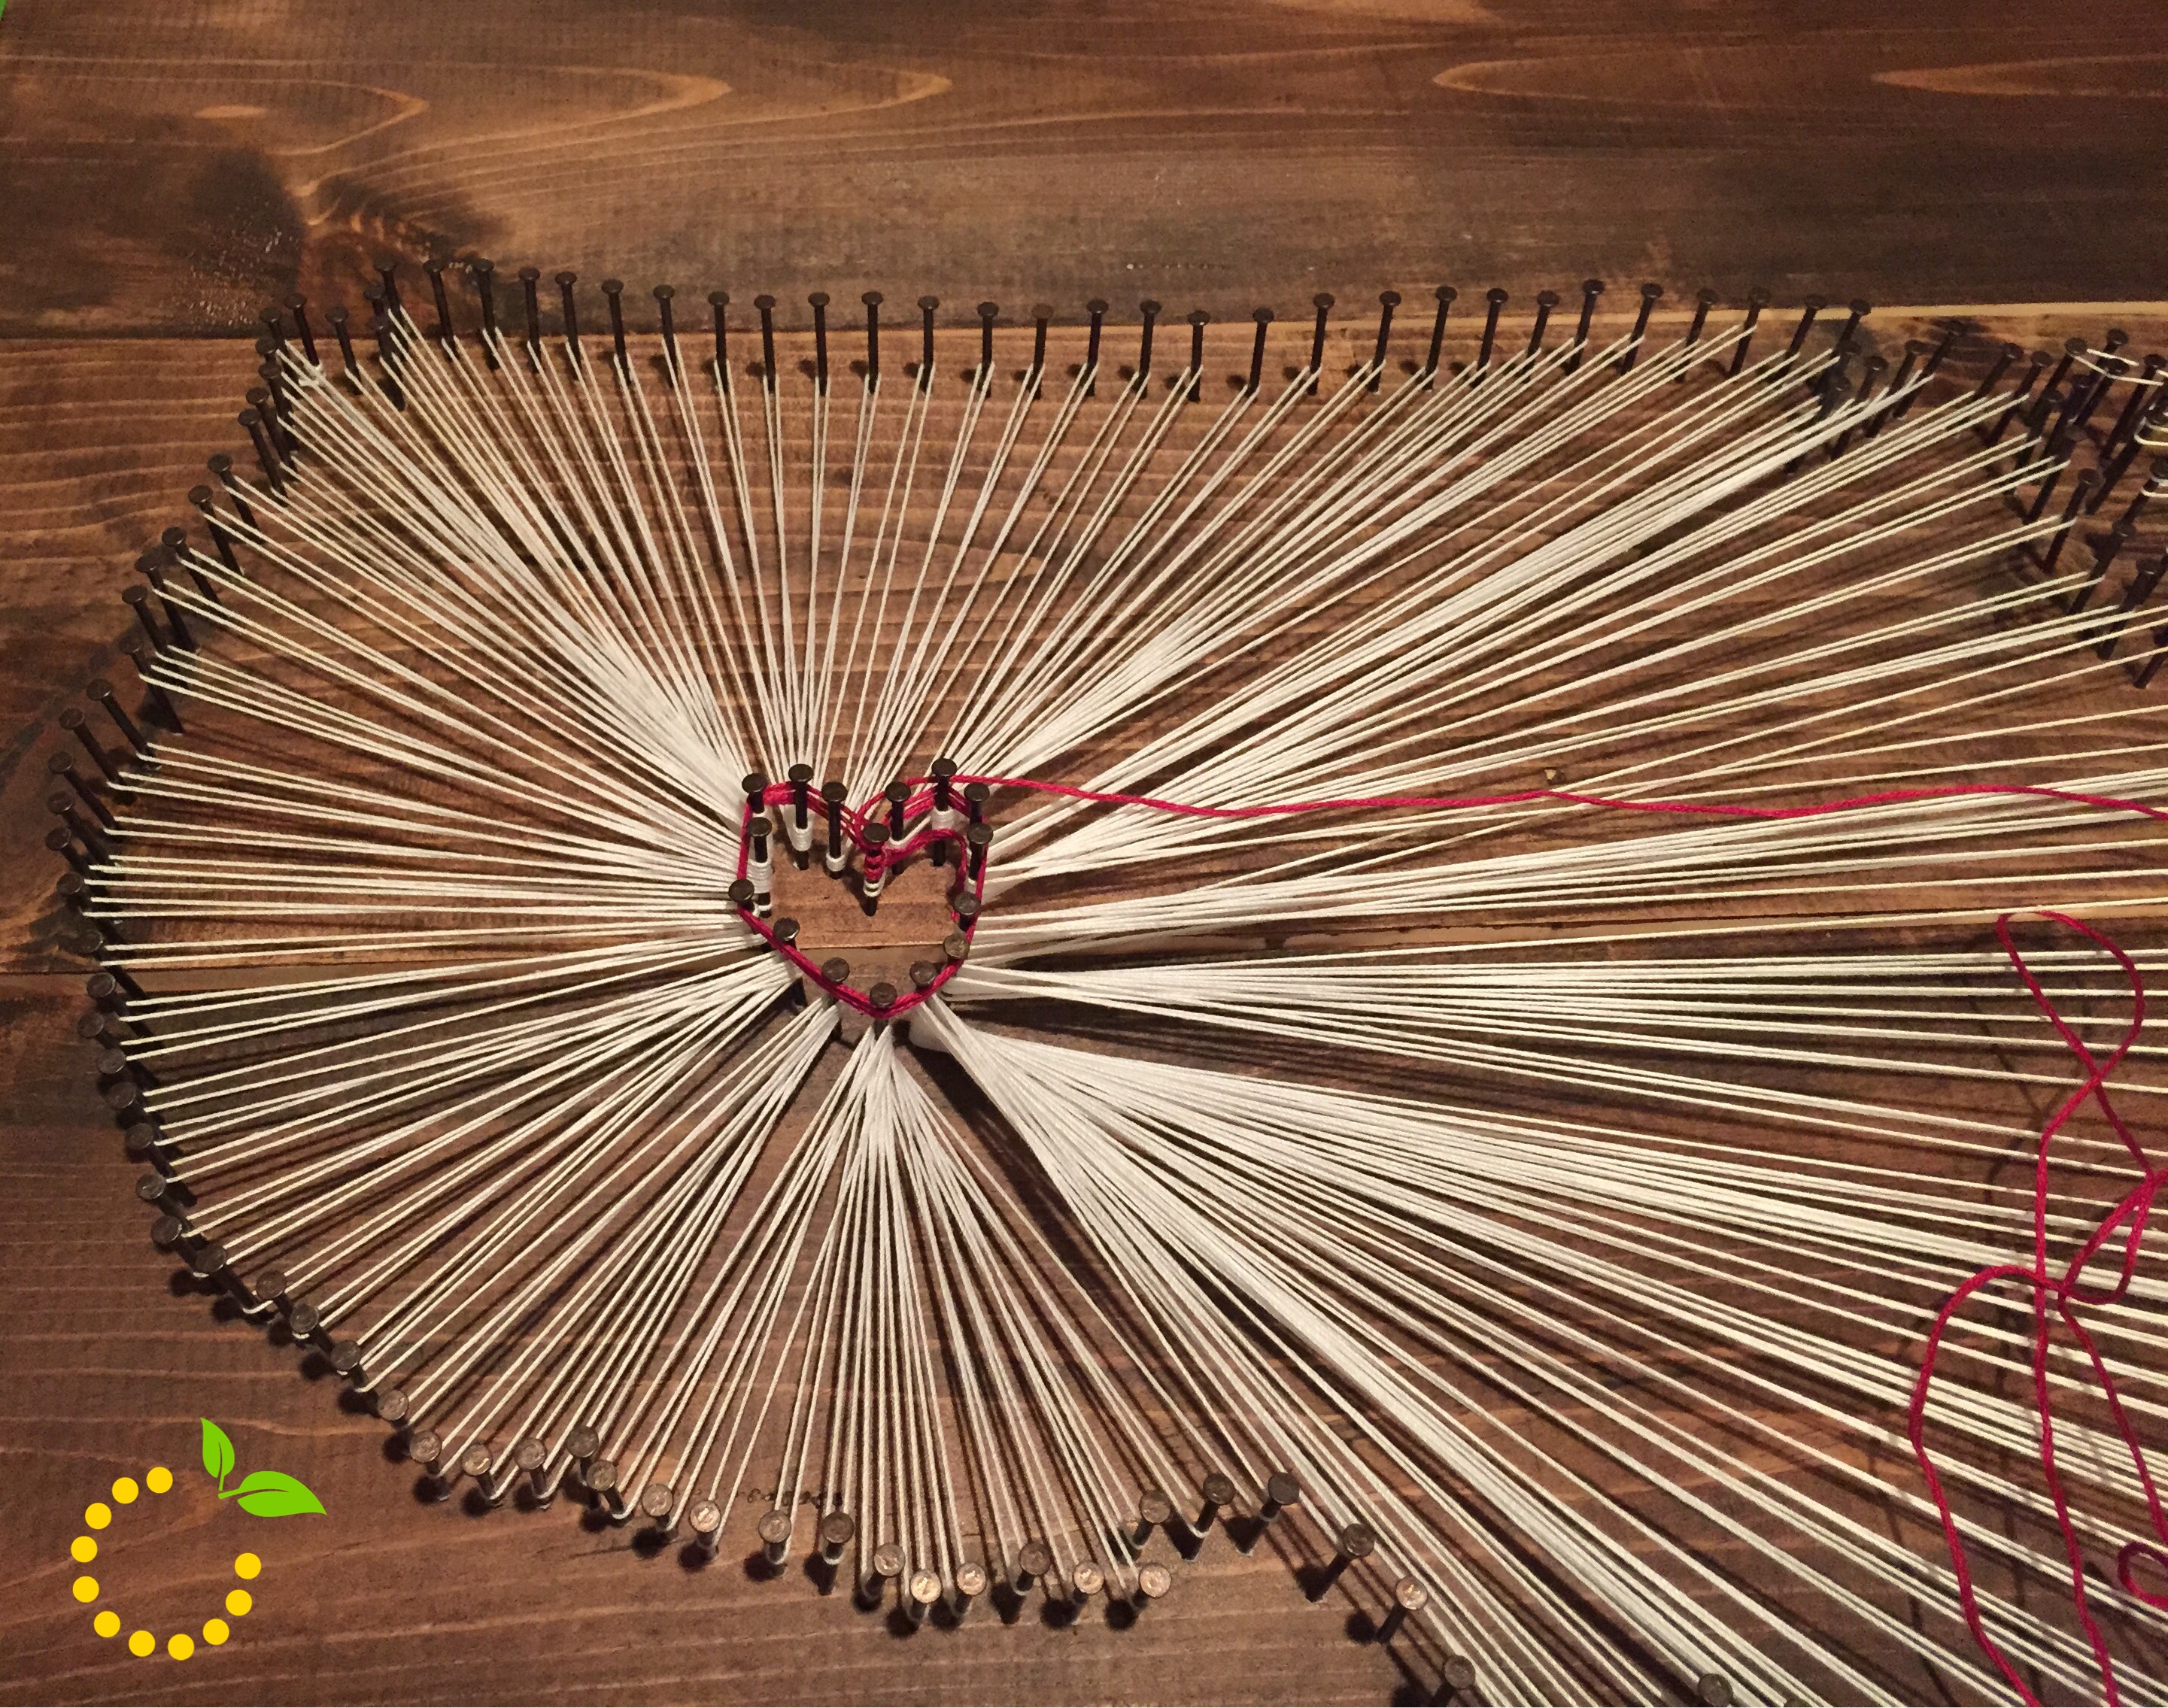
Step 7: Now for the fun part! Get your string and tie a knot around the head of one of the nails. Start by stringing the string down towards the heart and wrapping the string around one of the nails of the heart. (Tip: since the heart has less nails, you will need to string the outside strings around the nails multiple times.) Keep repeating until you are all done. Once you are done, tie another knot.
Step 8: Get your red DMC Embroidery Floss. Begin by tying a knot around one of the nails around the heart and string the string back and forth criss crossing the string.
Wood Connection Wood Projects
Materials Needed:
Red, white/cream, and blue paint
Foam brushes
Sand paper
Wood glue
Painters tape
Balsa wood sticks (for the stripes on the flag)
Metal star embellishment
Twin for embellishment
Thick wire for the firecrackers (can be purchased from Lowe’s or Home Depot)
Wire cutters
A pencil or wooden dowel to wrap the wire around to crate the twisted shape
Step 1: Sand any rough edges and wipe all wood pieces down with a cloth to get rid of any saw dust.
Step 2: Paint all wood pieces the desired colors and let dry. For the flag, I taped off the section for the blue and let dry and then covered the blue to paint the red.
Step 3: Once they have dried, sand the edges to distress (optional).
Step 4: Glue small stars onto the ‘4’, the balsa wood sticks to the flag, and the star to the flag.
Step 5: Cut wire to desired length and wrap it around a pencil/dowel to twist it into shape.
Step 6: Place a tiny amount of glue onto the end of the wire and insert into hole on top of each firecracker.
Step 7: Tie or wrap twine around whatever you want (optional).
I’ve got an unconventional cupcake flavor I whipped together that I think you should try out–spaghetti and meatball. You’re probably thinking that I’ve gone insane but, trust me it tastes really good!
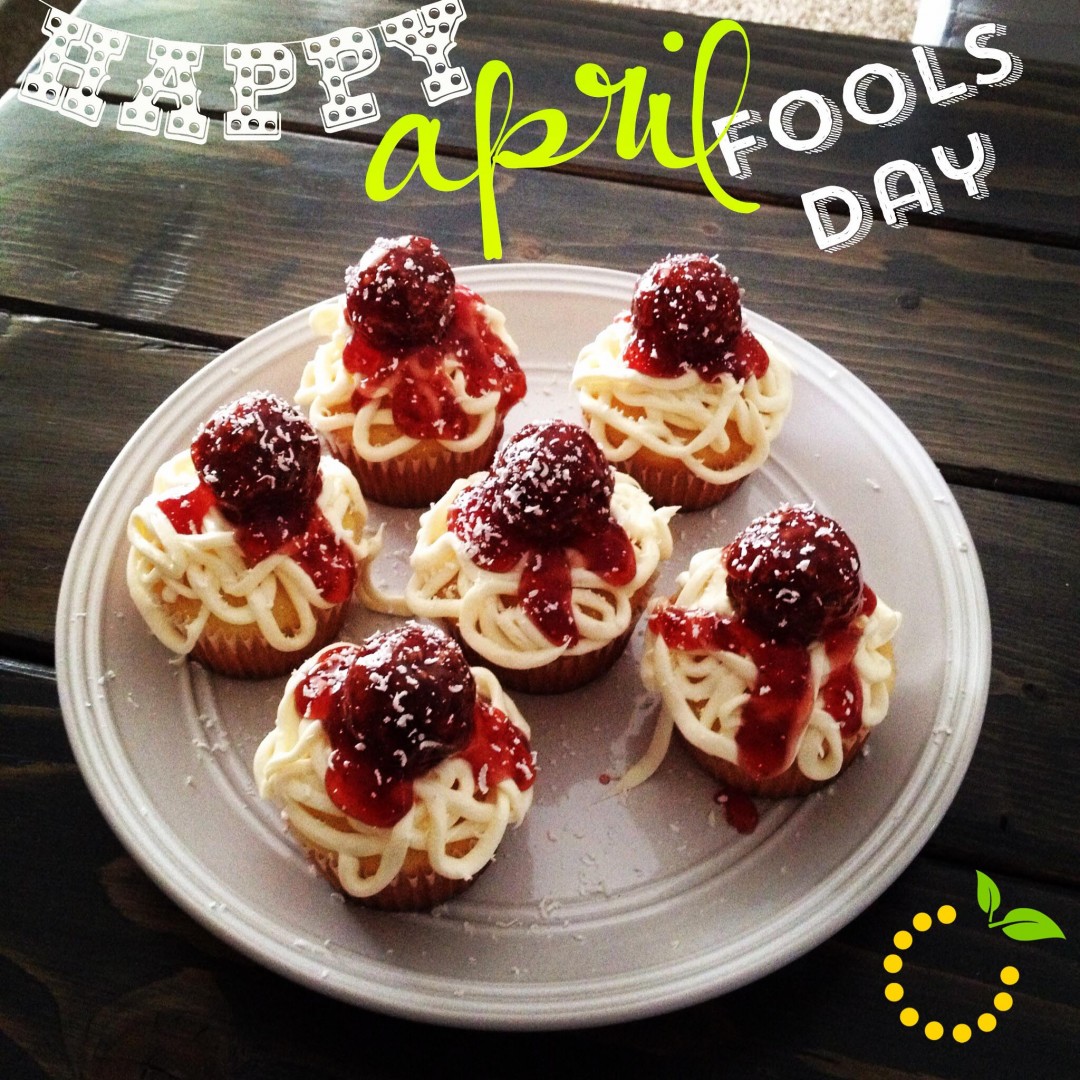
Just kidding!! APRIL FOOL’S! Gotcha ya!
I have a love/hate relationship with April Fool’s Day because I love to play tricks on people but, I hate getting tricks played on me! So for me, I bake treats that look like food to trick my family, friends, and coworkers but, lucky for them they never taste awful!
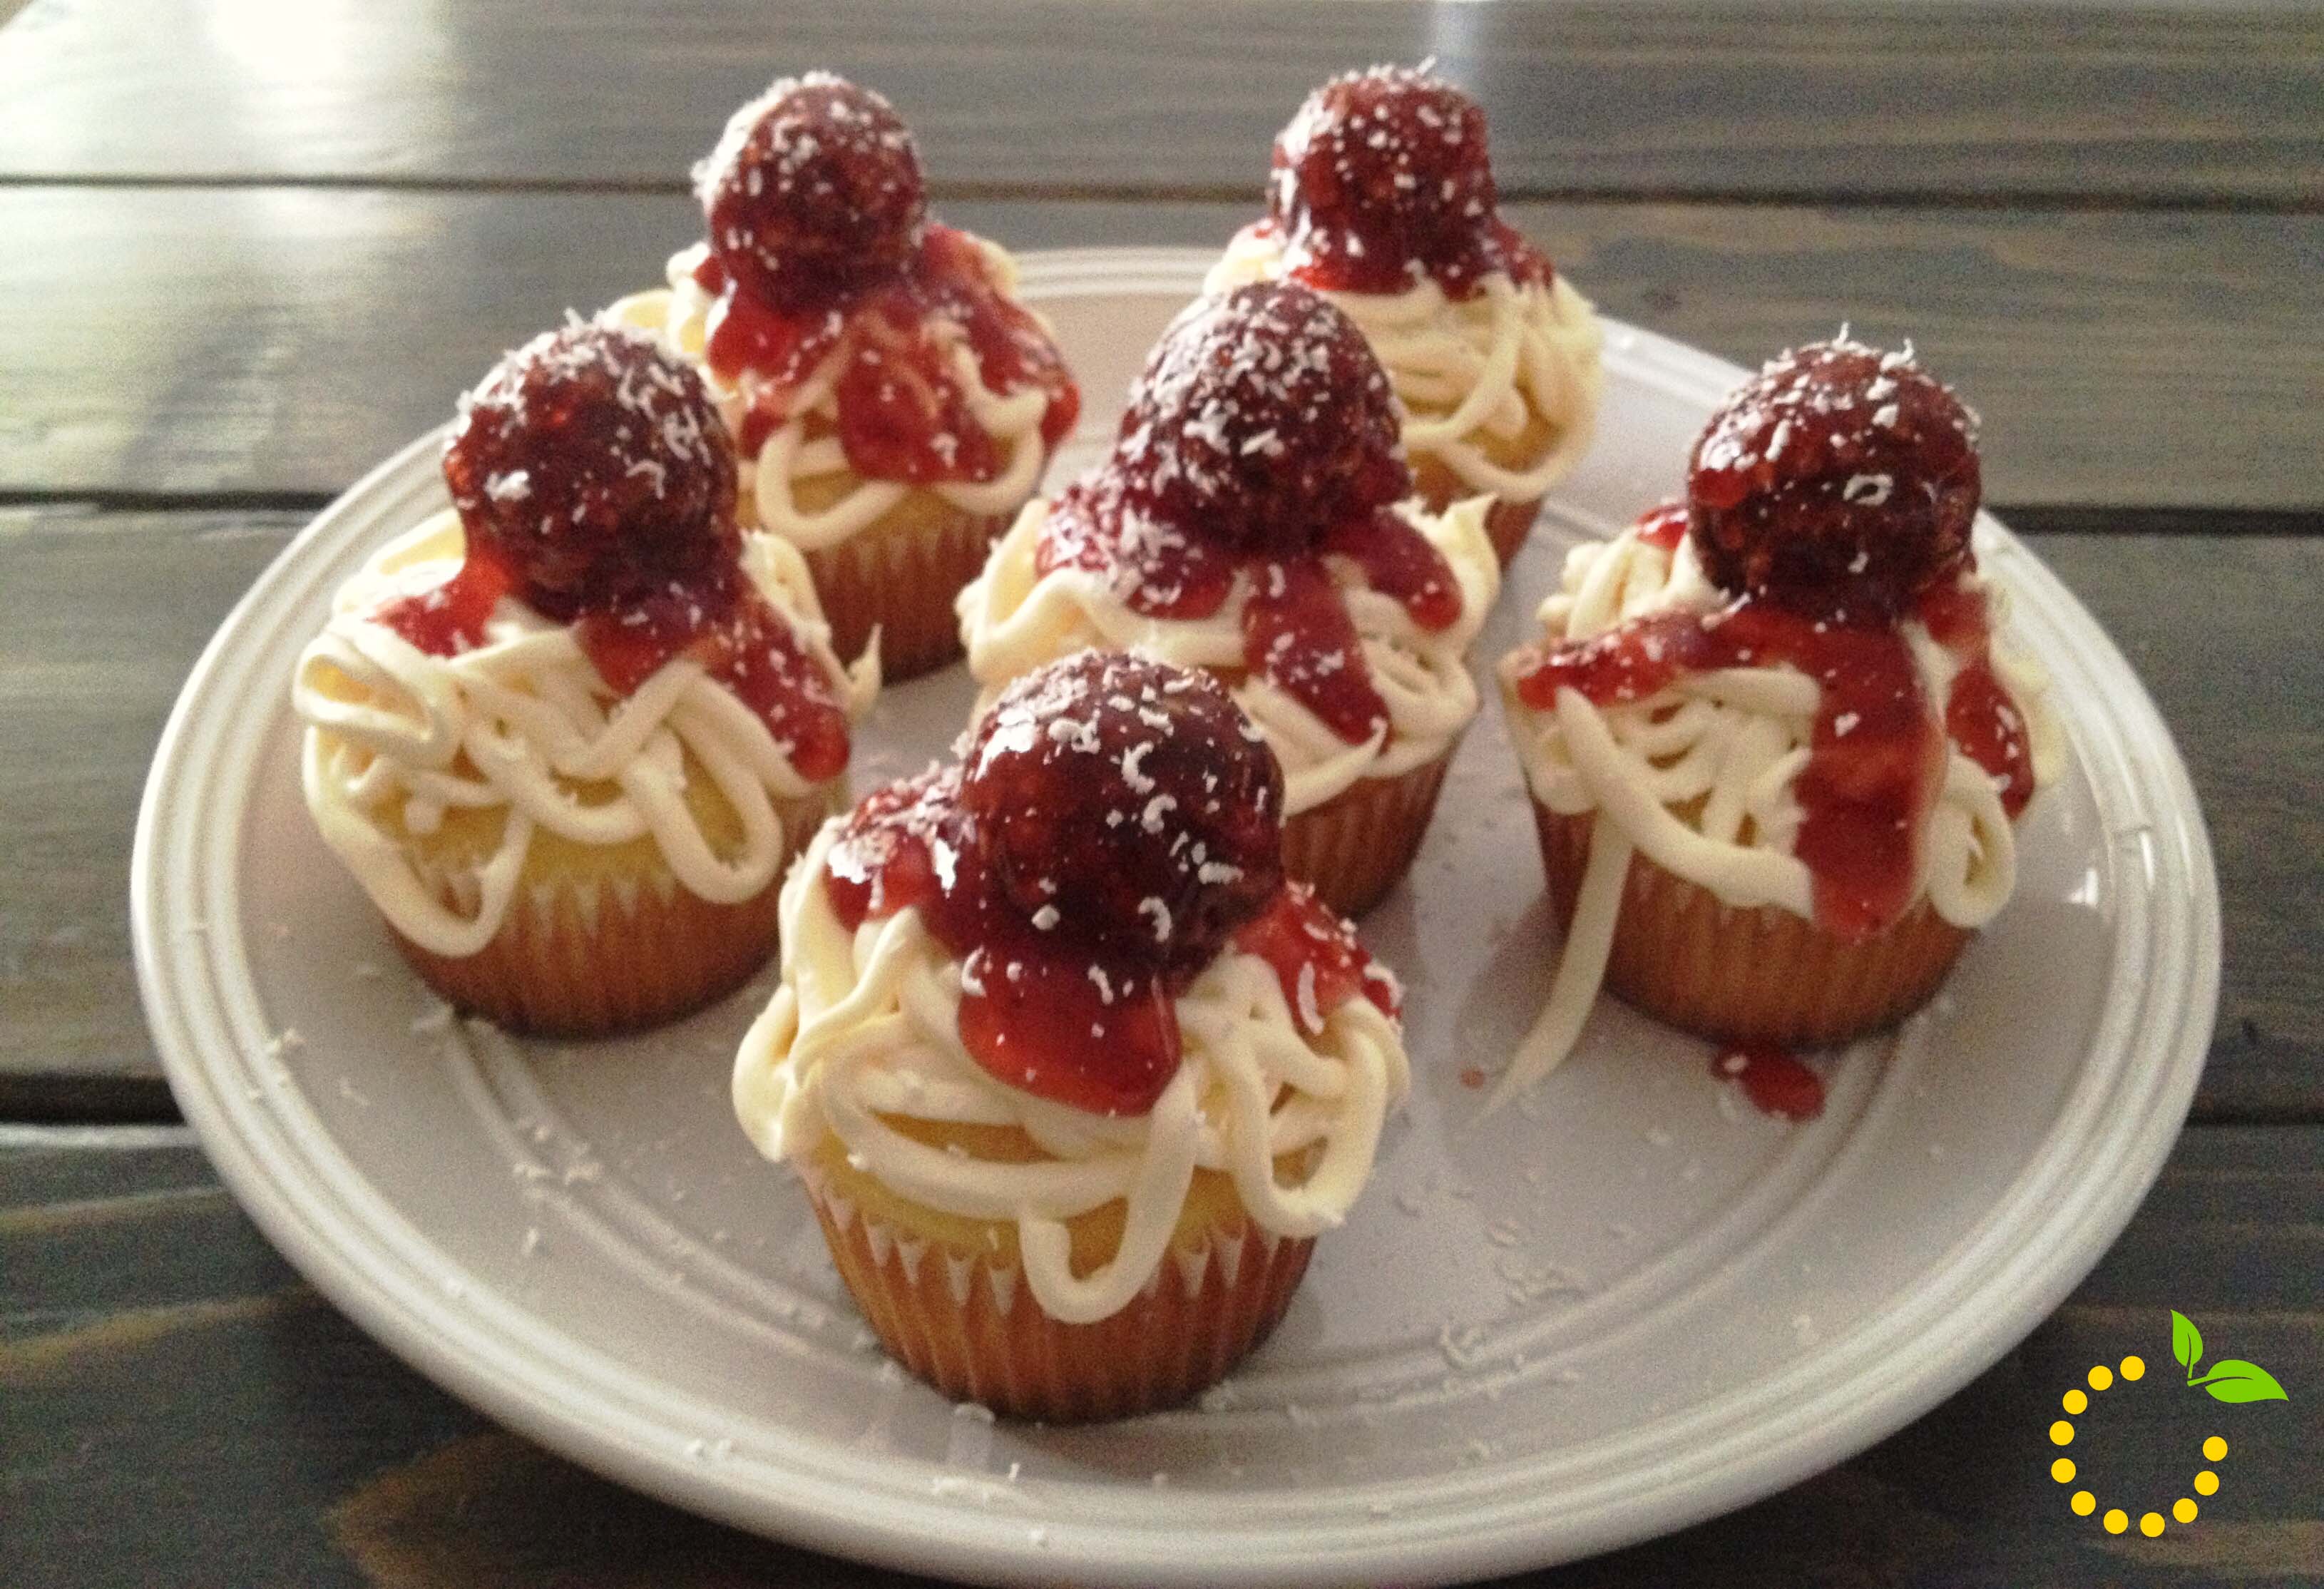
So, if you want to play an April Fool’s Day joke on your family, friends, or coworkers without being mean spirited these spaghetti meatball cupcakes will fool them but won’t make them want to gag! Some of them will think you are crazy for wanting them to try a spaghetti and meatball cupcake but, little do they know it actually tastes pretty good! The chocolate cupcake with “cream cheese frosting” spaghetti noodles, a “Ferrero Rocher” meatball, “strawberry jelly” marinara sauce, and “grated white chocolate” Parmesan cheese doesn’t taste all that bad! And I’m not just saying that to get you to eat it and for me to say “April Fool’s”! Or am I? I’m just messing with you, they taste good! 🙂
Spaghetti and Meatball Cupcakes
2016-04-01 12:11:49
A delicious vanilla cupcake with cream cheese filling.
Sift together the flours, baking powder, and salt and set aside.
Cream together butter and sugar in a mixer until light and fluffy.
Add eggs, one at a time, beating well after each addition.
Beat in vanilla extract.
Gently fold in the dry ingredients in three equal portions, alternating with the milk (start with dry ingredients and end with dry ingredients).
Pour batter evenly into paper lined muffin pan.
Bake for 12-16 minutes or until a toothpick inserted into the center comes out clean. Watch cupcakes carefully, making sure to not over bake. As soon as the toothpick comes out clean, remove the cupcakes from the oven. Let cool for 2 minutes and remove from pan and let them cool completely on a cooling rack.
Next up is the cream cheese filling. In a bowl of a stand mixer fitted with the paddle attachment beat the cream cheese and butter on medium speed until well combined and smooth, about 2-3 minutes.
Mix in the vanilla extract.
Gradually add in the powdered sugar until desired consistency is reached and smooth--should be thick but, not too thick.
Transfer the cream cheese filing to a pastry bag fitted with a small round tip.
Notes
Cupcake Assembly
1. Pipe cream cheese frosting onto the cupcakes in a figure-eight motion to make it look like spaghetti.
2. Unwrap a Ferrero Rocher and roll it in the jelly to coat it. Place in the middle of the cupcake and drizzle a little extra "sauce" jelly on top.
3. Grate almond bark on top to make it look like Parmesan cheese.
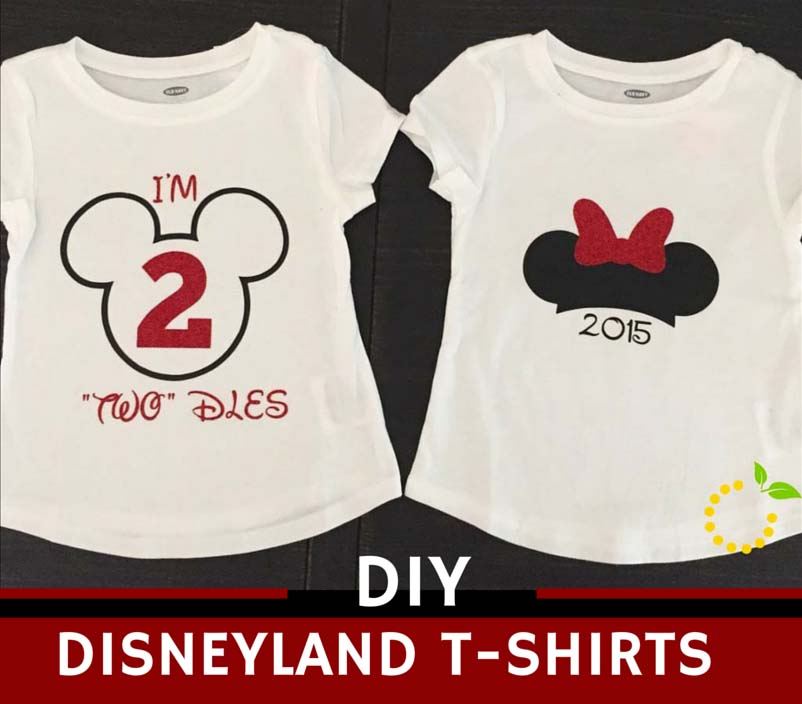
My daughter recently turned two and to celebrate we planned a family trip to the Happiest Place on Earth…Disneyland! It had been 10 years since my last visit (way too long) and would be Olivia’s first time, so I wanted to make it as fun and magical as possible.
The first thing that popped into my head was to make our own t-shirts to wear on the trip. Sure, I could easily go to the store and find something cute, but there was something special about making my own. I wasn’t sure where to start since it was my first time making anything with vinyl, so I called up my crafty sidekick Ashley for some help! I was surprised with how fast and easy it was to make the shirts, so I will definitely be making more in the future.
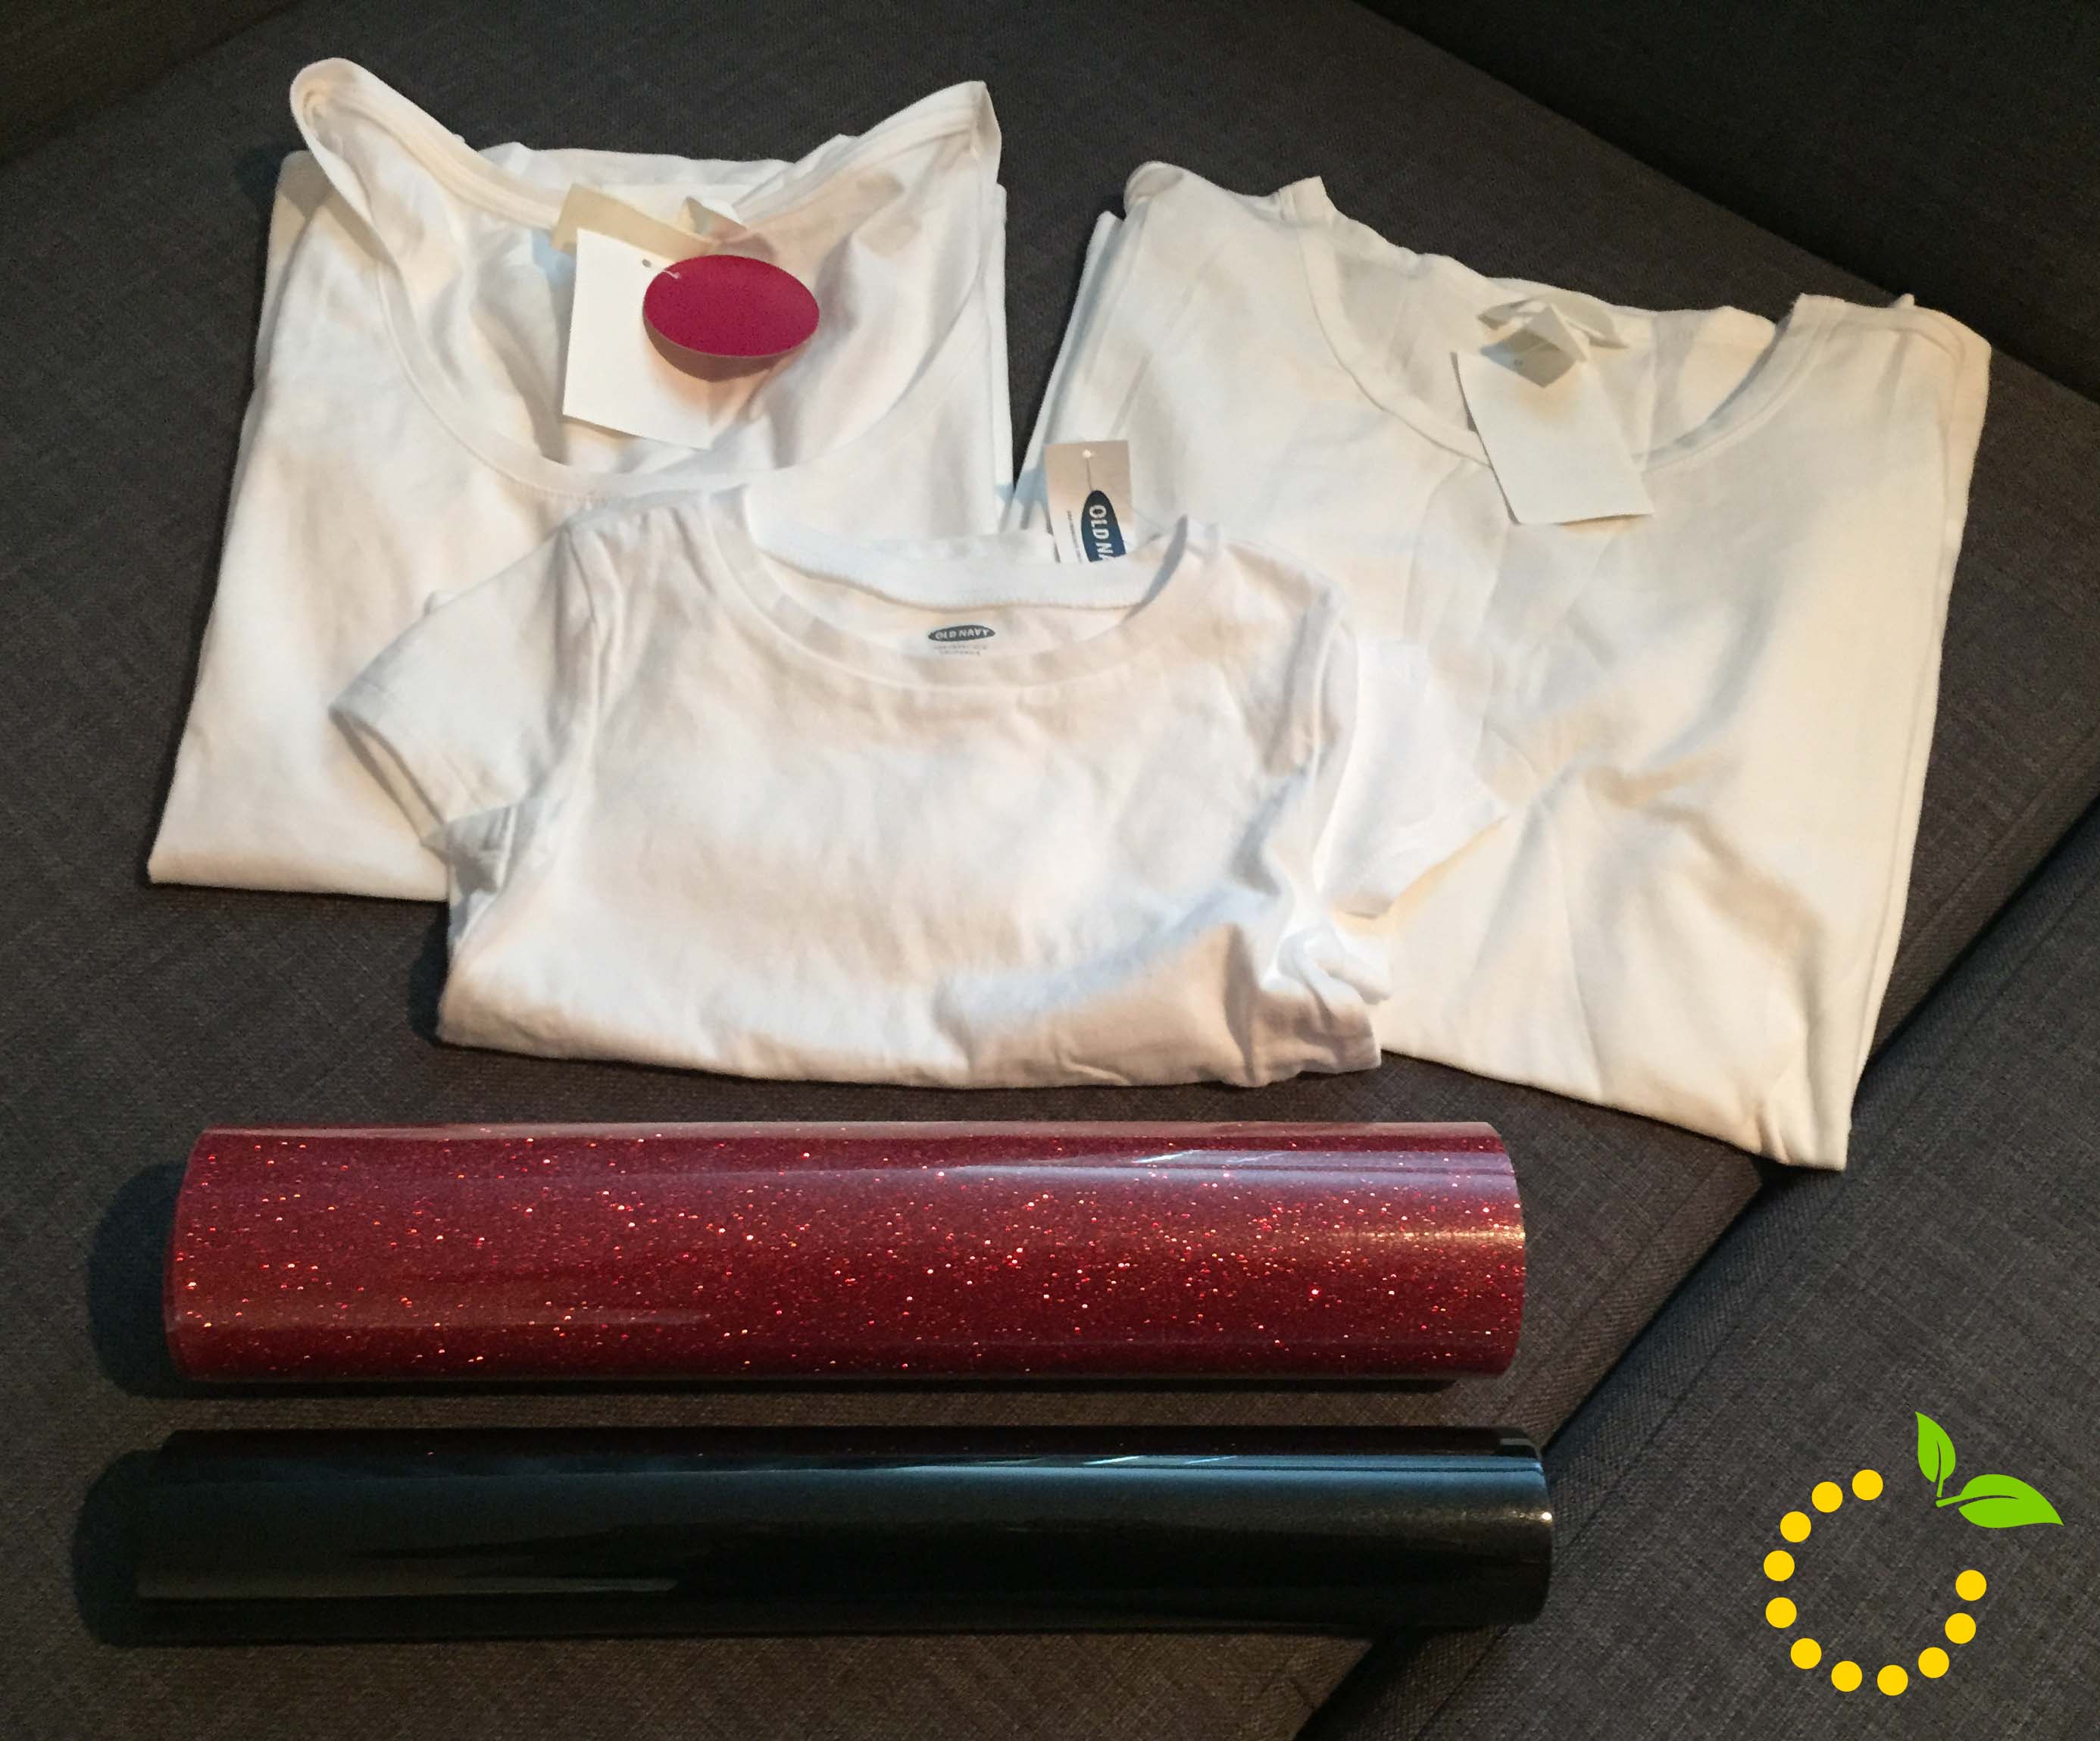
STEP 1. Visit a local craft shop and retail store to pick up your supplies. My shopping list included:
Adult Plain White T-Shirt: $5 each at H&M.
Child Plain White T-Shirt: $1.50 each at Old Navy (Yay for clearance deals).
Iron-On Heat Transfer Vinyl: $12 for one roll of black and $16 for one roll of red glitter. The vinyl is the most expensive part of the project, but the red glitter was totally worth the price.
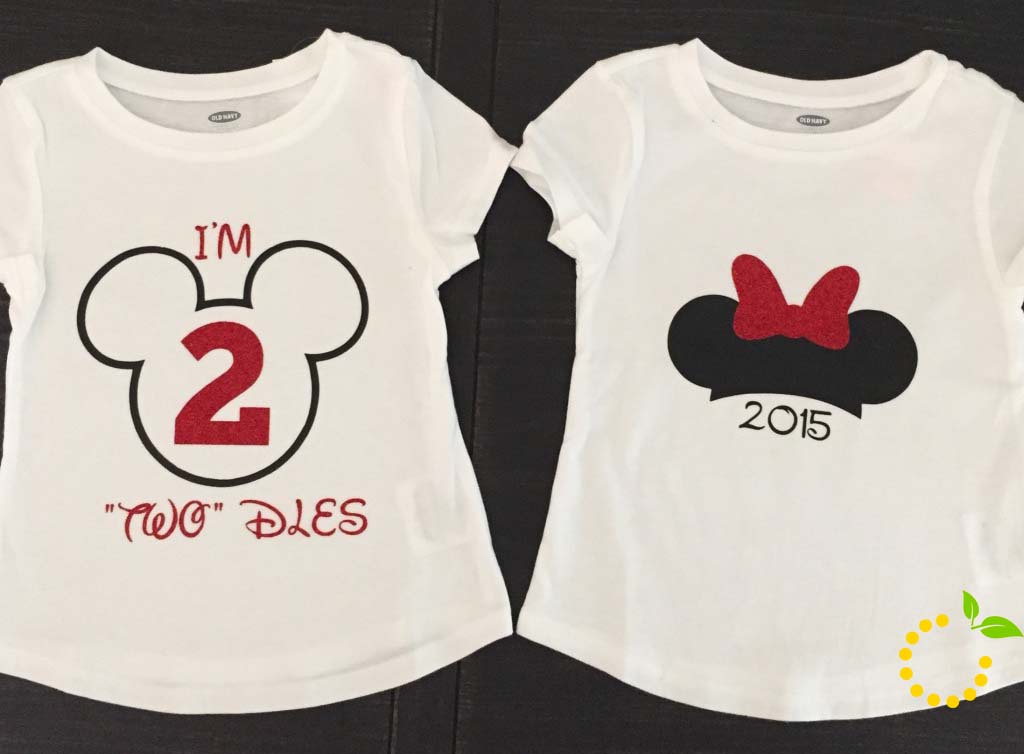
STEP 2. Grab a vinyl cutter and prepare the images you want to use on your shirt. Ashley owns a Silhouette Cameo, which was super easy to use, but because my designs weren’t on a template, we had to look online and upload them to the Cameo. Every system is different, but here is a Silhouette tutorial by Sew Dang Cute Crafts for reference. Just remember, make sure your designs are printed backwards since you are ironing onto a shirt! (That might have slipped our minds…a couple of times)
STEP 3. Drape your shirt over an ironing board and get your vinyl in place. Grab a towel to cover your shirt and start ironing. Run the iron back and forth multiple times. Lift the towel slowly to see if the vinyl is sticking or if it needs more heat. Once it sticks, you’re done!
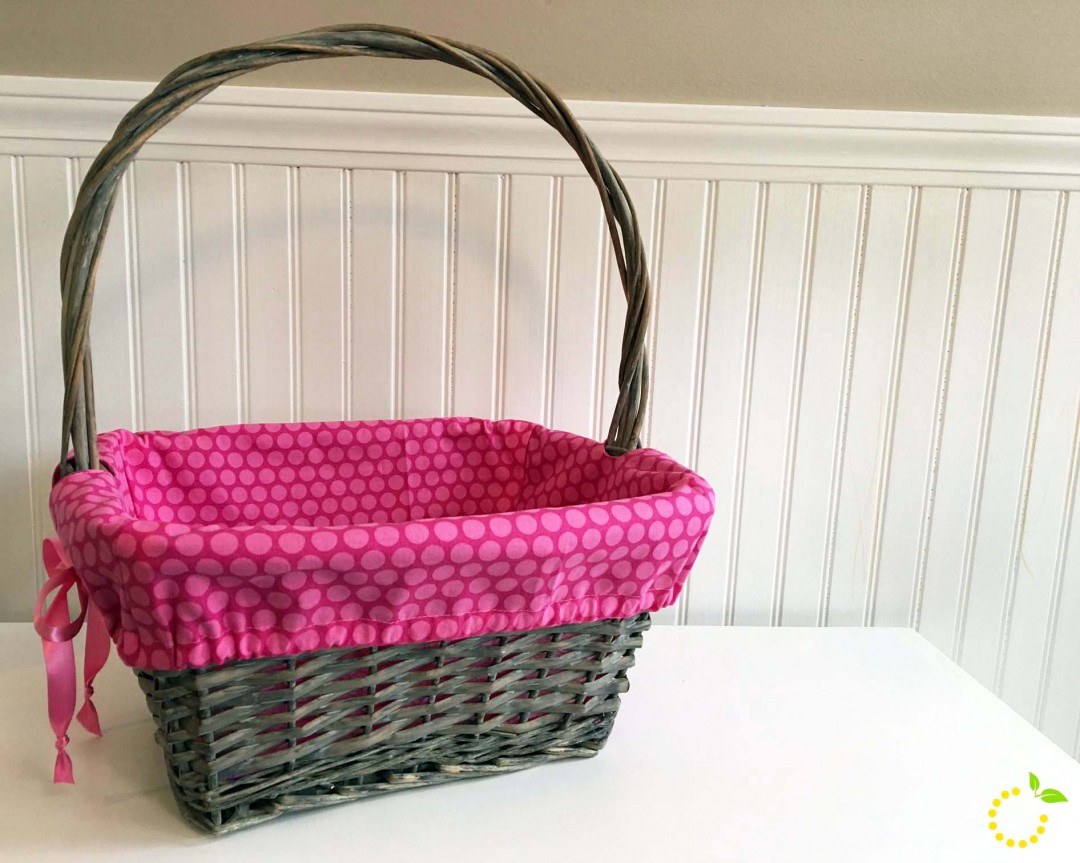
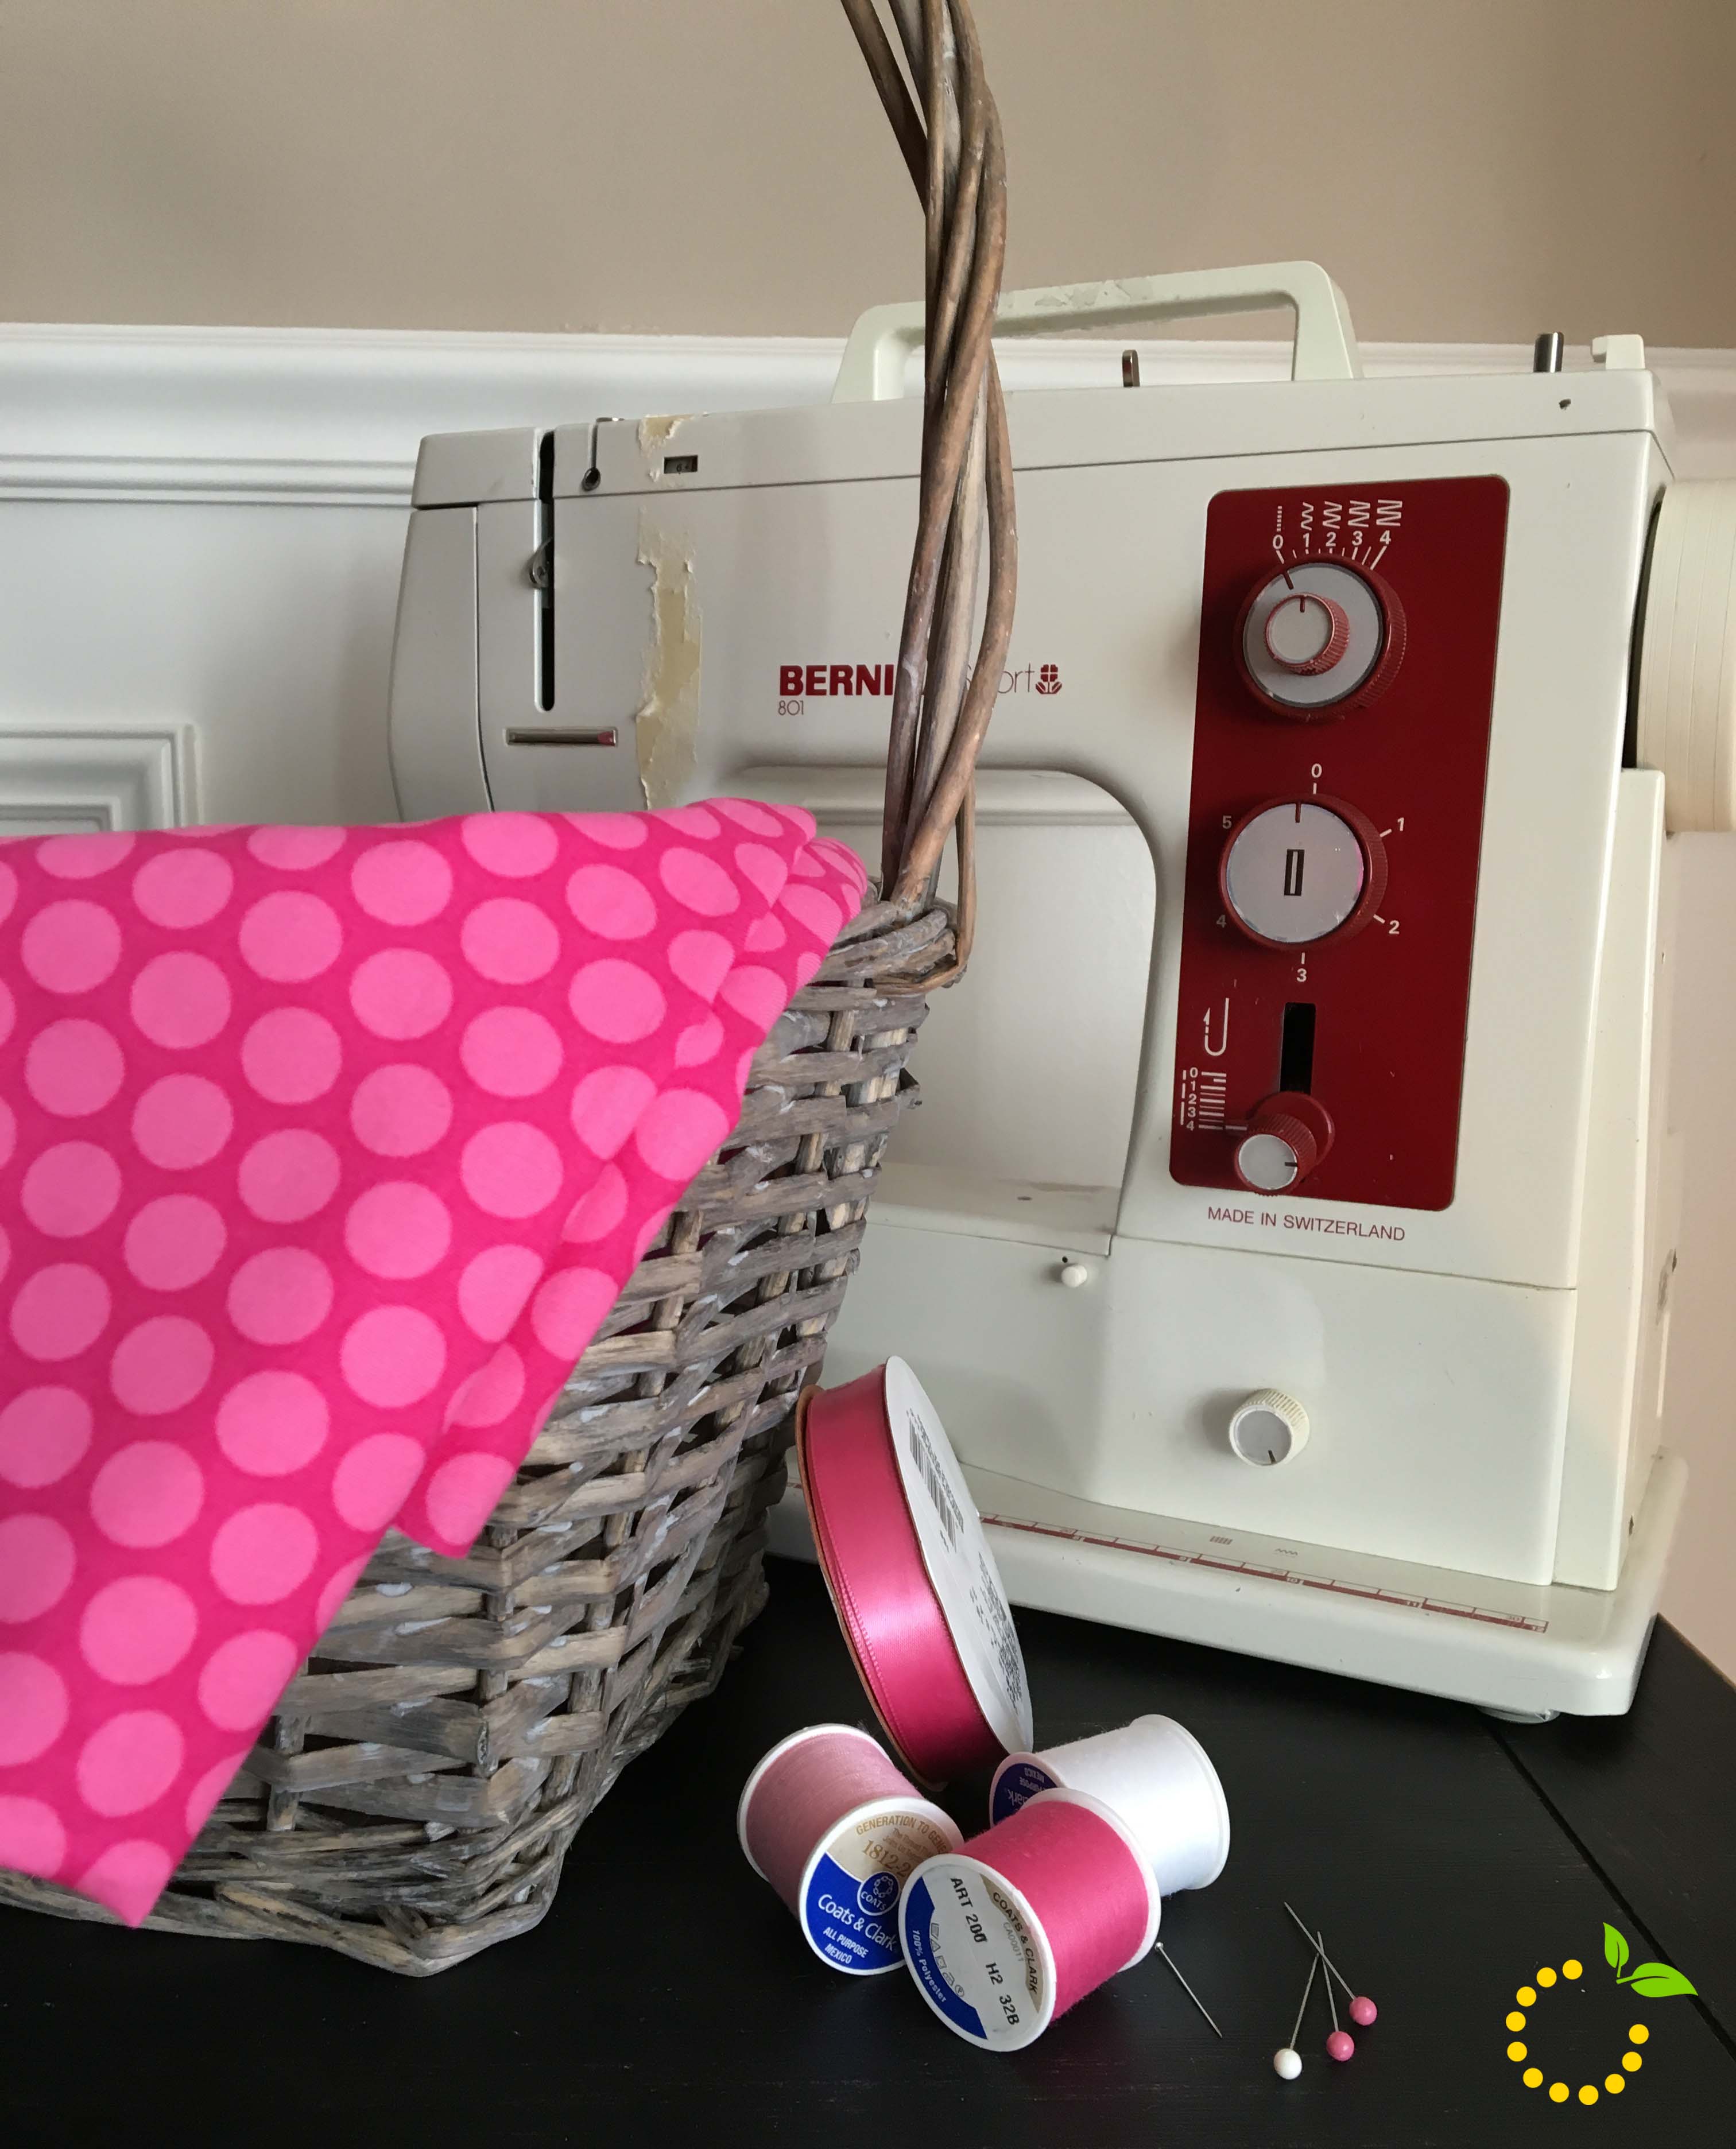
Every year I swoon over the cute fabric lined baskets while shopping for Easter goodies. So this year I decided to get crafty and make my own. Sewing is not my specialty, so I’m pretty excited about how it turned out. With Easter right around the corner, this simple and easy basket liner tutorial can help you personalize any basket that you already have on hand.
Step 1: Turn your basket upside down over an ironing board. You will then drape and center your fabric over the outside of your basket and pin the fabric tight around the corners and down the sides of the basket. This is a lot easier than trying to cut and sew multiple pieces together.
Step 2: Take the fabric off of the basket and with a ruler, extend the pin line to the edge of the fabric. Repeat this step for all four sides. Next, you will sew a seam along the pin lines, leaving a triangular flap. Cut off the flap on each side, leaving a 1/2 inch seam. If you find the fabric doesn’t fit snug in the basket, make your seam a little closer from the original.
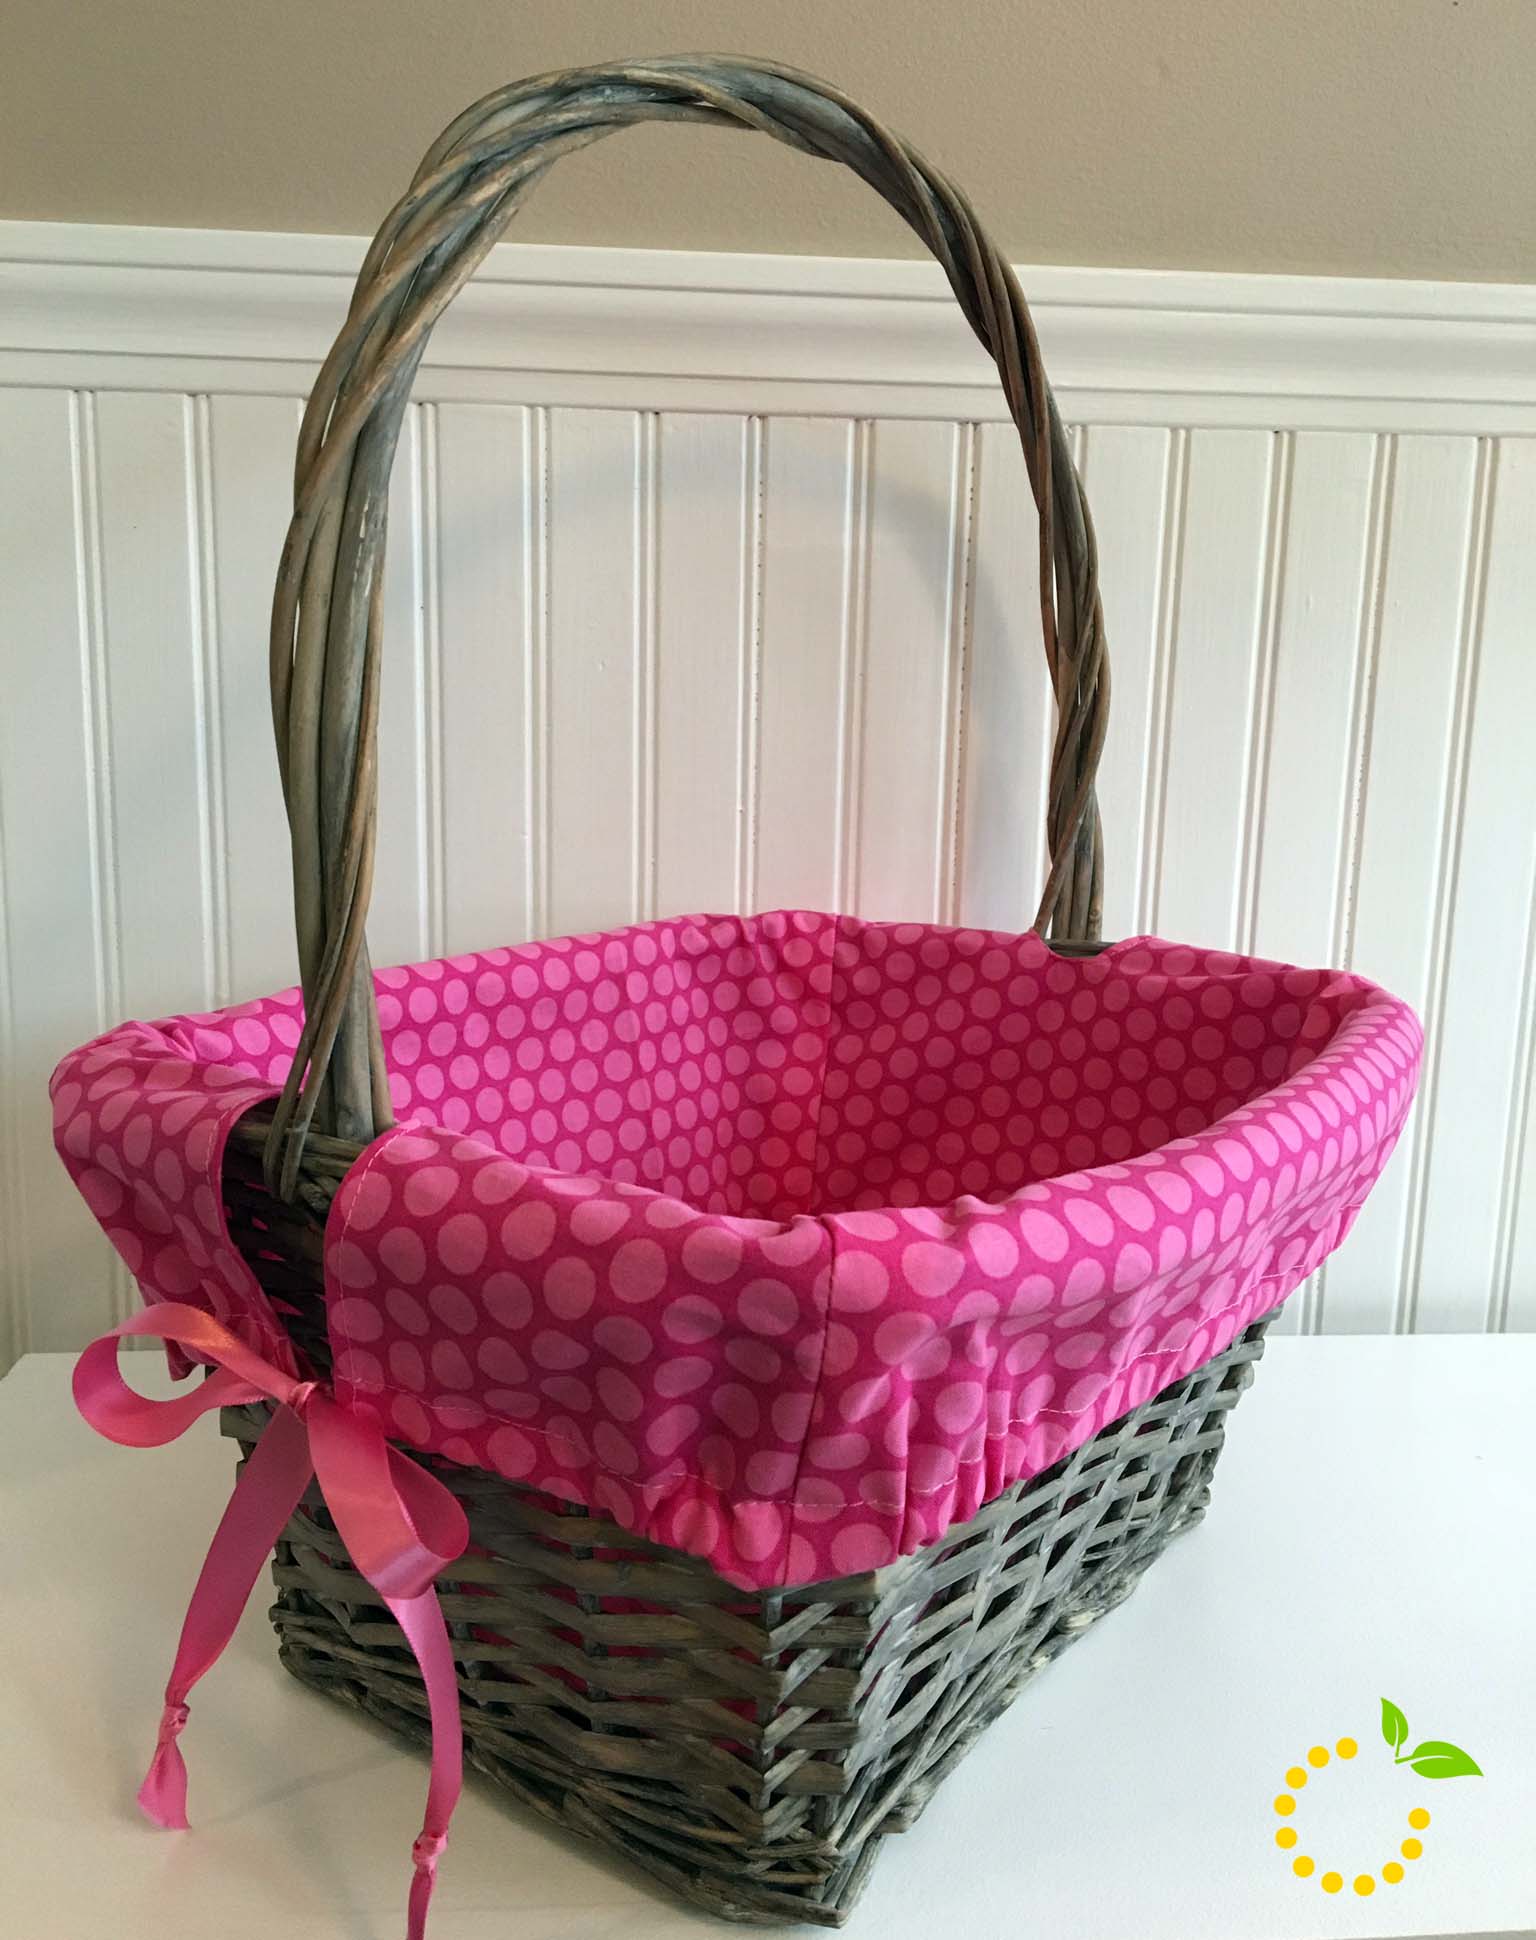
Step 3: Next you need to determine how much fabric you want showing on the outside of your basket. I have three inches showing on my basket. Measure your fabric accordingly and add an additional length for a ribbon casing. The length of your casing will depend on the width of your ribbon. You will then trim off the excess fabric.
Step 4: With the fabric in the basket, make a cut from the edge of the fabric to the handle at the top edge of the basket. The width of the cut will depend on the width of the basket handles. Fold the fabric under and stitch around the edge to get a nice finish.
Step 5: Next you will need to make the casing for your ribbon. Thread the ribbon through the casing and pull tight to make sure the liner fits snug around the outside of the basket and tie a bow at each end.