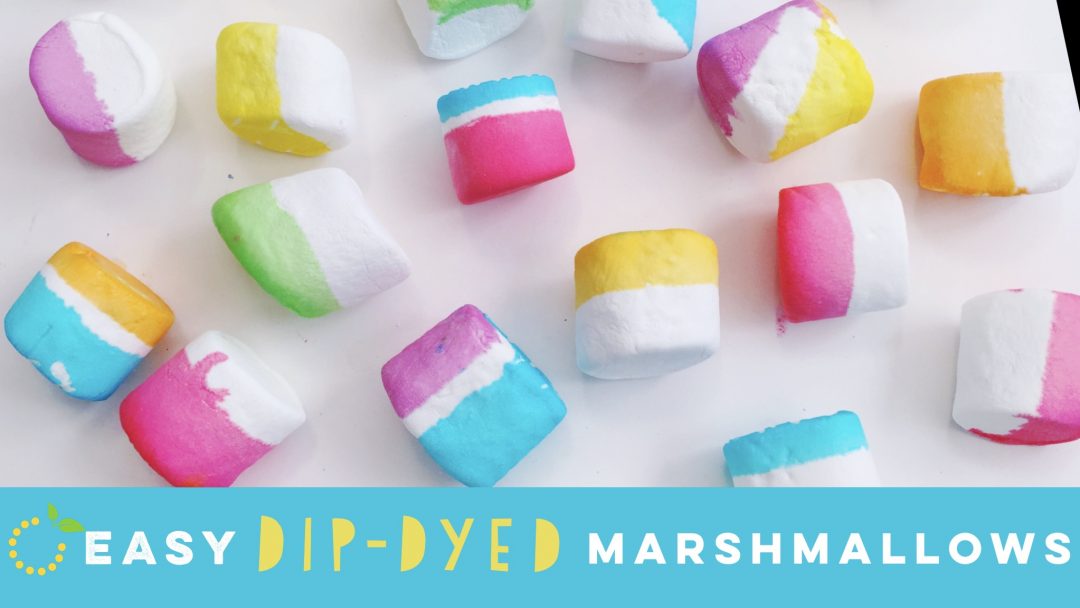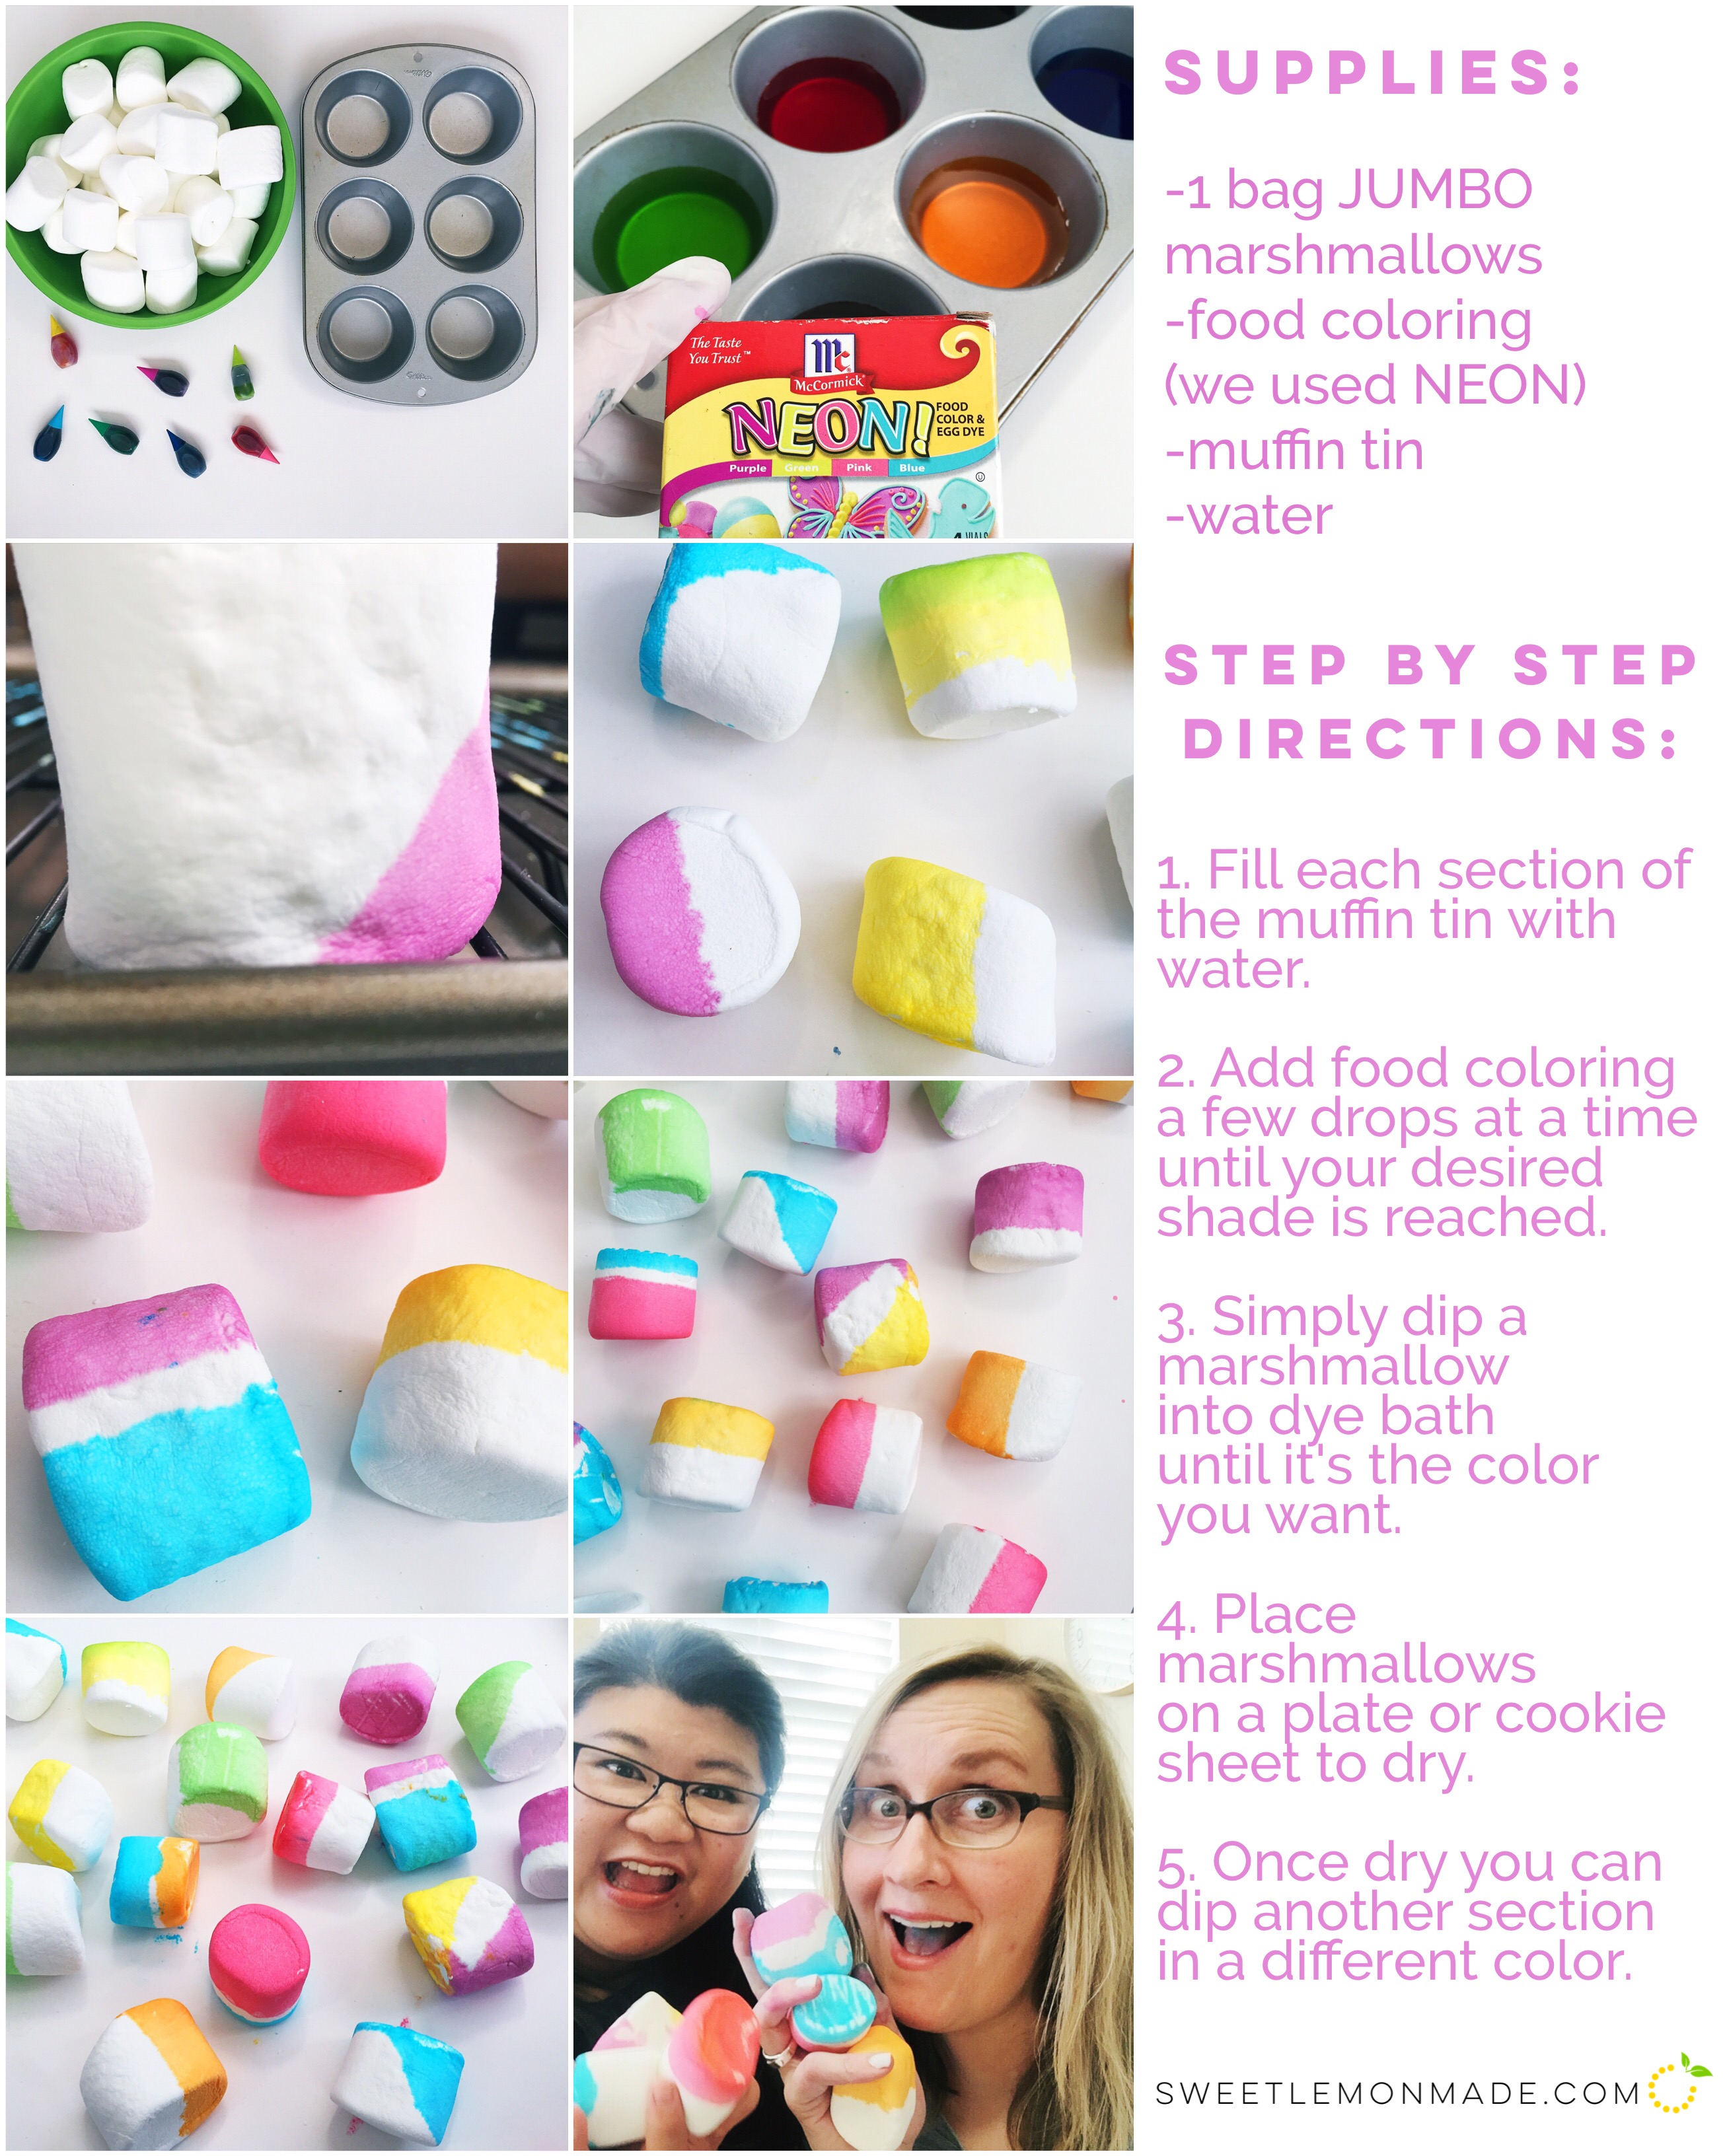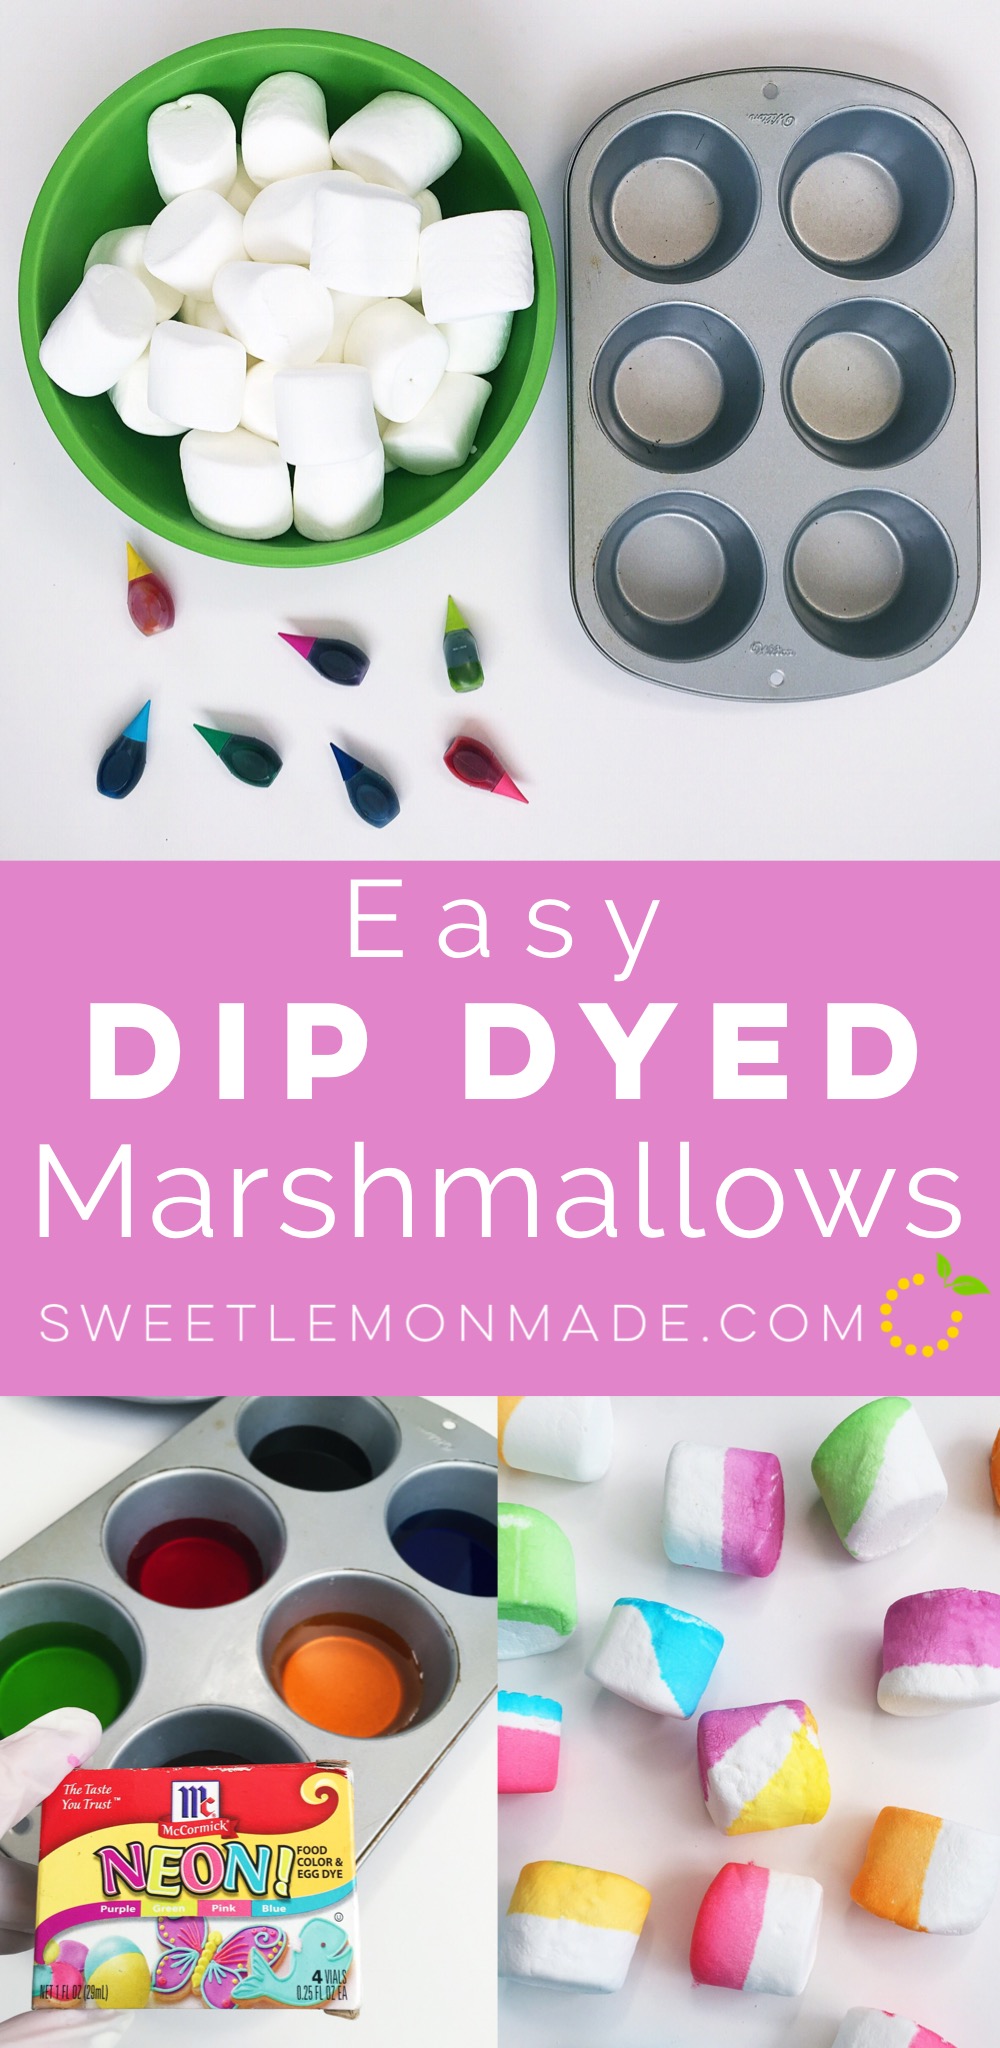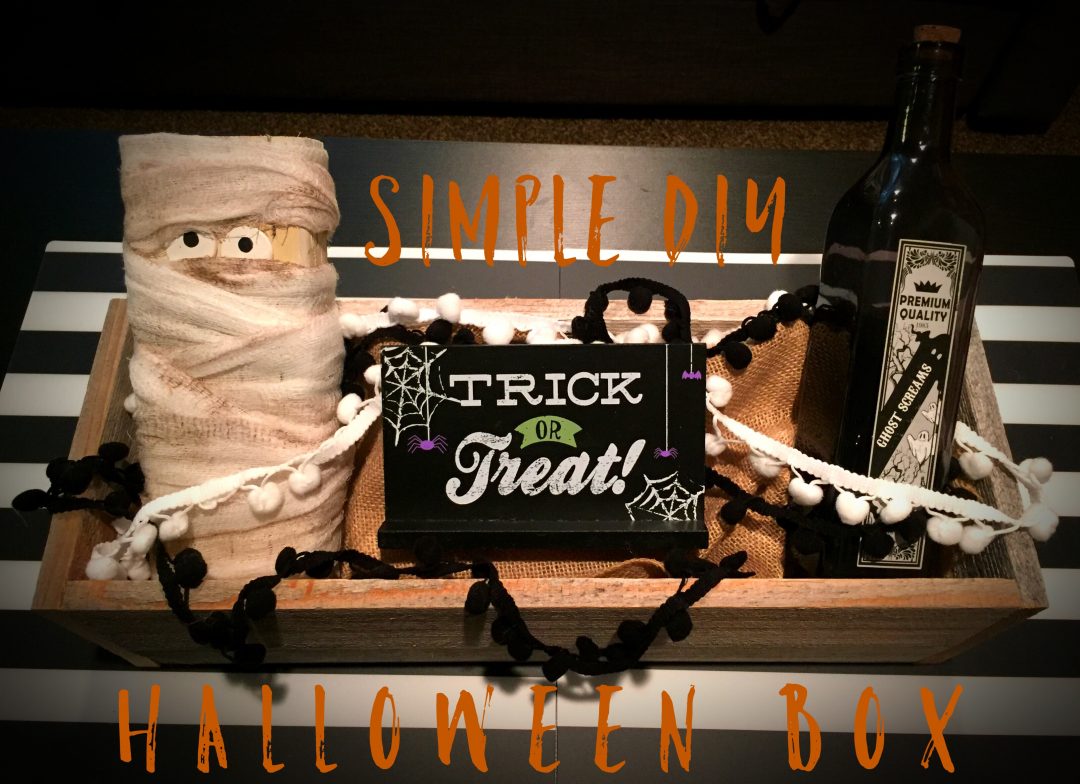
Spring is in the air and just about everyone I know is pregnant! So literally April will be the month of showers, in more ways than one. April showers bring summer babies! Haha. I love an excuse to throw a party, so naturally I’m the first to sign up to host a baby shower. So we’d thought we’d bring you along for the ride as we plan, prepare, and party. Stayed tuned all month long for all the fun details.
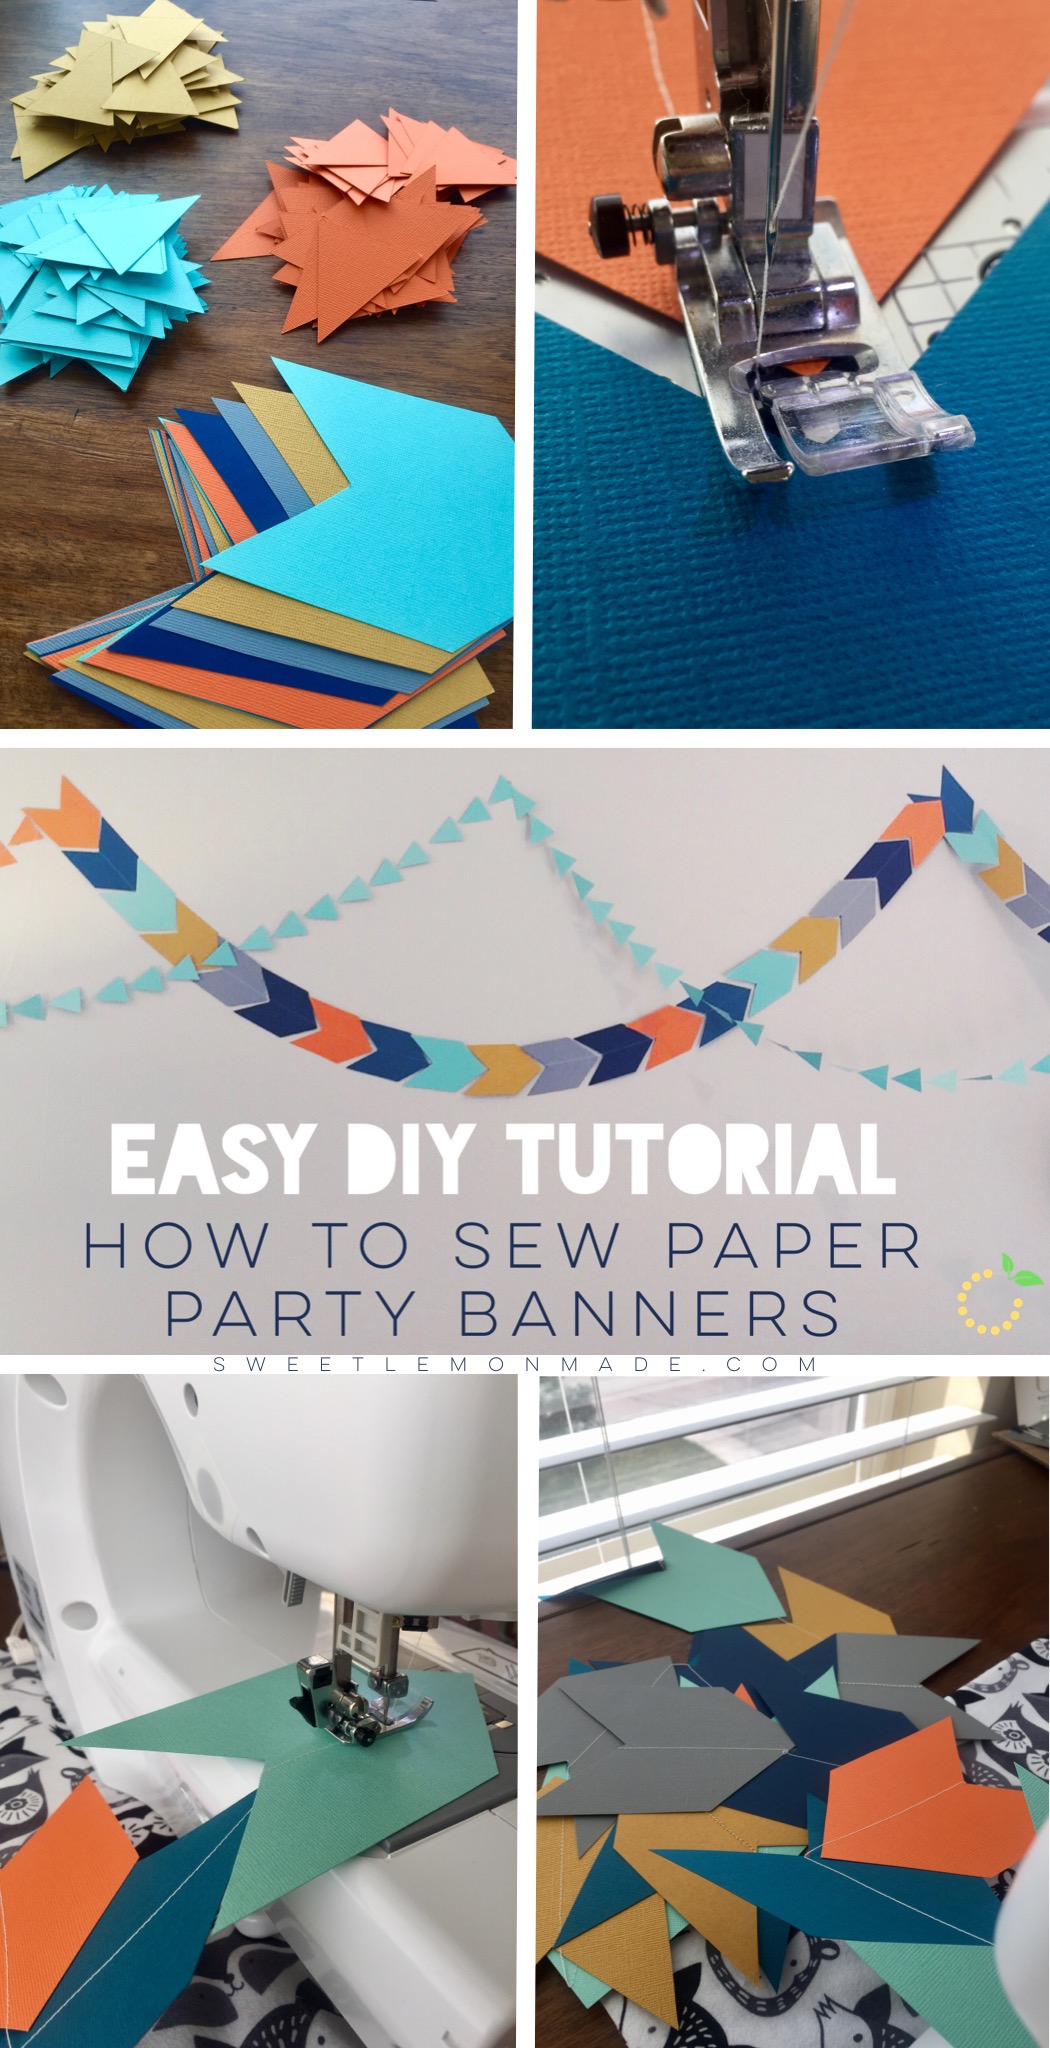
Today we are talking decor. I am a total Pinterest wannabe when it comes to party decor, I pin ALL THE THINGS. I’d like to think I operate on the values of simple and fun, but if I’m being honest half the time it ends up being over the top, time consuming, and pricey. The other half of the time the ideas never leave my brain or Pinterest board…always the best of intentions (can I get an AMEN?). So knowing that I have a couple of showers coming up I decided to get ahead of the game this time. Paper banners and garland are all the rage these days and I’d been eyeing a few up at my favorite party shops, but couldn’t bring myself to pay $10 for a 6 foot banner (that day–let’s be honest, there are plenty of days that I spend way more on way less because I’m too busy or lazy, haha). But I love the fun, whimsical look that paper banners can give. You can personalize them with letters or have a variety of shapes and colors to give texture and dimension. They are awesome. So I set out to try out making and sewing my own! I have seen and heard of people doing this, claiming “it’s so easy!” But I wasn’t really sure what to do. I figured there had to be a catch of some kind. You can’t just sew paper, can you? Well, according to the craft gods you can, and it really is easy! You don’t need a special needle or special thread. I just used what I had already in my machine and had zero problems. I was kind of amazed. Okay, so here are the details…
STEP ONE: Cutting the Paper
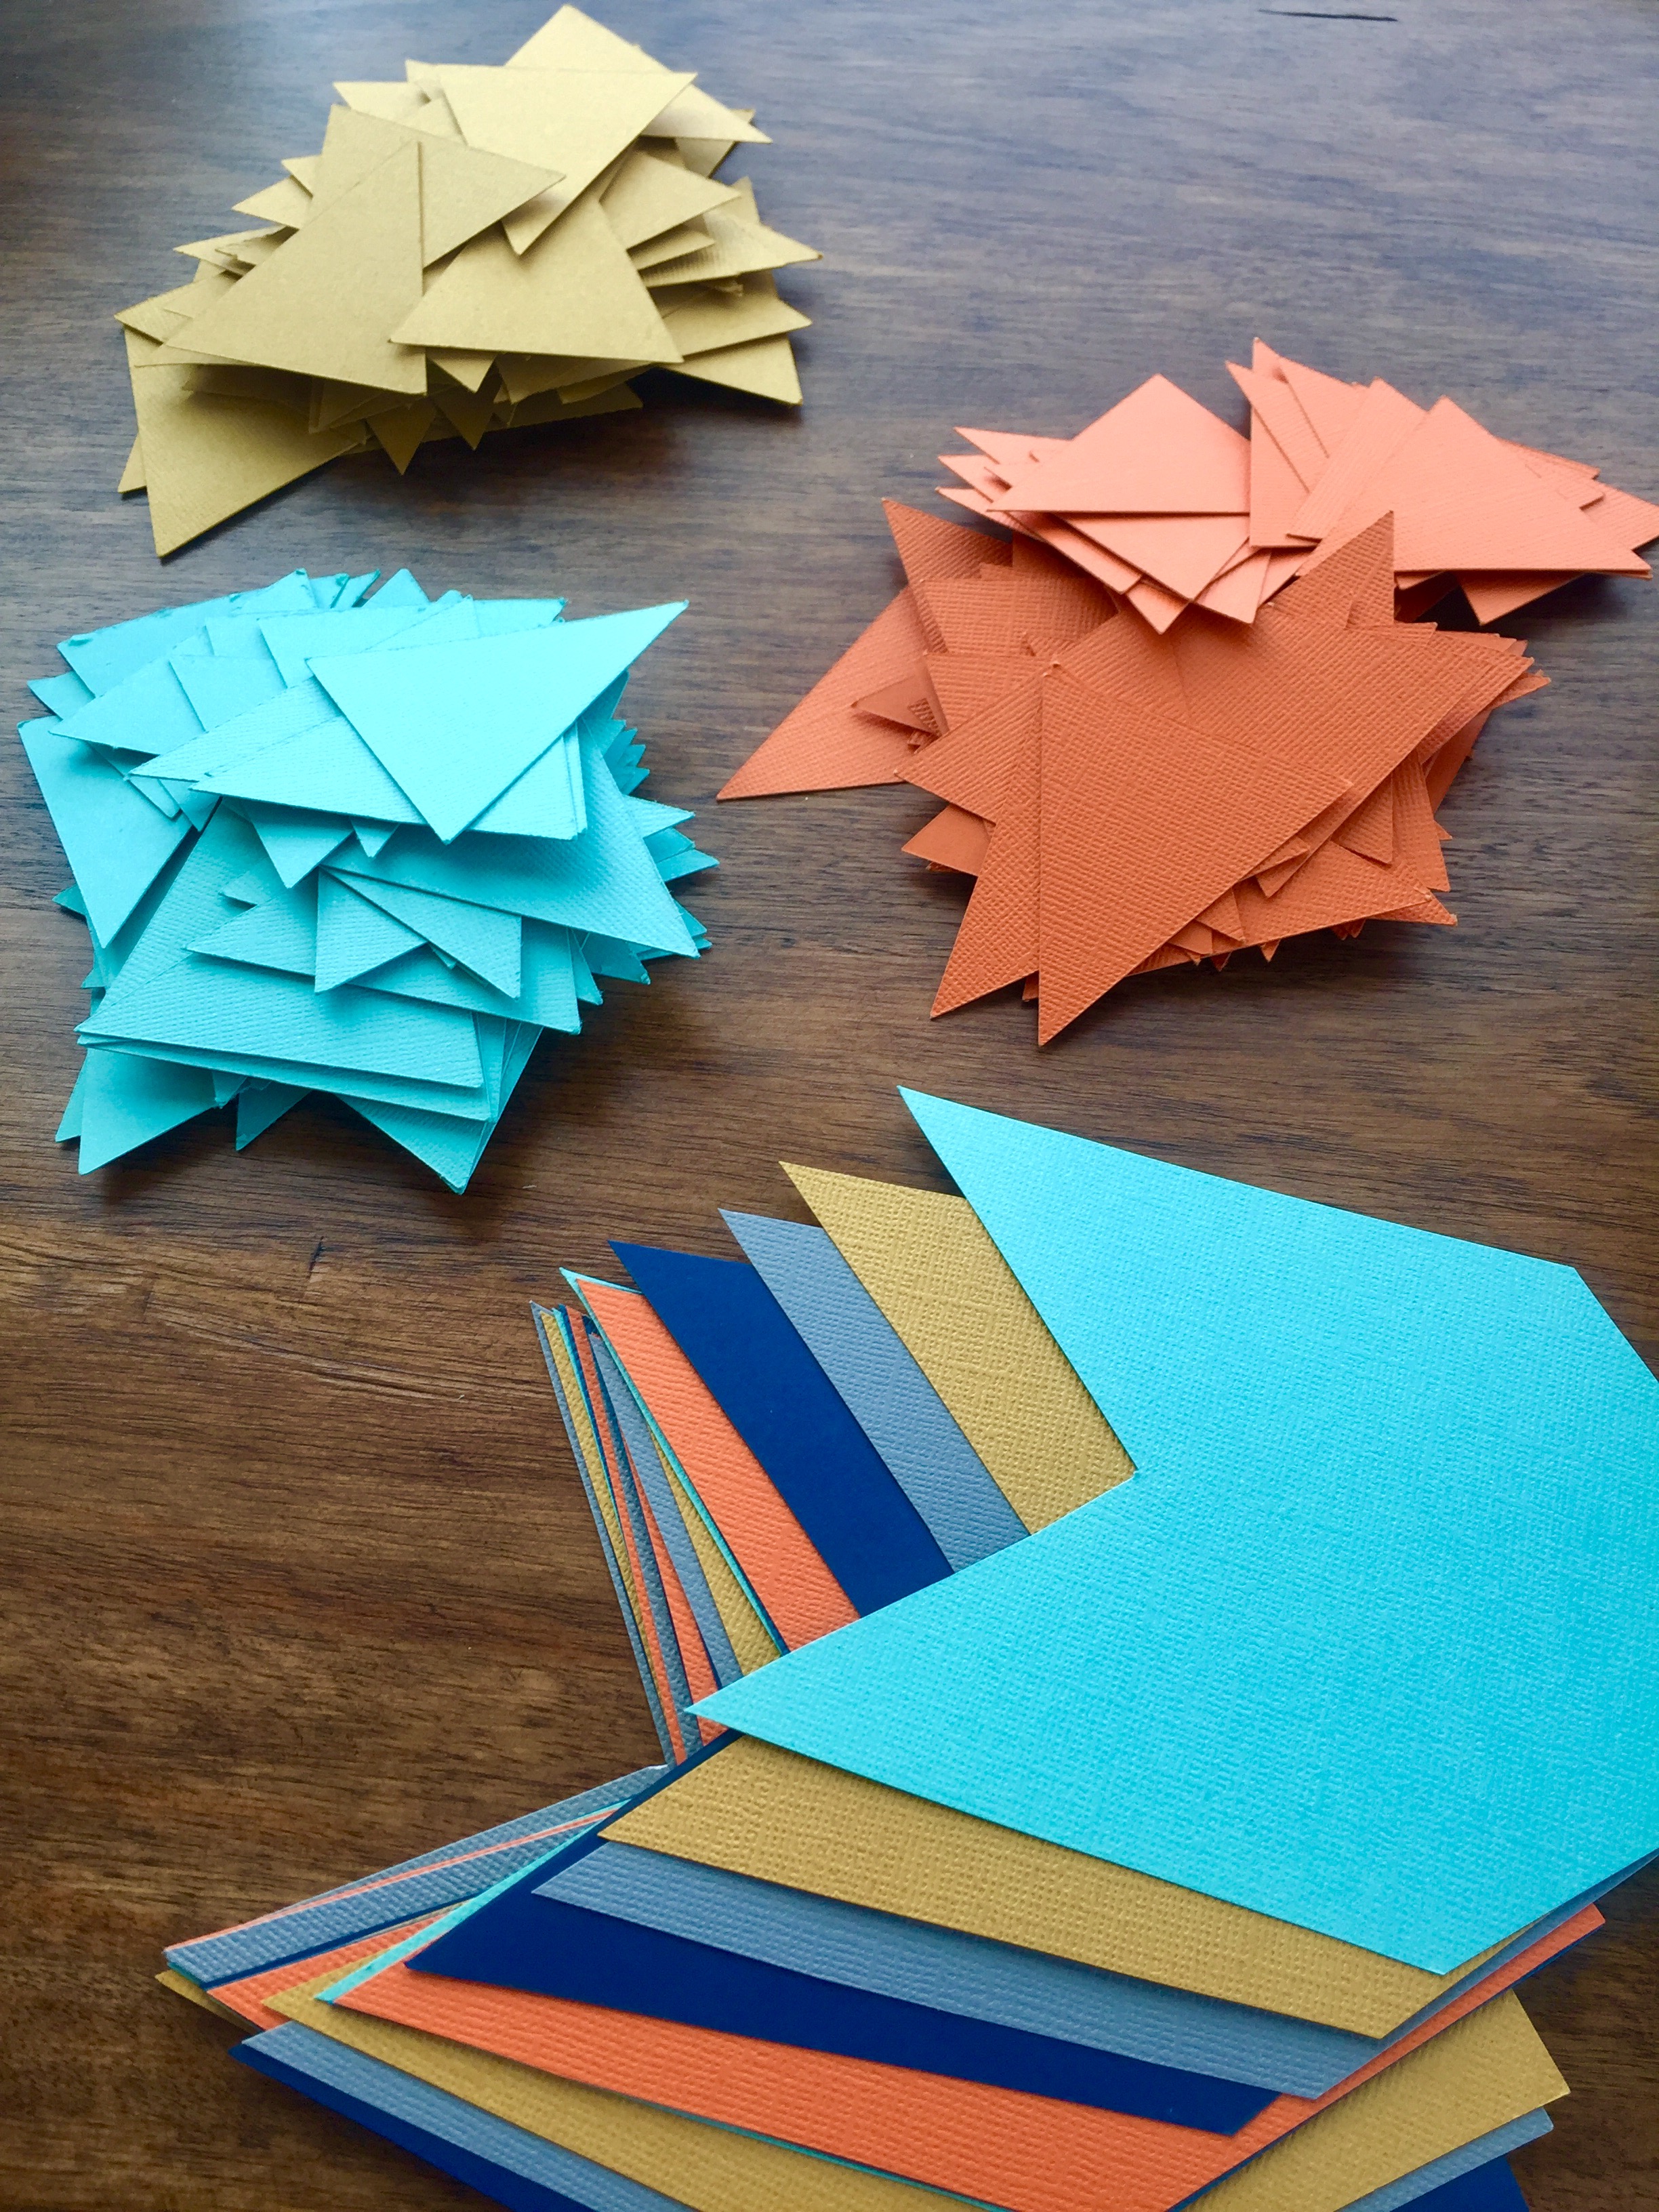
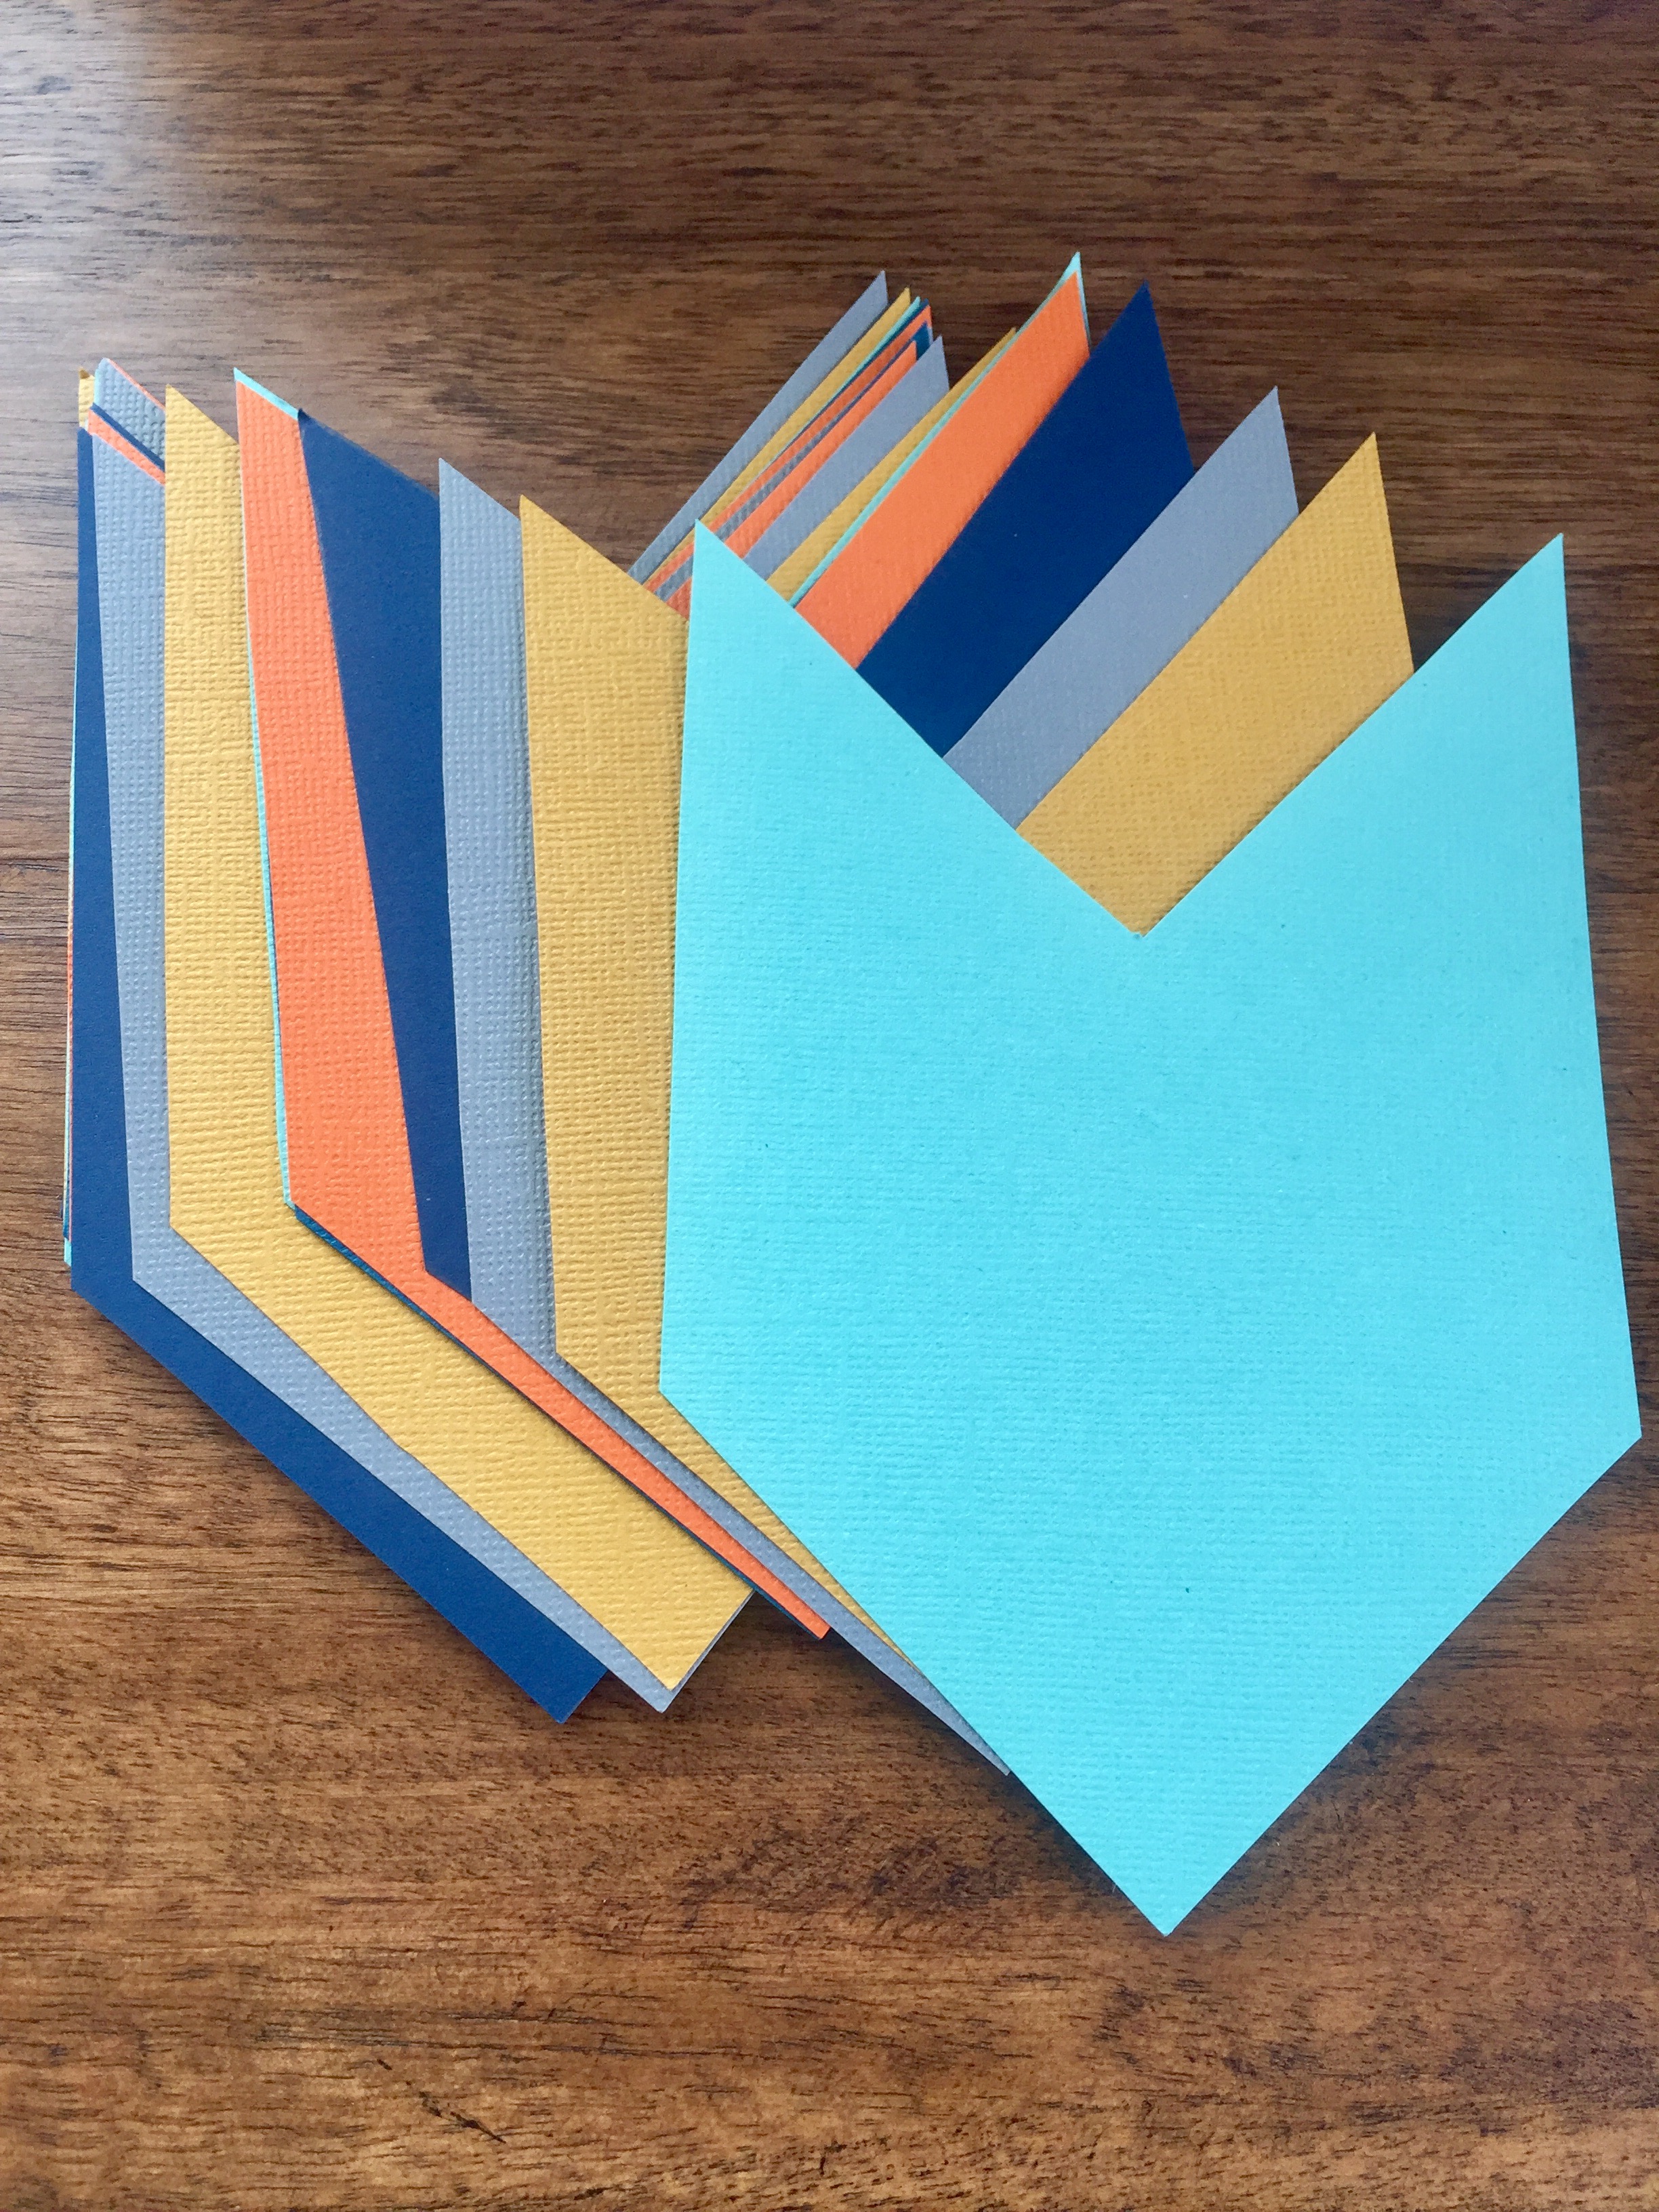
I decided that I wanted to do multiple garlands in different shapes and colors, so I searched the interwebs until I found the perfect shape. Once I found the arrow shape I wanted, I printed it on cardstock, cut it out, and then used it as a stencil to trace the shape on to the colored cardstock. After I had a page traced I used some regular old scissors and cut them out….one..by..one. This definitely the most time-consuming part of the whole project! I felt like I was doing an elementary art project. Trace and cut. Trace and cut. Searching for encouragement and validation in my seemingly endless endeavor, I texted this picture to my blogging budding and crafternoon partner in crime, Ashley, to show her my progress. Rather than responding with enthusiasm, she responded with surprise. “Are you really cutting all of those out by hand?” she asked. Confused I responded, “Yeah, how else would I do it? They don’t make hole punches that big!” Her response was filled with many tear-faced laughing emojis as she reminded me about her Silhouette Cameo Electronic Cutting Tool !! OH MY GOSH. Duh. I had totally forgotten she had one of those. I had literally spent hours tracing and cutting all of my large arrow shapes. Oh boy, if this isn’t the story of my life, I don’t know what is!! Haha.
She came over the next day and we used her fancy machine to cut out all the small triangles in no time at all. It was such a breeze I just shook my head in disbelief thinking of all the hours I had spent tracing and cutting the others the night before. So if you are going to do this, the only way for it to be simple and quick is if you have one of those fancy cutting machines!!!
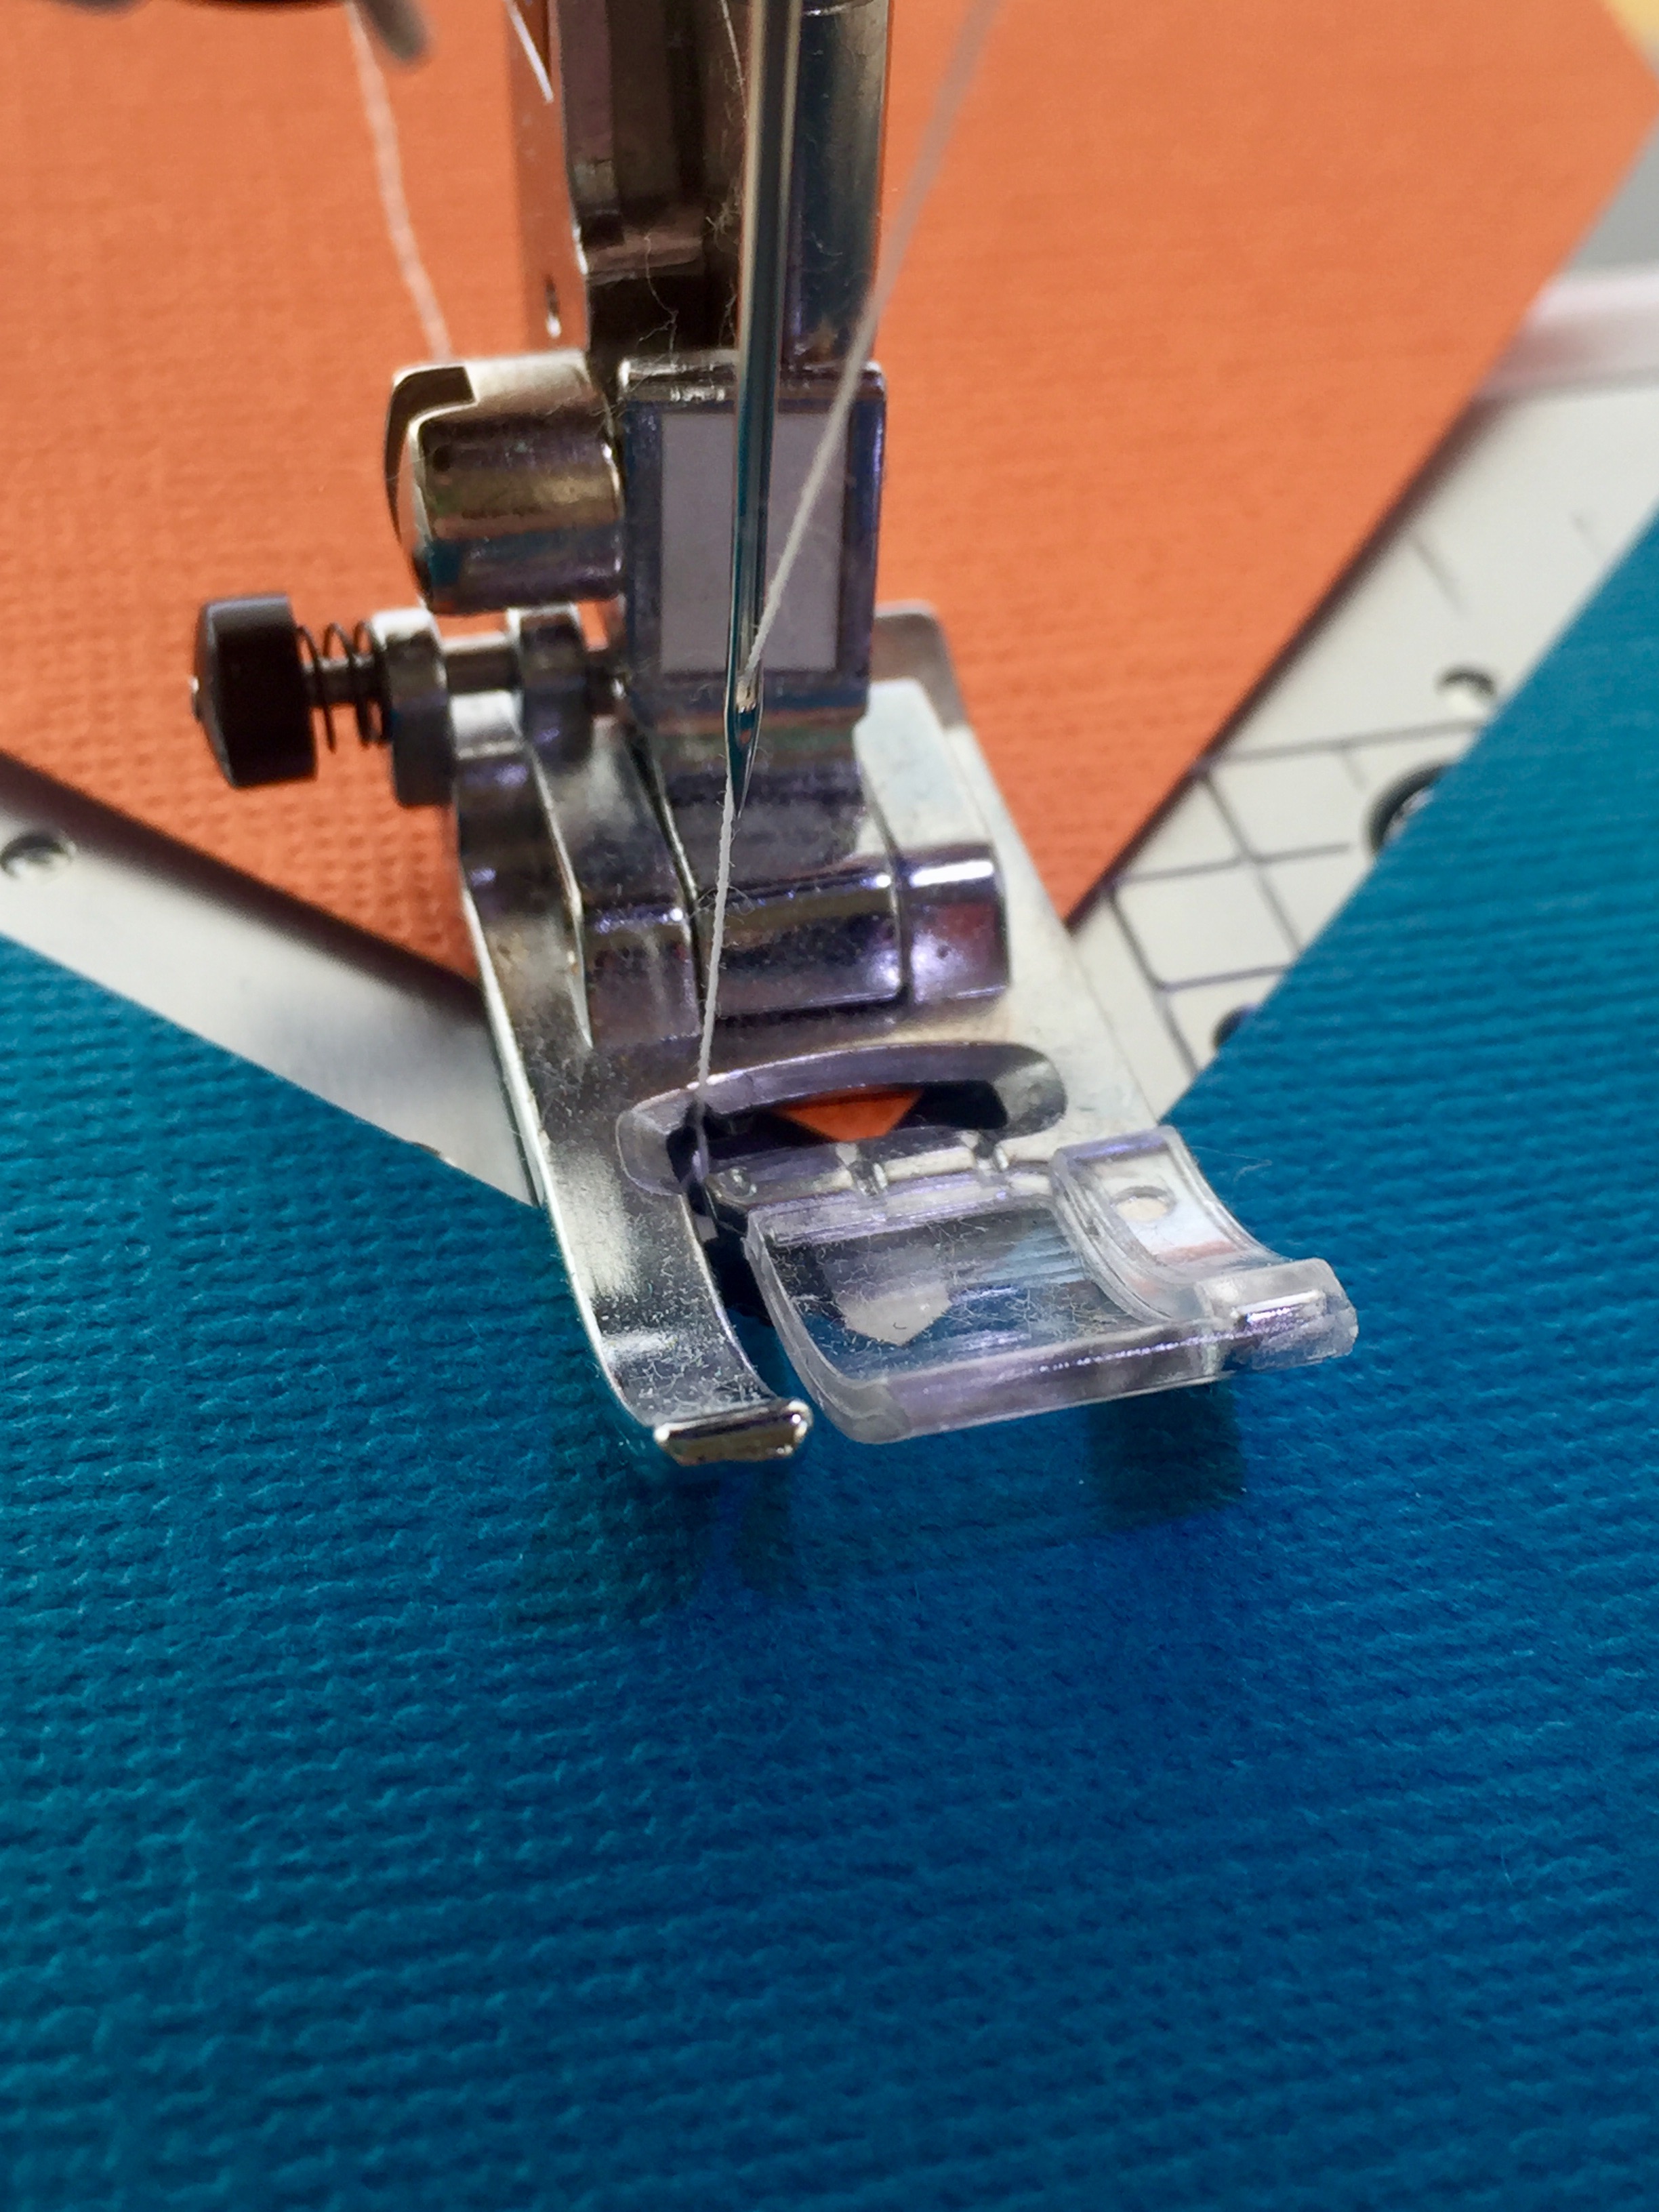
STEP TWO: Sewing the Paper
Once all your shapes are cut out, arrange them in the color pattern you want them to be sewn in (if you are using multiple colors) and make a pile. Next, make sure your sewing machine is ready to roll–full bobbin and threaded properly. For ease I picked the most basic, simple stitch. No need to adjust the tension or mess with any other fancy features–just keep it on the basic, standard settings. If your sewing machine has a speed dial be sure it is on the slowest setting. Before you put the first shape under the presser foot to sew, allow the sewing machine to sew with nothing under the presser foot (take the bobbin thread and the upper machine thread once there has been a few stiches and gently pull it back to help guide the formation of the string). You will do this so your banner has a long section of just thread at the beginning and the end of the banner. This will make hanging the banner much easier. Once you are ready to start sewing shapes, take your paper shapes and line one or two up on the sewing machine in front of the needle and presser foot. Make sure the presser foot is down and slowly begin sewing the shapes. Advance the shapes, adding new ones each time. Gently pull the shape that has been sewn and guide it behind the sewing machine. If you want your banner shapes to be more spaced out, allow the sewing machine to sew for longer without adding a shape (just letting it sew the upper thread and bobbin threads together).
Tip: when you are letting the sewing machine sew without paper, gently pull the last sewn shape (now behind the sewing machine) to keep some tension so the thread you are sewing does not tangle.

STEP THREE: Storing the Banner
After sewing the banner can get tangled very easy because the thread connecting all the shapes is so thin. After I had finished sewing I cut a flap off a large cardboard box (from my many Amazon Prime purchases…I’m addicted) and began to wrap the banner around the cardboard piece. Once the banner had been wrapped I used a paper clip or binder clip to secure the ends of the banner to the cardboard so they didn’t come loose or tangle. These store easily and keep the garland tangle-free until the next party!
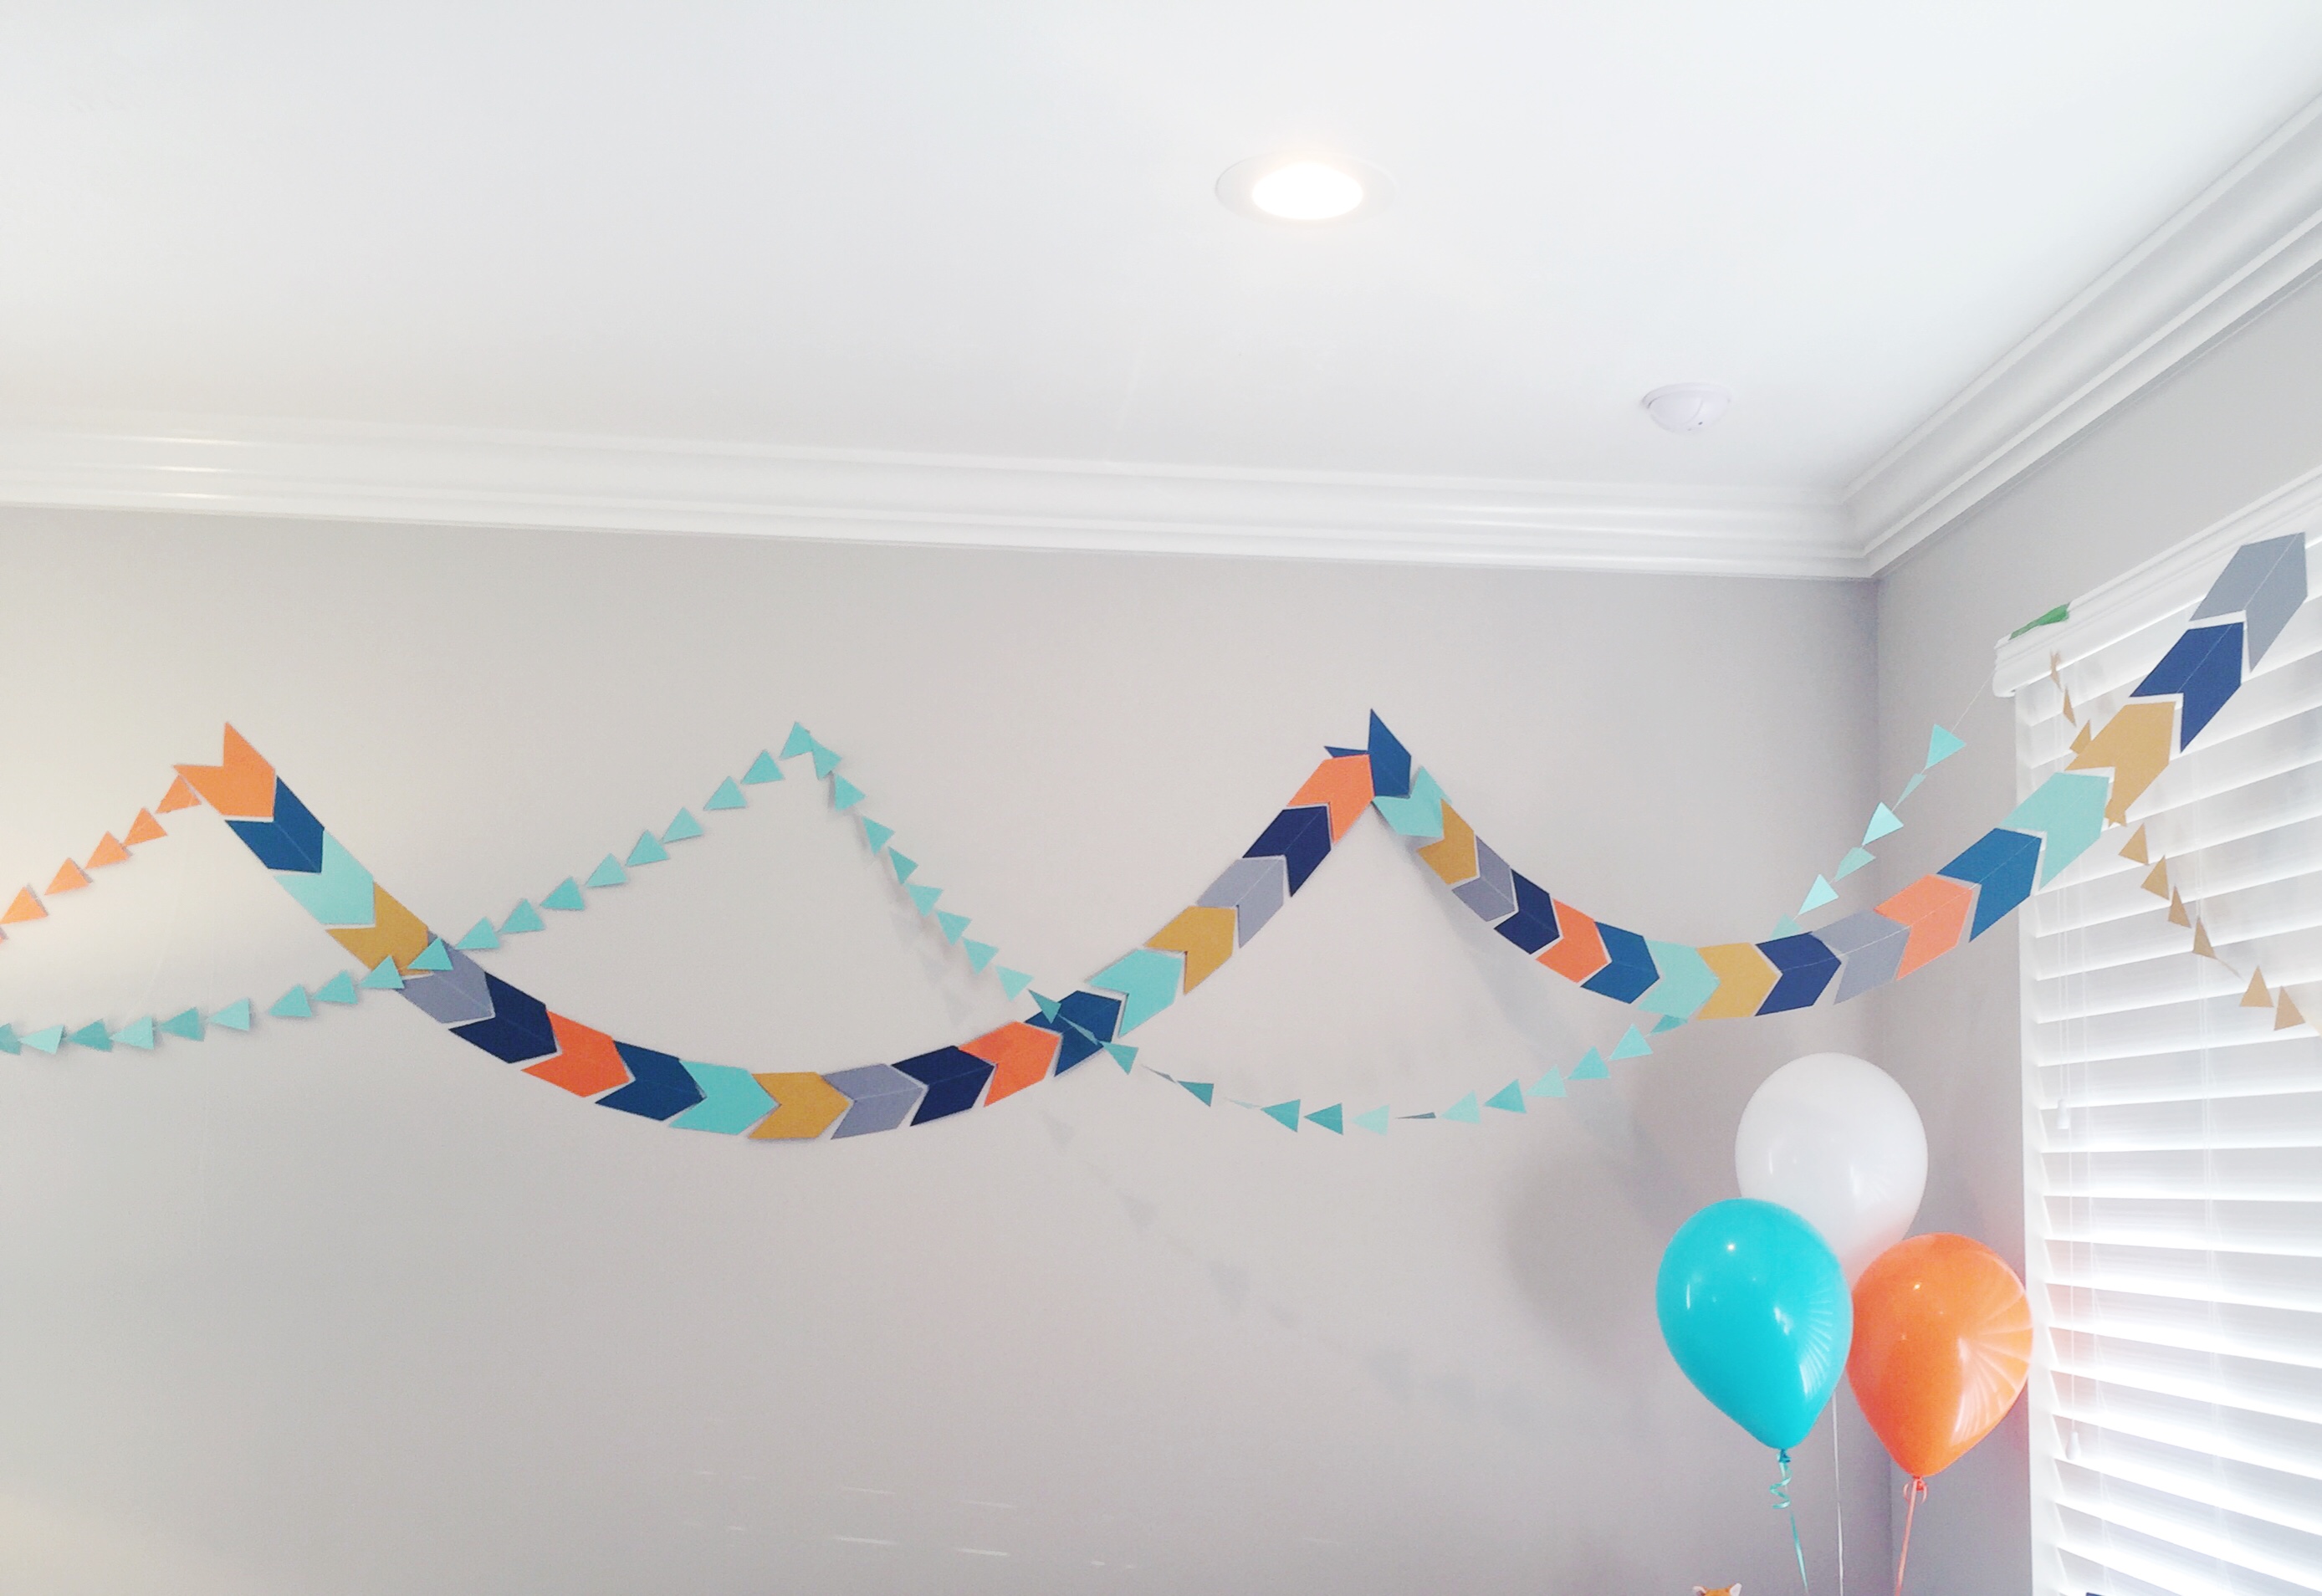
I loved the way the triangles turned out! It was a fun look and I really liked how they all didn’t hang the same way. The variations in the angles as the hung added great texture and dimension. So if you have a party coming up and know someone with a fancy electronic Silhouette Cameo or a Cricket, this project is definitely worth your time and will save you lots of money$$$.