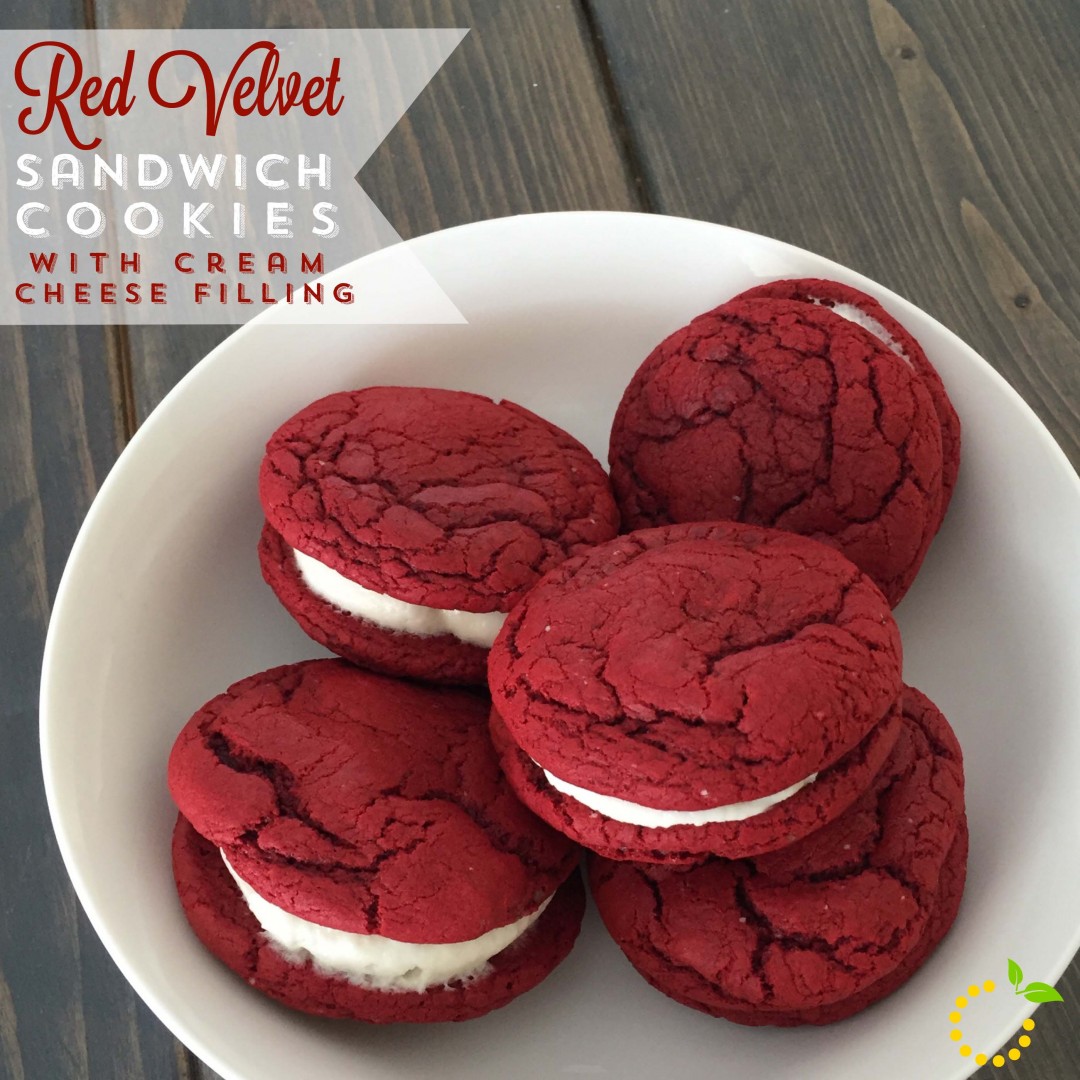
If you love red velvet and cream cheese, you will fall in love with these delicious Red Velvet Sandwich Cookies! Can I just tell you how soft these cake cookies are? SUPER SOFT!! Cake cookies have become my new favorite type of cookie. My family, friends and coworkers who I’ve shared them with would all agree. I normally make red velvet treats in February for Valentine’s Day but, when you get a craving for red velvet there is no right or wrong time to have a red velvet treat! Am I right?! I know all you fellow red velvet lovers would agree with me! Because what’s better than cream cheese frosting smooshed between two soft and chewy red velvet cake cookies! So, if you’ve never had a cake cookie, you’re missing out and should probably make these pronto! They are like pillows of heaven! And another plus, they are super easy to make!
Red Velvet Sandwich Cookies with Cream Cheese Filling
Preheat oven to 375° F. Line baking sheet with parchment paper.
Combine cake mix, eggs and oil in a large bowl.
Using a mini ice cream scooper, scoop out dough and roll into balls. Place on baking sheet about 2 inches apart. Tip: **It's best to bake one sheet at a time.**
Bake 8-9 minutes or until edges are set. FYI--The cookies will look under baked when you pull them out. That is alright because once they cool they will be soft and chewy. **Don't over bake them. Let cookies cool for 2-3 minutes on baking sheet. Transfer to cooling rack and let them cool completely.
Cream Cheese Filling
In a bowl of a stand mixer fitted with the paddle attachment beat the cream cheese and butter on medium speed until well combined and smooth, about 2-3 minutes.
Mix in the vanilla extract.
Gradually add in the powdered sugar until desired consistency is reached and smooth--should be thick but, not too thick.
Transfer the cream cheese filing to a pastry bag fitted with a plain, round tip.
Assembling the sandwich cookies
1. Pair the cookies up by size and shape as best as possible.
2. Flip one cookie of each pair over so that the flat side is facing up.
3. Pipe frosting onto the flat sided cookie of each pair, keeping the edges clear.
4. Sandwich the cookies together so the flat sides are facing each other and press gently and evenly to help the filing reach the edges but, not spilling out.
5. To store, refrigerate in an airtight container.
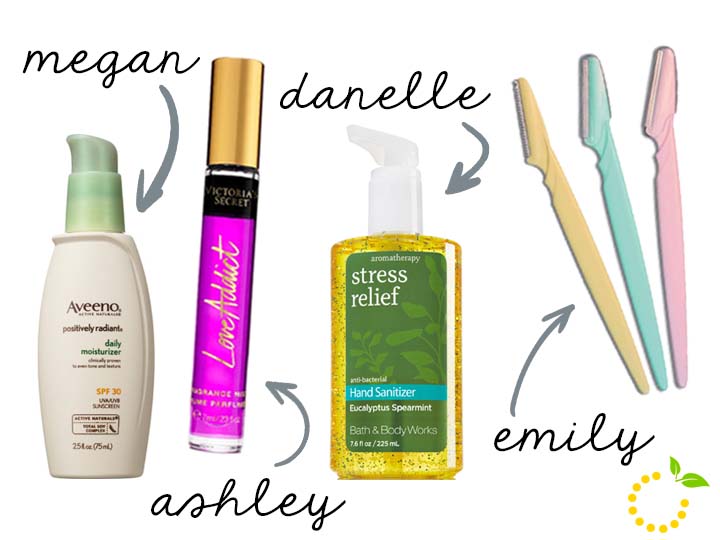
Bath and Body Works Eucalyptus Spearmint Hand Sanitizer: Who hates germs and stress? *all the hands* Yeah, duh, me too. I work in the hospital as a nurse practitioner so obviously I’m anti-germ and usually a little stressed (ok or a lot stressed) and this hand sanitizer is a little piece of heaven. You can ask anyone I work with. I have a large dispenser of this spearmint and eucalyptus potion on my desk and when emotions or tensions are running high, I give everyone a squirt. If someone comes into our office afterward they always comment on the relaxing smell. It seems crazy, but using this flavor of hand sanitizer and taking a few deep breaths of the scent is really relaxing! Grab the travel size and sneak a few zen moments/sniffs when and wherever you need—right before a big meeting or waiting in line at the Chick-fil-A drive-thru with a van full of noisy kids. Trust me, the stress relief promises with this product are no lie. Try it! Image Source: Bath and Body Works
Aveeno Positively Radiant Daily Moisturizer: A couple years ago I noticed my makeup was patchy on my skin and not applying very smoothly. Little did I know, the main culprit was my lack of facial moisturizer. I had never used a facial moisturizer before so I was pretty clueless to all of my options. In my mind, I would just pull out the cherry almond scented Jergens Lotion that’s been sitting in my closet for the past decade. I decided to go to Ulta and ask someone for some better advice. My skin can be very sensitive to products so I was hesitant to try something new. She suggested Aveeno and I haven’t used anything else since.
Aveeno Positively Radiant Daily Moisturizer is oil free and hypoallergenic, which is perfect for my sensitive skin. I’ve noticed that it has evened my skin tone and has eliminated my patchy makeup problem for good. This moisturizer goes on smoothly and is really light weight. My favorite thing is it also has SPF 30 so I know I’m always protected without putting on extra sunscreen. Image Source: Aveeno
Love Addict Mini Fragrance Mist from Victoria Secret: When it comes to fragrance mists and body sprays, I’m all about the fruity and sweet scents! So when I discovered the Love Addict fragrance mist one day during one of my frequent visits to Victoria’s Secret (which is every few weeks when I redeem my FREE panty coupons I receive in the mail–because who would turn down a freebie with no strings attached! Not this girl!). I sprayed the tester on my wrist and loved it immediately. I kept catching myself smelling my wrist as I walked around the store! I knew I wasn’t leaving without it and lucky for me the mini fragrances were BOGO (buy 1, get 1 FREE) that day! They have this deal quite often!
I am horrible at describing scents so it’s a good thing the description tells me that Love Addict has notes of wild orchid and blood orange. Also, I love the convenient size, as I can easily throw it into my purse or makeup bag. (7 ml/.23 fl oz.) FYI–the mini fragrance in Love Addict is hard to find and not sold online, so search your local VS store and get your hands on one of these! Image Source: Victoria’s Secret
Tinkle Razor: The worst name, but the best product. These little guys are so handy. You can use them for shaping your brows, unibrow defense, to take care of those sneaky dark hairs that appear on your upper lip giving the illusion of a mustache (ugh, I feel you) or you can go wild and use it to get rid of all your face hair. “Shave your face? What?” Yes, it’s a thing. That’s what I do. It’s awesome. My skin feels smoother. My makeup goes on perfectly. It’s great. No foam or water necessary, just you, your face and a tinkle (I know, it makes me snicker to say tinkle out loud too).
These little guys come in a pack of 3 for about $5 and of course you can buy them on Amazon. There are other brands and razors out there like this, but I splurge the $5 and buy the real deal, Tinkle razors. Some things are worth going name brand for, this is one of them. If you’re a visual person like I am and want to see these Tinkles in action, check out this “How-To” video. Image Source: Beauty Plus Salon
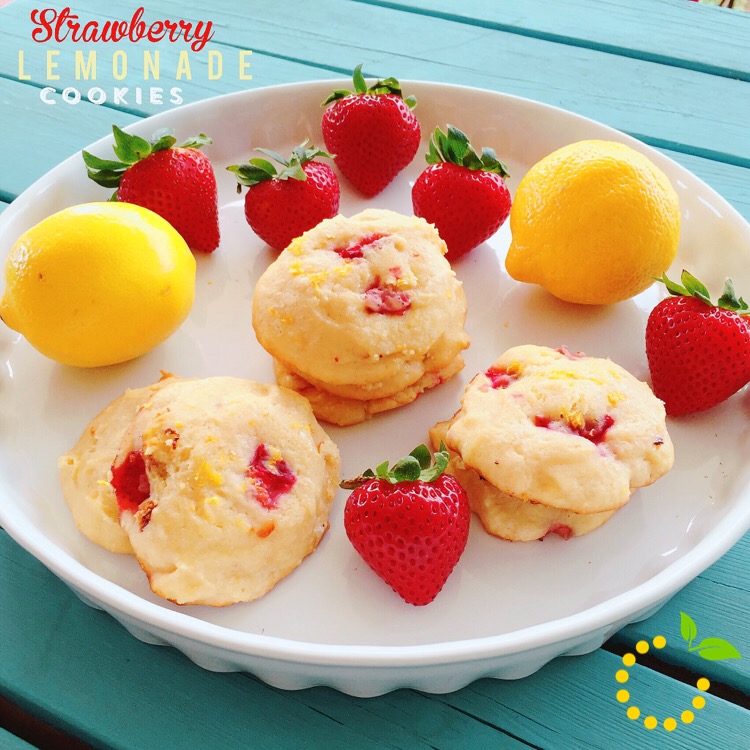
These soft, cheesecake flavored cookies with fresh strawberries and lemon zest are perfect for a spring dessert or to take along on your next picnic! I was at the grocery store the other day, roaming through the produce section and caught the sweet smell of strawberries. I immediately made a beeline to them! The super red, plump and sweet smelling strawberries had me craving these cookies and with the nice spring weather, it was the perfect time to make some!
With berries being in season now, it’s a great time to pick up some fresh berries at your local grocery store or farmers market and give these delicious cookies a try!
Preheat oven to 350 degrees F and line cookie sheet with parchment paper or a silicone baking mat.
In the bowl of a stand mixer, cream together the sugar and butter until light and fluffy.
Add in the cream cheese and continue to beat until the batter is completely smooth.
Beat in the egg and vanilla.
In a separate bowl, combine the flour, baking powder, salt, cornstarch, and pudding mix. Stir together and then slowly add to the wet ingredients.
In the same bowl you used for the dry ingredients, combine the strawberries, lemon juice, lemon zest, and 1 teaspoon flour.
Gently fold the strawberries into the batter being careful not to over mix (tip: over mixing or mixing too hard will dye your batter red from the strawberries).
Using a small cookie scoop, scoop batter and place on cookie sheet.
Optional: garnish cookies with lemon zest.
Bake for 10-13 minutes or until the bottoms are slightly brown.
One of my favorite things to do with my family is to go hiking. In my opinion, there’s no better way to spend quality time together than outside, free from distractions. Living in Utah we are definitely spoiled. Whether you are hiking along the Wasatch Front or spending time in Southern Utah, we have some of the country’s most beautiful hiking trails.
I love learning about new trails to take my family hiking. It’s important to me to know that the hike is family friendly and dog friendly. (We could never leave Mia at home, that’s just rude!) We recently moved to Layton so we’ve had a great time venturing around the new neighborhood to see what is available. As a family we decided to create a summer bucket list to see how many Utah Hikes we can complete. Below are three of our favorite spots to add to your summer bucket list. These are all moderately easy trails that will get your heart pumping. Grab your boots and get out and enjoy the beauty in our own backyard. Go on…”Take a hike”!
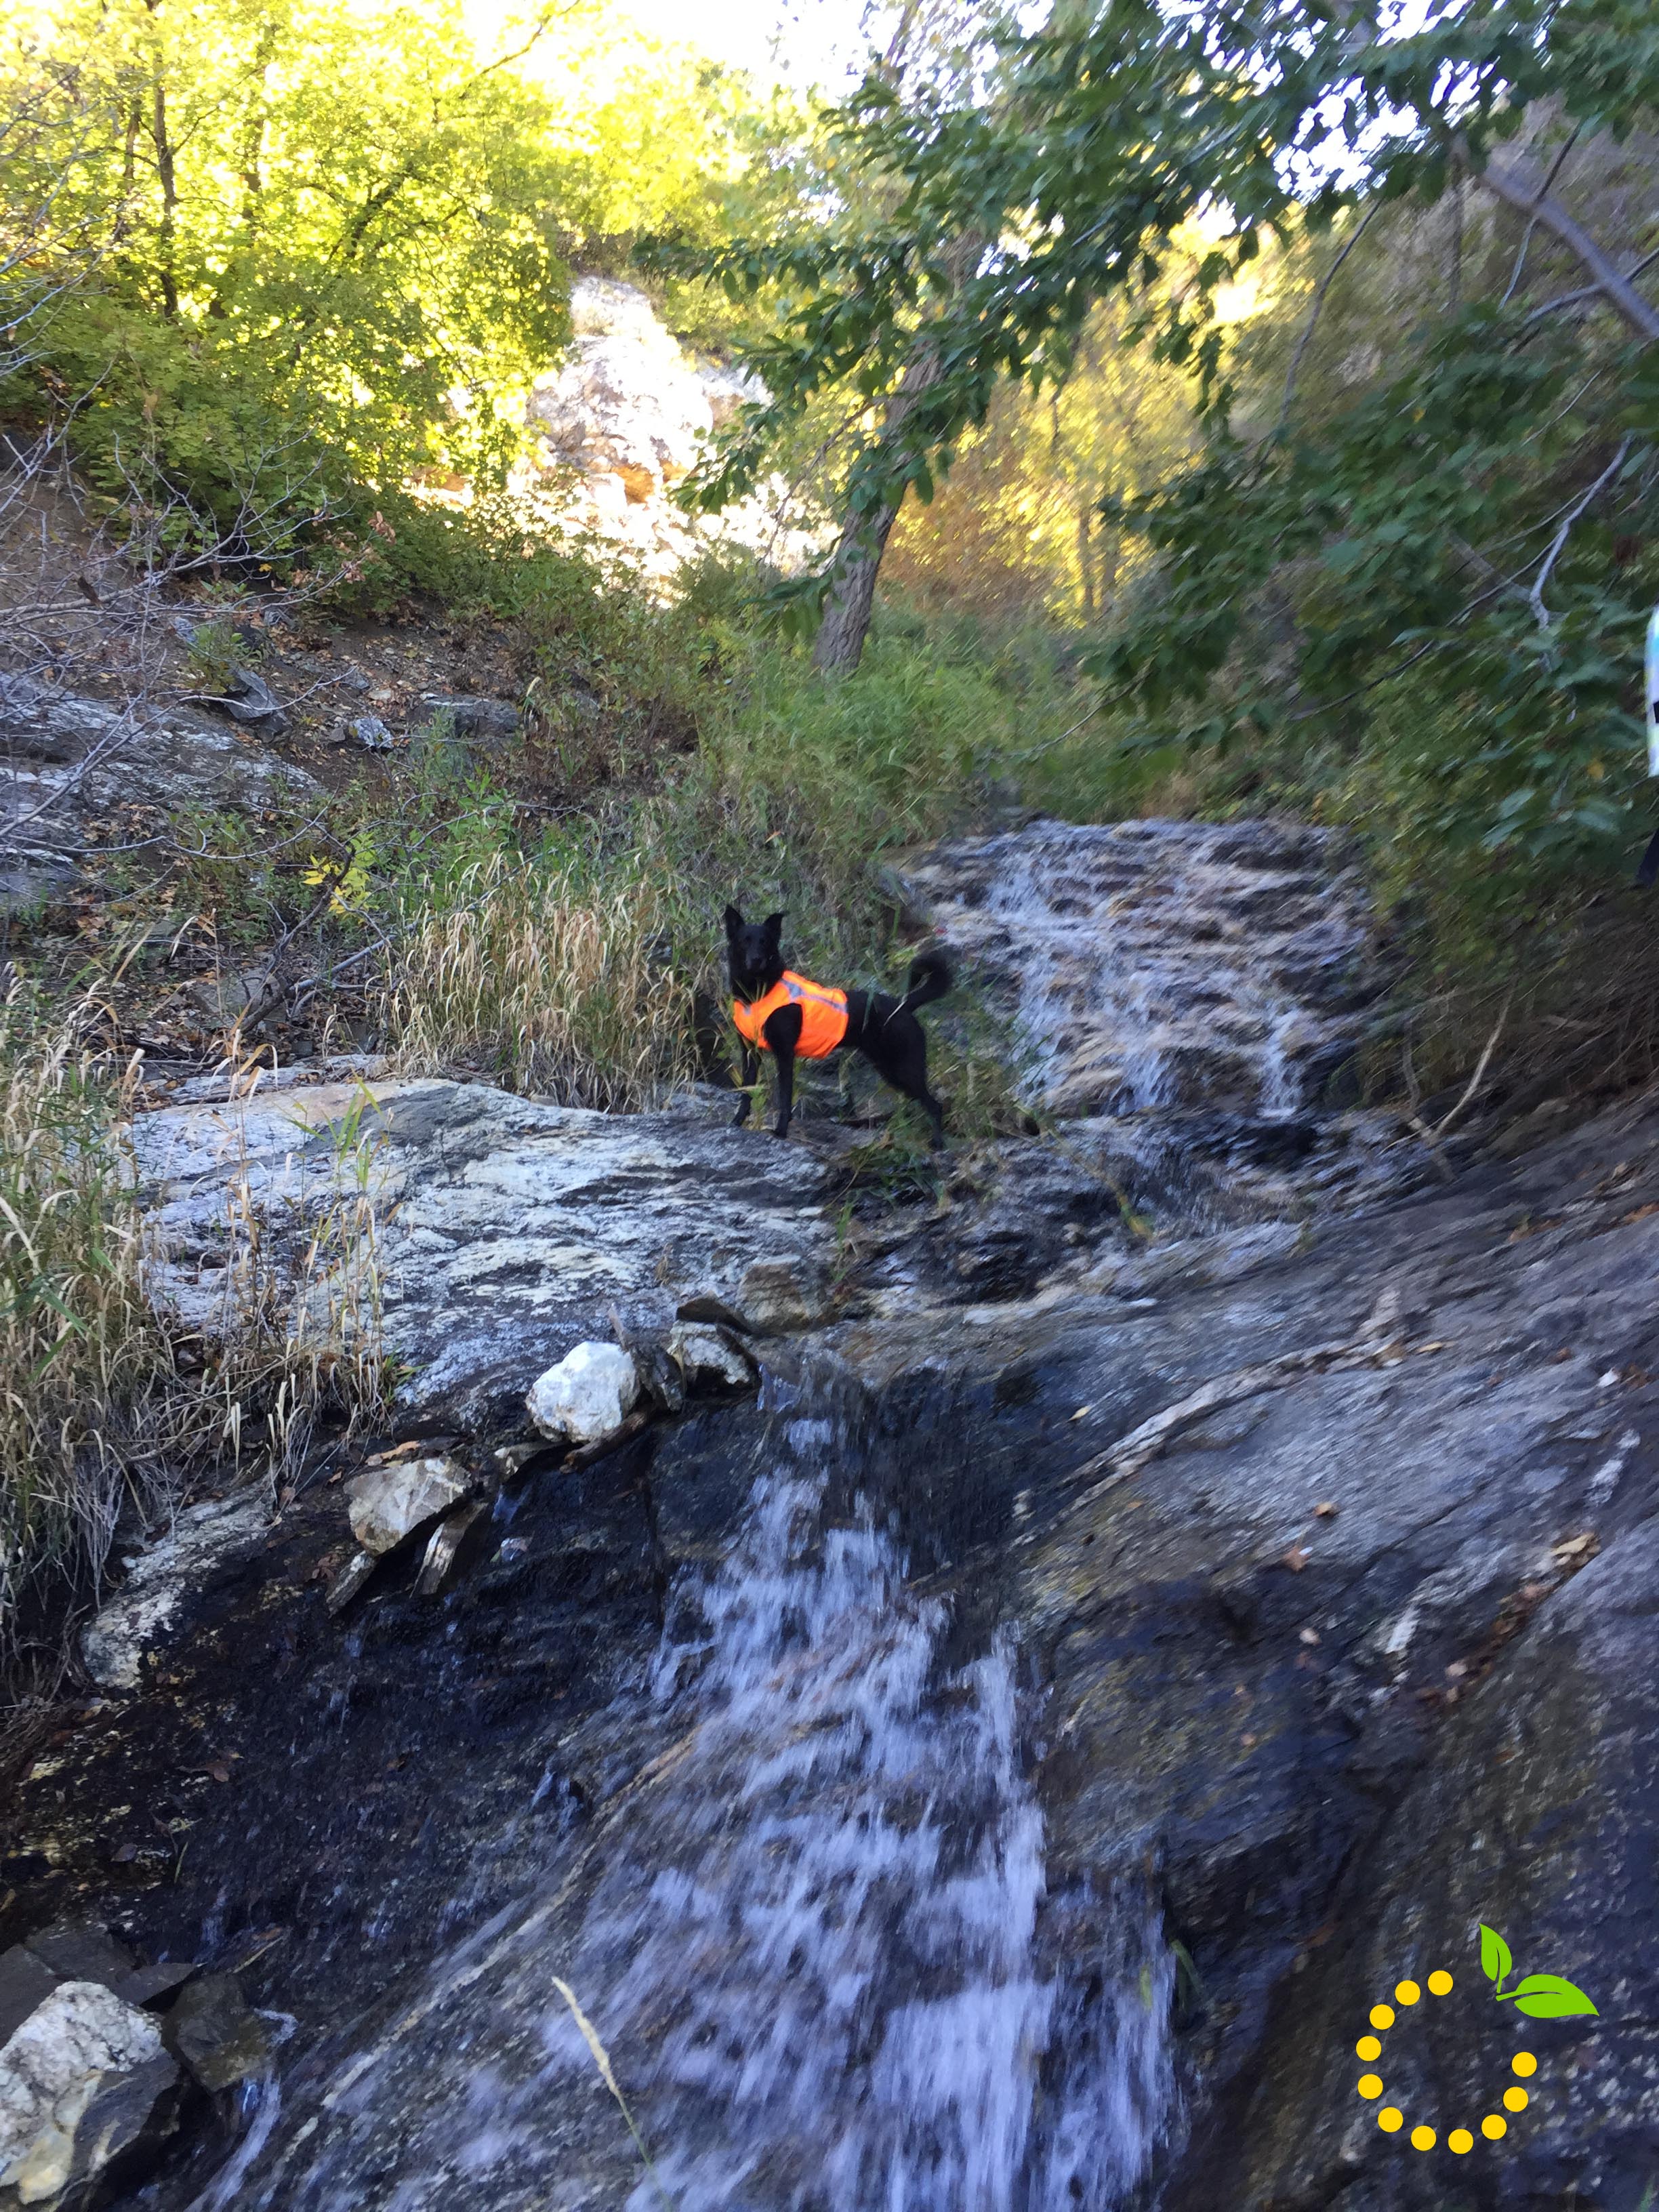
The Adams Canyon Trail is one of my favorite hikes to take with my family since it’s close to our home and ends with a gorgeous waterfall. This is a very popular hike, so arriving early will give you a head start from the weekend crowd. The parking lot is full every time we go so we always plan on parking along the side of the road and hiking up to the trail head.
This is a hike you definitely want to do in the early morning since the beginning of the trail is a series of switch backs with little shade. This is the most difficult part of the hike, so don’t let that keep you from moving forward! It might be a little intense for young kids, but once you get up in the canyon, your little ones will have a blast. There are so many places along the trail head to stop and play in the river and over the bridges. This is also a great trail to bring your dogs because it follows the creek for most of the hike. This makes it easy for them to lap up some water and stay cool on the hot summer days. The trail ends with a gorgeous 40-foot waterfall with a nice pool below, perfect for dipping your feet and relaxing.
If you’re looking for a unique hiking trail, somewhere you can choose your own adventure, the Parish Creek Pictograph trail in Centerville Canyon is the perfect spot! This trail is a fun place to explore that won’t take up your whole day. The trail starts off heading up the mountain towards the canyon. Follow the trail until you reach a bridge that crosses the creek. On the north side of the bridge you will see a small single track trail. You made it to the trail head!
The trail follows the creek as it slips and slides its way down the canyon. During the hike you don’t see a big increase in elevation; however, I would still rate this hike as being moderate because it does require some agility as it’s not an established trail. You’ll find times where you might need to climb up over some boulders or the occasional log.
This hike is perfect for the summer because the canyon provides lots of shade and the creek slightly cools the air. This is not a well-known trail, so you’ll most likely have it all to yourself.
What makes this hike unique are the pictographs. One mile up the canyon, on the north side, you will see a Forest Service marker informing you about the pictographs. If you climb a little further up the canyon around the rocks, you will find them!
This trail is pretty easy but does get a little technical in some areas, so I would leave kids under five at home. Also, don’t forget to bring your dog. They’re welcome on this hike and will love playing in the creek.
Strawberry River City: Heber
Distance: 4 miles roundtrip
Approximate Time: 1-2 hours
Difficulty: Easy
Elevation Gain: Minimal Map/Location
The Strawberry River is one of my family’s favorite places to visit in the summer when we have a full day to adventure. Most people go to this river for fishing, but we find it to be a fun easy hike to take with our toddler where we can enjoy the beautiful scenery. This is a bit of a drive, since it’s about 45 minutes past Heber, in the Uintah Mountains. When you arrive, you will see the trail head at the end of the parking lot, overlooking the river bottom. (Bonus: There is a restroom in the parking lot which can be much needed after a long drive, especially with children)
The beginning of the hike is a long semi-steep trail that gets you into the river bottom. The trail follows the river as it winds through the canyon. Take in the scenery and you might notice fish darting in and out of the water as you walk by. This is a pretty remote area, so be prepared to see other wildlife such as deer, eagles and even moose. So be careful and aware of your surroundings.
This hike is perfect for the whole family, young kids and dogs included. Bring a picnic for lunch and make a day out of your adventure to Strawberry River.
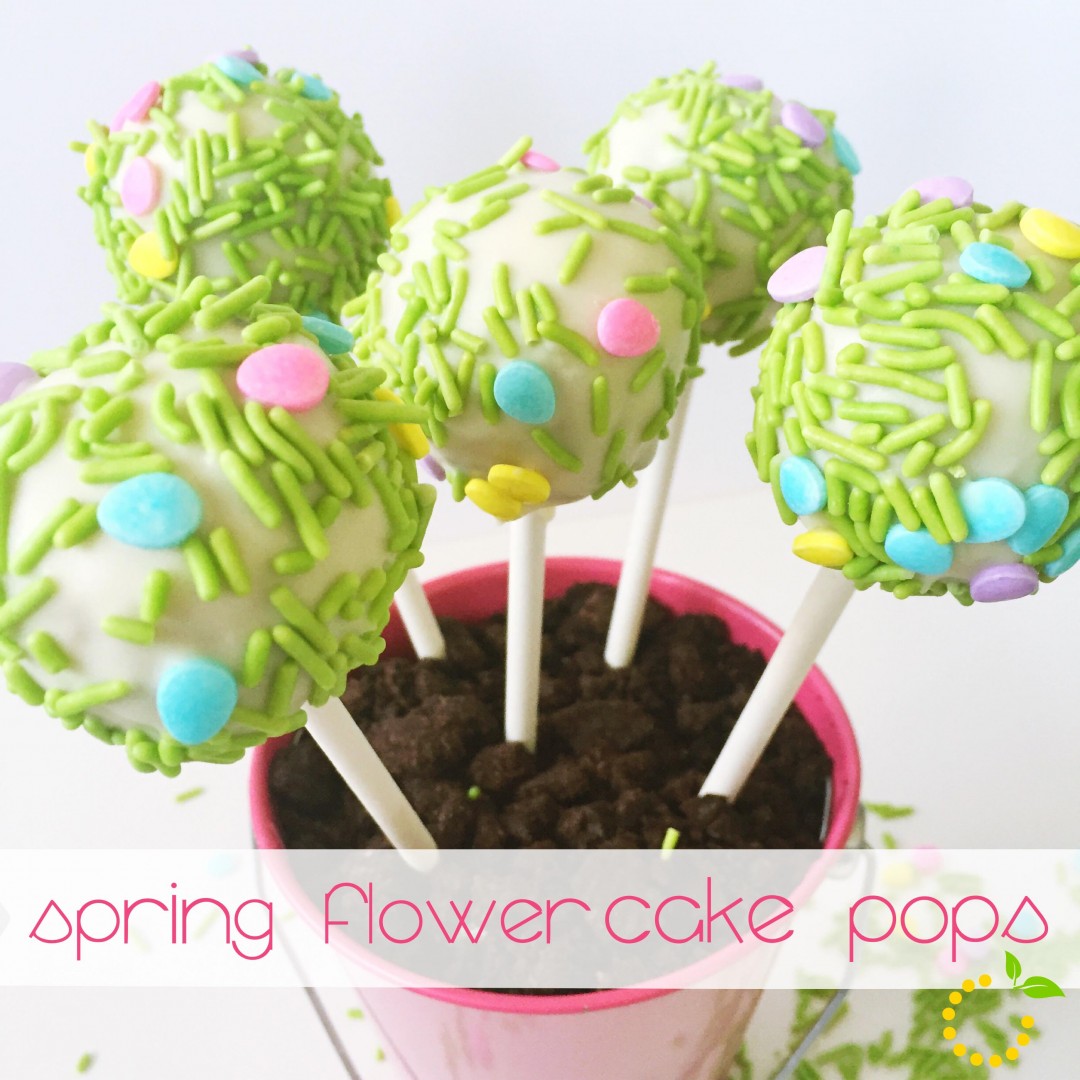
I know cake pops are so-4-years-ago, but they are tastier than you remember, less complicated than you think and a fun way to celebrate your favorite person or holiday. So read on and give them a try!
Like most ideas I have, this idea for a Spring-y treat came while wandering the aisles of Target. I’m sure you all know the feeling when you walk through those red double-doors and suddenly begin to see unreasonable potential in your creative self and/or your timetable to accomplish such creative endeavors. “Sure, I’ll buy twelve of these gold and mint shelf organizers at the Dollar Spot. This is totally the solution to my cluttered, drab pantry woes.” But then somehow those gold/mint organizers never make it to the pantry and end up cluttering some other closet.
This time the “Dollar Spot” wowed me with some fun, patterned tins (you know the ones, they have them every season just with a different pattern), I saw a few weeks ago. I had visions for some sort of Easter treat basket for my nieces. However, much like those gold and mint shelf organizers, I failed to transform these tins in a timely fashion (why was Easter so early this year???). I should know by now never to pick a time-sensitive creative project, it never works for me (as evidenced by the foam sticker hearts and yet-to-be-painted wood shamrocks in my closet). With Easter long gone and my strong resolve not to put these in the closet for next year (clearly, I already have two projects waiting in the wings already), I thought it would be fun to turn these into a springtime treat…Easter/Spring, same thing, right? As I stared at these pastel tins, it popped into my head to make cake pop “flowers” and to fill the tins with Oreo “dirt” for a fun, blooming treat for my nieces (a peace offering, really, since I failed them on the Easter baskets).
Now I don’t know if you’ve been following the blog long enough to realize that I am not the baker of this sweet lemon group—that’s Ashley—and I have only attempted cake pops one other time in my entire life, and, I’ll be honest, that endeavor belongs on one of those “Pinterest FAIL” blogs because it was seriously the worst. The middle of the cake pops were too gooey due to an inappropriate frosting-to-cake ratio and the supposed thin, chocolate outer-coating was more like a lumpy, rock-hard slab of confection, all on a stick. I took them to my coworkers and they about lost a tooth just attempting to take a bite.
Naturally I was a little nervous to try again, especially knowing that I was going to be putting it out there for all the blogging world to see (I know, it’s only 12 of you, but still), but I was determined to get these tins outta my closet! So I called up Ash and bamboozled her into helping me with this spring cake pop project (note: one of my favorite parts about Ashley is that she is easily bamboozled by my crazy ideas—bless her).
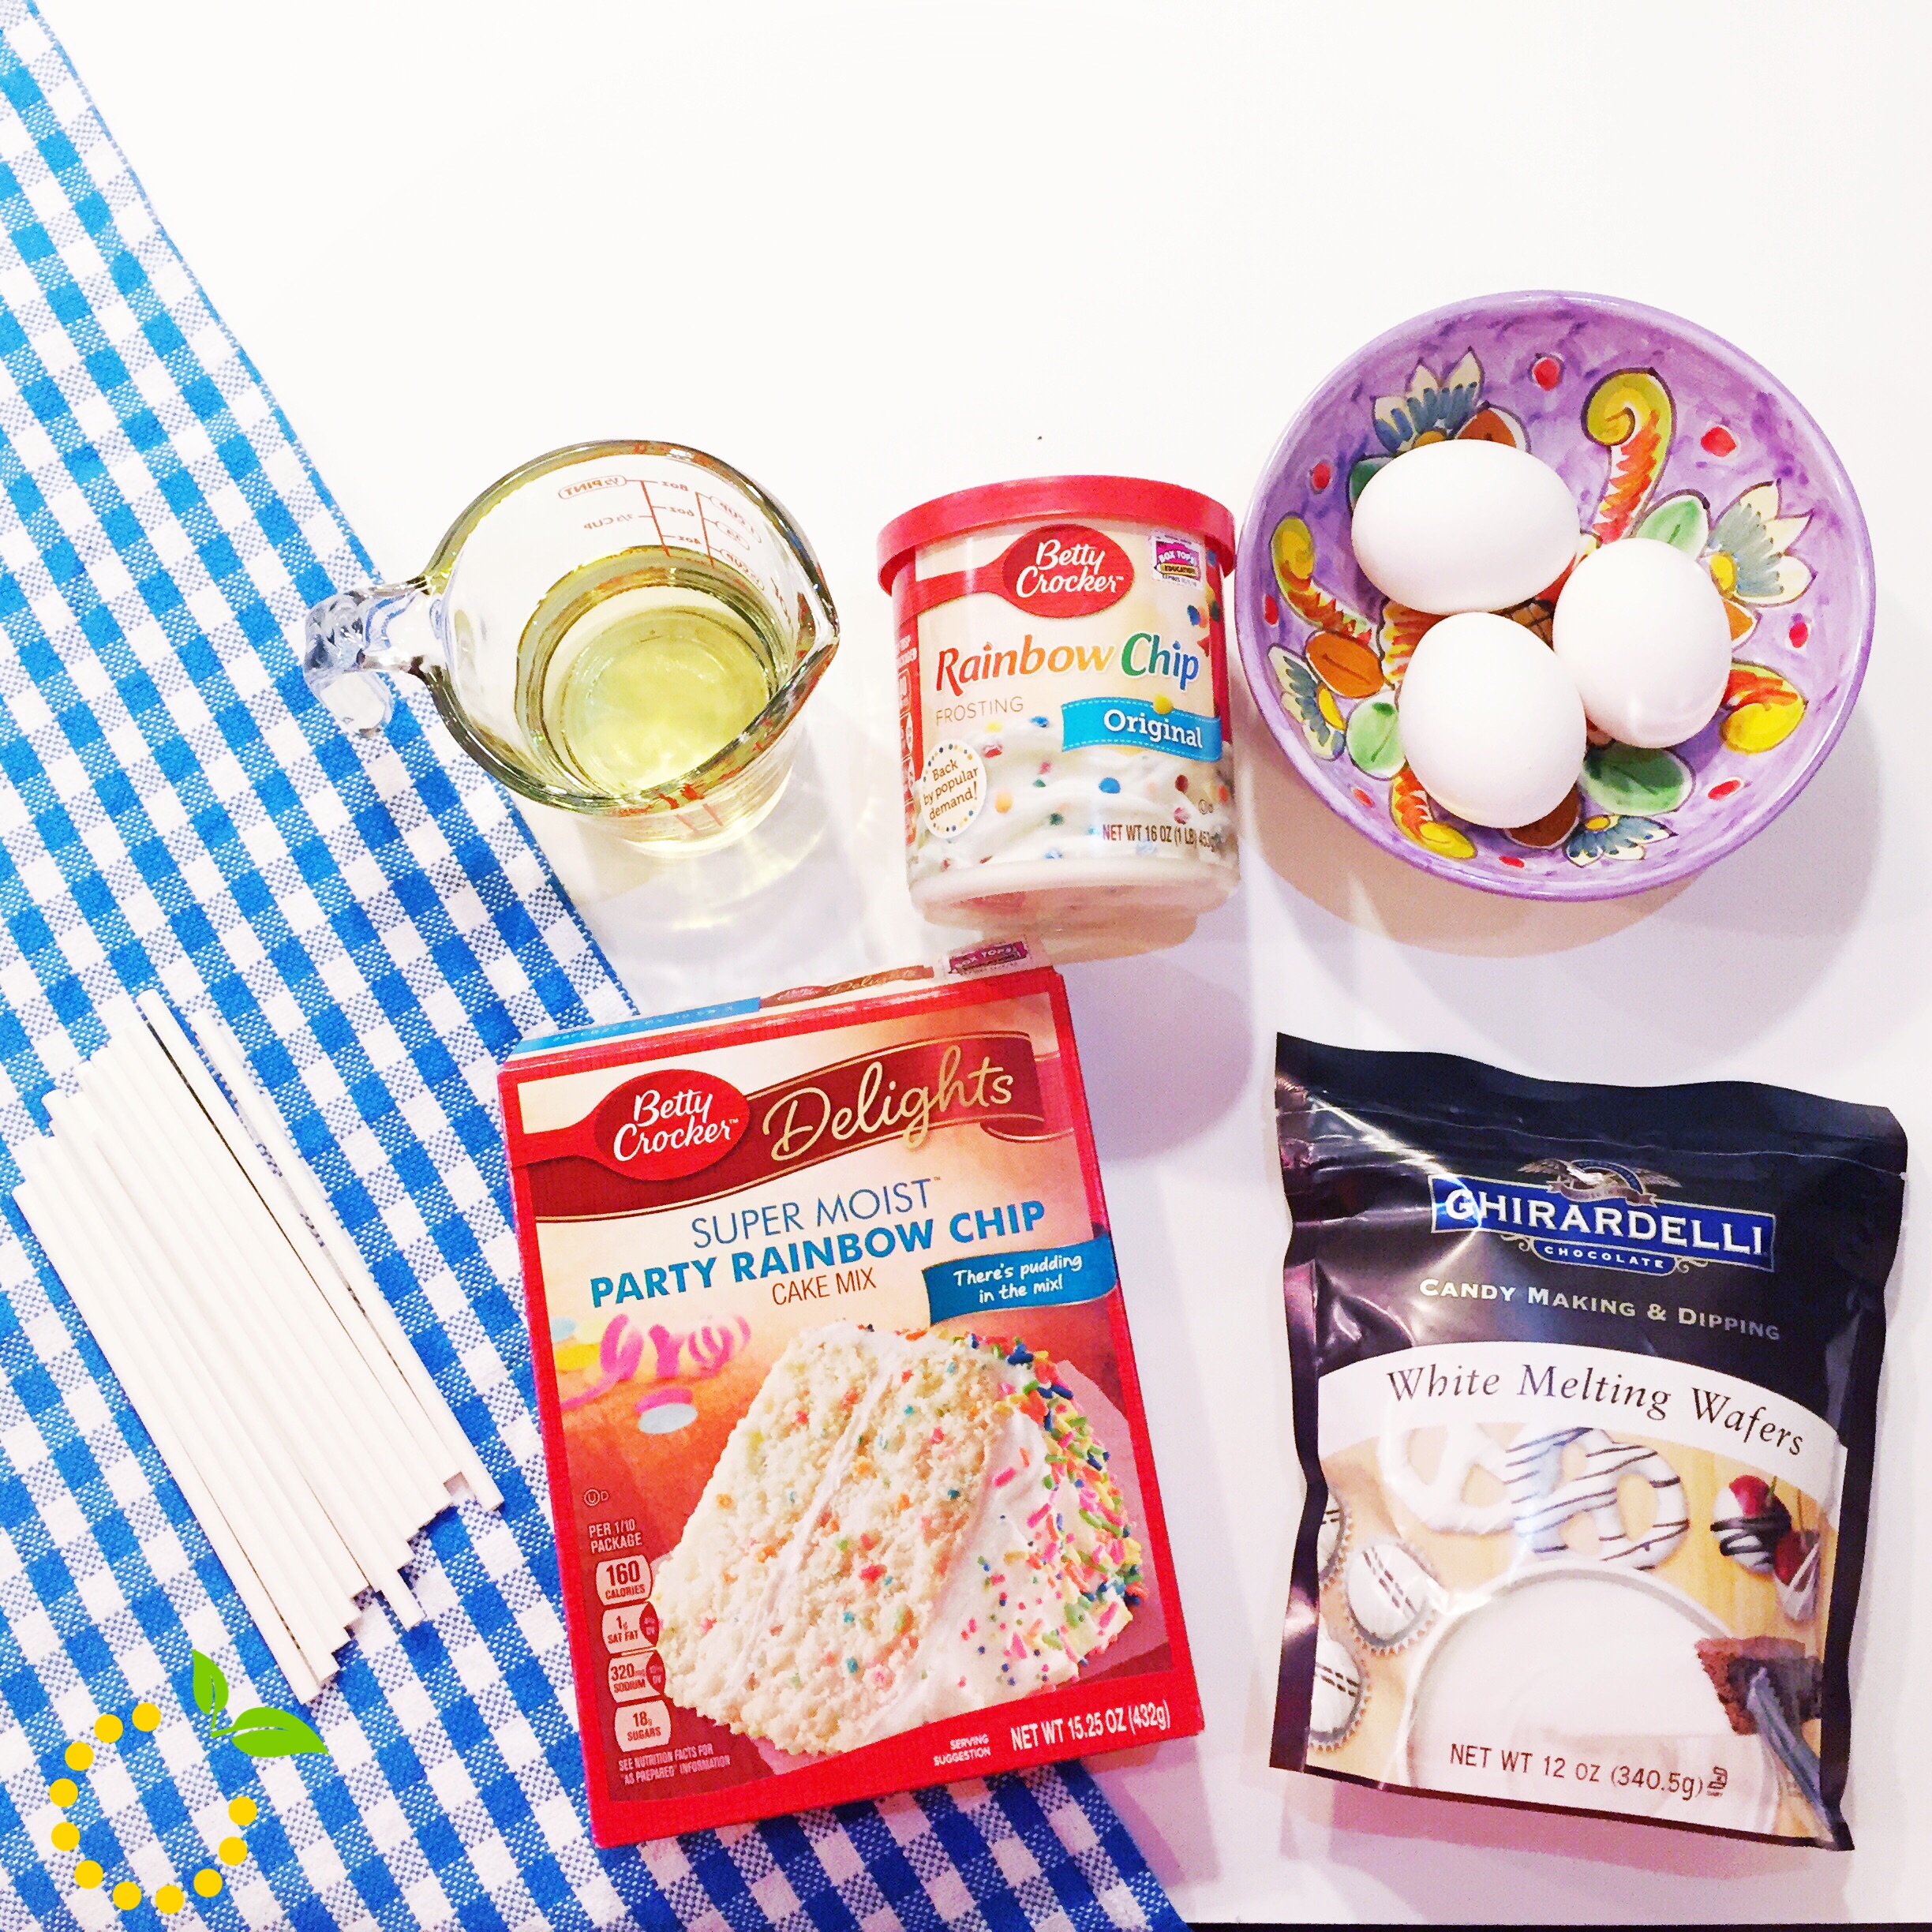
So we gathered our supplies and went to town…
For the cake pops we used Bakerella’s basic cake pop recipe, but snazzed it up a little by using Rainbow Chip cake mix and frosting (don’t be confused, rainbow chip is NOT the same as Funfetti. Rainbow chips are bigger, softer, and tastier. They are the unicorn of the Betty Crocker lineup. Try it, you’ll see).
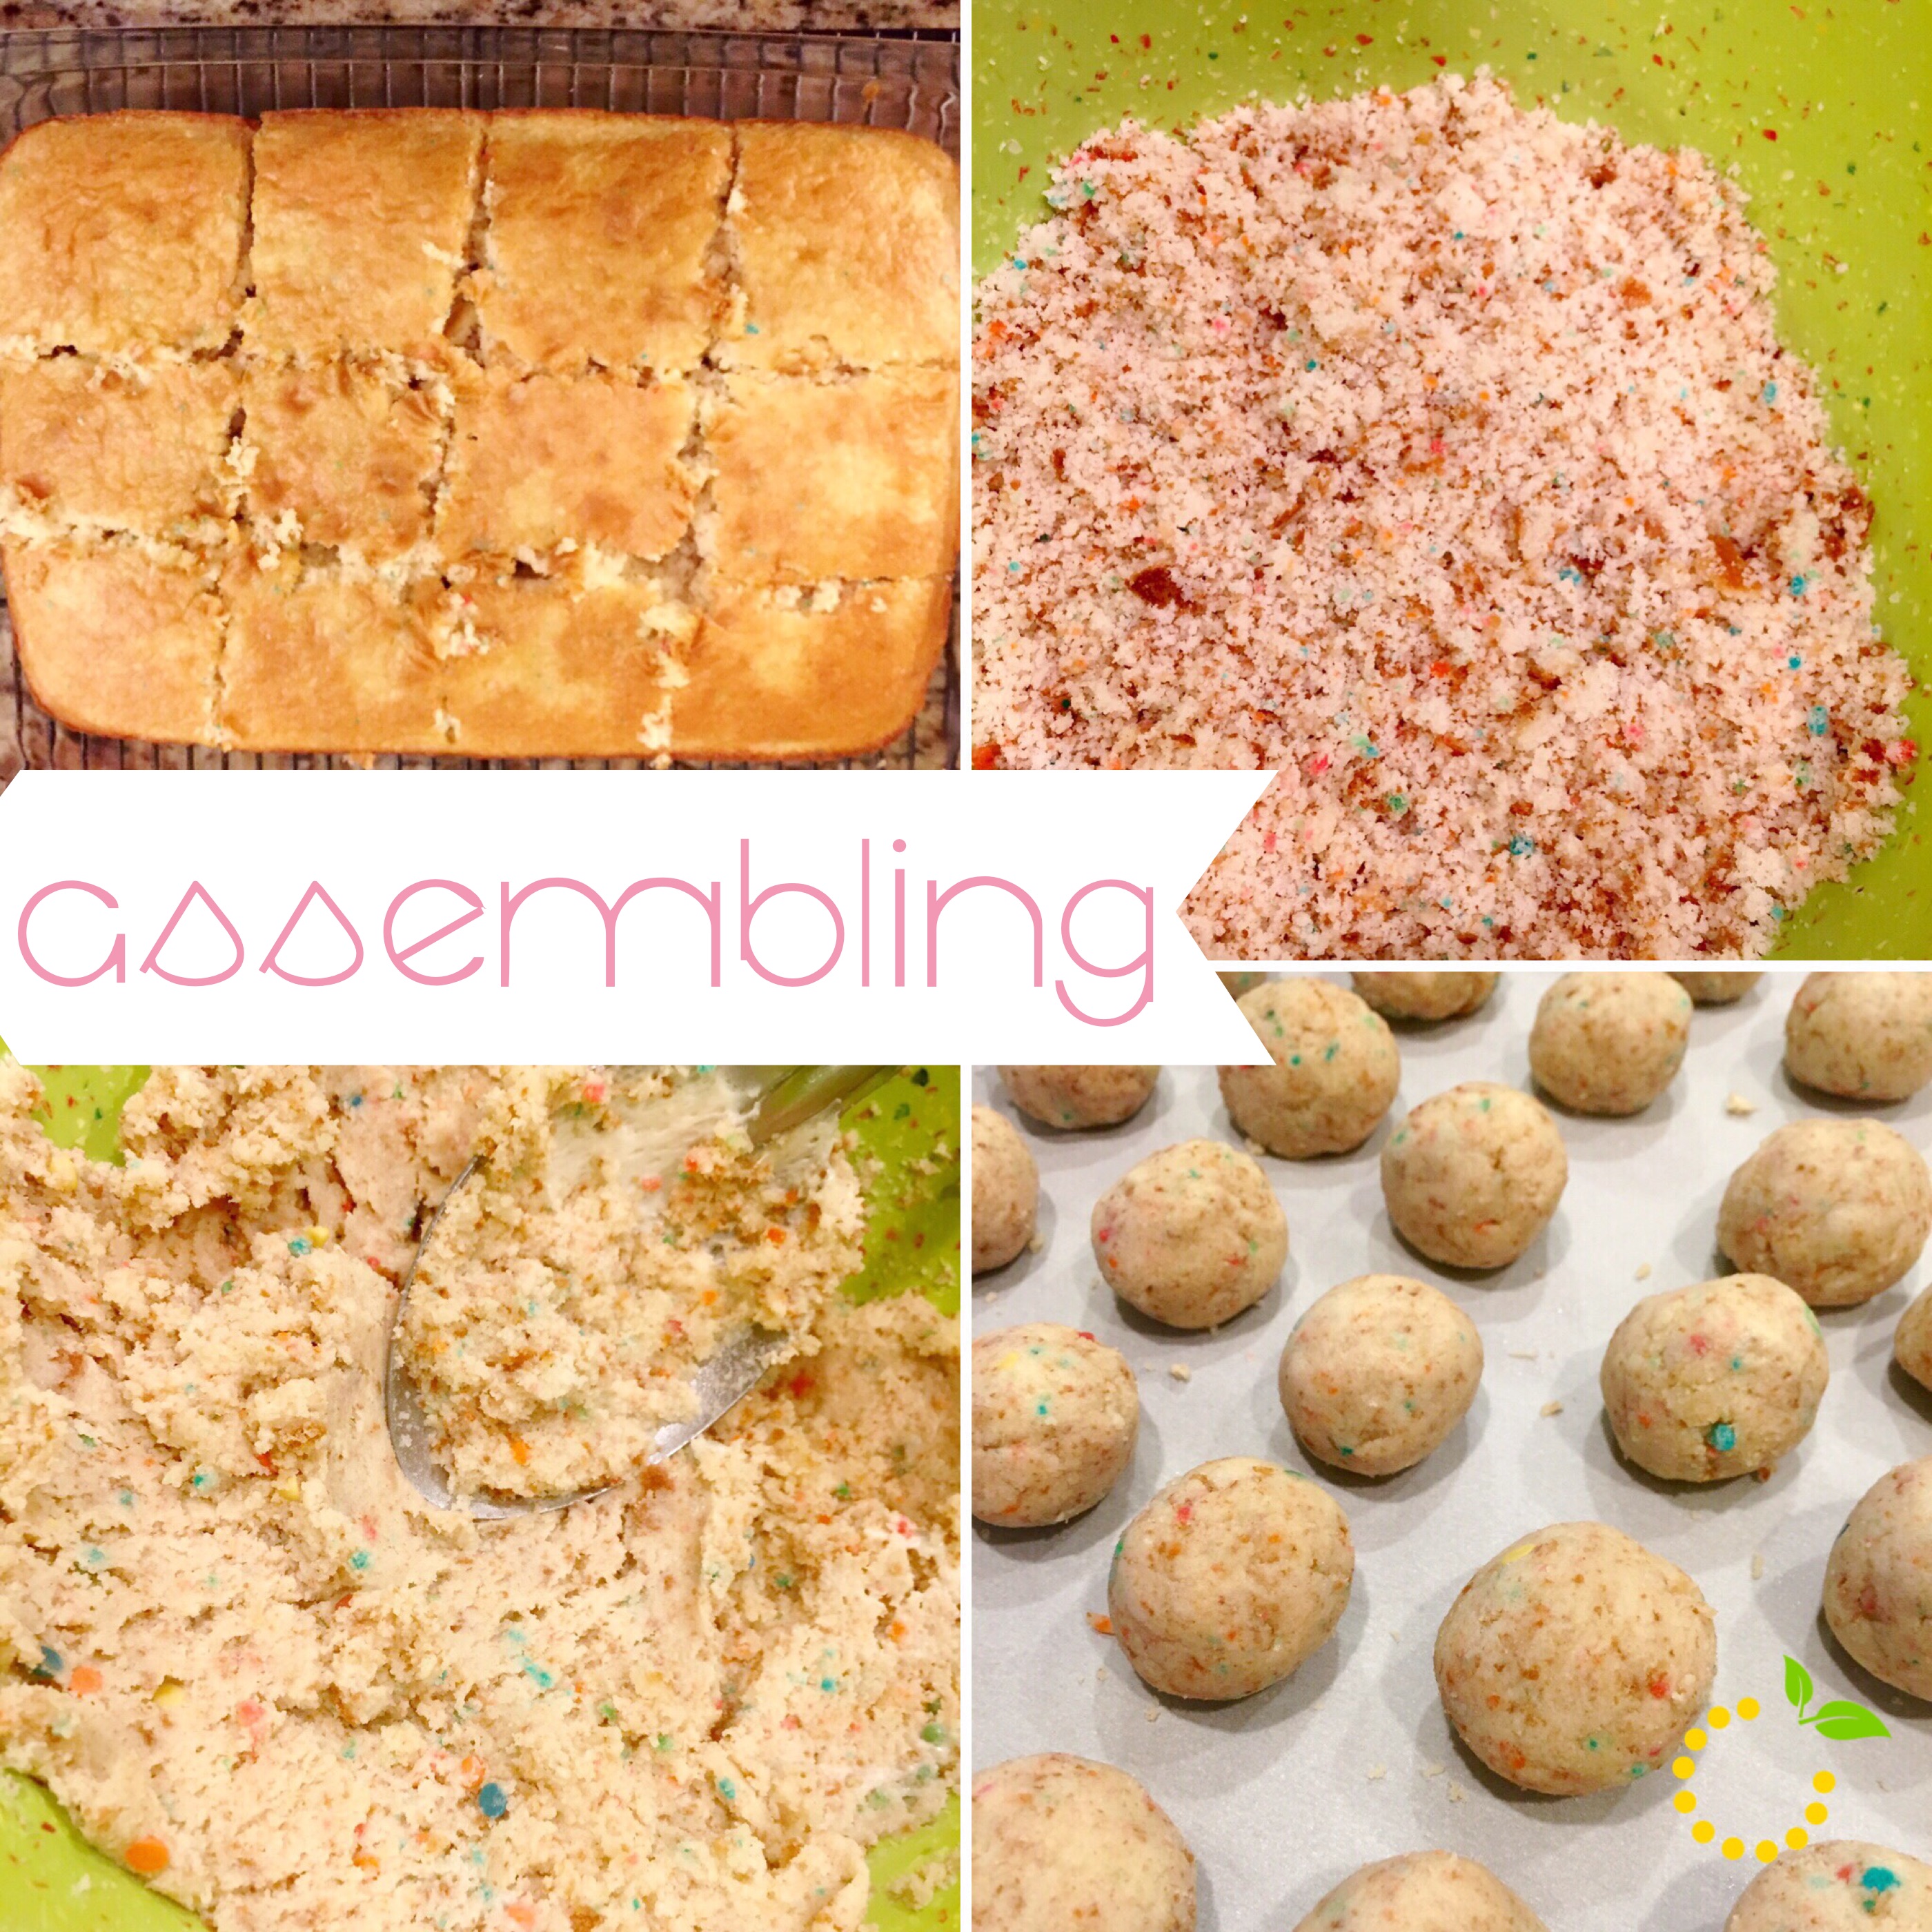
Tip: While waiting for cake to cool cut it into slices so the heat escapes faster.
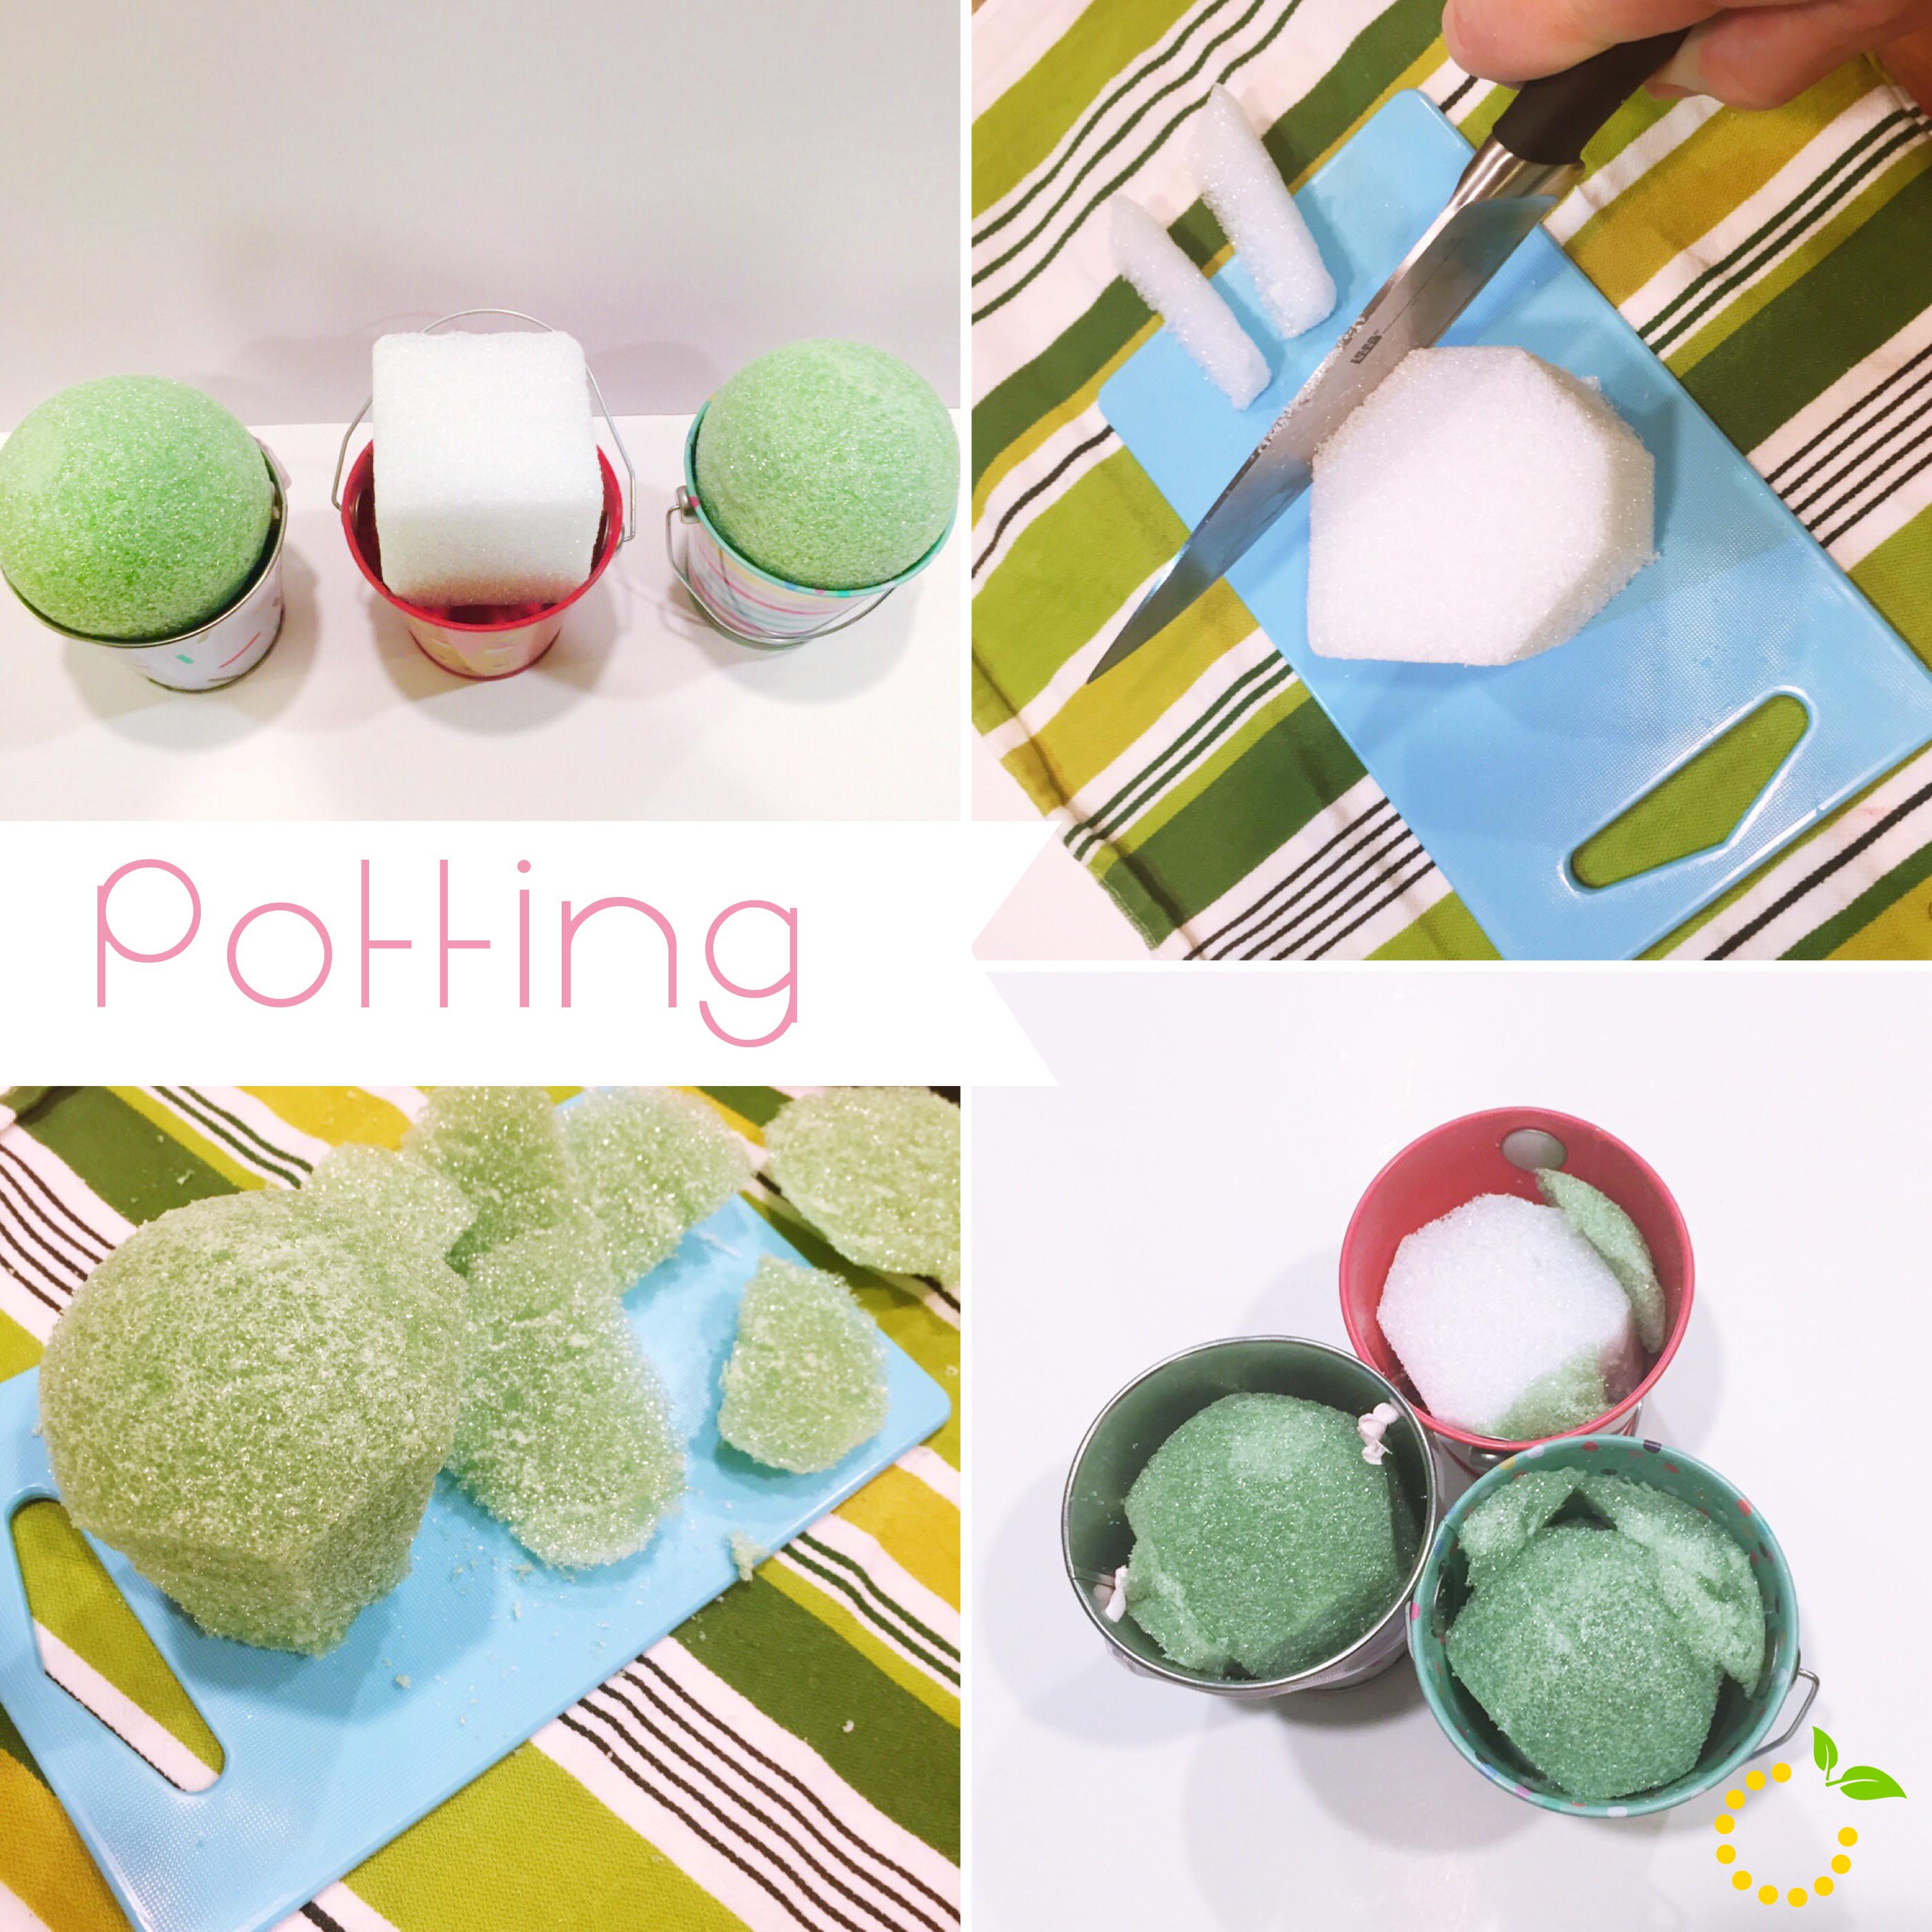
While the cake balls were chilling we prepped our pots with styrofoam (those pops have to have something to hold them up). We found that the small styrofoam balls worked better than a square, but honestly, you can use whatever you have lying around. We just chopped off some sides until it nestled in nicely. You want it to be snug so the foam and the pops don’t slide around. You also want to make sure that your foam is below the rim of the pot about an inch to allow space for your Oreo “dirt.” Once you shaped and chopped to size add the crushed Oreos to the top of the foam.
Tip: Pre-punch your holes where you will be putting your sticks into the styrofoam. Trust me, you will not want to forget this step! It is much harder to do when your cake pop is on the stick (you might end up losing a few cake pops).
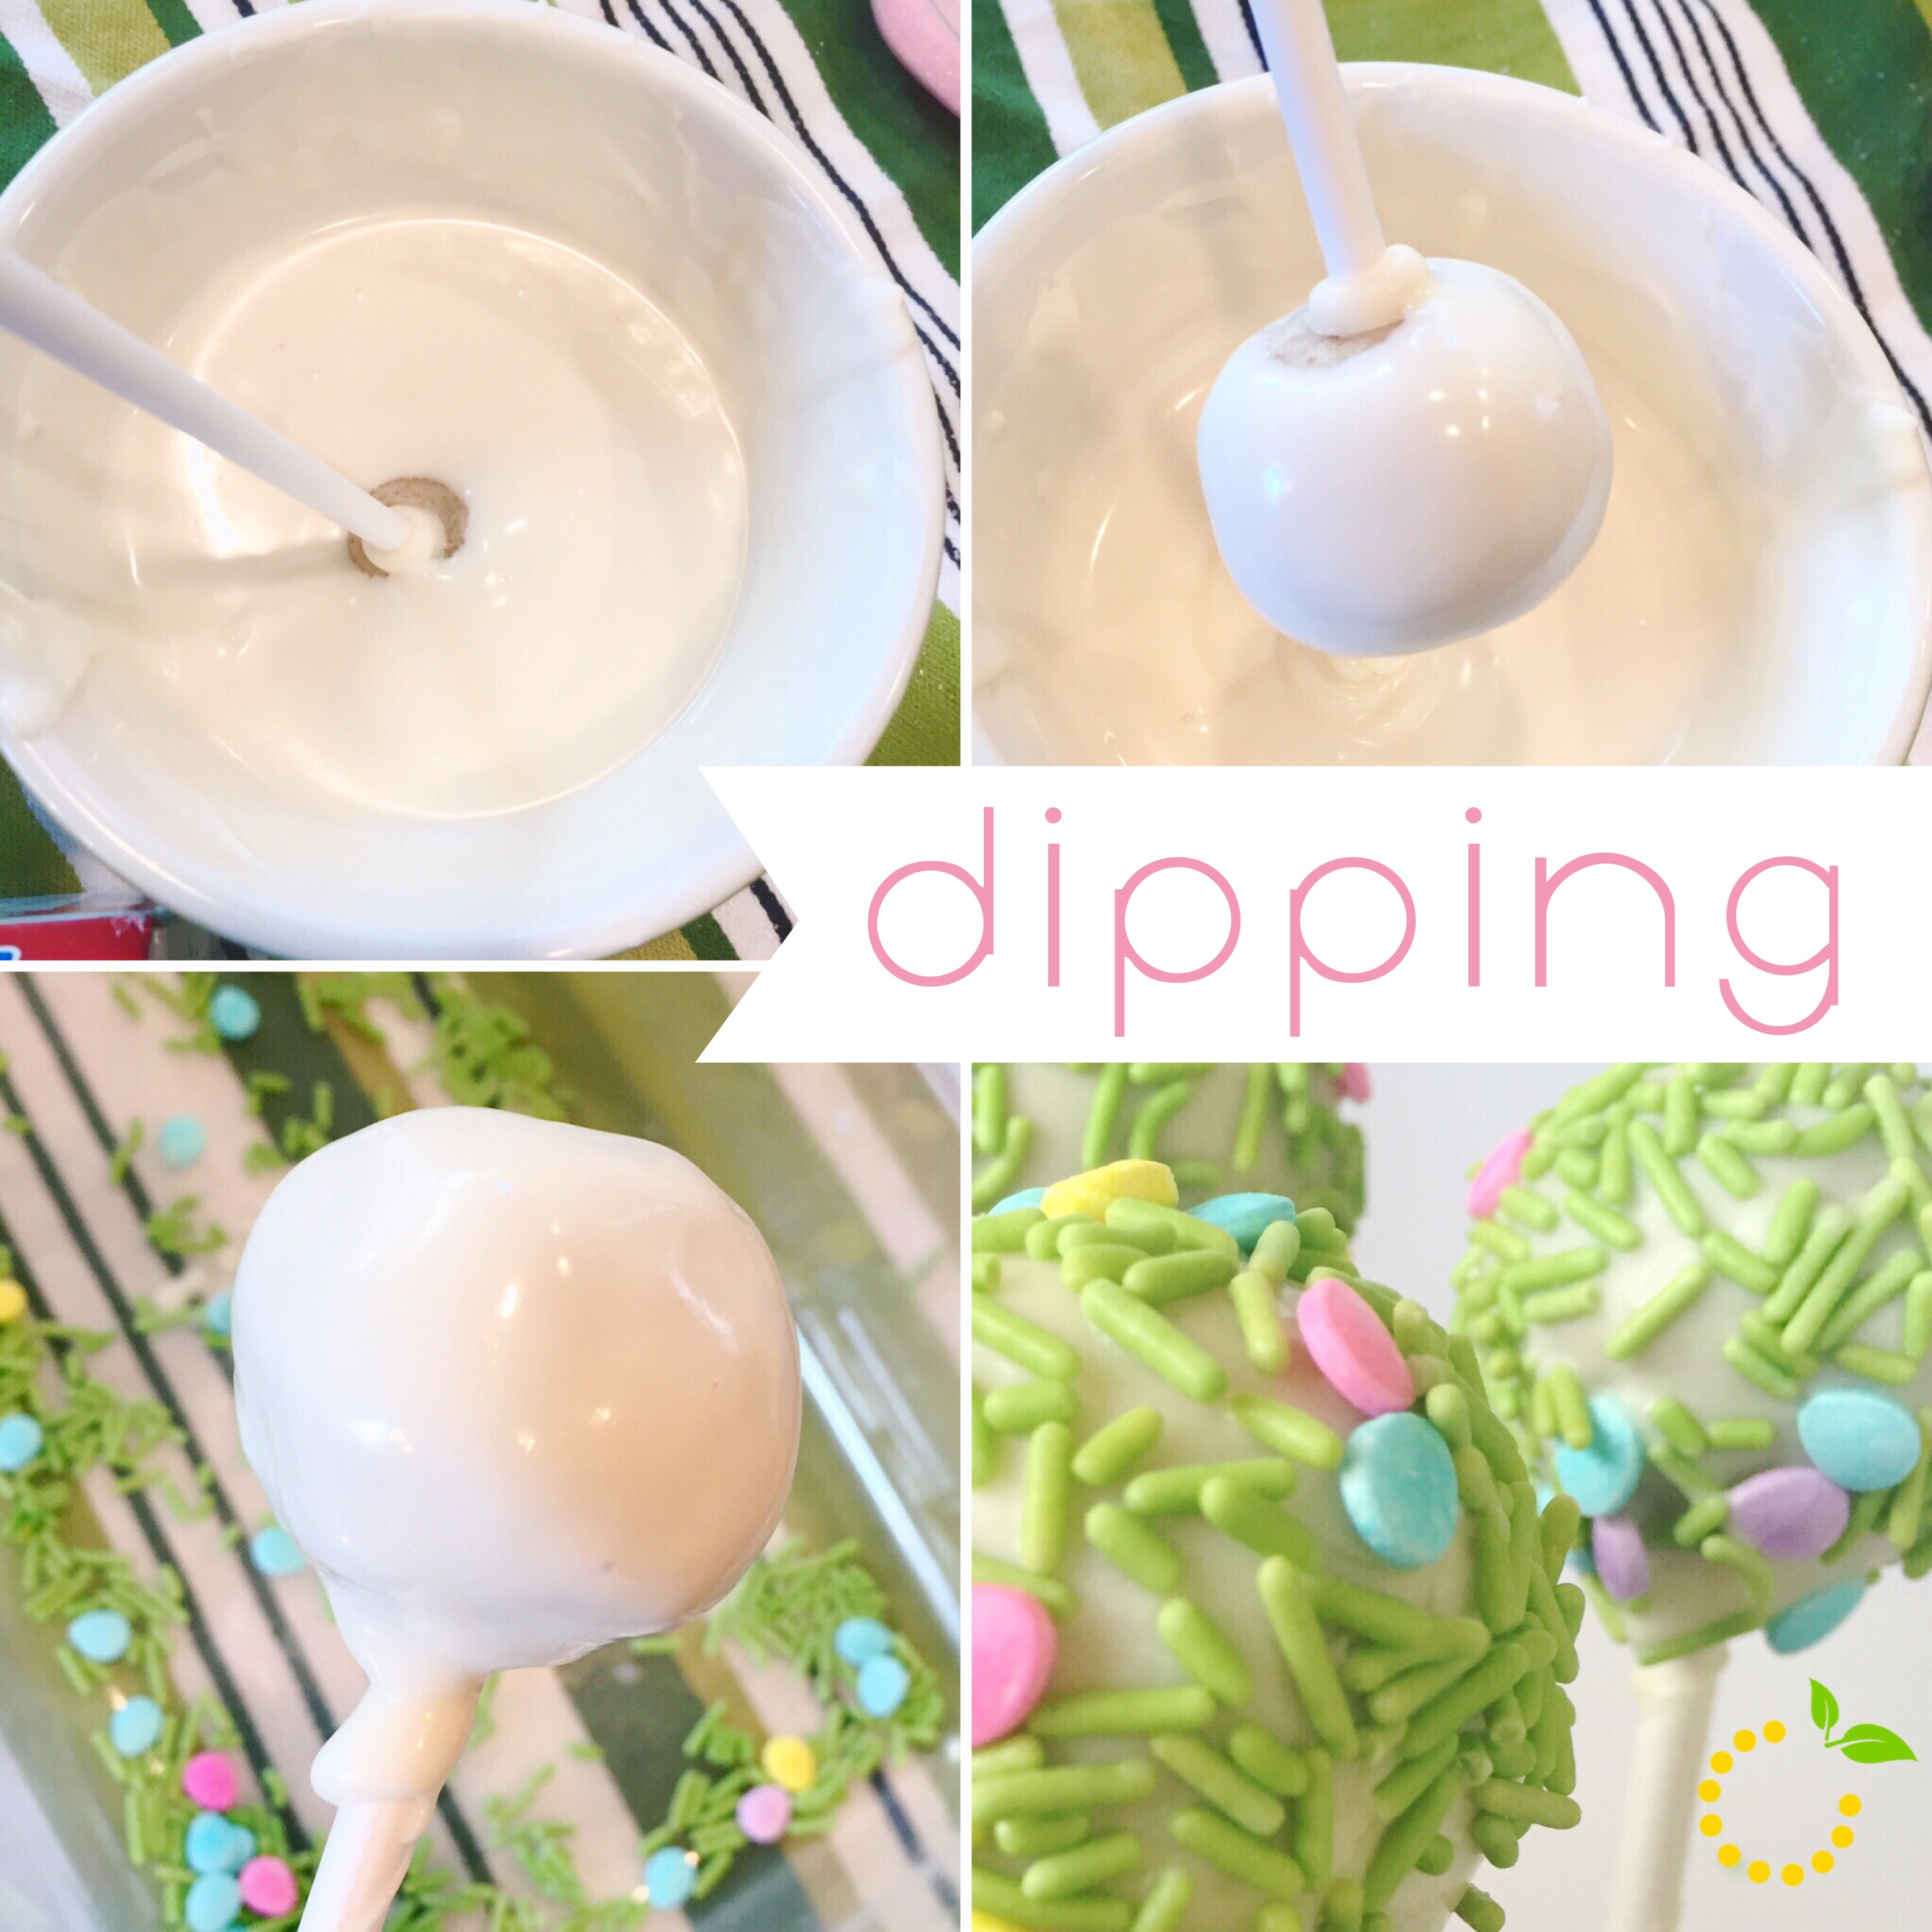
This is where you gently tap and rotate the cake ball so that the candy coating lays (somewhat) flat and smooth on the cake ball. If your candy coating starts to cool down, it gets thicker and heavier, making it harder to coat the cake ball. Also, if your cake balls are no longer cold and become room temperature they are more prone to crack like this when dipping. Tip: The consistency of the candy coating should be thin enough to coat the cake pop but, not too thin that the cake pop shows through the candy coating. Use an extra cake pop to test out the consistency of the candy coating and if it needs to be thinned out add a tiny amount (1/8 of a teaspoon at a time) of vegetable oil until you reach a good consistency. Also, make sure to get your sprinkles on before the candy coating hardens.
Bake the cake as directed on the box, using the 9-by-13-in cake pan. Let cool completely.
Once the cake has cooled, line baking sheets with wax paper.
Crumble the cooled cake into the large bowl. You should not see any big pieces of cake.
Add up to three-quarters of the container of frosting to the bowl. (You will not need the remaining frosting. Save it in the refrigerator for a later use.) Mix it into the crumbled cake, using the back of the large metal spoon, until thoroughly combined. If you use the entire container, the cake balls will be too moist. The mixture should be moist enough to roll into 1 1/2-in balls and still hold a round shape. After rolling the cake balls by hand, place them on the prepared baking sheets and let them rest for about 20 minutes before chilling.
Cover the baking sheets with plastic wrap and chill for several hours in the refrigerator, or place them in the freezer for about 15 minutes. You want the balls to be firm but not frozen.
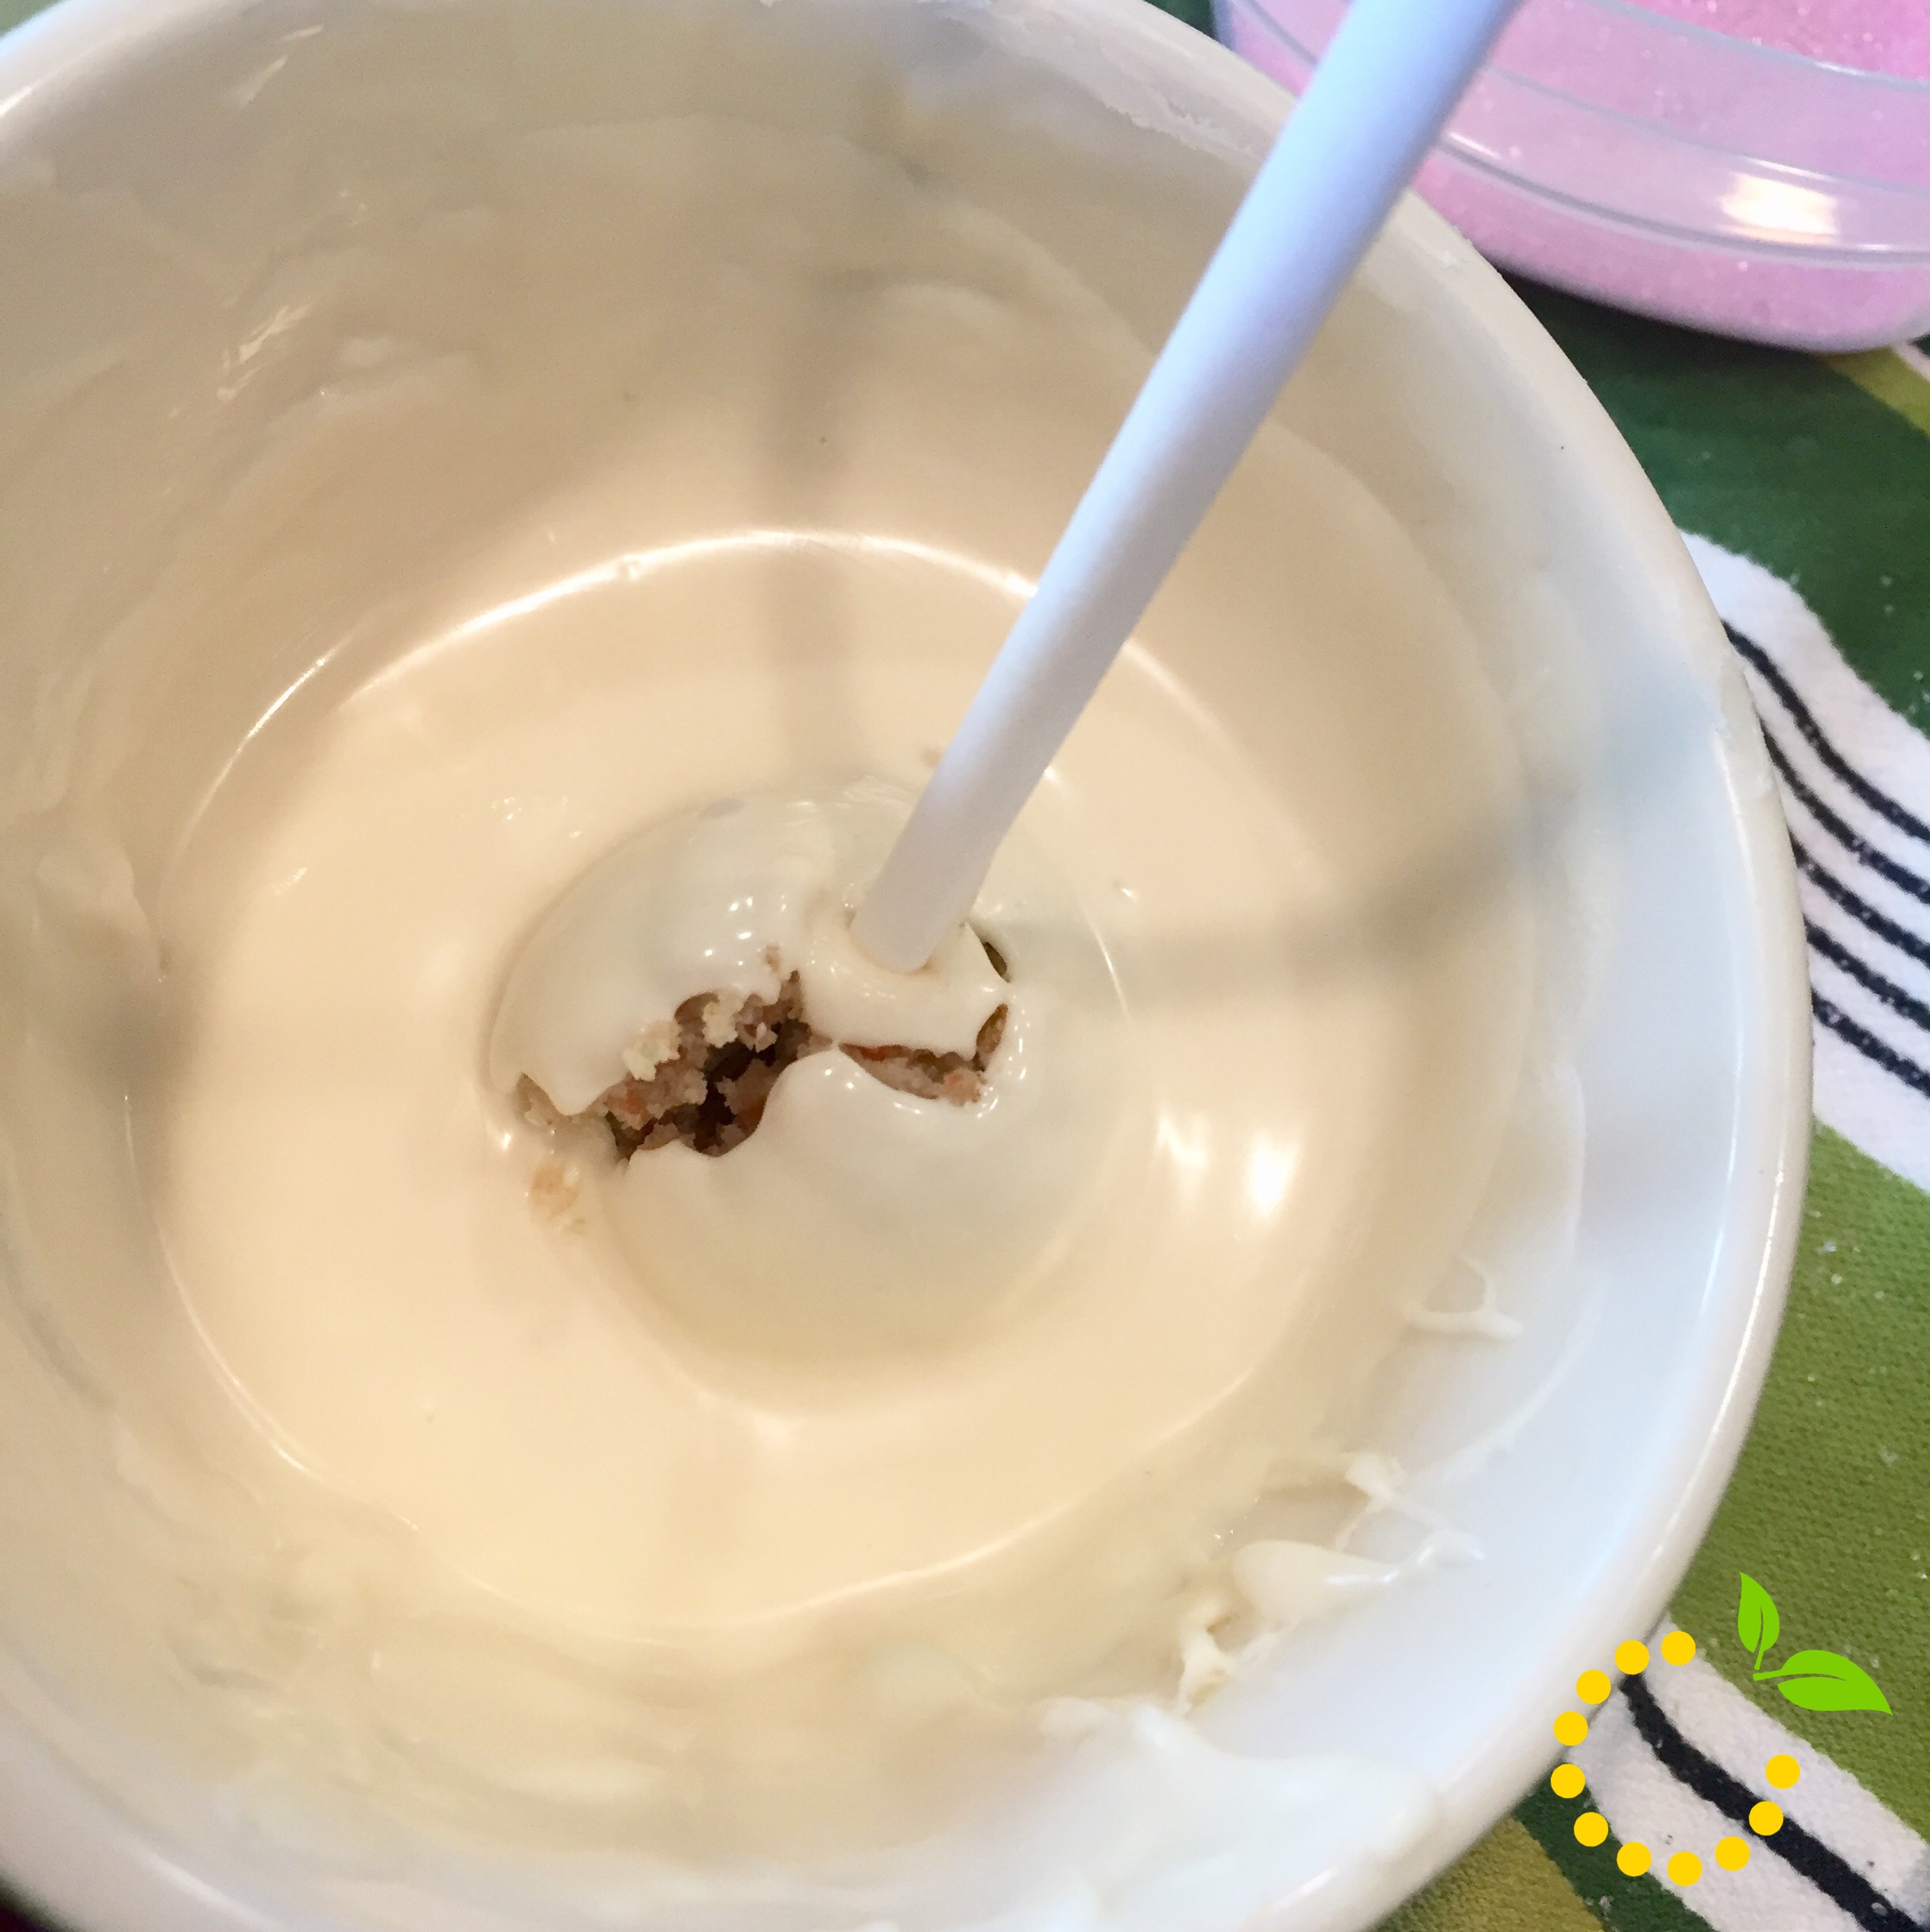
Place the candy coating in the deep microwave-safe bowl. These bowls make it easier to cover the cake balls completely with candy coating while holding the bowl and without burning your fingers. The coating should be about 3 inches deep for easier dipping. Work with about 16 oz of coating at a time.
Melt the candy coating. Microwave for 30 seconds at a time, stirring between each interval. (You can also use a double boiler.) Make sure you do not overheat the coating.
Now you’re ready to dip. Take a few cake balls out of the refrigerator or freezer to work with, keeping the rest chilled. If they’re in the freezer, transfer the rest of the balls to the refrigerator at this point so they stay firm but do not freeze.
One at a time, dip about 1/2 inch of the tip of a lollipop stick into the melted candy coating, and then insert the lollipop stick straight into a cake ball, pushing it no more than halfway through.
Holding the lollipop stick with cake ball attached, dip the entire cake ball into the melted candy coating until it is completely covered, and remove it in one motion. Make sure the coating meets at the base of the lollipop stick. This helps secure the cake ball to the stick when the coating sets. The object is to completely cover the cake ball and remove it without submerging it in the coating more than once. If you do resubmerge the cake pop, the weight of the candy coating can pull on the cake ball and cause it to get stuck in the coating. The thinner the consistency of your coating, the easier it will be to coat the cake pops. (If you find that your coating is too thick, add some vegetable oil to help thin it and make the coating more fluid.)
Remove the cake pop from the candy coating, some excess coating may start to drip. Hold the cake pop in one hand and use the other to gently tap the first wrist. Rotate the lollipop stick if necessary to allow the excess coating to fall off evenly, so one side doesn’t get heavier than the other. If you didn’t completely dunk the cake pop, this method of tapping and rotating generally takes care of that. The coating will slowly slide down the surface of the cake ball until it reaches the lollipop stick. If too much coating surrounds the base of the lollipop stick, you can wipe the excess off with your finger. Simply place your finger on the stick right under the cake ball and rotate the pop, allowing any excess coating to fall off and back into the bowl. When most of the excess coating has fallen off and it is no longer dripping, stick the cake pop into the Styrofoam block.
Repeat with the remaining cake balls and let the pops dry completely in the Styrofoam block.