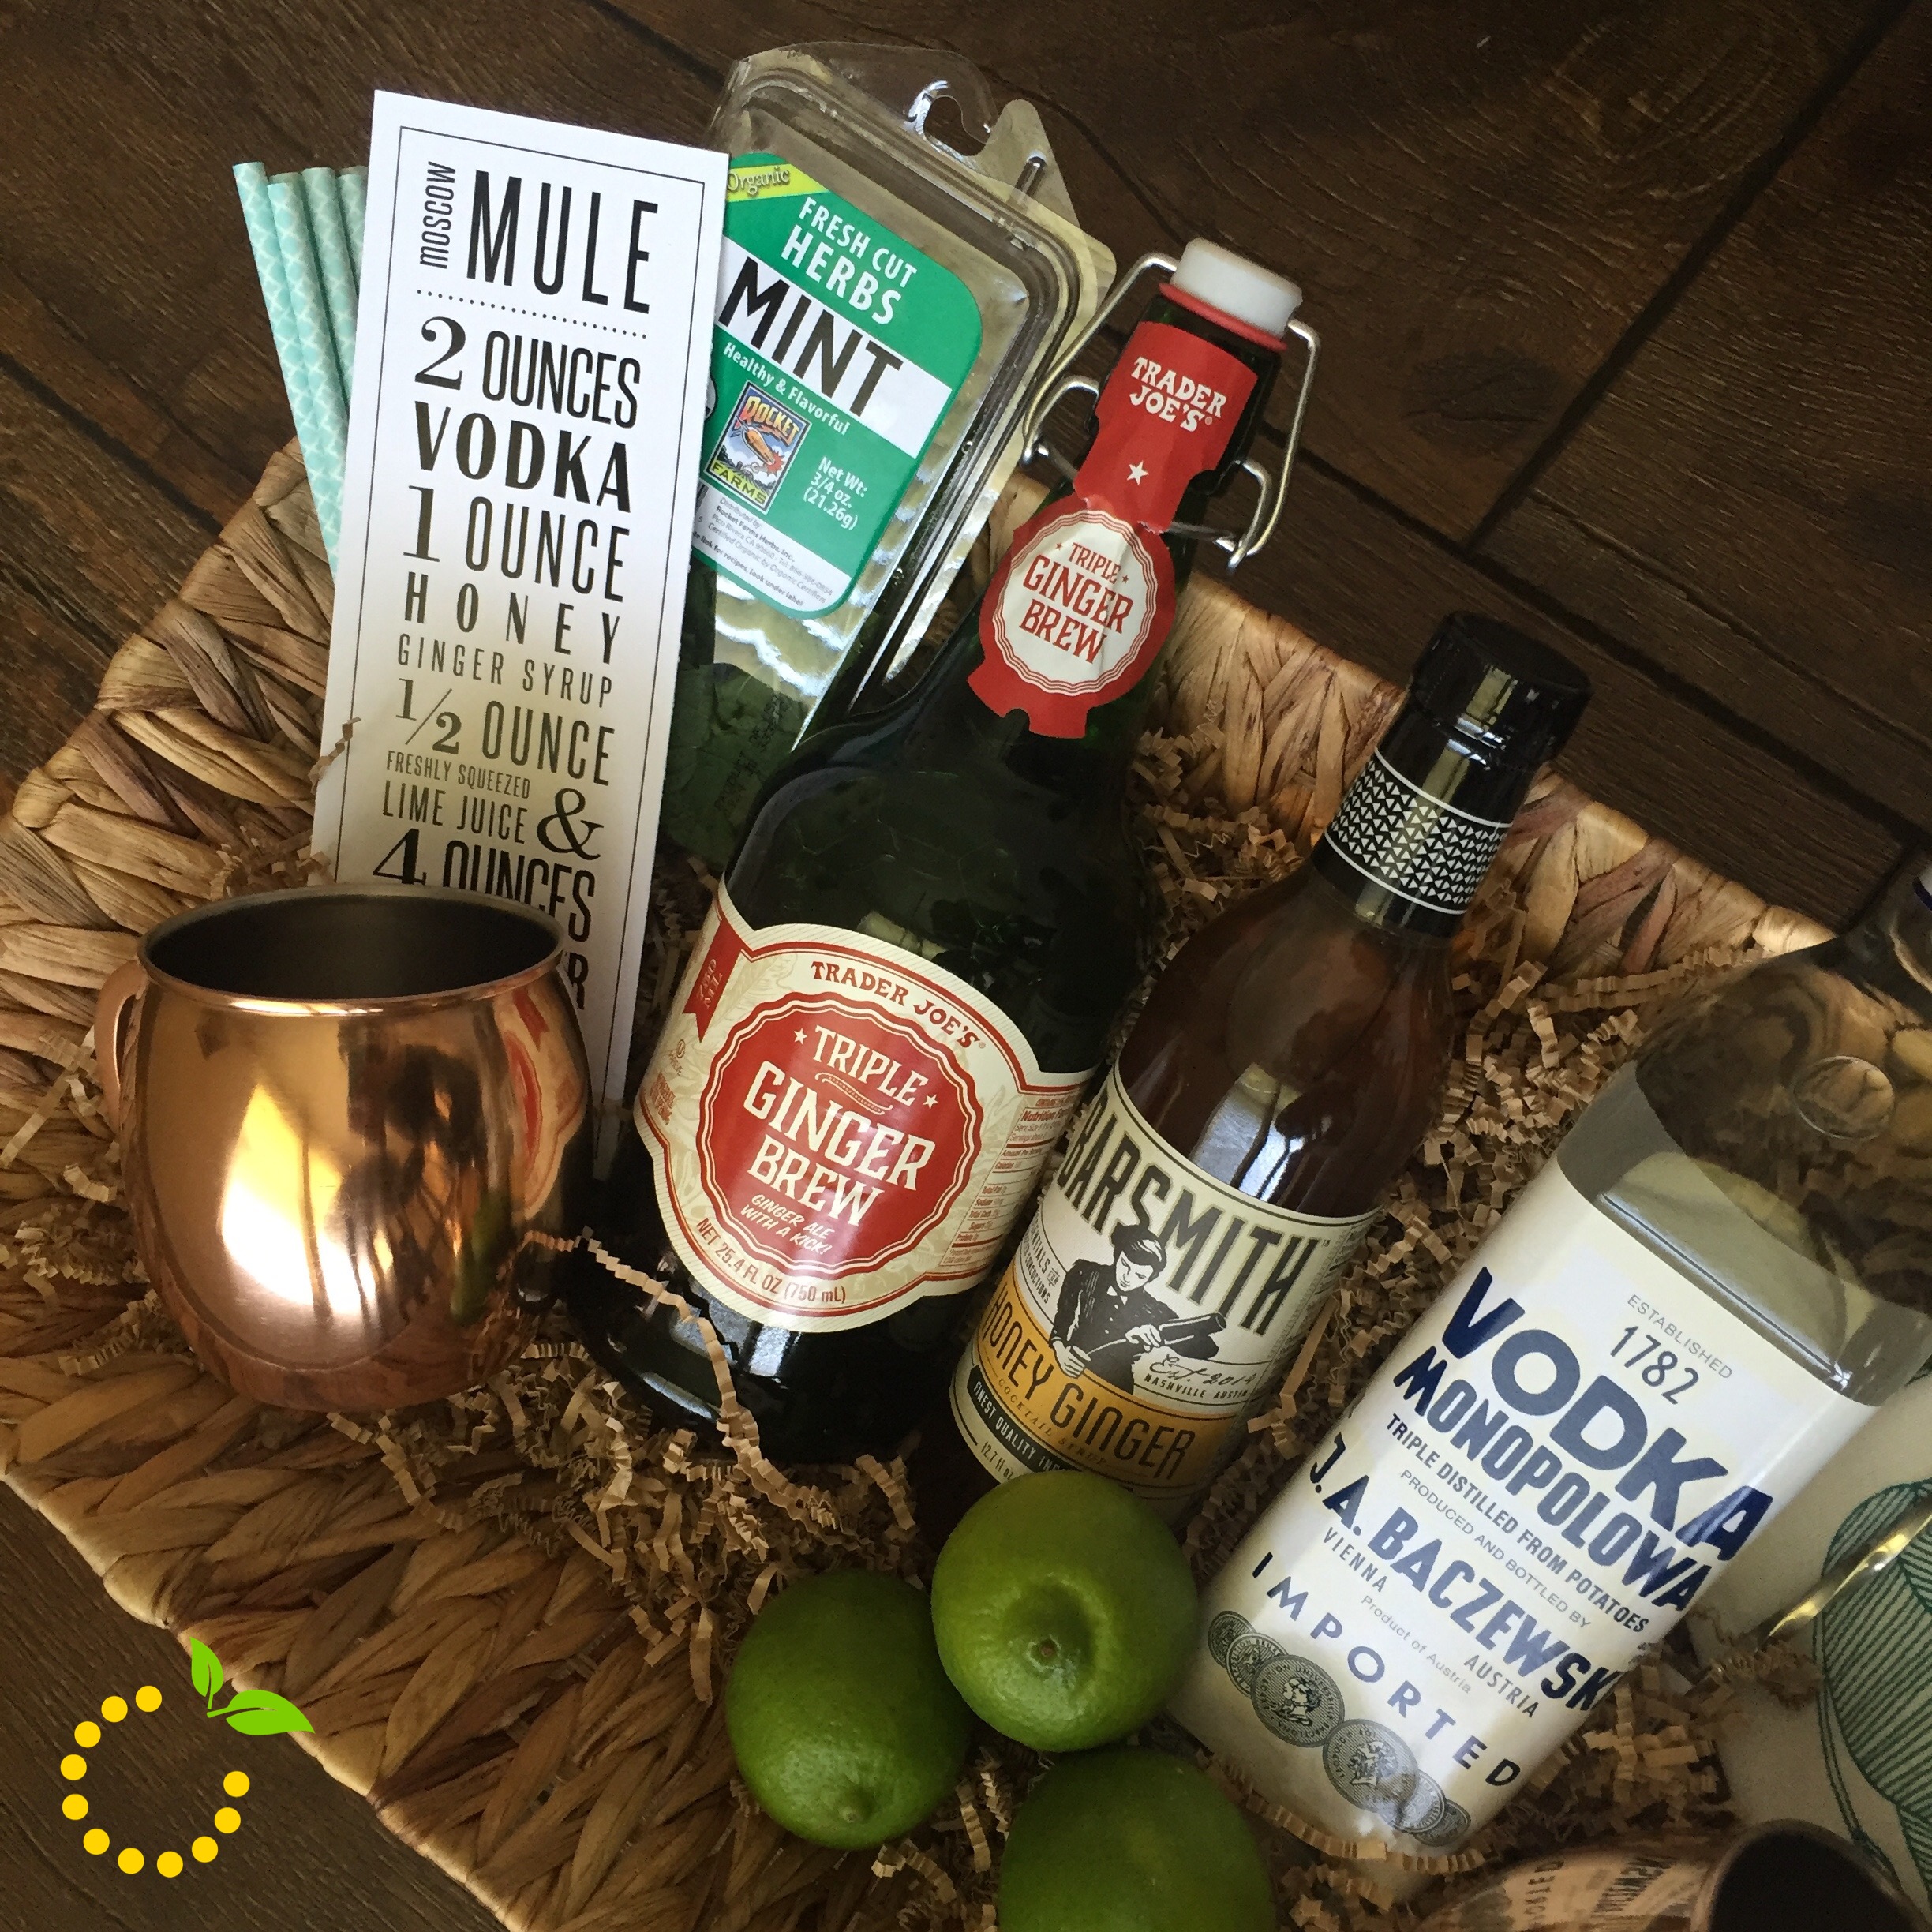
Moscow Mules have been a favorite cocktail of mine lately and a go to cocktail to mix up at our parties! If you’ve never had a Moscow Mule, you need to try one. The Moscow Mule is a very simple cocktail that consists of ginger beer, vodka, lime juice, honey ginger syrup (optional), and mint.
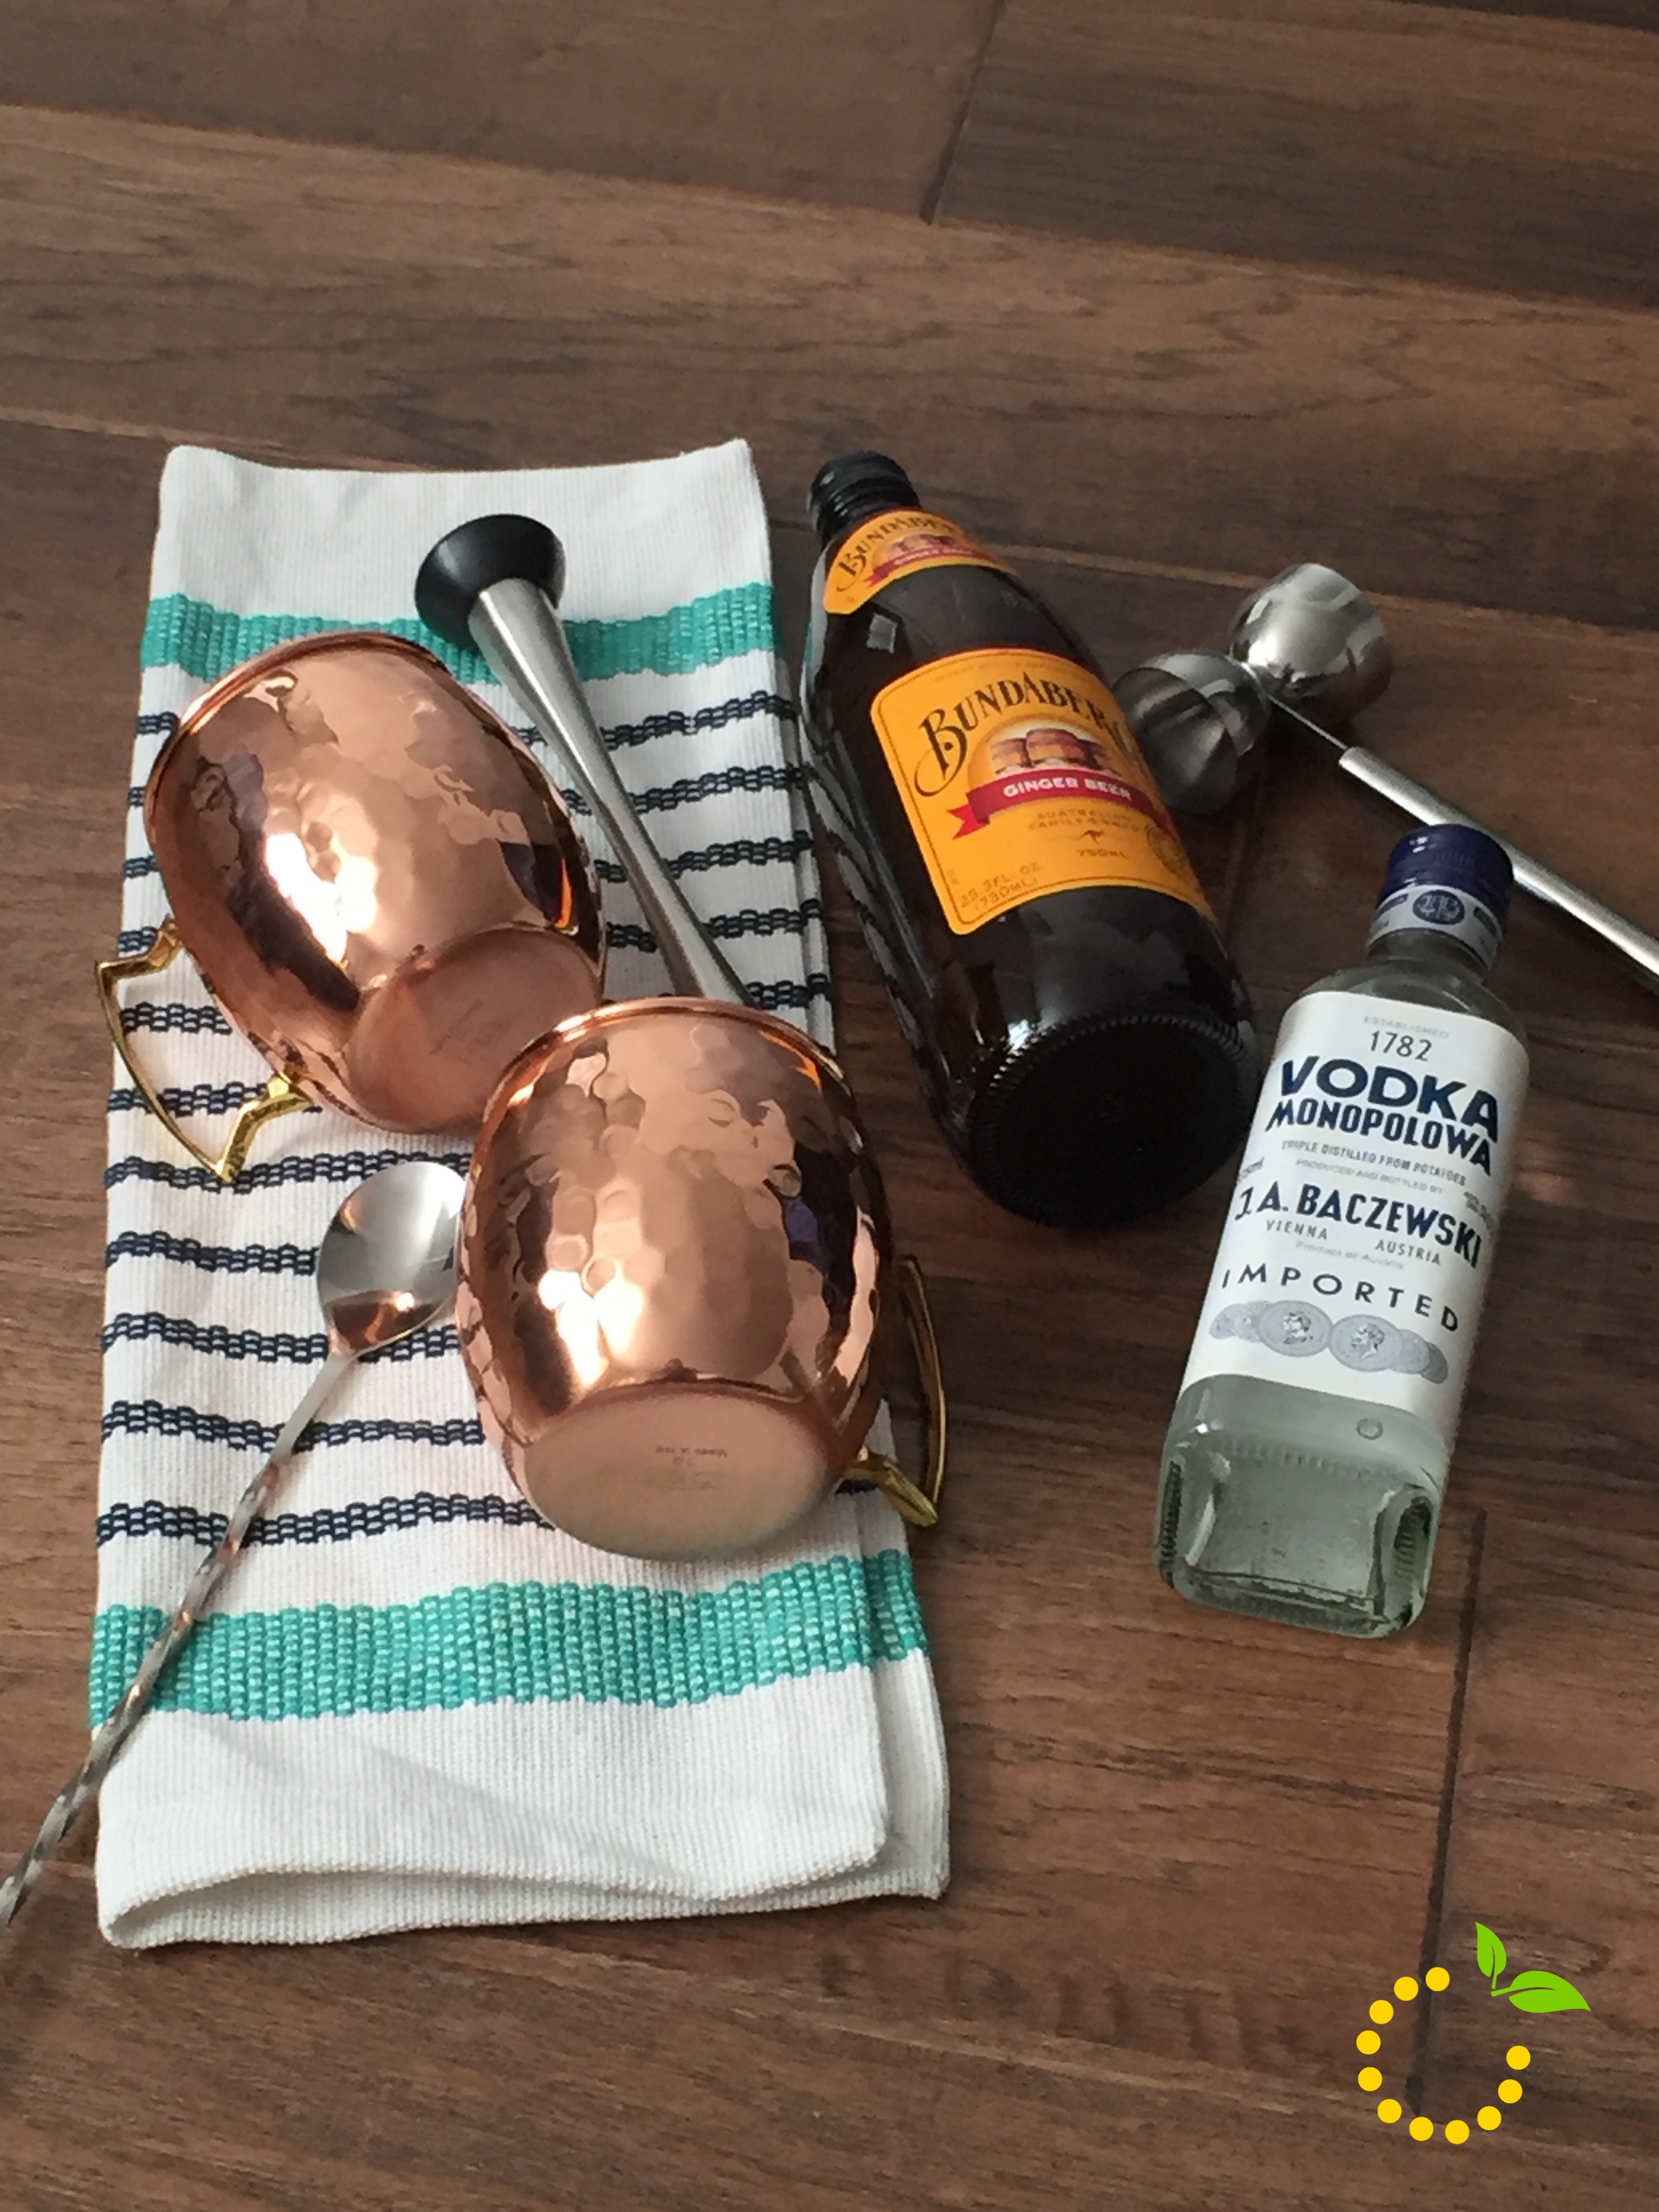
So when one of my friend’s birthdays was coming up who loves Moscow mules, I knew it would make the perfect gift basket and that they would love it! So, if you’ve got someone who loves Moscow Mules this makes the perfect gift and they will end up loving you! The copper mugs alone are so cool and you can’t have a Moscow Mule without the signature copper mug.
For those friends or family members that love cocktails, this is the perfect gift basket for them for practically any occasion like a birthday, bridal shower, wedding, Father’s Day, Mother’s Day, or Christmas! I’ve got a list of all the items below needed to make a Moscow Mule gift basket! We’ve also made a recipe card and a downloadable PDF file of the recipe to download and print to place in the basket!
Happy National Chocolate Chip Day!! If you were looking for an excuse to make some chocolate chip cookies today, today is the day to have that cheat day because c’mon it’s a national holiday! And any reason to make these soft cream cheese chocolate cookies is a good day in my book! These cream cheese chocolate chip cookies are so soft and moist with the addition of a little bit of cream cheese.
Would you believe me if I told you that the secret ingredients to these soft cookies is cream cheese and cornstarch?!? If you don’t believe me, give this recipe a try and tell us what you think. The other secret to thick soft cookies is to refrigerate the dough for up to 2 hours or overnight. I know some people hate recipes that require you to refrigerate your dough, but if your dough is warm your cookies will spread while baking and turn out thin.
I love how these cookies are thick without being cakey and the texture of these cookies are a bit chewy around the edges while the interior is soft, tender, and moist.
1/4 cup cream cheese, softened (don't use fat-free, light or whipped)
3/4 cup light brown sugar, packed
1/4 cup granulated sugar
1 large egg
2 teaspoons vanilla extract
2 1/4 cups all-purpose flour
2 teaspoons cornstarch
1 teaspoon baking soda
1/4 teaspoon salt
2 1/4 cups semi-sweet chocolate chips or chunks (I like to use 1 cup chips and 1 1/4 cups chunks)
Instructions
To the bowl of a stand mixer fitted with the paddle attachment, combine the butter, cream cheese (to get an accurate measurement, put it into a 1/4-cup measure cup rather than using the marks on the outside package), sugars, egg, vanilla, and beat on medium-high speed until well-creamed, light and fluffy, about 5 minutes.
Scrape down the sides of the bowl, and add the flour, cornstarch, baking soda, salt, and mix until just combined, about 1 minute.
Add chocolate chips and chunks, and beat for just a minute to incorporate, or fold in by hand.
Using a medium cookie scoop, form heaping mounds. Place on a large plate and flatten mounds slightly with your palm.
Cover with plasticwrap, and refrigerate for at least 2 hours, or up to 5 days, before baking. Baking with warm dough causes cookies to spread and bake thinner and flatter.
Preheat oven to 350F and line a baking sheet with parchment paper or a Silpat Non-Stick Baking Mat and place dough on baking sheet, spaced at least 2 inches apart. Bake for 8 to 9 minutes, or until edges have set and tops are just beginning to set. They will look slightly under cooked, pale and glossy in the center. Rotate pans after 4 minutes and do not bake longer than 10 minutes as cookies will firm up as they cool. (If dough is refrigerated overnight, allow dough to come to room temp for 15 minutes before baking).
Allow cookies to cool on the baking sheet for 5 minutes before removing and transferring to a rack to finish cooling.
Oh, if only we could all live in brand new, crisp white houses with perfect black shutters on all the windows, and inviting porch swings to sit in as we gaze across our perfectly manicured yards. But let’s be honest, most of us live in somewhat outdated, basic middle-class houses with far more weeds in the yard than we care to admit. We’re all secretly hoping that Chip and Jo show up to make our home reno dreams come true! But alas, all of our renovation dreams usually end up being just that–dreams. Haha.
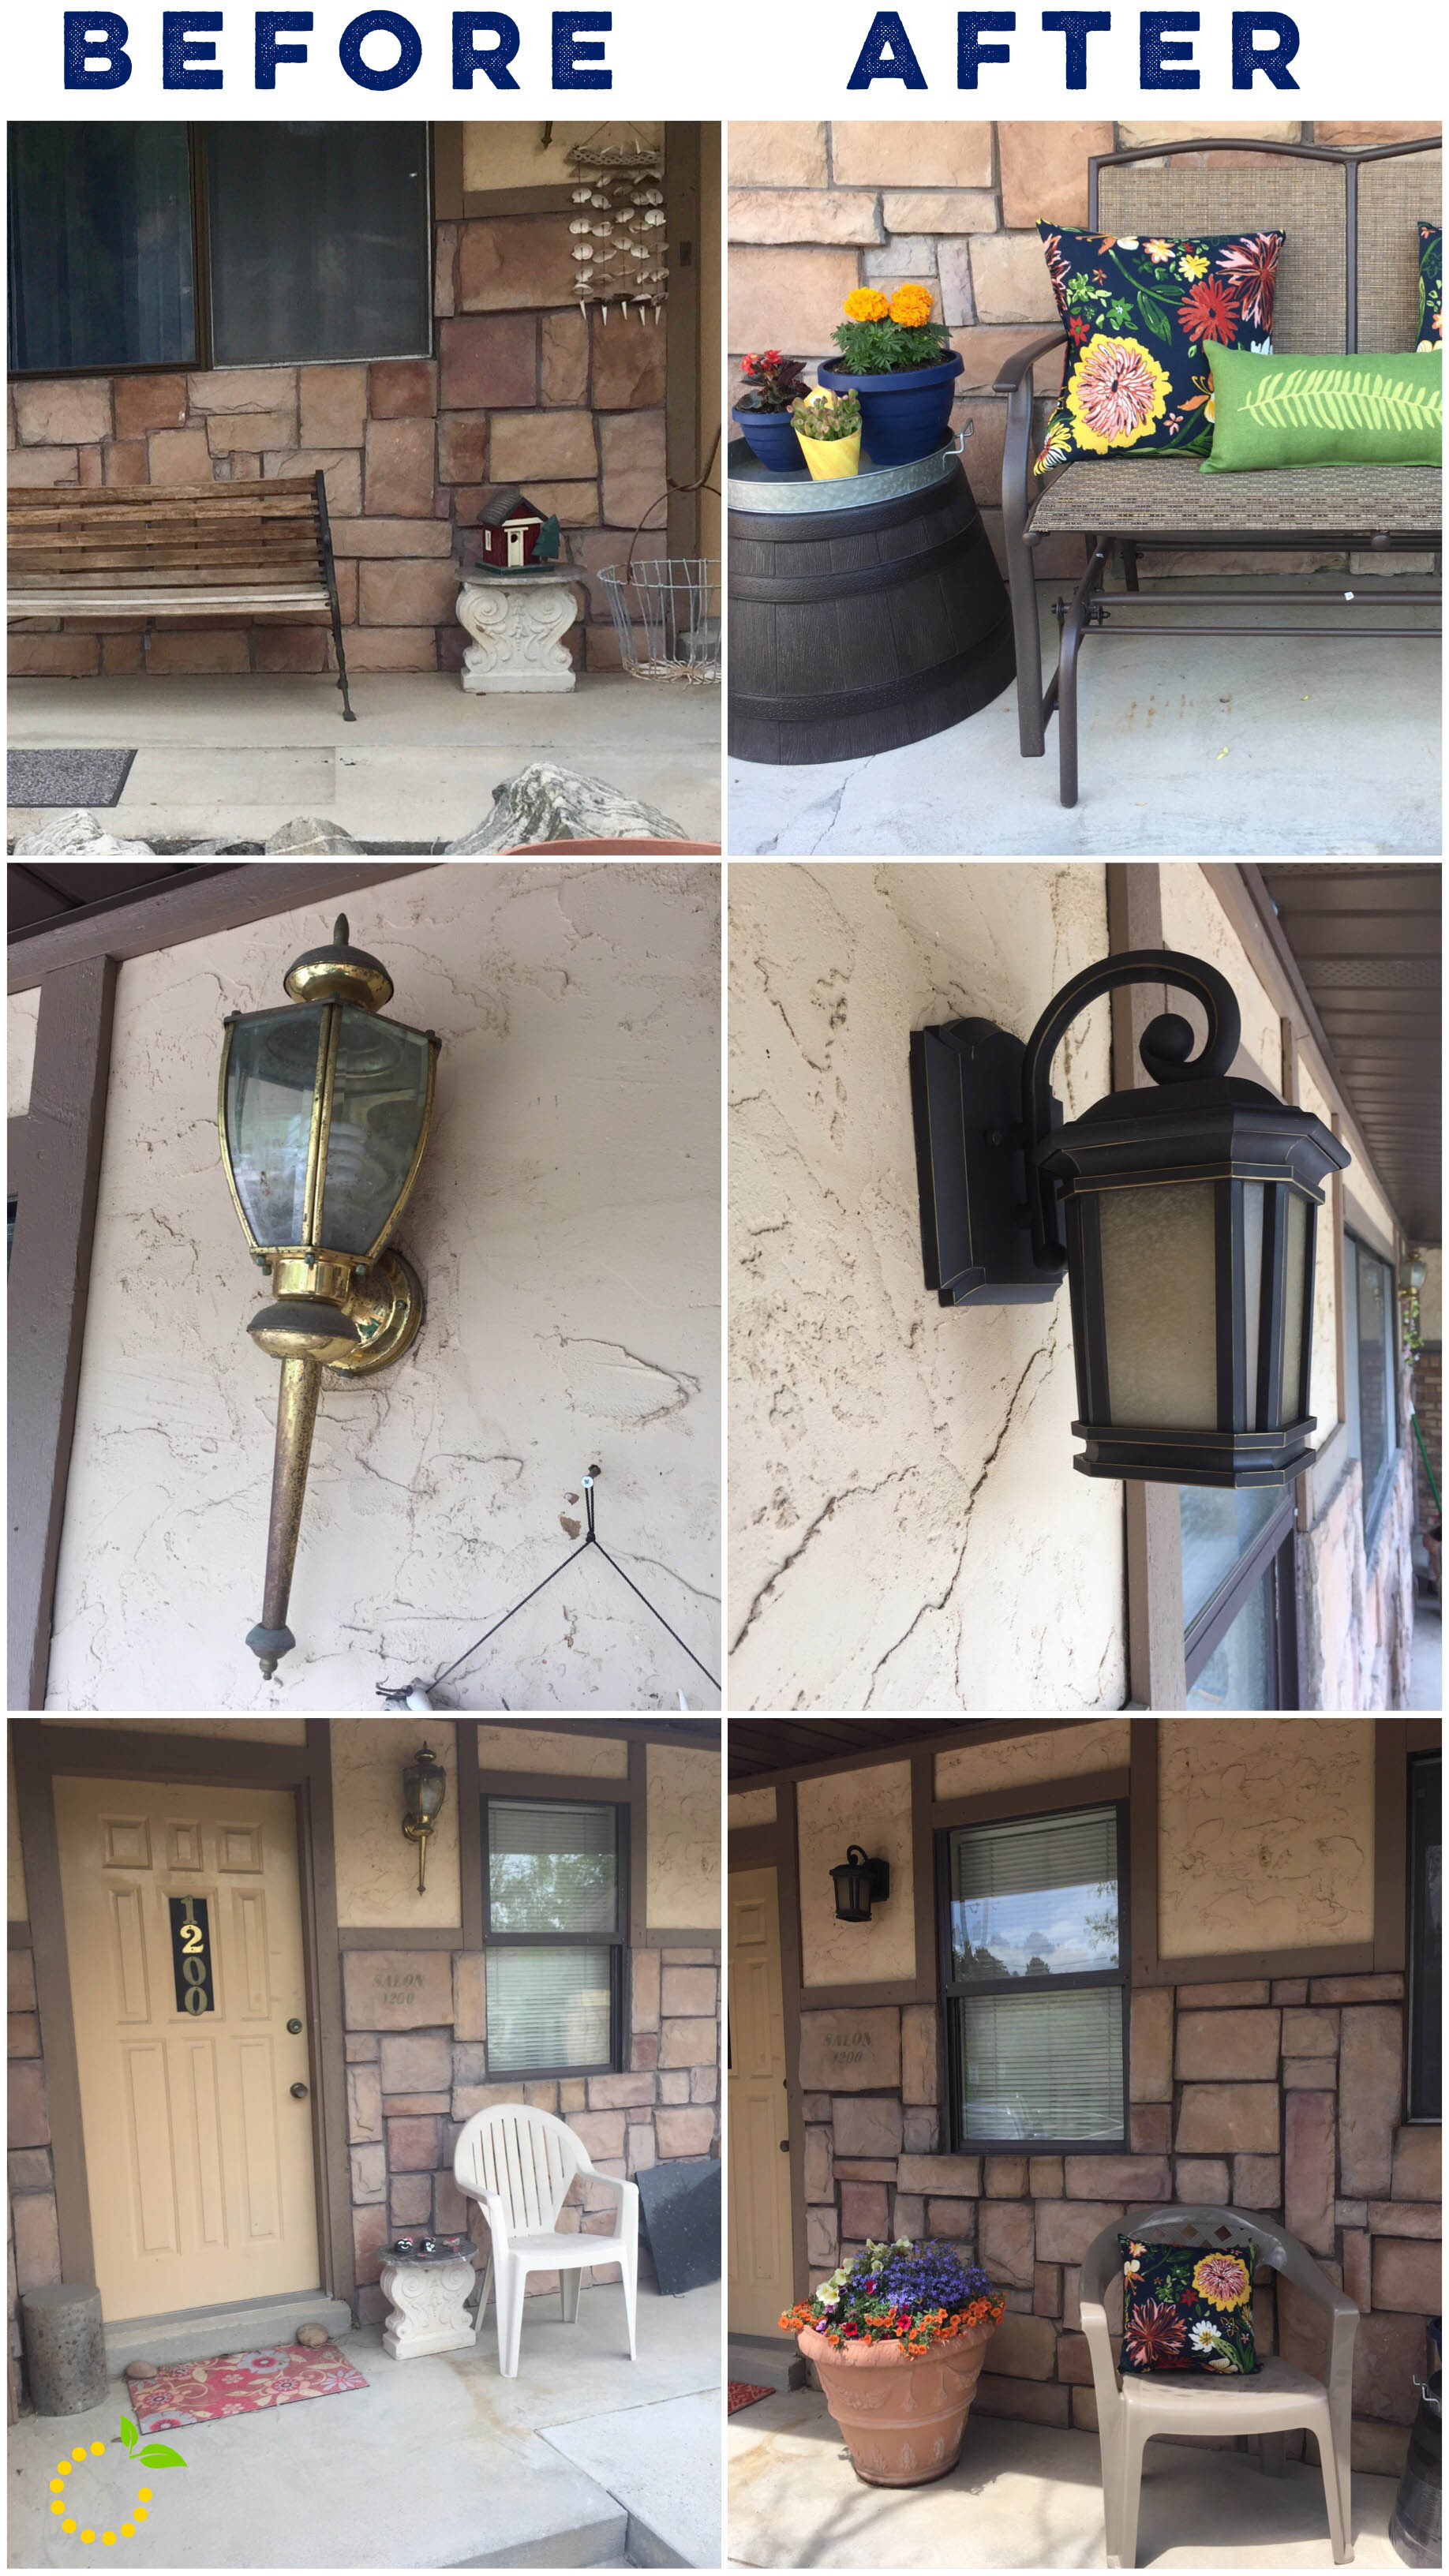
Well, this year my mom has been working hard to renovate our childhood home that was built in 1985 and it can definitely start to get overwhelming. It starts as a room or two and before you know it there’s a project for every room in the house! So to help encourage her along, I decided to surprise her with a little porch renovation. And for $270.88 I was able to really enhance the curb appeal on this 1980s rambler.
If you’re looking to amp up your curb appeal because you’re getting ready to sell your home or just want to smile a little bigger when you pull in the driveway, we’ve got some quick and easy ideas to help you spruce up any porch or patio.
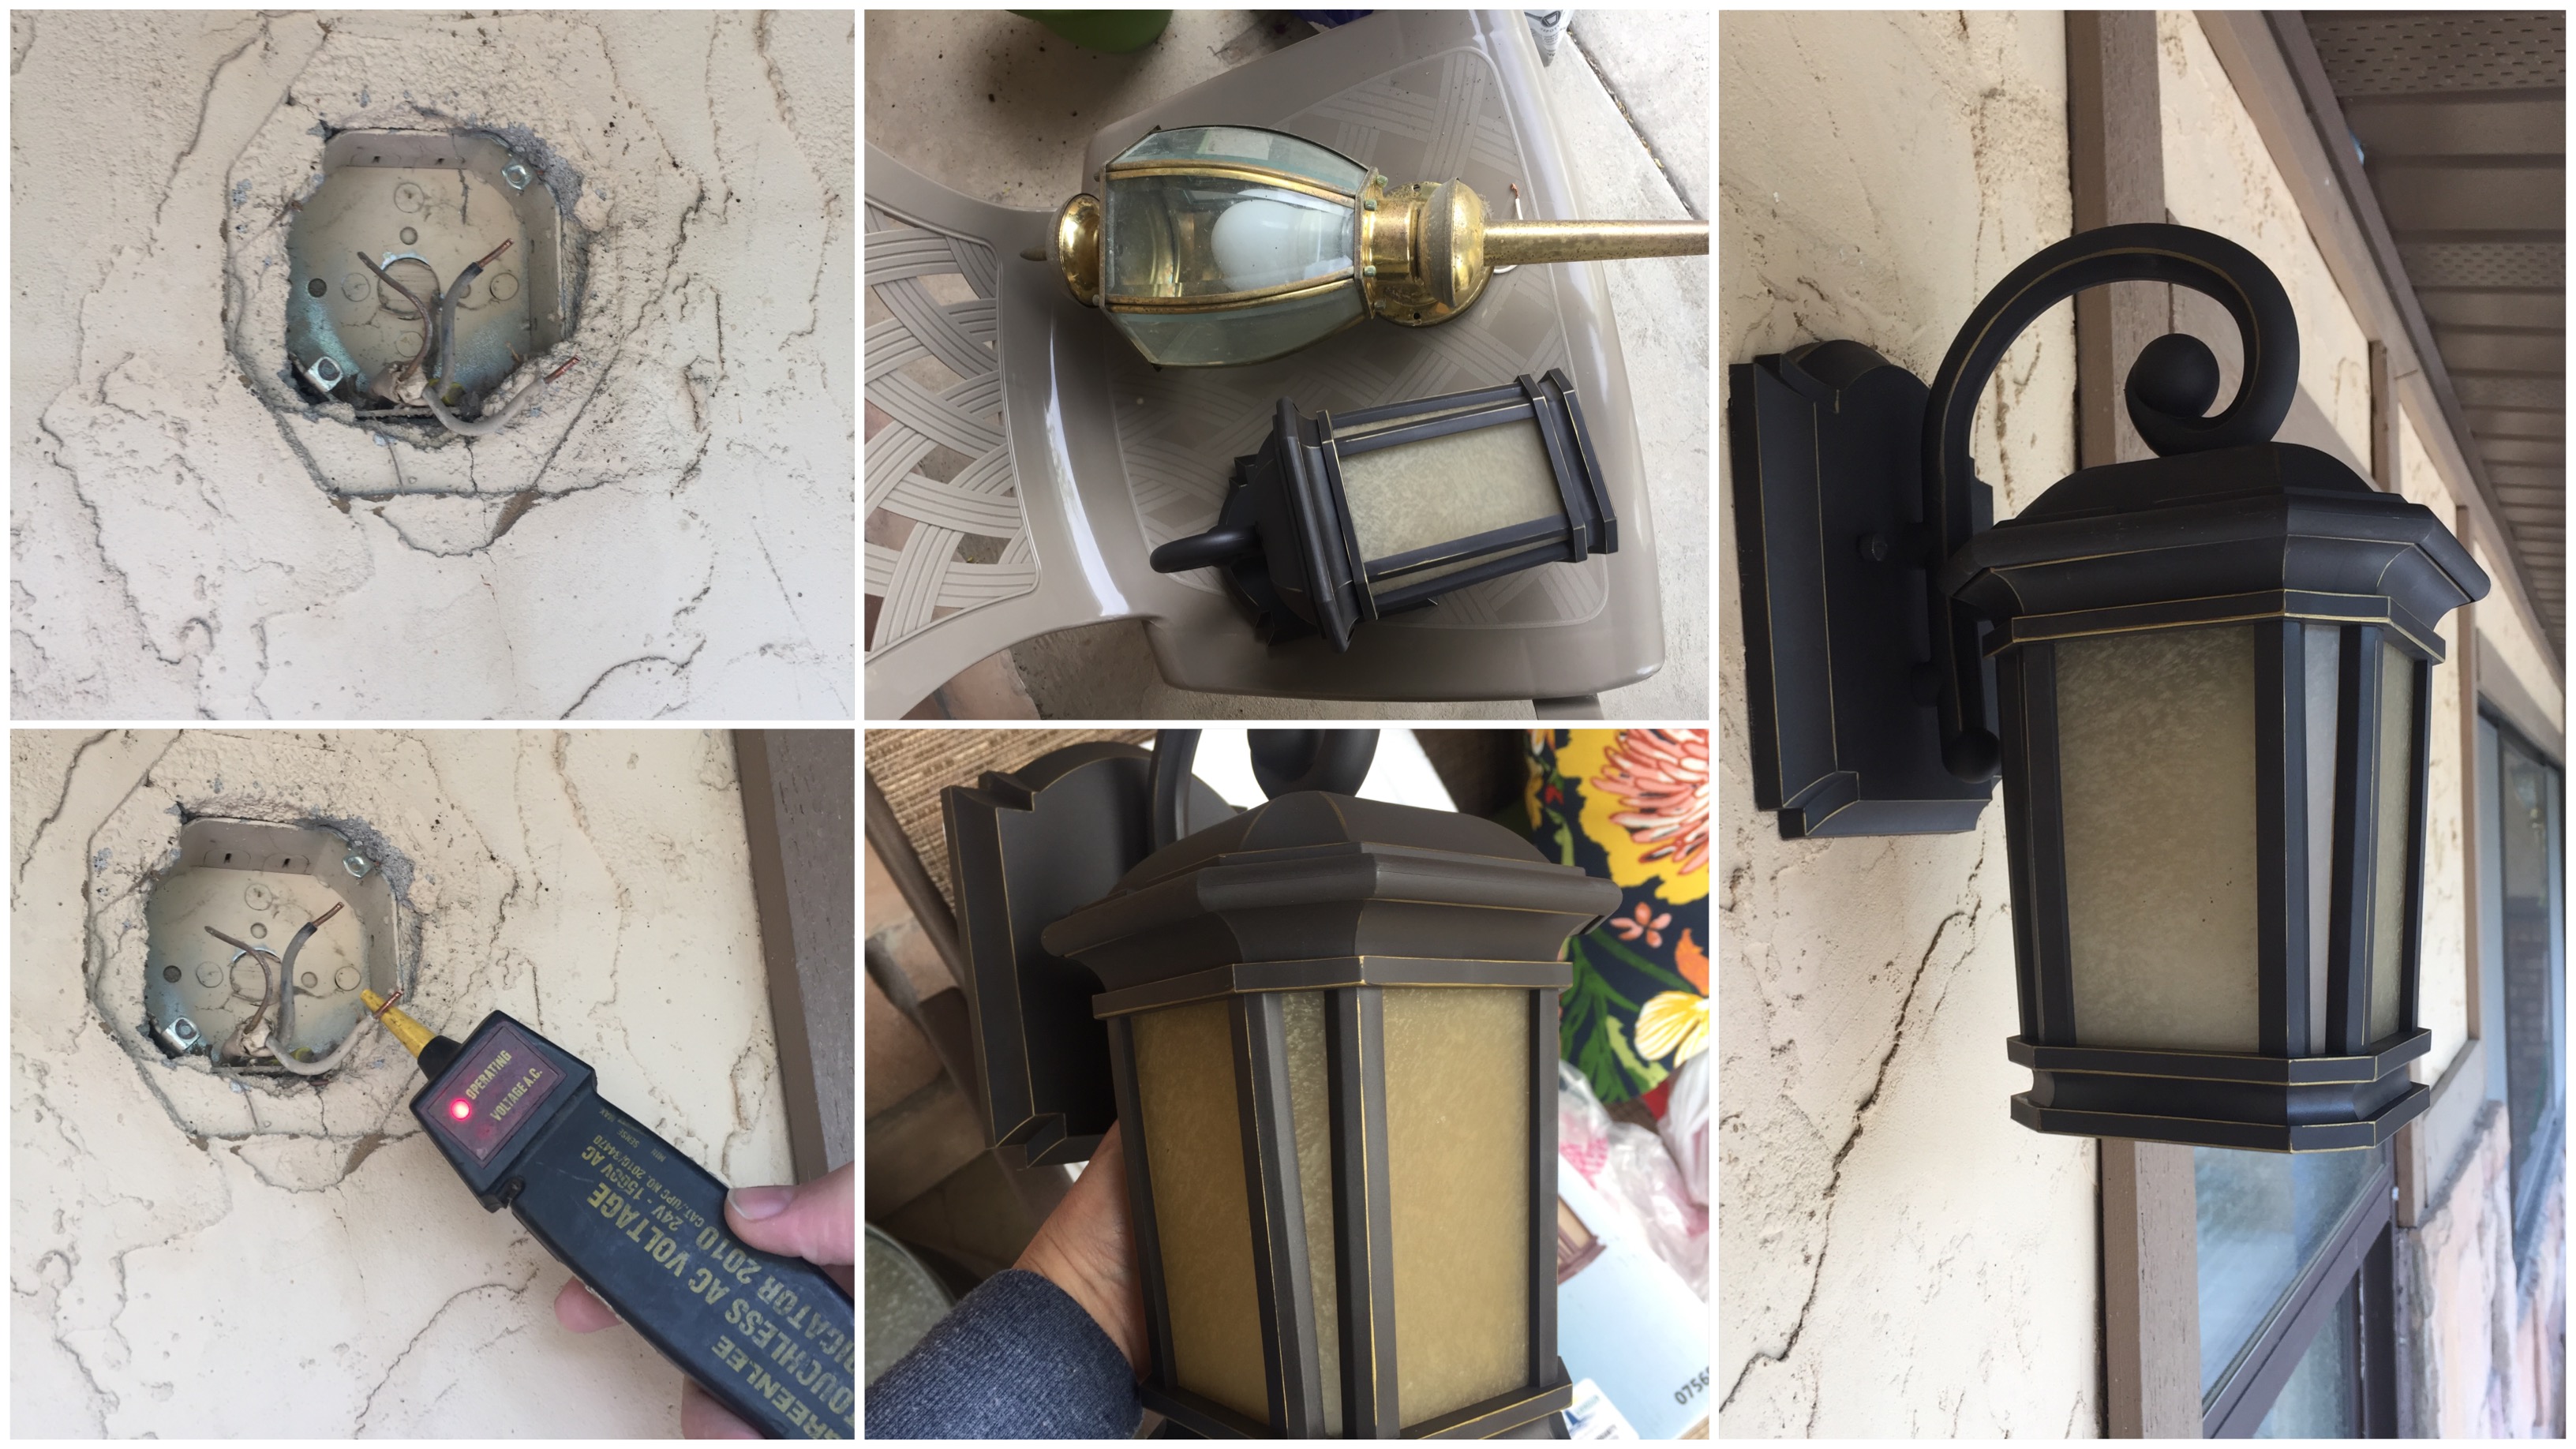
Light fixtures. This swapout definitely gave us some bang for our buck! As you can see these old brass fixtures have seen better days, and for $39 each we were able to switch them out for a much more modern fixture. I honestly never really noticed how bad those old light fixtures looked until we changed them. The new ones give such a polished. complete finish! These lights were surprisingly easy to switch out as well–no electrician required. Just make sure you go to your circuit breaker and turn OFF the power to the porch light before you replace it. THIS STEP IS KEY to avoid getting zapped!
Fun pillows. Adding pillows to the outdoor furniture really gave a great splash of color and made the porch a lot more inviting. The pillows also made our $14 plastic chairs from Home Depot look a lot classier! These pillows are made with outdoor fabric so they can withstand some of the elements without wearing down or molding. The great part is that you can switch the pillows out quite easily and change the whole look of the porch for different seasons.
Flowers. And lots of them. I tend to have a black thumb when it comes to plants, but flowers add so much life I knew we had to include them in the porch makeover. My sister taught me a great trick though–that is to buy those large blooming hanging baskets and then plant them in a large pot with soil, rather than growing each plant one by one. Usually those baskets have multiple flower types already grown and blooming, then all you have to do it get them in the soil and water them. It made the pots look like they had been growing all summer long!
Hopefully you’ve been inspired by our simple porch reno and ideas for your own porch have started popping into your head. Here are the links to all of our porch renovation items. Take a look and happy porch planning!
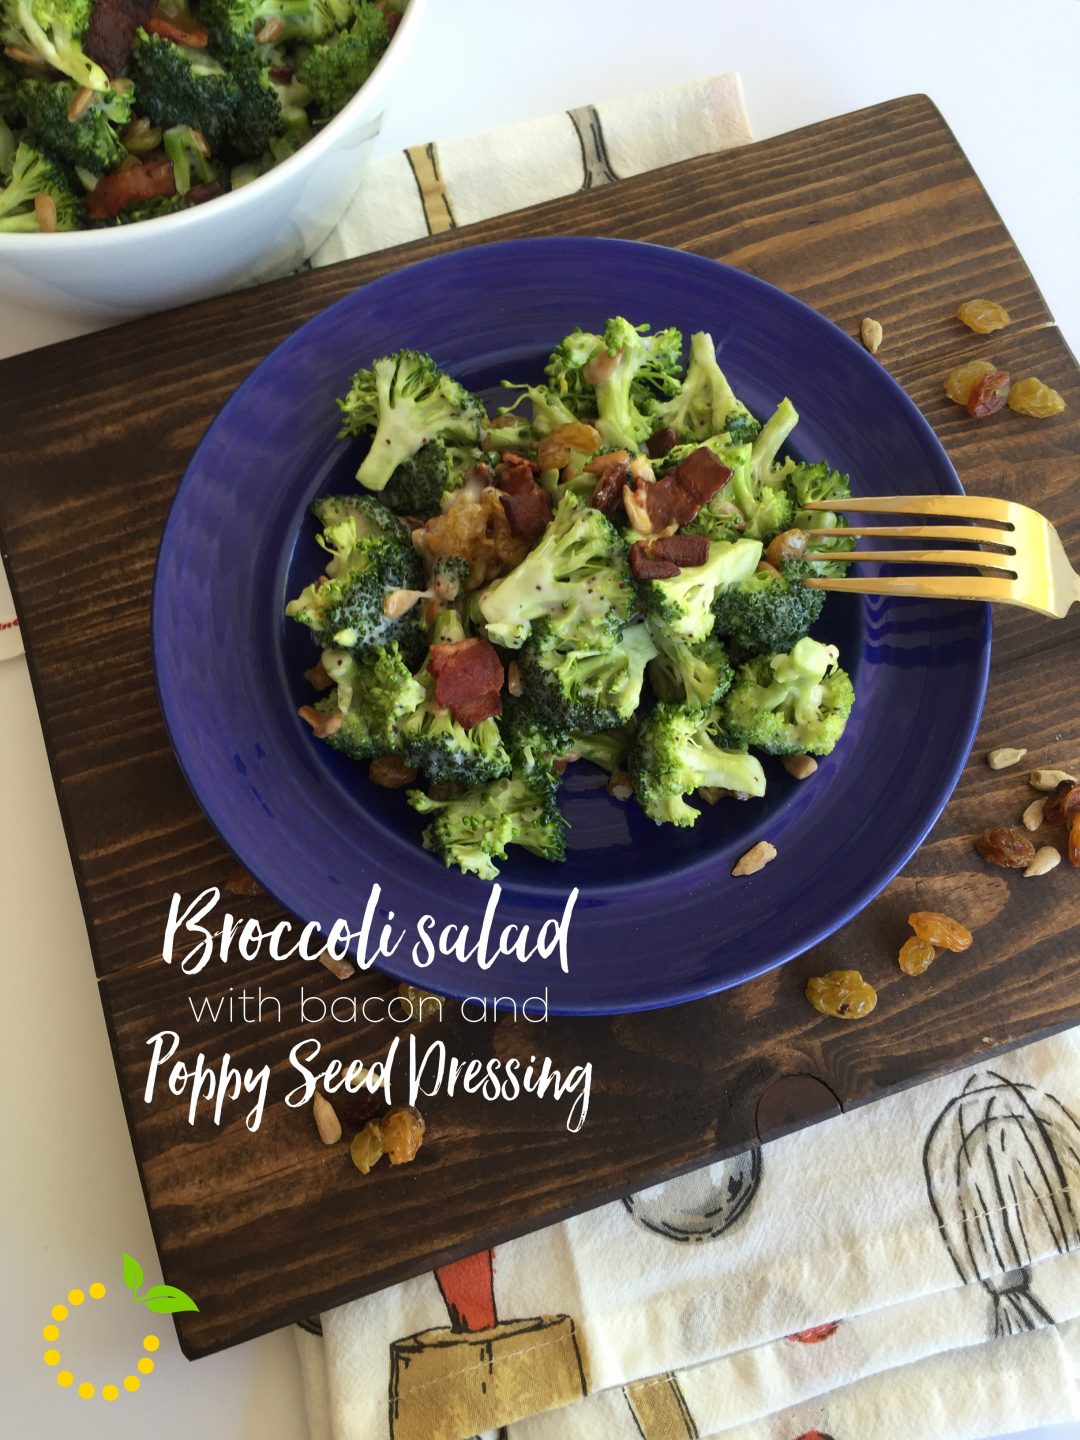
Were you invited to a BBQ and don’t know what to make or forgot you needed to bring a dish? I’ve got you covered with my go to dish I like to bring…Broccoli Salad! This salad is so simple and easy to make and it’s soooo good!! This broccoli salad is my favorite! It’s full of broccoli, crispy crumbled bacon, golden raisins, sunflower seeds, and sweet poppyseed dressing! It always seems to be one of the first dishes to get eaten up too, so that tells you how yummy it is! The only thing you have to cook is the bacon. How much easier can a recipe get? Not much easier. All you have to do with the rest of the other ingredients is pour it into a bowl and mix it all together.
So hit up the grocery store and grab all the ingredients needed and a giant bowl and whip up this delicious salad! You won’t regret it! I promise. And you can get any brand of poppyseed dressing, but I love the BRIANNAS brand the best!
1 (12 ounce) bags of broccoli florets, cut into bite size pieces
1 bottle Briannas poppyseed dressing
1 (16 ounce) package of bacon, cooked and crumbled
1 and 1/2 cups of Golden Raisins
1/3 cup unshelled sunflowers seeds
Instructions
Combine broccoli, golden raisins and sunflower seeds in a bowl.
Pour the bottle of dressing into the salad and mix all together. Tip: I usually use the whole bottle but if you don't like as much dressing you can start off with half the bottle and then continue to add dressing until desired.
Let salad chill for 1-2 hours. It might look like the salad doesn't have enough dressing when you take it out of the fridge but it is. The salad dressing marinates into the ingredients.
Give the salad a stir before serving, mix in bacon leaving a bit for the top, and serve!
We’ve all been there. First pool day of the summer or first day of our beach vacay, and we’re roasted and toasted. Burnt to a crisp. Sometimes ten layers of SPF 50 just doesn’t do the trick. But have no fear, we’ve rounded up our top 5 ways to beat a sunburn for you! These methods are ALL TRIED AND TRUE. I swear by them. In no time at all your painful skin will no longer be glowing inferno red and you’ll actually be able to wear normal clothes without gritting your teeth.
Hydration. And lots of it. I’m not talking about drinking “a water bottle” when you get back from the beach. That’s not enough. You’re going to think I’m crazy, but you need to drink a water bottle every hour, if possible. And yes, this means you’ll be peeing like a racehorse (probably every hour as well), but I’m telling you it works. I learned this trick from a friend in college. He grew up surfing in California and has had his fair share of sunburns as a result, but this trick takes the sting out by the next day. If you’re hurting really bad you definitely need to start pounding the water!! I promise, it works.
Cold Aloe Vera. Aloe is no secret. I’m sure we’ve all used it before for to help aid the sunburn sting. But have you tried putting it in the fridge? Game changer! During the summer we keep a bottle of aloe vera in the fridge at all times. There’s something about that COLD gel that can calm even the hottest burn.
Sun Bum Cool Down. You may have heard us talk about this product before in one of our sweet pick posts, but it must be mentioned again! It’s pure magic. I prefer this because it’s less sticky than aloe and seems to take away the heat for a lot longer than aloe does. I put this on as soon as I come in from a long sun-exposed day to help the healing start right away. If the it turns into a bad burn I’ll apply this repeatedly until the skin calms down. This takes that burning sting OUT better than any other lotion I’ve tried (and it smells delicious).
Noxzema cream. Yes, the same Noxzema that you used in junior high as part of your acne-defending face regimen can heal some of the worst burns! Noxzema was actually originally developed as a sunburn remedy and then was later marketed as a facial cream. It contains camphor, menthol, phenol and eucalyptus, among other ingredients to help soothe and calm the skin. When using it for burns apply a layer of the white cream over the burn. Don’t rub it in, just allow it to slowly sink into the skin if possible. Apply it as often as you need until the burn heals. This product not only helps with sunburns, but burns of any kind. So, whether it’s a sunburn or a stove burn, you’ve gotta have some of this stuff on hand!
Be smart about SPF. Did you know that not all sunscreen is created equal? If you think you’re covered because your moisturizer or foundation have sunscreen in them, think again! According to my thorough WebMD research, you need 7 times the normal amount of foundation to achieve the SPF on the label. No one does this so make sure to use a real sunscreen—not just make up sunscreen. Here are a few more tips to make sure you bring your sunscreen A-game to the next pool party.
Broad spectrum coverage is a MUST. There are two types of UV rays—UVA rays (these are the ones that cause wrinkles and premature aging) and UVB rays (these are the ones responsible for sunburns). Make sure your sunscreen has both UVA and UVB protection. According to the FDA, if your sunscreen is labeled “broad spectrum” it covers UVA and UVB.
No sunscreen blocks 100 percent of UV rays! Ultrahigh SPFs are not much more protective than SPFs of 30 or 50. SPF 15 blocks 93 percent of UVB rays. SPF 30 blocks 97 percent. The increase in protection is even more gradual after that, 98 percent for SPF 50 and 99 percent for SPF 100. So don’t be fooled SPF 100 isn’t doing much more for you than SPF 30!
The real secret is to apply sunscreen early and often. Apply at least 15 minutes prior to exposure and reapply every 2 hours!
There’s no such thing as waterproof or sweatproof sunscreen. Water-resistant technically means it will last for 40 minutes or 80 minutes in the water (depending on the brand)…that’s it! So make sure to reapply often when in the water or sweating.
Cheers to the first day of summer! Hopefully these tips will keep you calm, cool, and careful on all your sunny summer adventures.