Browsing Tag

food

Adventure

Weekend in Waco at Magnolia Market

Magnolia Market sweetlemonmade.com

I just got back from a weekend in Waco living my “Fixer Upper” dreams. You know the show. It doesn’t matter if you’re 12, 25, or 65, chances are you’ve heard of Chip and Joanna Gaines and their wildly popular HGTV show, “Fixer Upper.” And if you’re like me, after one episode you’ve fallen in love with their down-to-Earth attitudes, Chip’s goofy antics, Joanna’s stunningly simple, fresh décor, and the shocking before and after reveals that accompany each episode.

I’ve always been a sucker for home remodeling shows. I think it was TLC’s “Trading Spaces” that first got me hooked. You know, the one where two sets of neighbors got to spend $1,000 and redecorate a room in each other’s houses in two days? I remember watching episode after episode during my freshman year in college and wishing that hottie-handyman Ty Pennington could make me a built-in bookcase. Trading Spaces ended, but I followed that quirky, tan carpenter over to ABC’s Extreme Makeover: Home Edition.

I’m a sucker for “big reveals” and a cause, so naturally this show literally had me crying each week when they said, “Move that bus!” In 2009, hurricane GRADUATE SCHOOL hit and I was forced to say goodbye to free time, cable, and happiness. It has taken me years to recover from that bomb and find TV again, but I’d like to thank the Food Network for reeling me back in and Hobby Lobby for re-igniting my love of home décor with their endless aisles of stuff. I’m back in the creativity game and it feels good. Take that science degree. 

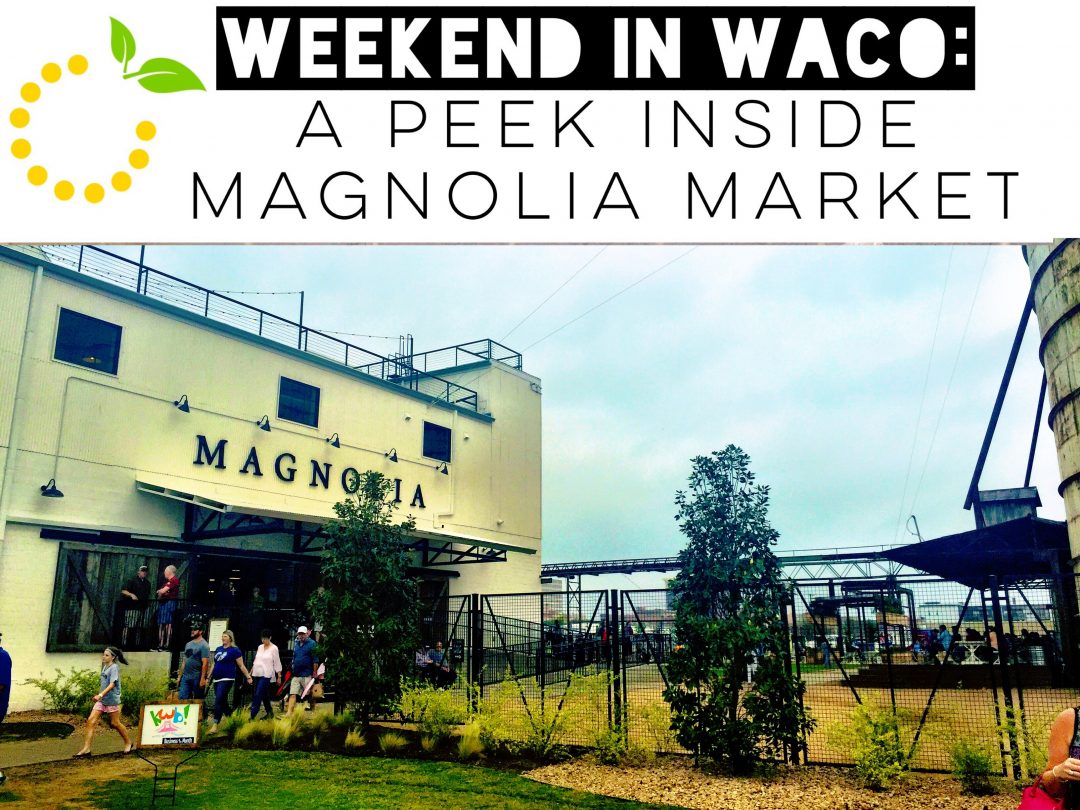
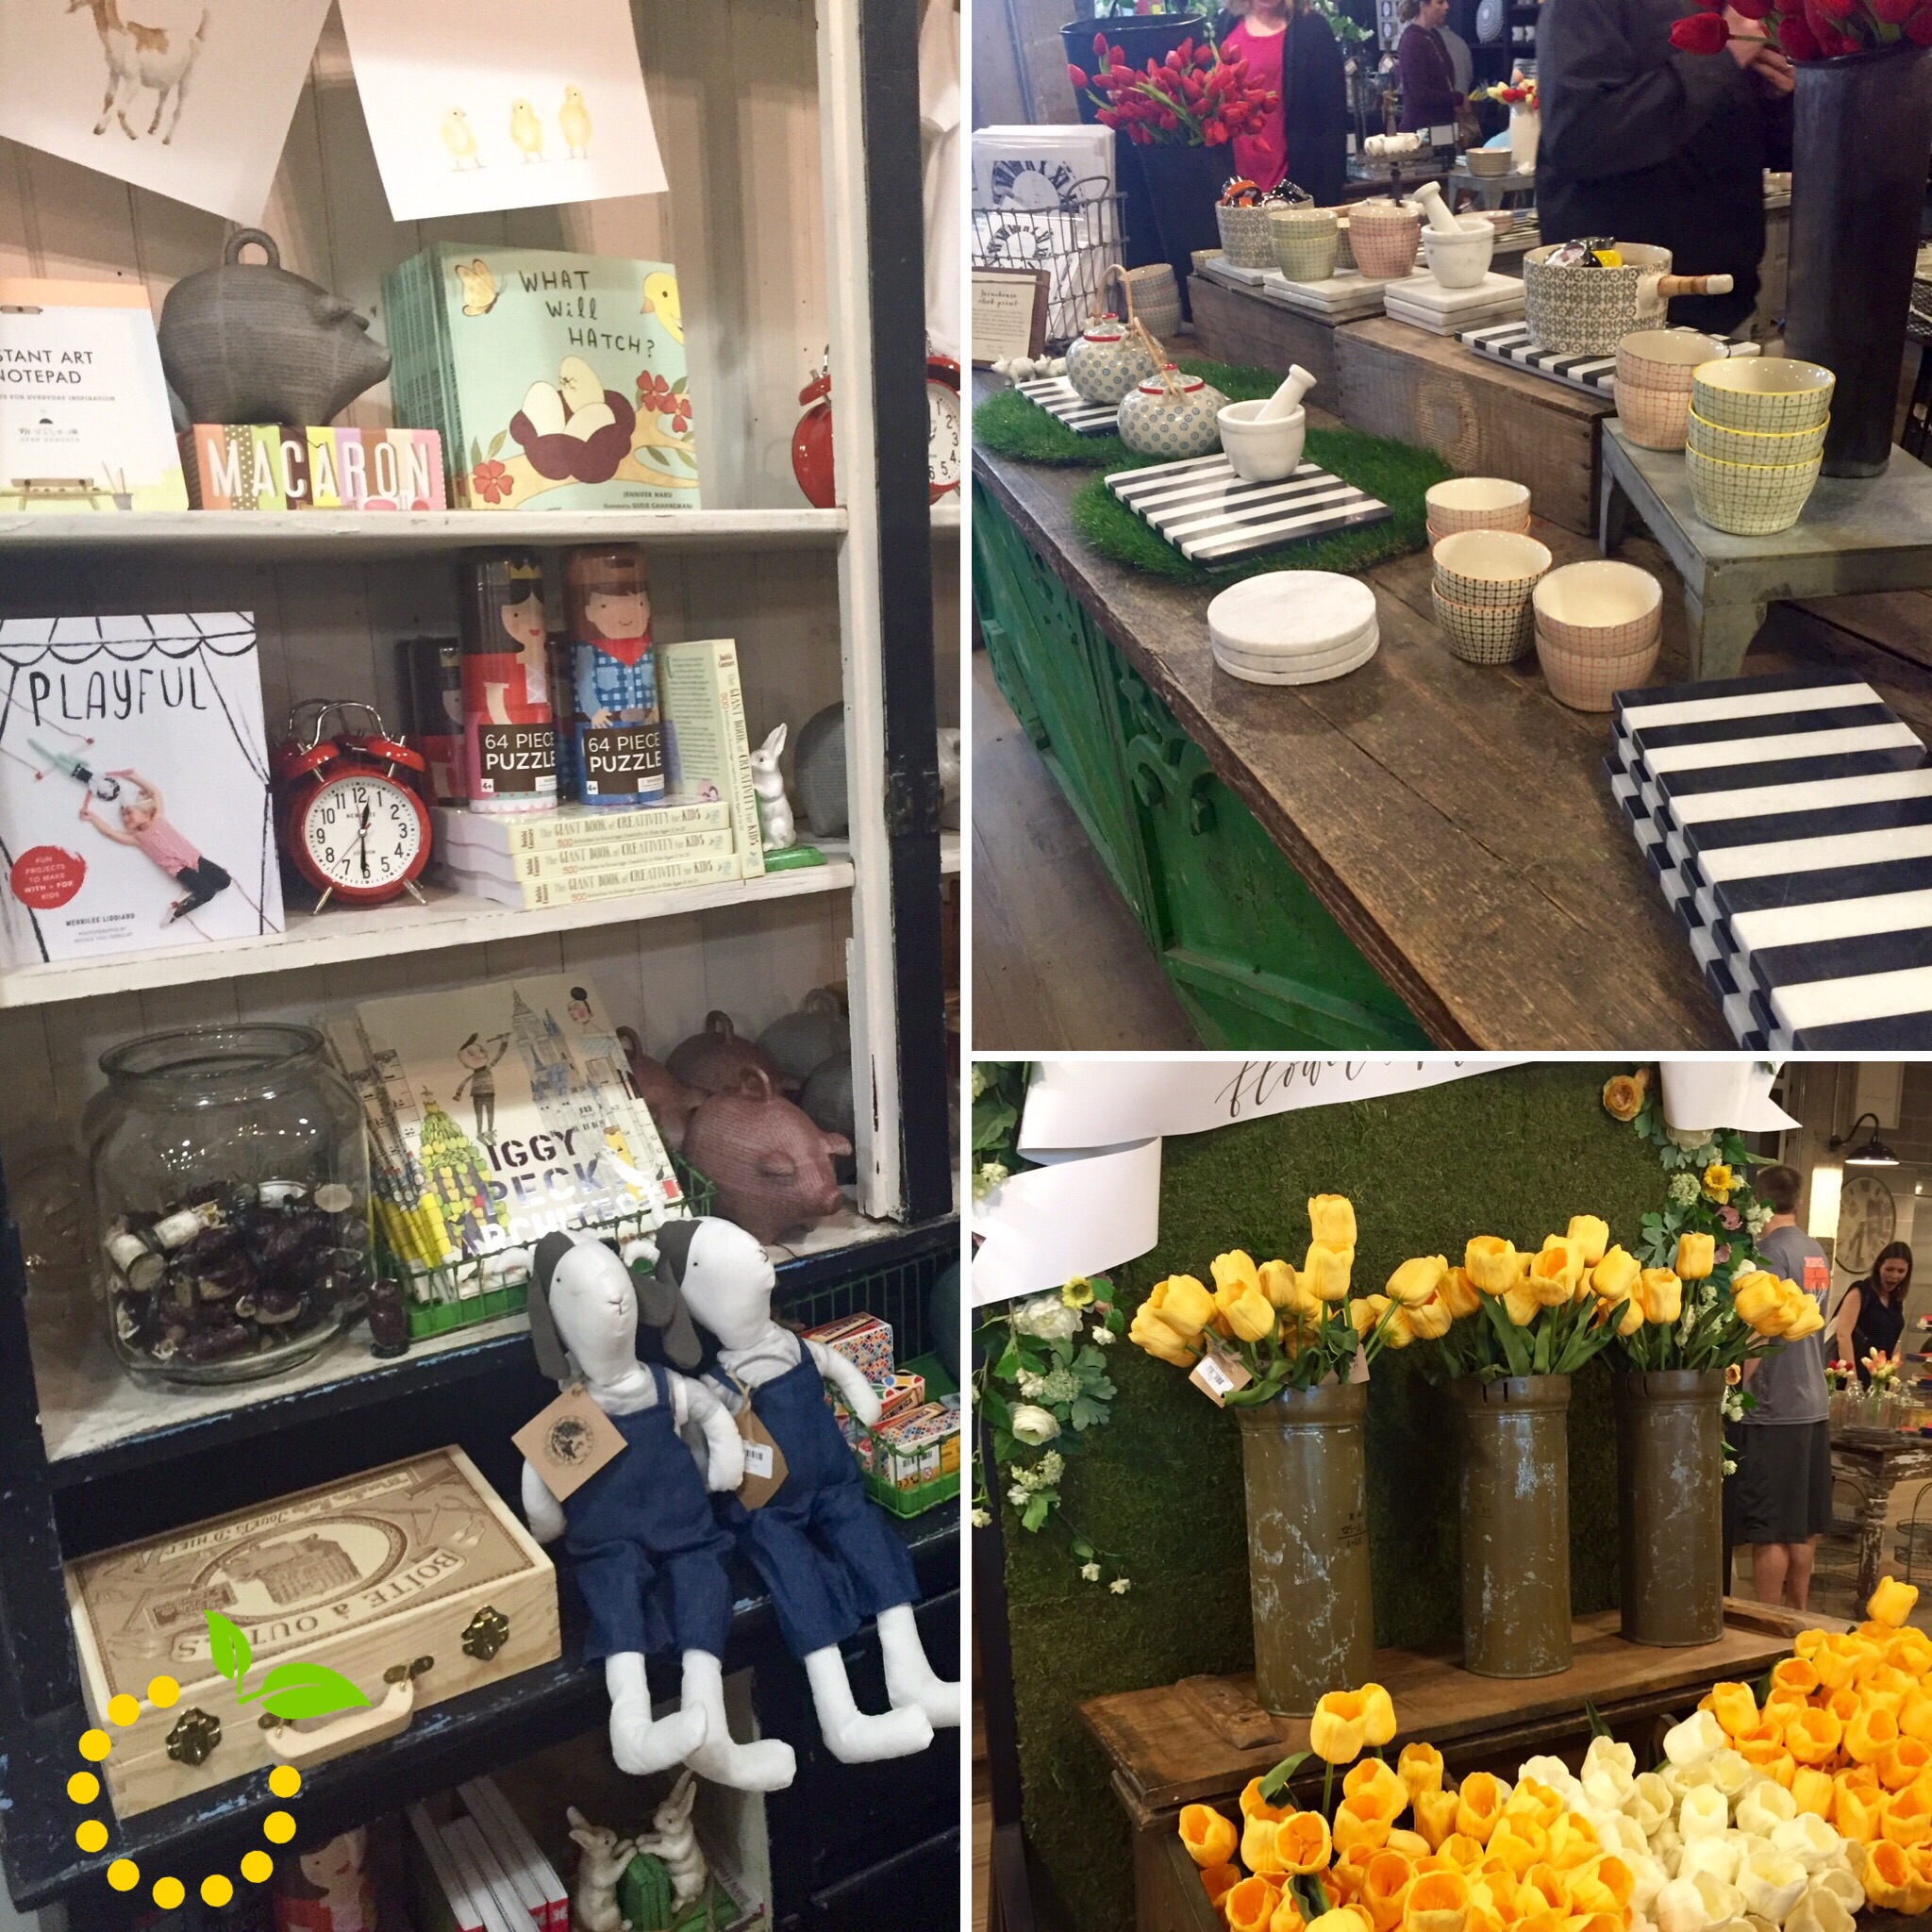
Now back to Waco and the country-chic-flea-market-finding-shiplap-loving mecca that Chip and Jo are creating there. What a blast. The market was actually a little smaller than I thought it would be, or maybe that’s just because it was crawling with well-meaning, decorating wannabes like myself. But the space was enchanting and full of fresh ideas and “Fixer Upper” staples. Many of the items rotate through seasonally, making it a unique selection of goods each time you go.

Magnolia Market sweetlemonmade.com

Weekend in Waco sweetlemonmade.com

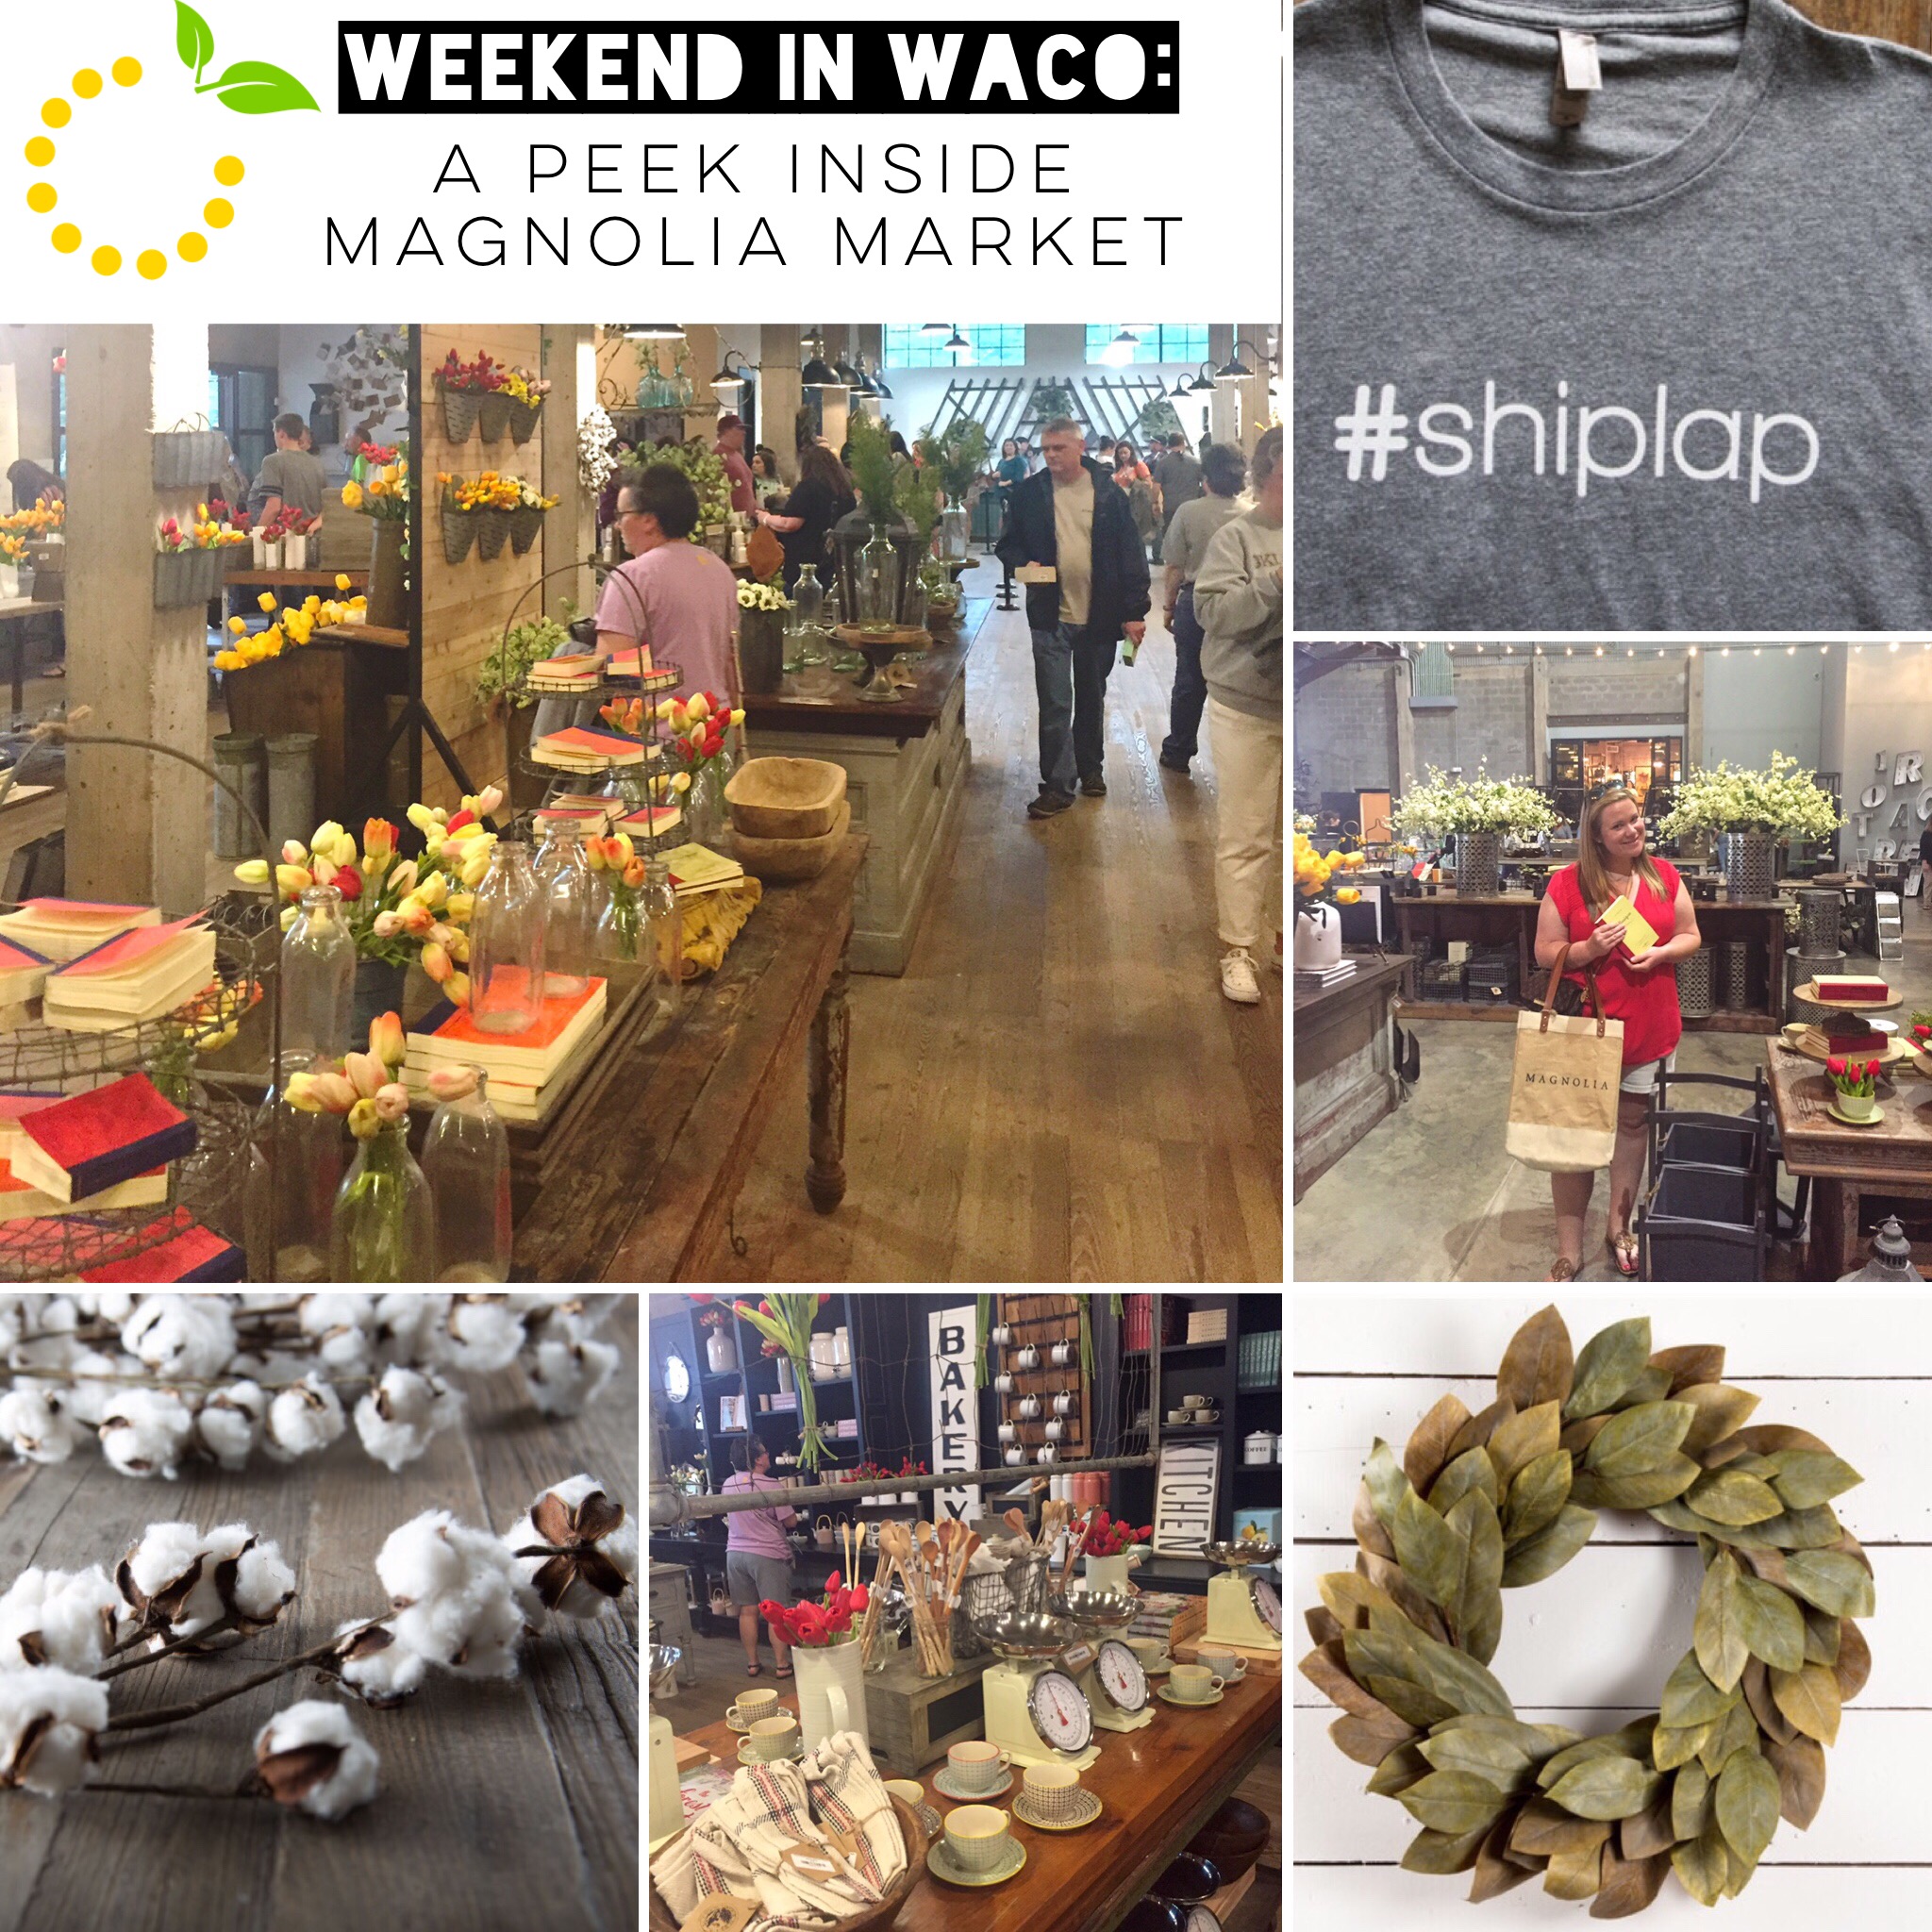
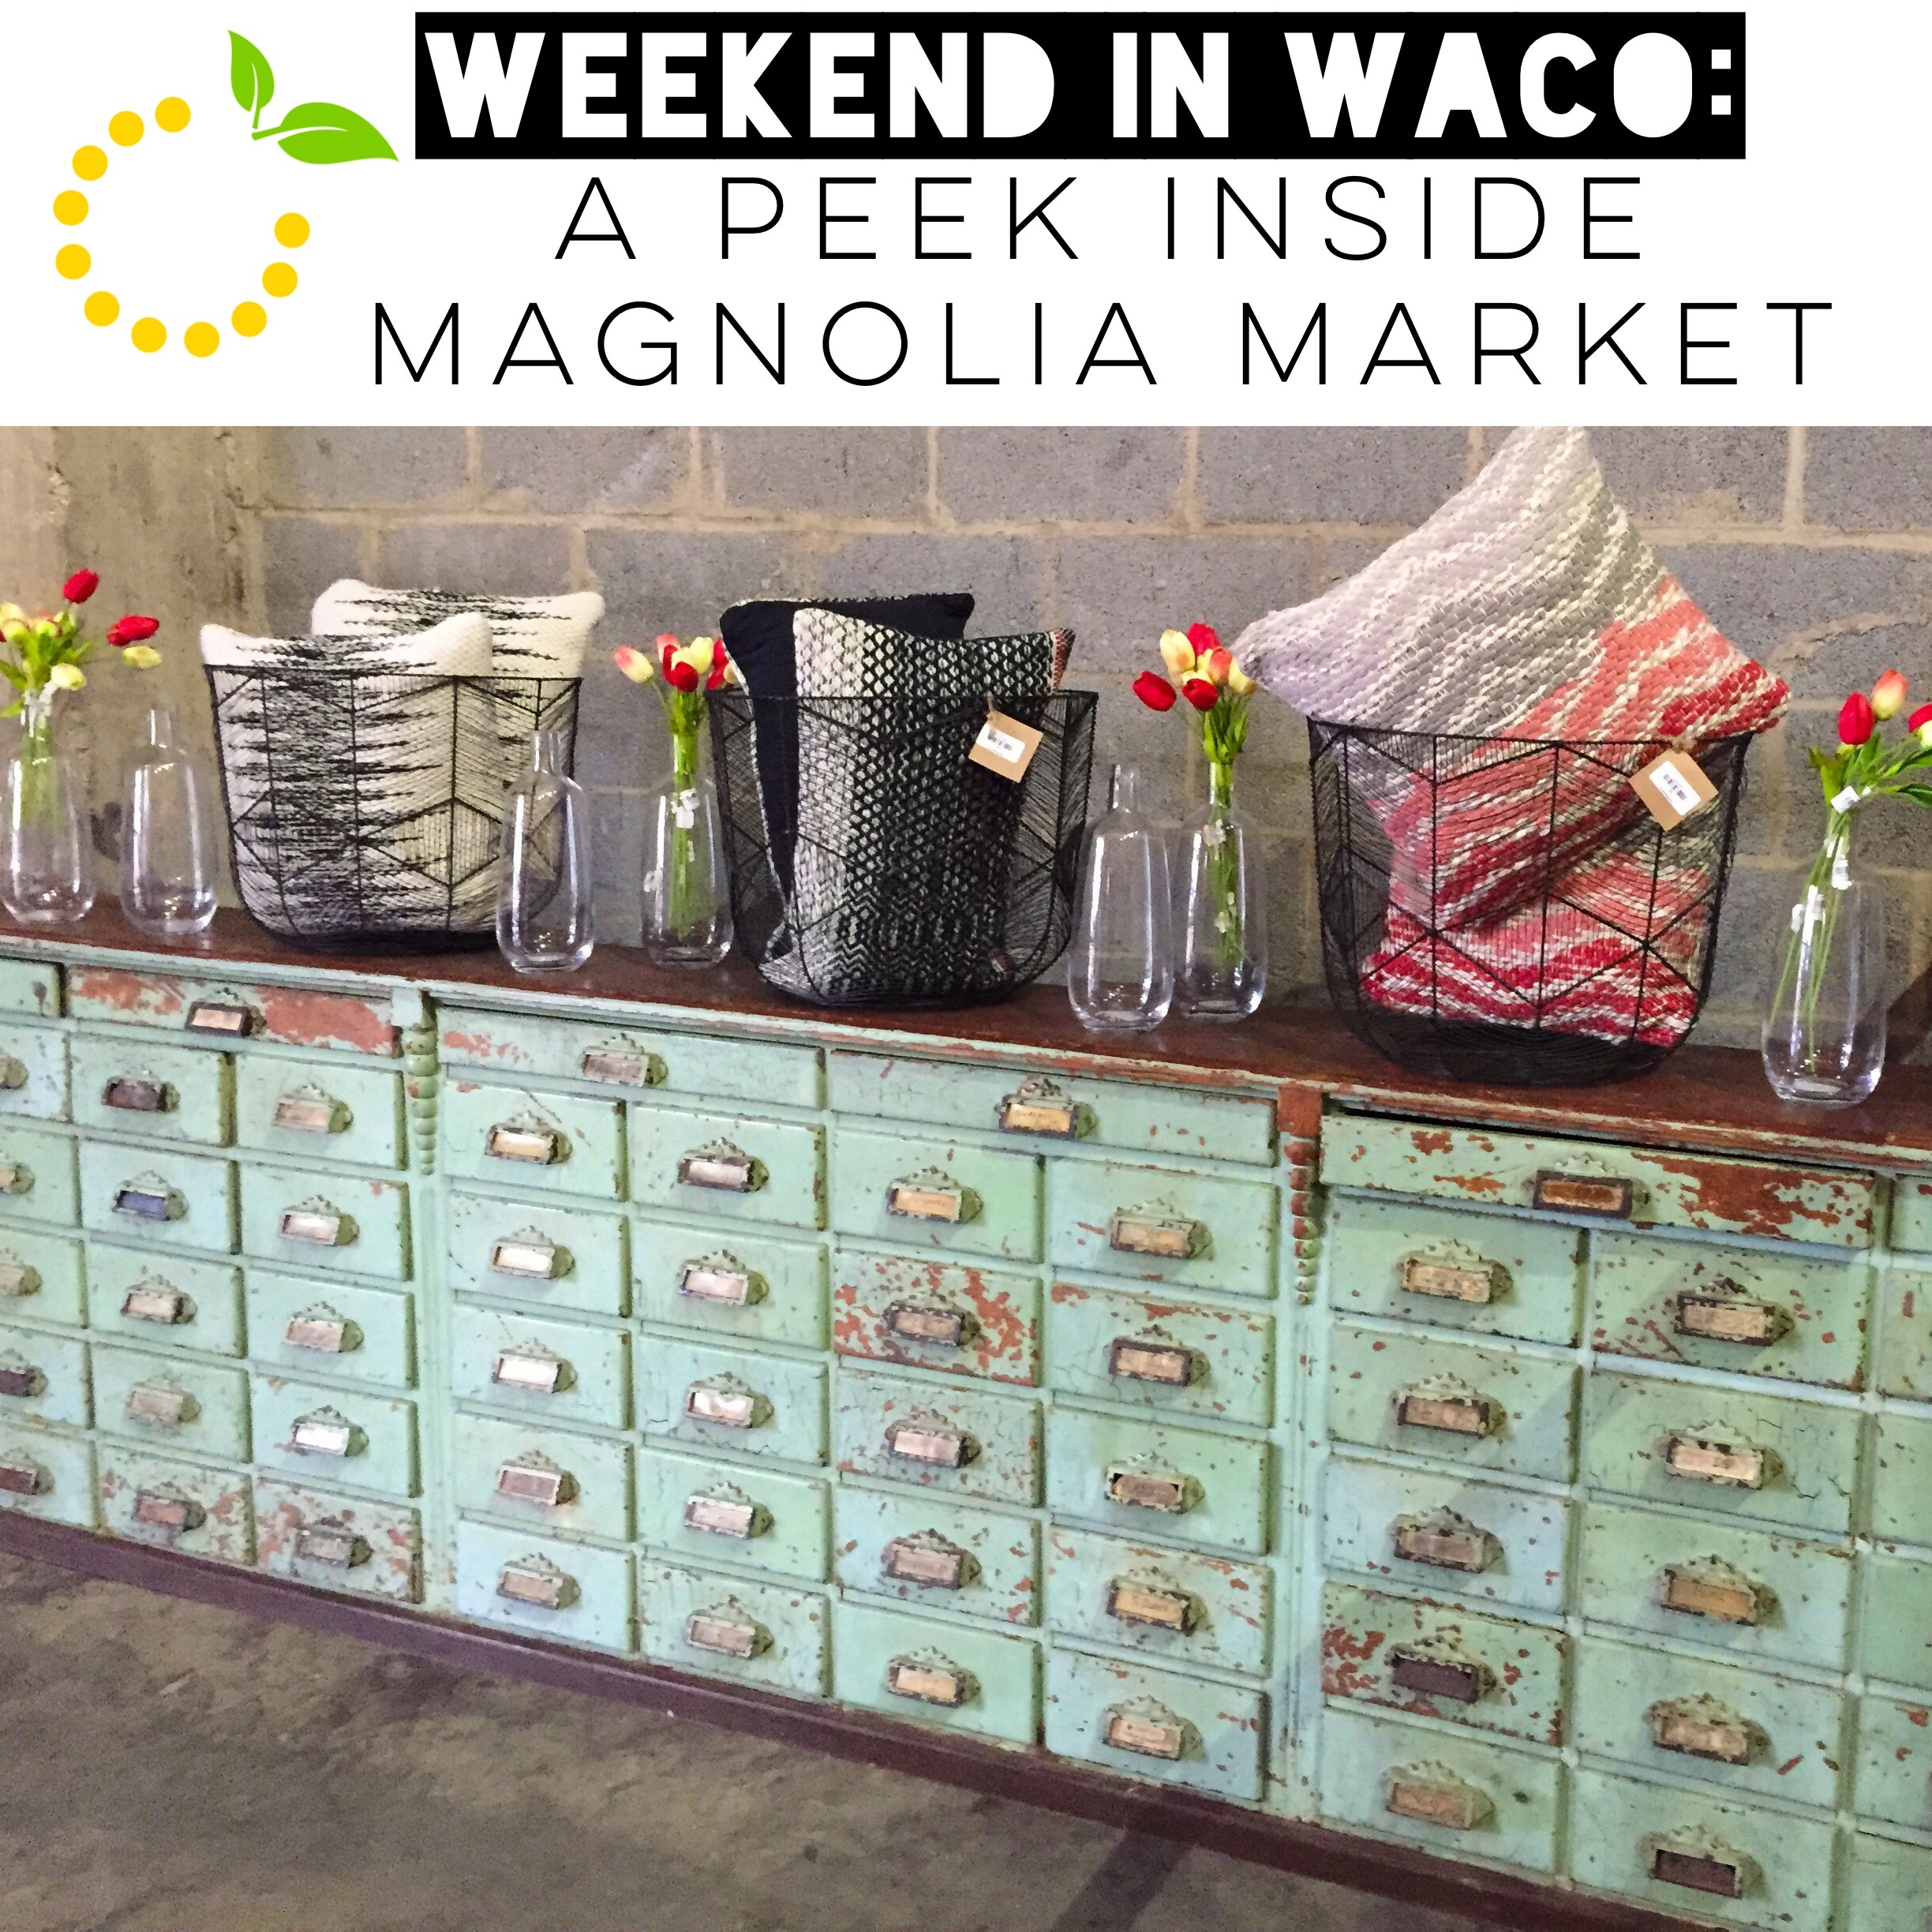
In addition to home goods, they had a few of Joanna’s favorite items for purchase as well—like her favorite perfume or candle. I only wish I had suitcase to bring it all home on the airplane with me. Given my rationed space I was forced to buy only packable items, which included a #shiplap t-shirt, tea towel, and a black Magnolia canvas tote. If I could buy whatever my heart desired I would have purchased some cool light fixtures, some dishes (if you know me, you know I have a slight addiction to bowls), some fun florals and vases. 

Joanna's Favorites sweetlemonmade.com

Magnolia is to Waco what Disney is to Anaheim. No, but seriously. The fun doesn’t just stop at Magnolia Market, next to the market are “the Silos” where they have a huge turf and lawn games, dozens of picnic tables, swings sets, food trucks, and gardens. The atmosphere is unique with a clean, urban design among the farmland backdrop. The area is very family-focused and a perfect spot to hang out and enjoy lunch. They are also working on a garden shop that is slated to open up later this year. People love this place and are flocking by the thousands to experience all things Magnolia. I have a feeling there may be a Magnolia Amusement Park in the near future, but that’s just a guess, haha.

Magnolia Market sweetlemonmade.com

People love this place. It is a perfect day trip if you’re in the area or an easy weekend getaway. But if you’re wanting to stay onsite at the Magnolia House you’re going to need to plan ahead, way ahead. That place and practically every other B&B and hotel in Waco is sold out until 2017. Can you believe it? But if you’re itching to get down there sooner, I know a nice roadside Marriott just out of town that you can stay at. And if you’re making a weekend out of it like we did you’re going to need a few more things to do while in Waco, so check out these fun spots while you’re down there…

OTHER FUN THINGS TO DO IN WACO:

  • Spice Village: A huge market full of different booths and shops from locals and other larger brands. It’s like Etsy, but in real life.
  • Dr. Pepper Museum: Yep, Dr. Pepper was created in Waco and the town couldn’t be prouder. Stop in here for a self-guided tour and pick up a Dr. Pepper float when you’re done.
  • McLane Stadium: Home of the Baylor Bears, even if you’re not into sports this place will “wow” you. Nestled right on the Brazos River, this state-of-the-art facility is a fun stop on your Waco tour, especially if it’s filled with 45,140 screaming fans!
  • Food Trucks: Xristo’s, Club Sandwich and Pokey O’s to name a few. Waco’s food truck scene is small when compared to larger cities, but it’s a niche market that is continuing to grow. Look for them around town mid-morning to mid-afternoon (even at the Magnolia Silos!) or check out the top 10 Waco food trucks.
  • Torchy’s Tacos: A classic Texas taco joint and one of my favorite. With fried chicken, shredded barbacoa beef, slow-roasted pork carnitas, beef brisket, blackened salmon, jalapeno sausage, hand-battered shrimp, seared ahi tuna and Jamaican jerk chicken on the menu you can’t go wrong. Order it “trashy” and you’ll your taco will be topped with their amazing, green chile queso. If only this was a universal term, I’d prefer most things I eat in life covered with melted queso.
  • Manny’s on the River: This is actually a pretty basic Tex/Mex restaurant, but if you sit out on the back patio the breeze and river make up for the generic food. That being said, this restaurant is basic and casual enough to accommodate kids, large groups, grandparent taste buds, and everything in between. Not to mention the chips, salsa, and queso are great!
  • Looking for more food options? Check out The Local Waco 10 Favorite Restaurants.
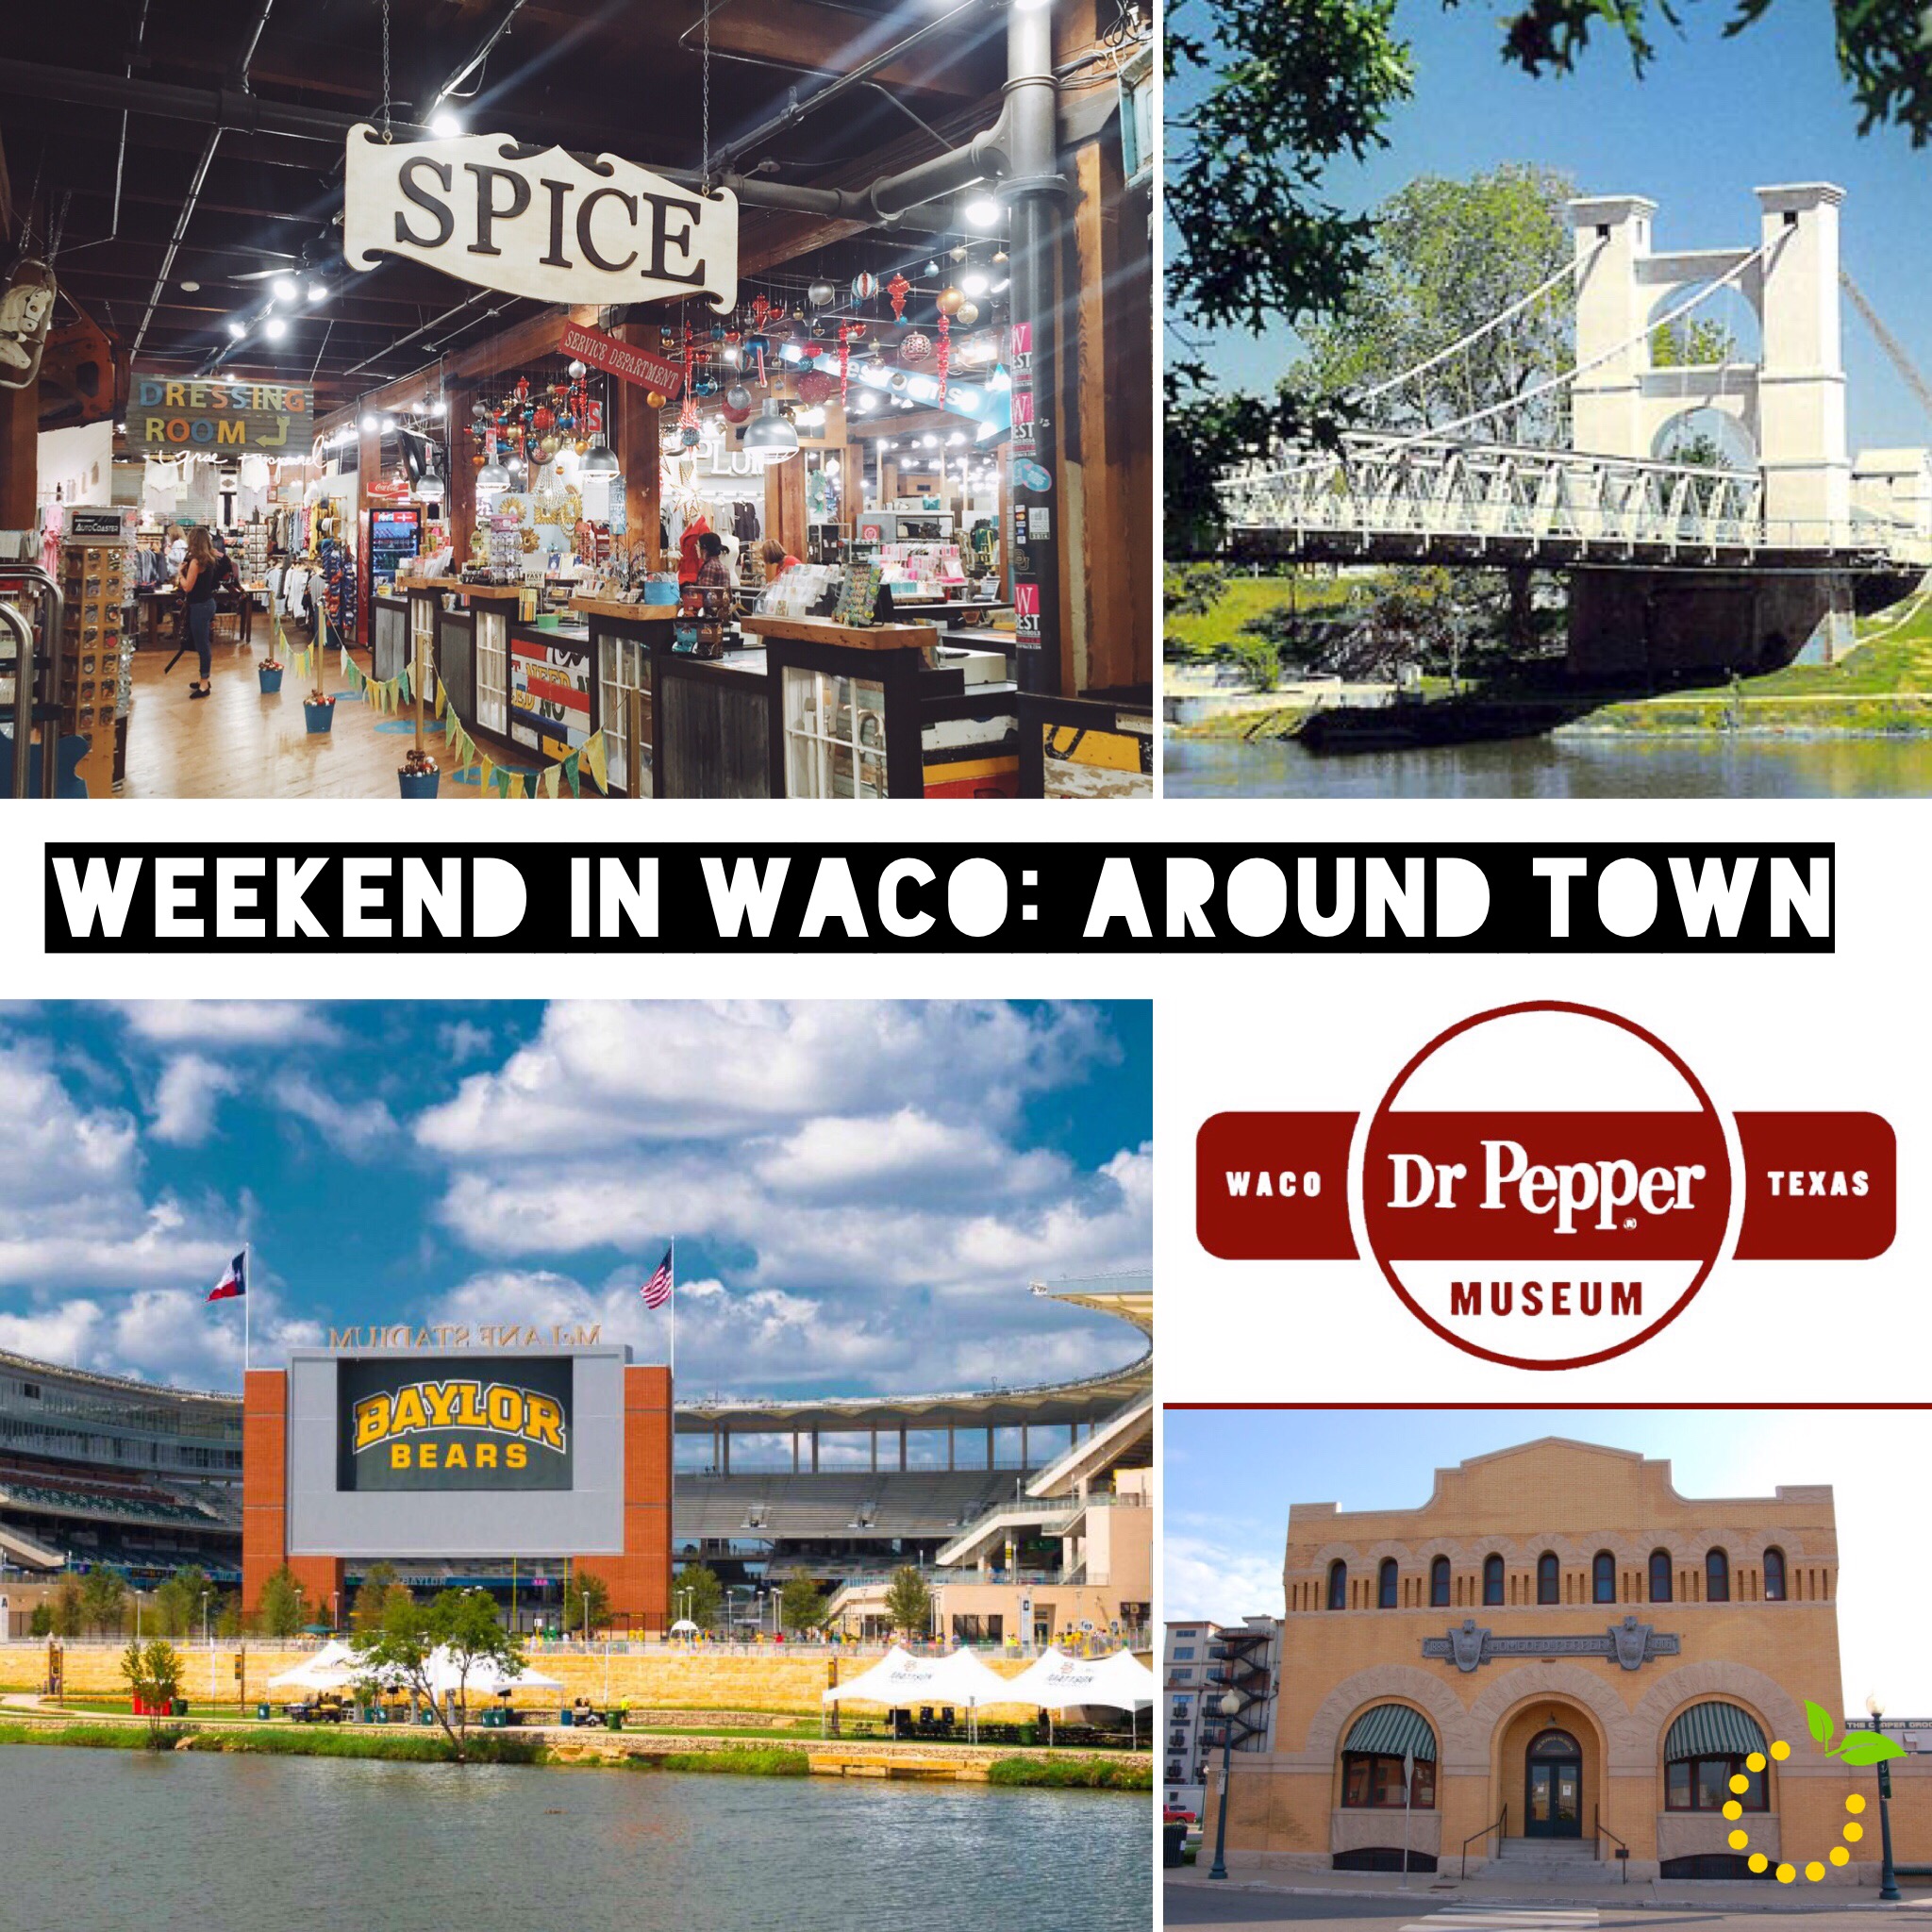
weekend around town sweetlemonmade.com

Image Sources:

Waco Suspension Bridge from Baylor website.
Manny’s from Manny’s on the River website.
McLane Stadium from CE Engineers website.
Dr Pepper Museum from the Dr. Pepper Museum website.
Spice Village from Waco Point website.

Eats

Red Velvet Sandwich Cookies

Yummy Red Velvet Cookies sweetlemonmade.com

If you love red velvet and cream cheese, you will fall in love with these delicious Red Velvet Sandwich Cookies! Can I just tell you how soft these cake cookies are? SUPER SOFT!! Cake cookies have become my new favorite type of cookie. My family, friends and coworkers who I’ve shared them with would all agree. I normally make red velvet treats in February for Valentine’s Day but, when you get a craving for red velvet there is no right or wrong time to have a red velvet treat! Am I right?! I know all you fellow red velvet lovers would agree with me!  Because what’s better than cream cheese frosting smooshed between two soft and chewy red velvet cake cookies! So, if you’ve never had a cake cookie, you’re missing out and should probably make these pronto! They are like pillows of heaven! And another plus, they are super easy to make!

Red Velvet Cookies sweetlemonmade.com

Red Velvet Sandwich Cookies with Cream Cheese Filling
Yields 10
Write a review
Print
Ingredients
  1. COOKIES
  2. 1 package Duncan Hines Red Velvet Cake Mix
  3. 2 large eggs
  4. 1/3 cup vegetable oil
  5. CREAM CHEESE FILLING
  6. 8 ounces cream cheese, room temp
  7. 5 tbsp. unsalted butter
  8. 2 - 2 1/2 cups powdered sugar
  9. 2 tsp. vanilla
For the cookies
  1. Preheat oven to 375° F. Line baking sheet with parchment paper.
  2. Combine cake mix, eggs and oil in a large bowl.
  3. Using a mini ice cream scooper, scoop out dough and roll into balls. Place on baking sheet about 2 inches apart. Tip: **It's best to bake one sheet at a time.**
  4. Bake 8-9 minutes or until edges are set. FYI--The cookies will look under baked when you pull them out. That is alright because once they cool they will be soft and chewy. **Don't over bake them. Let cookies cool for 2-3 minutes on baking sheet. Transfer to cooling rack and let them cool completely.
Cream Cheese Filling
  1. In a bowl of a stand mixer fitted with the paddle attachment beat the cream cheese and butter on medium speed until well combined and smooth, about 2-3 minutes.
  2. Mix in the vanilla extract.
  3. Gradually add in the powdered sugar until desired consistency is reached and smooth--should be thick but, not too thick.
  4. Transfer the cream cheese filing to a pastry bag fitted with a plain, round tip.
Assembling the sandwich cookies
  1. 1. Pair the cookies up by size and shape as best as possible.
  2. 2. Flip one cookie of each pair over so that the flat side is facing up.
  3. 3. Pipe frosting onto the flat sided cookie of each pair, keeping the edges clear.
  4. 4. Sandwich the cookies together so the flat sides are facing each other and press gently and evenly to help the filing reach the edges but, not spilling out.
  5. 5. To store, refrigerate in an airtight container.
Sweet Lemon Made https://sweetlemonmade.com/

Eats

Spring Flower Cake Pops

Spring Flower Cake Pop sweetlemonmade.com

I know cake pops are so-4-years-ago, but they are tastier than you remember, less complicated than you think and a fun way to celebrate your favorite person or holiday. So read on and give them a try!

Like most ideas I have, this idea for a Spring-y treat came while wandering the aisles of Target.  I’m sure you all know the feeling when you walk through those red double-doors and suddenly begin to see unreasonable potential in your creative self and/or your timetable to accomplish such creative endeavors. “Sure, I’ll buy twelve of these gold and mint shelf organizers at the Dollar Spot. This is totally the solution to my cluttered, drab pantry woes.” But then somehow those gold/mint organizers never make it to the pantry and end up cluttering some other closet.

This time the “Dollar Spot” wowed me with some fun, patterned tins (you know the ones, they have them every season just with a different pattern), I saw a few weeks ago. I had visions for some sort of Easter treat basket for my nieces. However, much like those gold and mint shelf organizers, I failed to transform these tins in a timely fashion (why was Easter so early this year???). I should know by now never to pick a time-sensitive creative project, it never works for me (as evidenced by the foam sticker hearts and yet-to-be-painted wood shamrocks in my closet).  With Easter long gone and my strong resolve not to put these in the closet for next year (clearly, I already have two projects waiting in the wings already), I thought it would be fun to turn these into a springtime treat…Easter/Spring, same thing, right? As I stared at these pastel tins, it popped into my head to make cake pop “flowers” and to fill the tins with Oreo “dirt” for a fun, blooming treat for my nieces (a peace offering, really, since I failed them on the Easter baskets).

Now I don’t know if you’ve been following the blog long enough to realize that I am not the baker of this sweet lemon group—that’s Ashley—and I have only attempted cake pops one other time in my entire life, and, I’ll be honest, that endeavor belongs on one of those “Pinterest FAIL” blogs because it was seriously the worst. The middle of the cake pops were too gooey due to an inappropriate frosting-to-cake ratio and the supposed thin, chocolate outer-coating was more like a lumpy, rock-hard slab of confection, all on a stick. I took them to my coworkers and they about lost a tooth just attempting to take a bite.

Naturally I was a little nervous to try again, especially knowing that I was going to be putting it out there for all the blogging world to see (I know, it’s only 12 of you, but still), but I was determined to get these tins outta my closet! So I called up Ash and bamboozled her into helping me with this spring cake pop project (note: one of my favorite parts about Ashley is that she is easily bamboozled by my crazy ideas—bless her).

So we gathered our supplies and went to town…

Cake Pop Supplies sweetlemonmade.com

For the cake pops we used Bakerella’s basic cake pop recipe, but snazzed it up a little by using Rainbow Chip cake mix and frosting (don’t be confused, rainbow chip is NOT the same as Funfetti. Rainbow chips are bigger, softer, and tastier. They are the unicorn of the Betty Crocker lineup. Try it, you’ll see).  

Cake Pop Assembly sweetlemonmade.com

Tip: While waiting for cake to cool cut it into slices so the heat escapes faster.

 Cake Pop Potting sweetlemonmade.com

While the cake balls were chilling we prepped our pots with styrofoam (those pops have to have something to hold them up). We found that the small styrofoam balls worked better than a square, but honestly, you can use whatever you have lying around. We just chopped off some sides until it nestled in nicely. You want it to be snug so the foam and the pops don’t slide around. You also want to make sure that your foam is below the rim of the pot about an inch to allow space for your Oreo “dirt.” Once you shaped and chopped to size add the crushed Oreos to the top of the foam. 

Tip: Pre-punch your holes where you will be putting your sticks into the styrofoam. Trust me, you will not want to forget this step! It is much harder to do when your cake pop is on the stick (you might end up losing a few cake pops).

Cake Pop Dipping sweetlemonmade.com

This is where you gently tap and rotate the cake ball so that the candy coating lays (somewhat) flat and smooth on the cake ball. If your candy coating starts to cool down, it gets thicker and heavier, making it harder to coat the cake ball. Also, if your cake balls are no longer cold and become room temperature they are more prone to crack like this when dipping. Tip: The consistency of the candy coating should be thin enough to coat the cake pop but, not too thin that the cake pop shows through the candy coating. Use an extra cake pop to test out the consistency of the candy coating and if it needs to be thinned out add a tiny amount (1/8 of a teaspoon at a time) of vegetable oil until you reach a good consistency. Also, make sure to get your sprinkles on before the candy coating hardens.

Cracked Cake Pop sweetlemonmade.com

Spring Flower Cake Pops sweetlemonmade.com

Basic Cake Pop Recipe
Write a review
Print
Ingredients
  1. 18.25-oz box cake mix
  2. 9-by-13-in cake pan
  3. Two baking sheets
  4. Wax paper
  5. Large mixing bowl
  6. 16-oz container ready-made frosting
  7. Large metal spoon
  8. Plastic wrap
  9. 48 oz candy coating
  10. Deep, microwave-safe plastic bowl
  11. 48 lollipop sticks
  12. Styrofoam block
Instructions
  1. Bake the cake as directed on the box, using the 9-by-13-in cake pan. Let cool completely.
  2. Once the cake has cooled, line baking sheets with wax paper.
  3. Crumble the cooled cake into the large bowl. You should not see any big pieces of cake.
  4. Add up to three-quarters of the container of frosting to the bowl. (You will not need the remaining frosting. Save it in the refrigerator for a later use.) Mix it into the crumbled cake, using the back of the large metal spoon, until thoroughly combined. If you use the entire container, the cake balls will be too moist. The mixture should be moist enough to roll into 1 1/2-in balls and still hold a round shape. After rolling the cake balls by hand, place them on the prepared baking sheets and let them rest for about 20 minutes before chilling.
  5. Cover the baking sheets with plastic wrap and chill for several hours in the refrigerator, or place them in the freezer for about 15 minutes. You want the balls to be firm but not frozen.
  6. Place the candy coating in the deep microwave-safe bowl. These bowls make it easier to cover the cake balls completely with candy coating while holding the bowl and without burning your fingers. The coating should be about 3 inches deep for easier dipping. Work with about 16 oz of coating at a time.
  7. Melt the candy coating. Microwave for 30 seconds at a time, stirring between each interval. (You can also use a double boiler.) Make sure you do not overheat the coating.
  8. Now you’re ready to dip. Take a few cake balls out of the refrigerator or freezer to work with, keeping the rest chilled. If they’re in the freezer, transfer the rest of the balls to the refrigerator at this point so they stay firm but do not freeze.
  9. One at a time, dip about 1/2 inch of the tip of a lollipop stick into the melted candy coating, and then insert the lollipop stick straight into a cake ball, pushing it no more than halfway through.
  10. Holding the lollipop stick with cake ball attached, dip the entire cake ball into the melted candy coating until it is completely covered, and remove it in one motion. Make sure the coating meets at the base of the lollipop stick. This helps secure the cake ball to the stick when the coating sets. The object is to completely cover the cake ball and remove it without submerging it in the coating more than once. If you do resubmerge the cake pop, the weight of the candy coating can pull on the cake ball and cause it to get stuck in the coating. The thinner the consistency of your coating, the easier it will be to coat the cake pops. (If you find that your coating is too thick, add some vegetable oil to help thin it and make the coating more fluid.)
  11. Remove the cake pop from the candy coating, some excess coating may start to drip. Hold the cake pop in one hand and use the other to gently tap the first wrist. Rotate the lollipop stick if necessary to allow the excess coating to fall off evenly, so one side doesn’t get heavier than the other. If you didn’t completely dunk the cake pop, this method of tapping and rotating generally takes care of that. The coating will slowly slide down the surface of the cake ball until it reaches the lollipop stick. If too much coating surrounds the base of the lollipop stick, you can wipe the excess off with your finger. Simply place your finger on the stick right under the cake ball and rotate the pop, allowing any excess coating to fall off and back into the bowl. When most of the excess coating has fallen off and it is no longer dripping, stick the cake pop into the Styrofoam block.
  12. Repeat with the remaining cake balls and let the pops dry completely in the Styrofoam block.
Sweet Lemon Made https://sweetlemonmade.com/

Celebrate

Girls’ Night Oscar Party

Party Oscars sweetlemonmade.com

Oscar party ballots and beverages sweetlemonmade.com

“And the Oscar goes to…”

It’s almost here. The biggest night in Hollywood. The red carpet is rolling out this Sunday for the 88th annual Academy Awards. Whether you’re in it for the cinematic appeal or just want to know “who wore it best”, the 2016 Oscars promise to leave no one unfulfilled.  I haven’t actually seen any of the nominated films for “Best Picture”, I never do, but that doesn’t stop me from getting together with my sisters to watch Hollywood’s favorite night of glitz and glam. We bring a table full of treats, make our predictions and settle in for a girls night full of Diet Coke and fun.

Turn your Oscar’s party up a notch this year with this rich, buttery caramel corn, some snazzy bottles of diet coke, and an Oscar’s ballot to make all your predictions. And if you really want to get wild, try a new hot, red lipstick to jazz up your hoodie and yoga pants. No ball gown required for this viewing party.

Quick and Easy Ooey Gooey Caramel Corn
Write a review
Print
Ingredients
  1. 2 bags microwave popcorn (I prefer 94% fat free...just to make myself feel a little better.)
  2. 1/2 cup of butter
  3. 1 cup brown sugar
  4. 1/2 cup Karo syrup
  5. 1/4 tsp baking soda
Instructions
  1. Pop microwave popcorn according to package directions.
  2. Place cooked popcorn in large mixing bowl and shake gently so all the kernels fall to the bottom.
  3. Gently scoop popcorn into another large mixing bowl, leaving any unpopped pieces behind.
  4. Next, mix butter, brown sugar, and Karo syrup in saucepan.
  5. Bring to a boil. Let boil for 1 minute. Remove from heat and stir in baking soda.
  6. Pour over popcorn and stir well.
Sweet Lemon Made https://sweetlemonmade.com/