Browsing Tag

pumpkin

Eats

Double Layer Pumpkin Pie

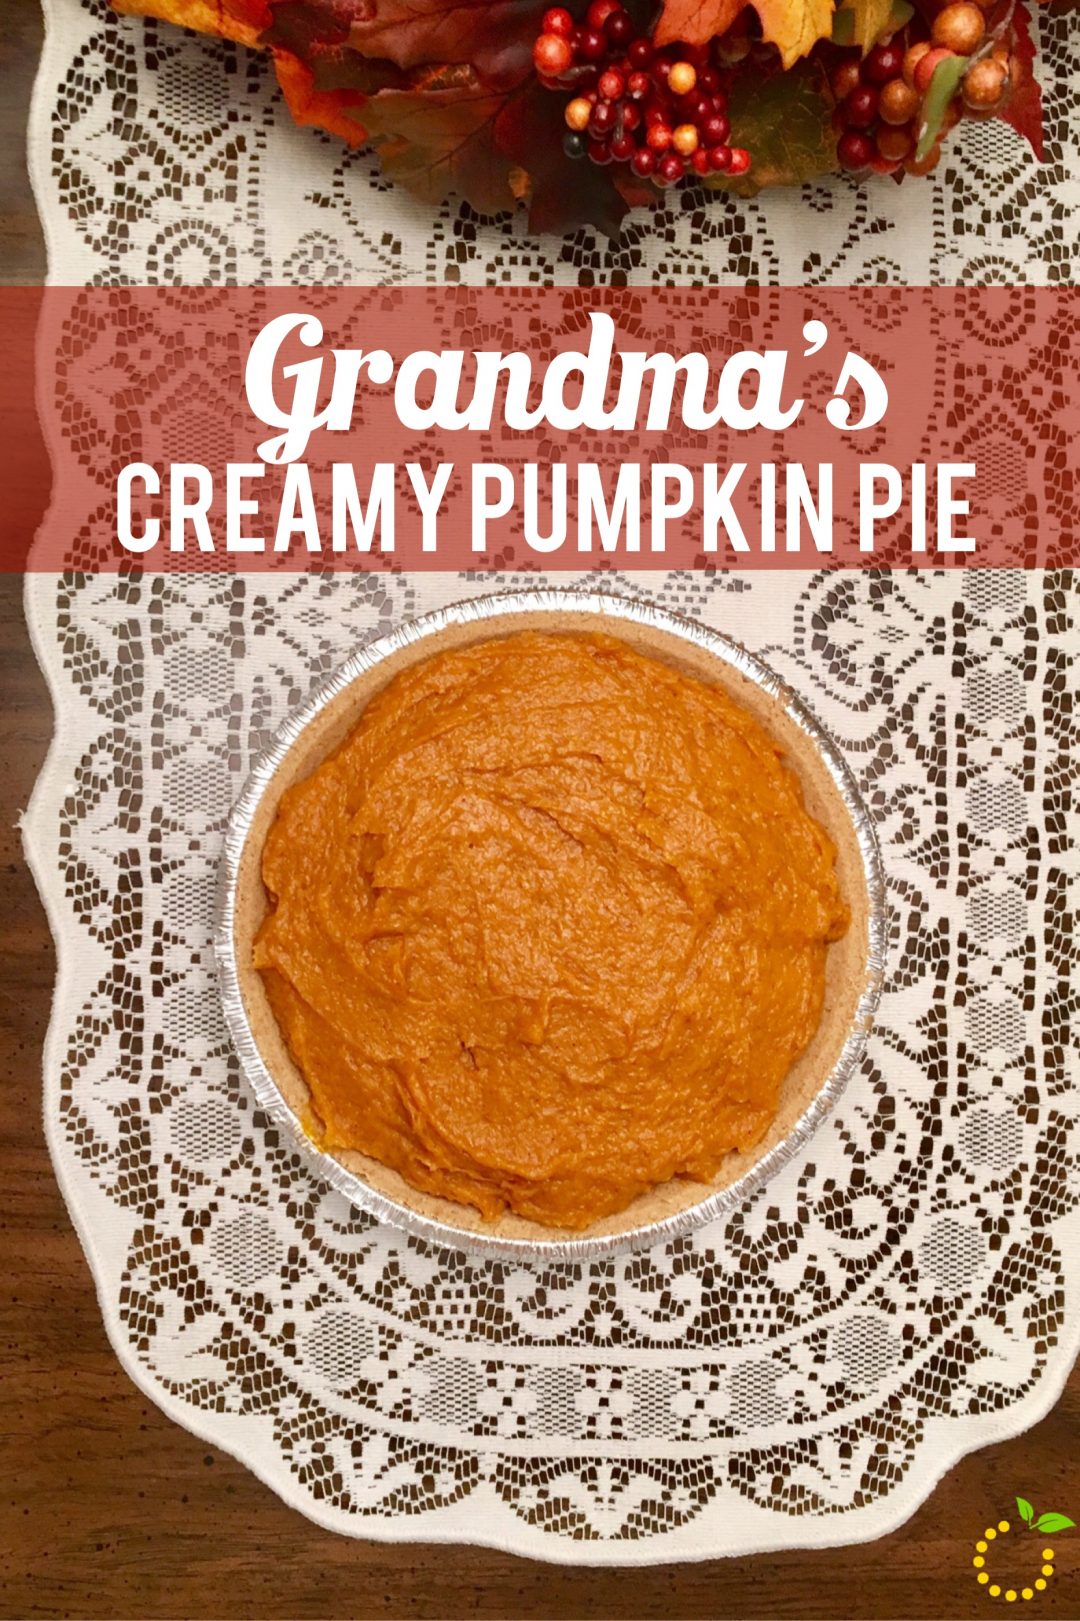
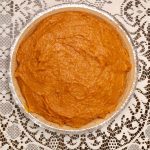
Every Thanksgiving I look forward to getting together with my family and enjoying delicious food, just like everyone else. But the one thing I look forward to the most is my grandma’s creamy pumpkin pie. She’s been making this pie for 20 years and it’s my absolute favorite. It’s lighter than the typical pumpkin pie, but it’s very rich and filling. The best part, it’s super easy to make! This pumpkin pie only takes 15 minutes to make and doesn’t involve baking. You just stick it right in the refrigerator to set. This is my kind of recipe!

I asked my grandma if there was a special story behind the recipe I could share, but she just happened to find it in a magazine one day back in 1996. Either way, it’s delicious and I wanted to share it with all of you. Enjoy!

image-1ingredients

img_9380

img_9381

img_9382

Double Layer Pumpkin Pie
Write a review
Print
Ingredients
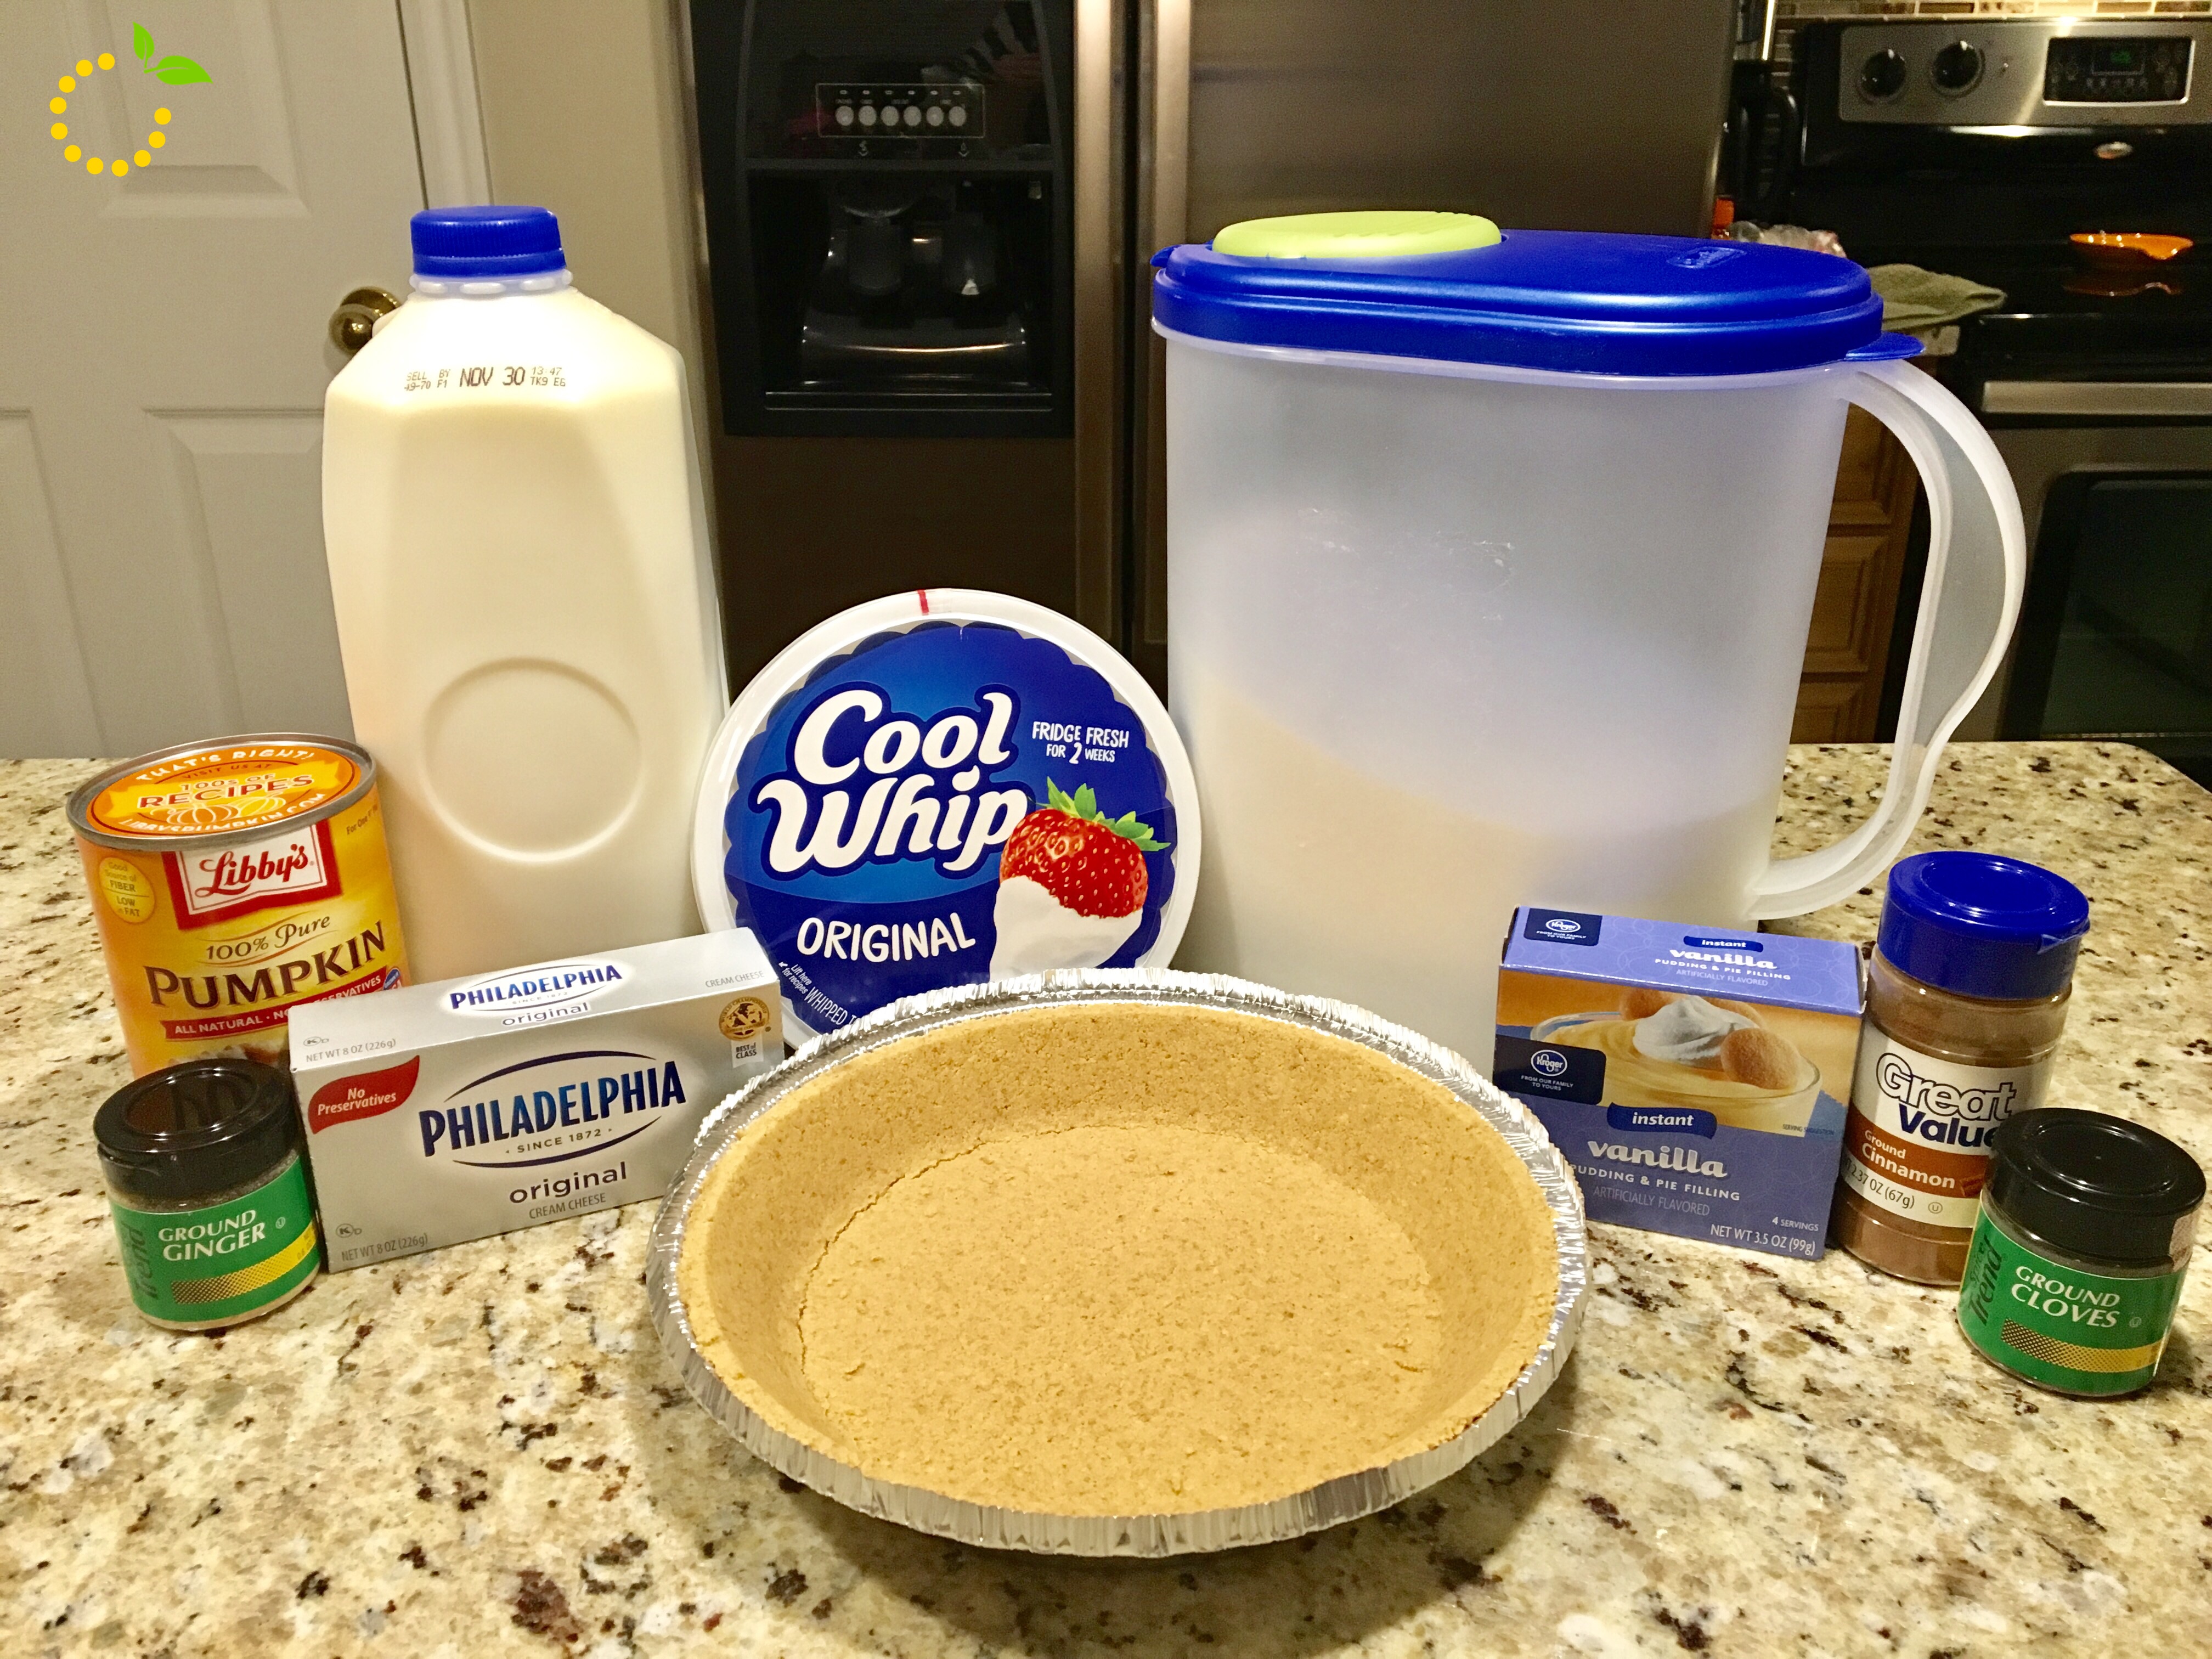
  1. 4 ounces cream cheese, softened
  2. 1 tablespoon milk
  3. 1 tablespoon sugar
  4. 1 1/2 cups thawed cool whip
  5. 1 graham cracker pie crust
  6. 1 cup cold milk
  7. 1 can (16 ounces) pumpkin
  8. 2 packages (4-serving size) vanilla flavor instant pudding and pie filling
  9. 1 teaspoon ground cinnamon
  10. 1/2 teaspoon ground ginger
  11. 1/4 teaspoon ground cloves
Instructions
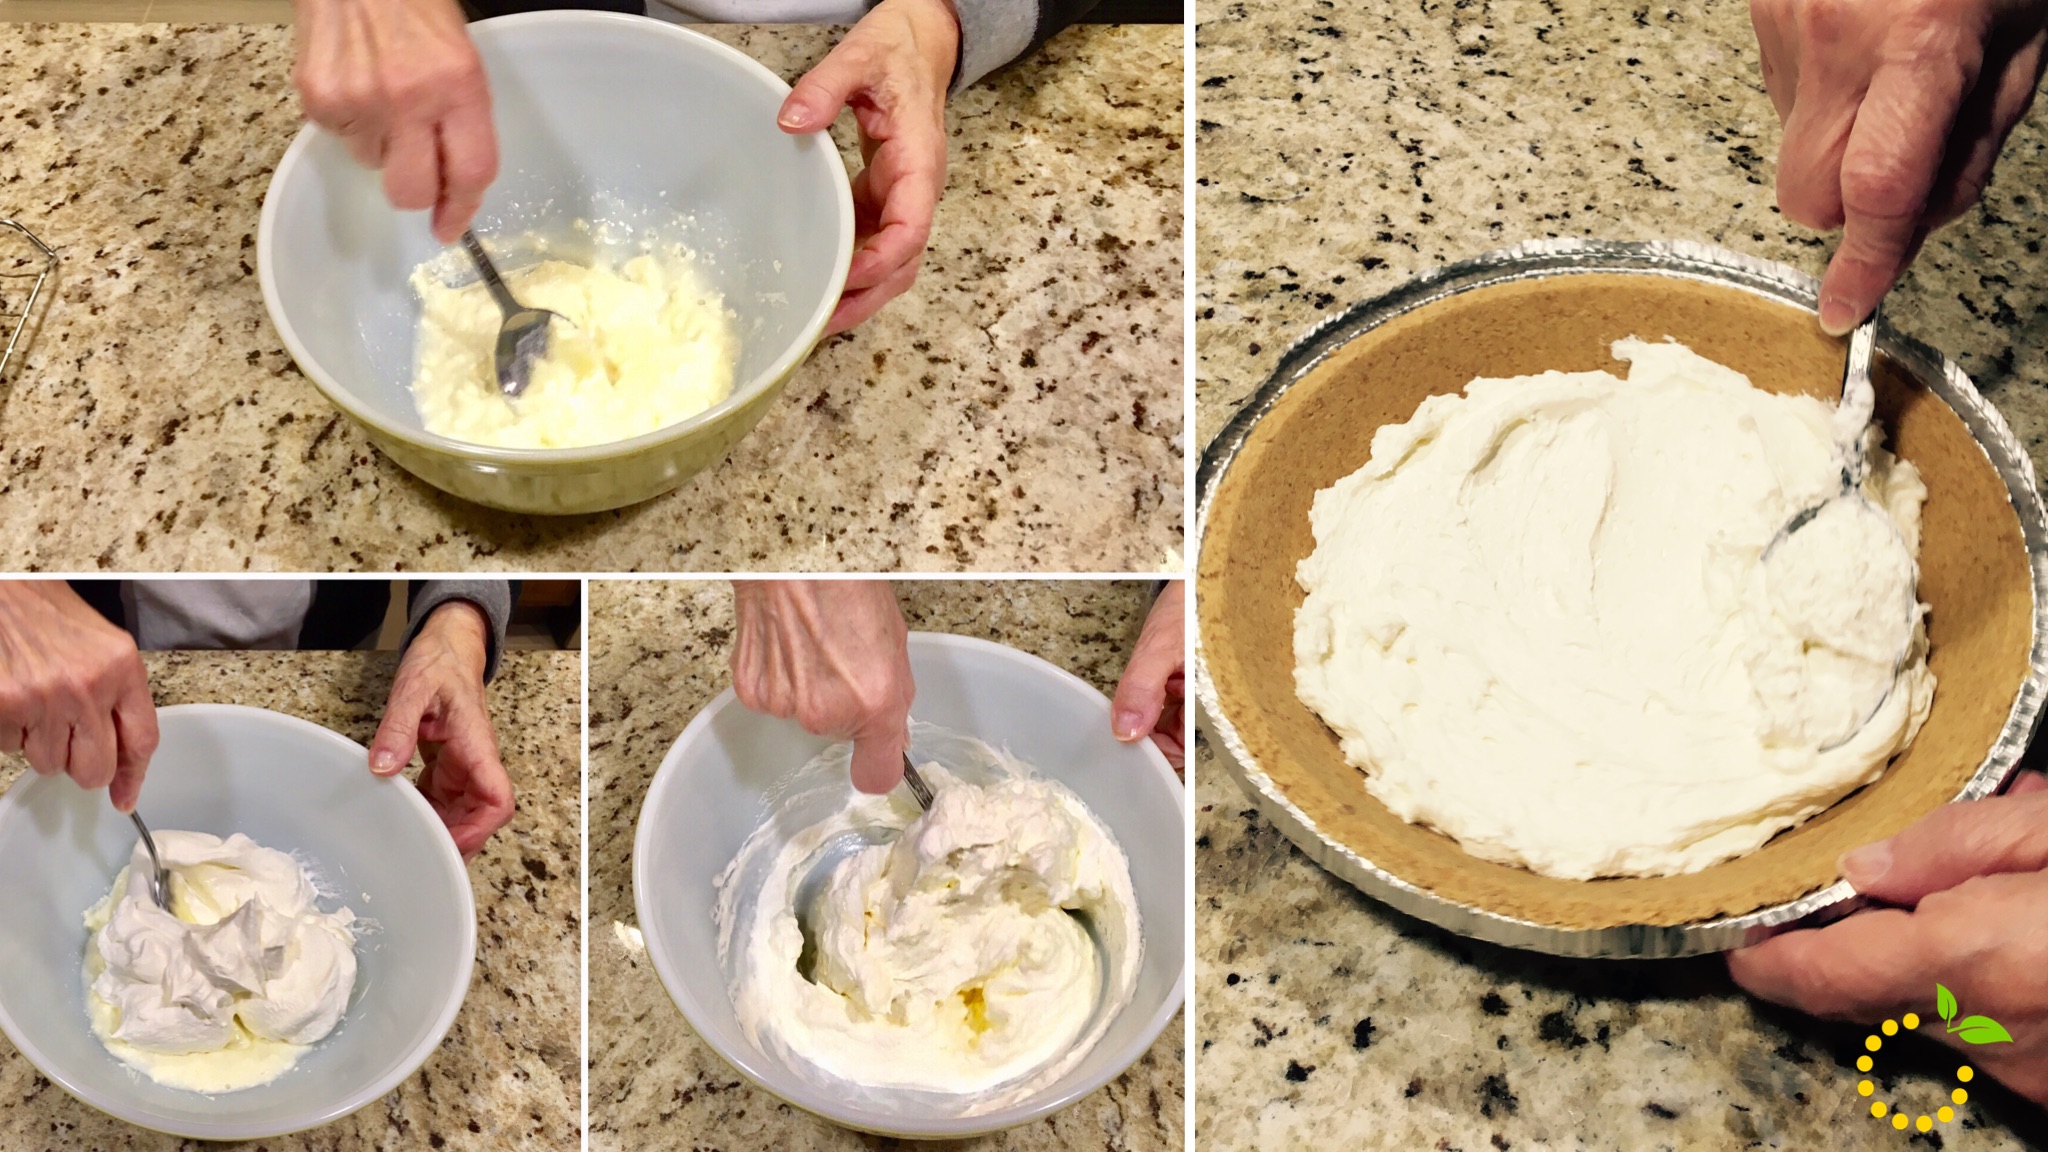
  1. Soften cream cheese in the microwave for 15 seconds
  2. Mix cream cheese, 1 tablespoon milk nad sugar in large bowl with wire whisk until smooth.
  3. Gently stir in whipped topping.
  4. Spread on bottom of crust.
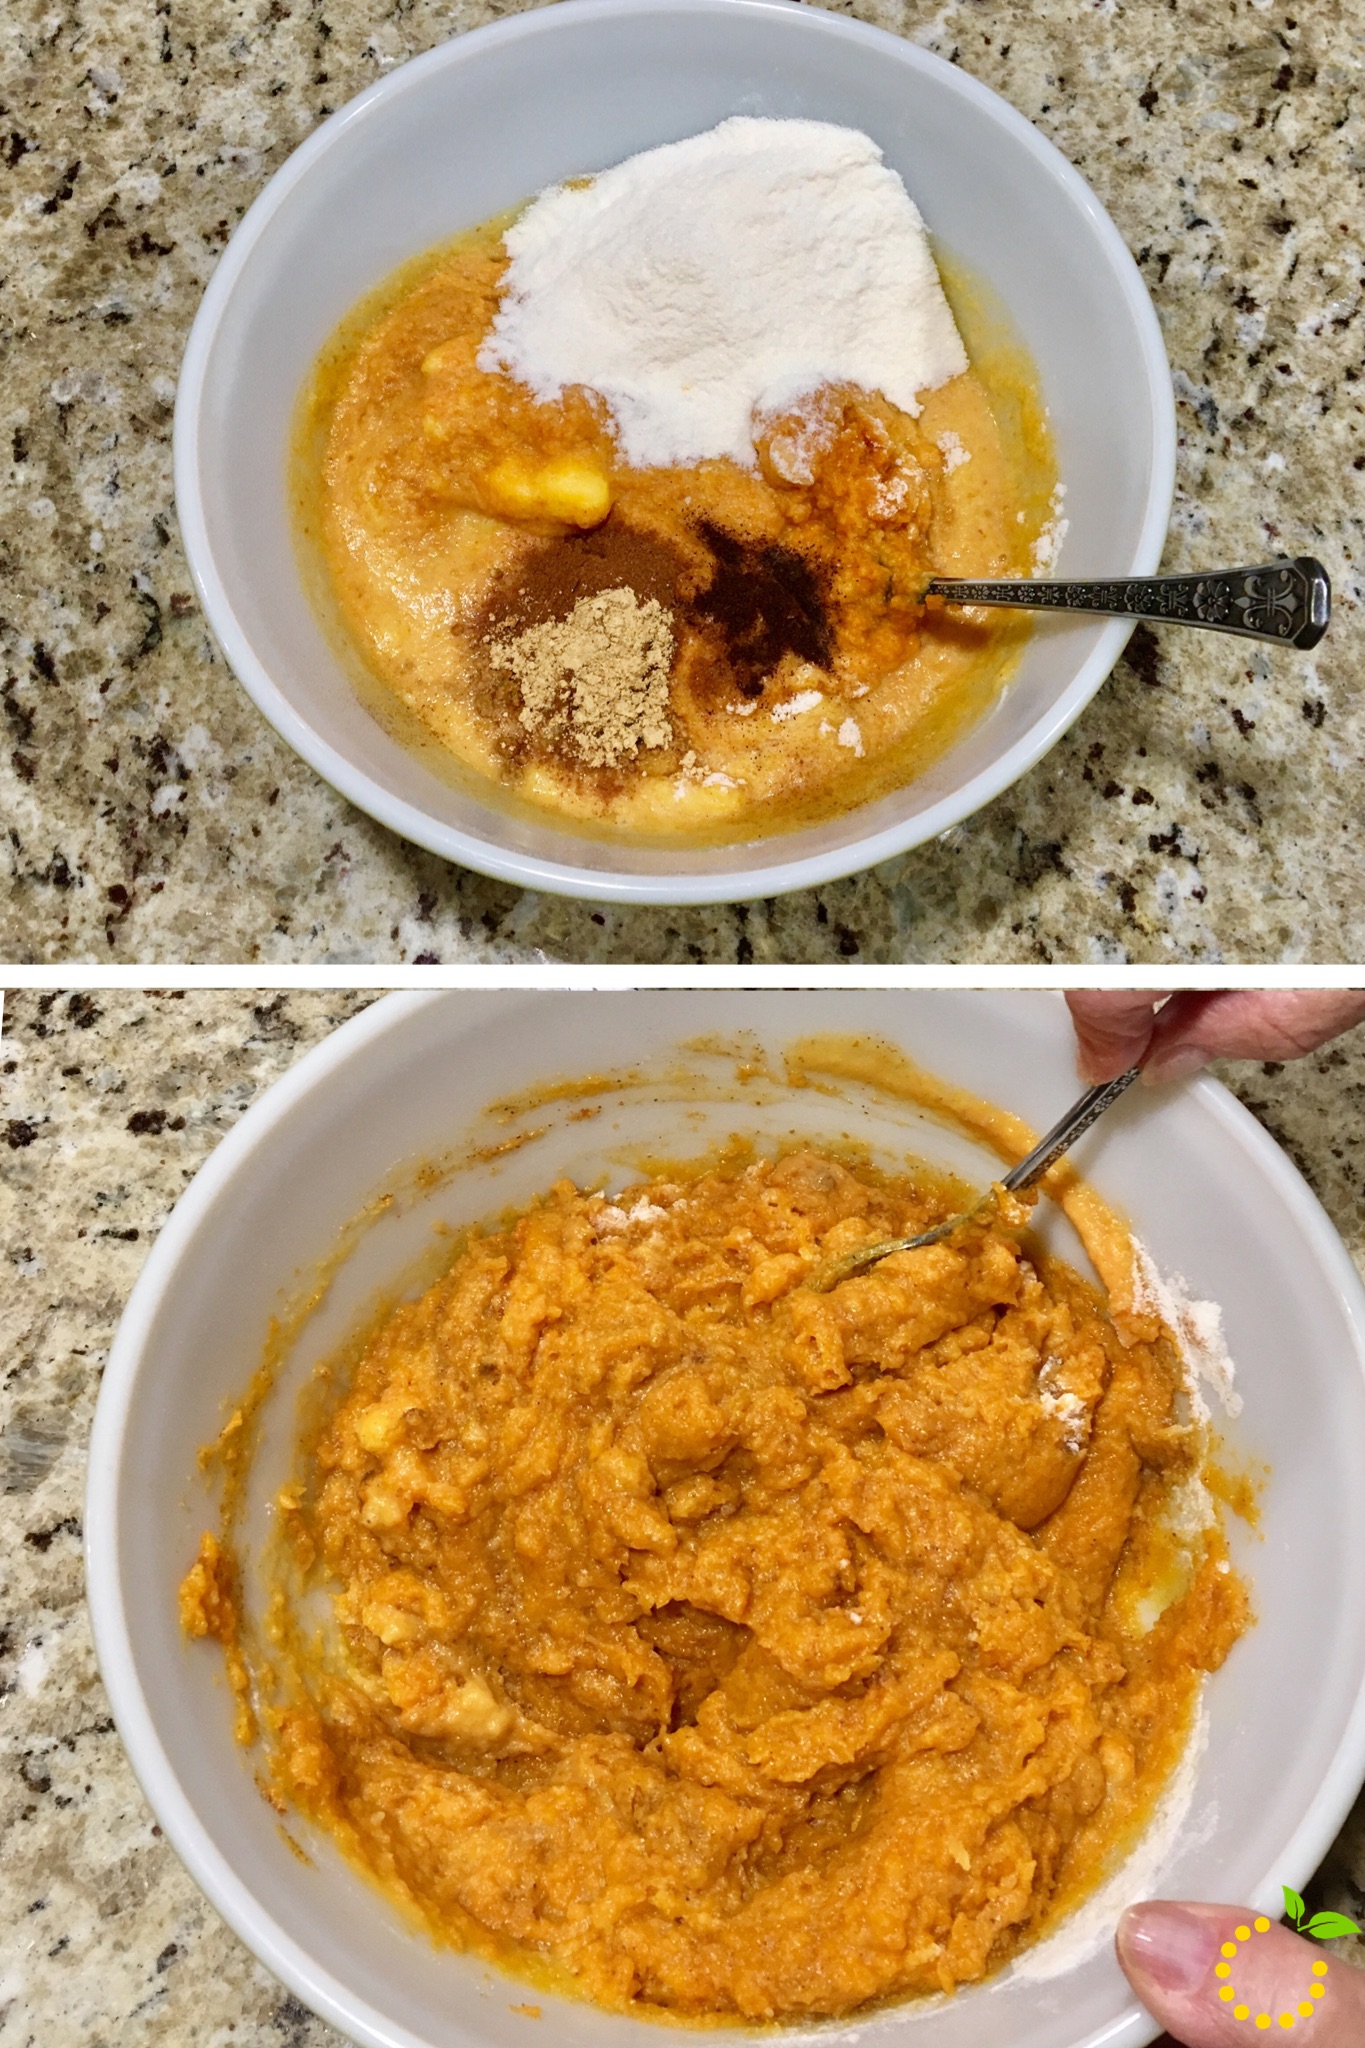
  5. Pour 1 cup cold milk into bowl.
  6. Add pumpkin, pudding mixes and spices. Beat with wire whisk until well mixed. (mixture will be thick)
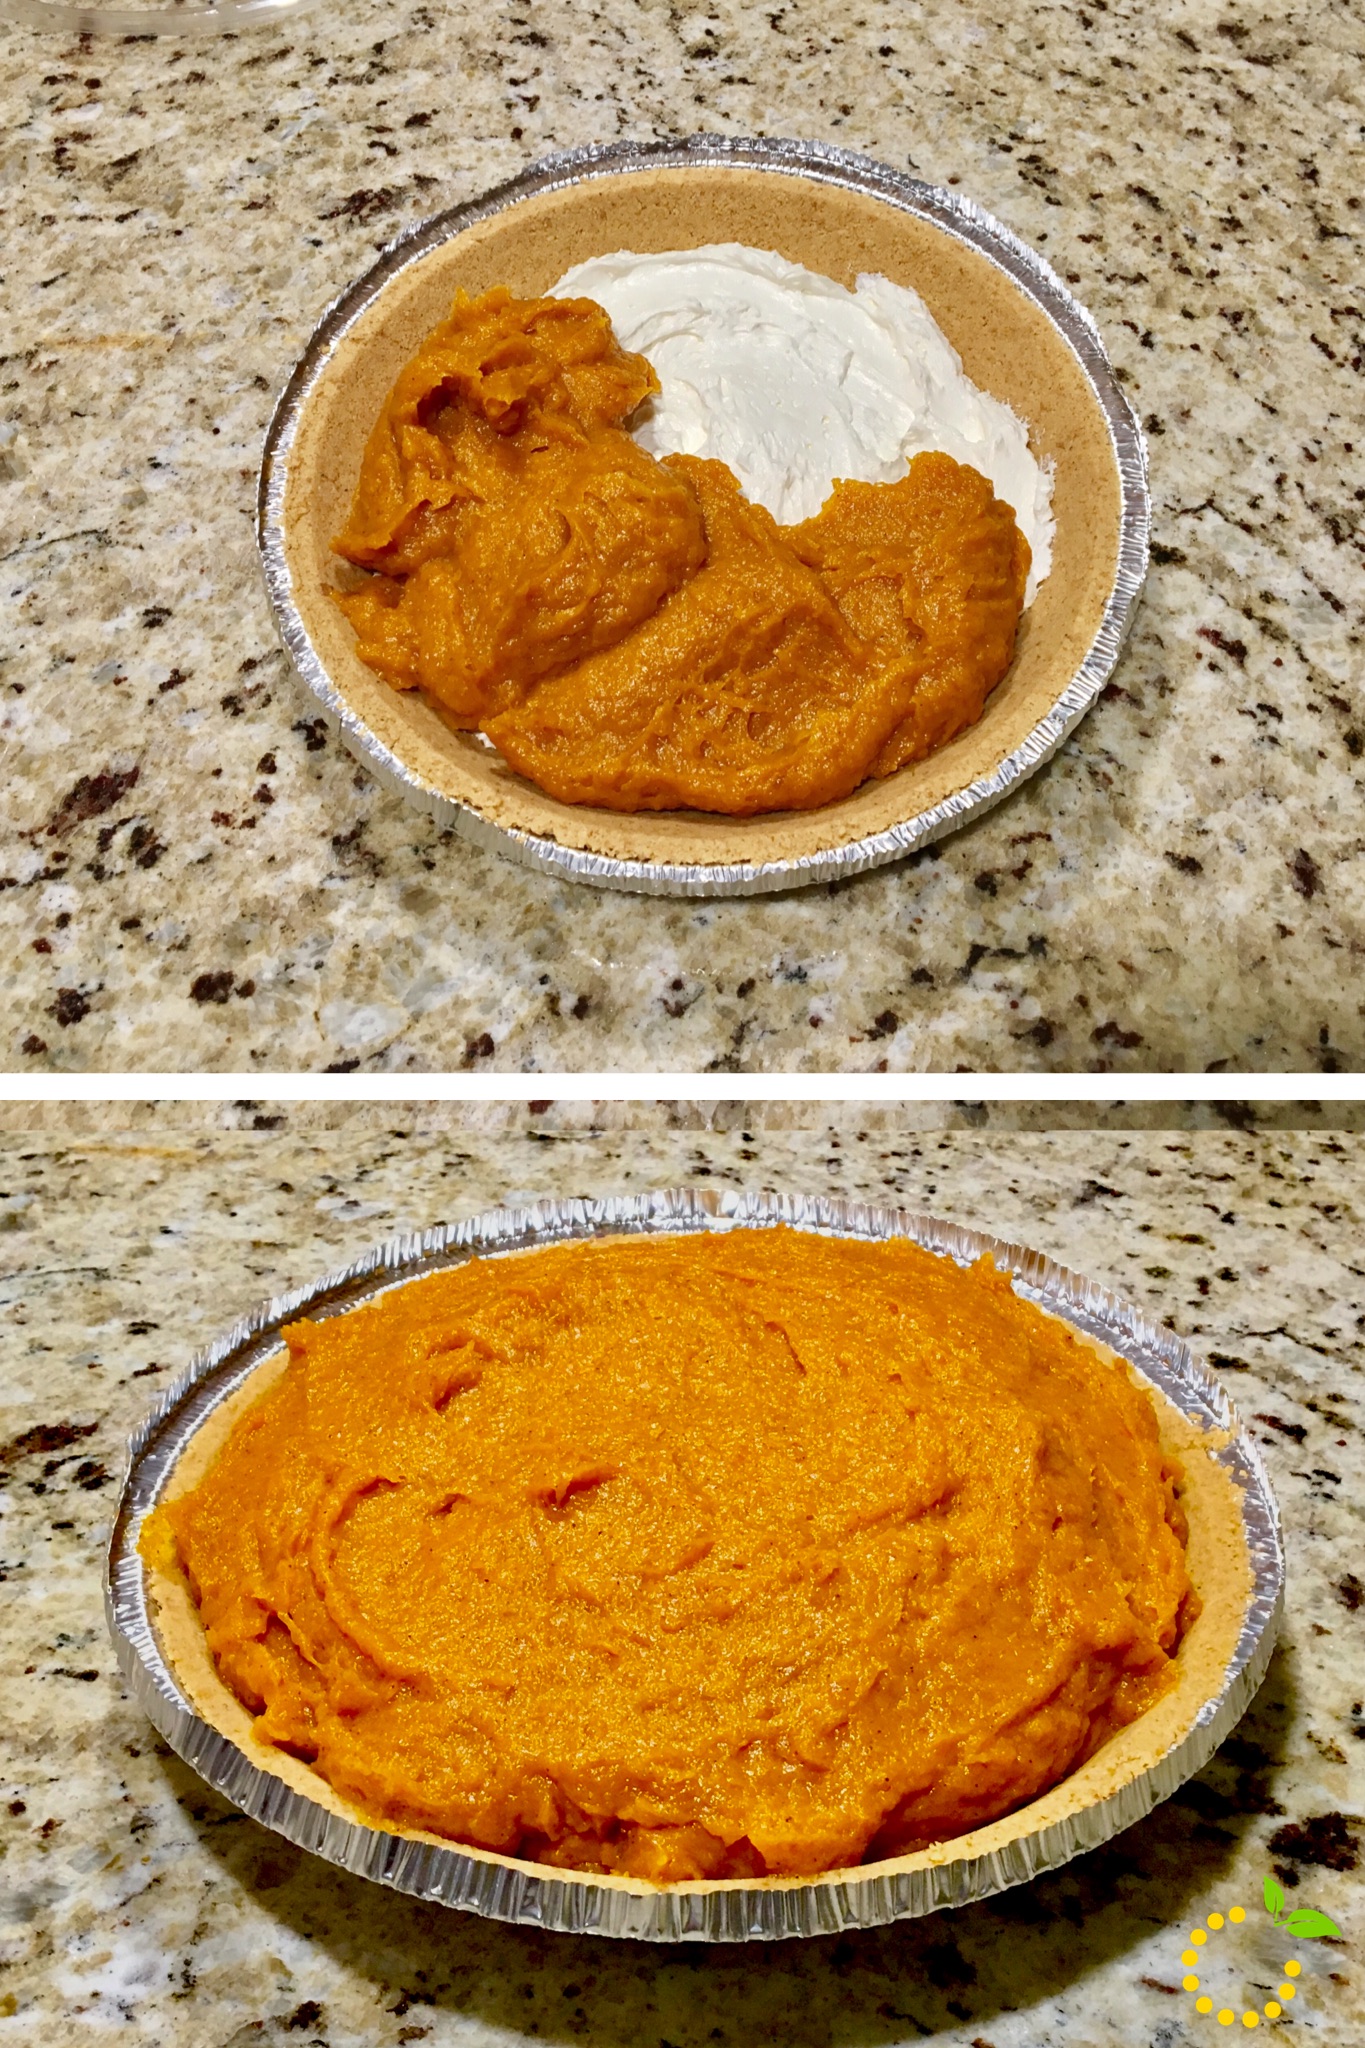
  7. Spread over cream cheese layer.
  8. Refrigerate 4 hours or until set.
  9. Garnish with additional whipped topping.
Sweet Lemon Made https://sweetlemonmade.com/

Eats

Chocolate Chip Pumpkin Mini Loaves

Let the fall baking commence! You can’t celebrate fall without some pumpkin in your life! Am I right? These chocolate chip pumpkin mini loaves have all the flavors you love about fall combined into each little mini loaf—pumpkin, mini chocolate chips, pecans, and bursts of cinnamon and nutmeg. And with the addition of applesauce in this recipe these little loaves are super moist.

img_8498


As I thought about making pumpkin bread, I remember that I had bought this mini loaf pan and couldn’t resist not using it. I love anything mini so, naturally I knew I had to use this new pan of mine! Because mini foods = happiness! 🙂 Does mini food make anyone else’s heart flutter with happiness? I love how these mini loaves are easily shareable with family, friends, and coworkers. And they also make great holiday treats to pack up individually.

img_8336-1

The best part of this recipe is that it is easy and simple. All you need is 2 bowls, a hand mixer, a mini loaf pan, and an oven. I hope I just made your holiday baking one step easier with this simple and delicious recipe.

Chocolate Chip Pumpkin Mini Loaves
Yields 18
Write a review
Print
Ingredients
  1. 3 1/2 cups all-purpose flour
  2. 2 teaspoon baking soda
  3. 1 tablespoon cinnamon
  4. 1/4 teaspoon nutmeg
  5. 1 tsp pumpkin spice
  6. 1 teaspoon salt
  7. 2 cups Libby's pure pumpkin (NOT pumpkin pie filling)
  8. 2 cups granulated sugar
  9. 1/2 cup oil
  10. 1/2 cup applesauce
  11. 4 eggs
  12. 1 teaspoon vanilla extract
  13. 1/2 cup water
  14. 1 cup mini chocolate chips
  15. 1 cup chopped pecans or nut of choice (optional)
Instructions
  1. Preheat oven to 350 degrees F.
  2. Grease your mini loaf pan and set aside.
  3. In a large bowl combine pumpkin, oil, applesauce, sugar, eggs, vanilla, and water. Using a hand mixer, mix until combined.
  4. In a separate bowl combine and whisk together the flour, baking soda, cinnamon, nutmeg, pumpkin spice and salt.
  5. Add dry ingredients to wet ingredients and mix until combined.
  6. Add mini chocolate chips and nuts and mix by hand with a spatula.
  7. Scoop batter into pan and fill each just under 3/4 of the way full.
  8. Bake for 20 minutes or until toothpick comes out clean when inserted into middle.
  9. Let cool in pan for 5-7 minutes before transferring to cooling rack.
  10. ENJOY!
Sweet Lemon Made https://sweetlemonmade.com/

 fullsizerender-1

Eats

Pumpkin Rice Krispie Treats

Okay, so I’m a chronic recipe hoarder thanks to Pinterest and Instagram, but when I saw this “Salted Brown Butter Crispy Treats” posted by Smitten Kitchen it was enough to motivate me to action. I love Smitten Kitchen and have absolute trust in all of her recipes. So when I needed a quick treat for a Halloween party  last night I made a quick adaptation to turn these amazing little guys into a festive party treat!

img_1590-1


Brown Butter and Sea Salt Rice Crispy Treat Pumpkins
Makes about 18 pumpkins (varies based on cookie cutter)
Write a review
Print
Ingredients
  1. 4 ounces unsalted butter
  2. 1 bag marshmallows (10 ounces)
  3. Heaping 1/4 teaspoon coarse sea salt
  4. 6 cups crispy rice cereal (about half a 12-ounce box)
  5. Buttercream frosting to decorate
  6. Food coloring
  7. Parchment paper
  8. Pumpkin cookie cutter (or any shape you want)
Instructions
  1. In a large pot, melt butter over medium-low heat. It will melt, then foam, then turn clear golden and finally start to turn brown and smell nutty. Stir frequently, scraping up any bits from the bottom as you do. Don’t take your eyes off the pot as while you may be impatient for it to start browning, the period between the time the butter begins to take on color and the point where it burns is often less than a minute.
  2. As soon as the butter takes on a nutty color, turn the heat off and stir in the marshmallows. The residual heat from the melted butter should be enough to melt them, but if it is not, turn it back on low until the marshmallows are smooth. Add food coloring to turn the marshmallow magic orange (gel food coloring gives a more vibrant color) and stir well.
  3. Remove the pot from the stove and stir in the salt and cereal together.
  4. Quickly spread onto a piece of waxed or parchment paper.
  5. Spray your hands with non-stick cooking spray (or oil) so the marshmallow concoction won't stick to your hands and then press marshmallow/crisp rice mixture to about 1/2 to 3/4 of inch in thickness.
  6. Then using a cookie cutter, cut out shapes and allow mixture to cool.
  7. While cooling make your frosting. Make 3/4 of the frosting black and 1/4 of the frosting green with your food coloring. Then transfer each color into a Ziploc bag for piping.
  8. Cut a small hole in the corner of the Ziploc bag and begin piping faces on the pumpkins.
Sweet Lemon Made https://sweetlemonmade.com/
The brown butter and sea salt in these little guys will make you come back for more and more. Not to mention everyone will love you and ask you for this recipe. Thanks, Deb (SmittenKitchen)!

Recipe adapted from Smitten Kitchen

 Brown Butter and Sea Salt Rice Crispy Treat Pumpkins

Create

Pumpkin Carving Made Easy!

Raise your hand if you love Halloween and all it’s pumpkin-y fanfare…. Yes, me too. I love decorating and carving pumpkins, but pumpkin guts make me want to barf. Seriously, even the thought of scooping that stringy stuff makes me queasy. I don’t know why, but I hate it. So when my friend showed me this magic tool that cleans out those slimy pumpkin innards in a matter of seconds, I was amazed. Even if you don’t have a hard-core aversion to inner pumpkin mush, you’ll still love this. This little tool attaches to any drill (yeah, like the one your husband has in the garage) and guts the entire pumpkin in a matter of seconds. Score!! Watch the YouTube video below to see this baby in action and click here to buy this little piece of genius right now on Amazon.

image-1-2