
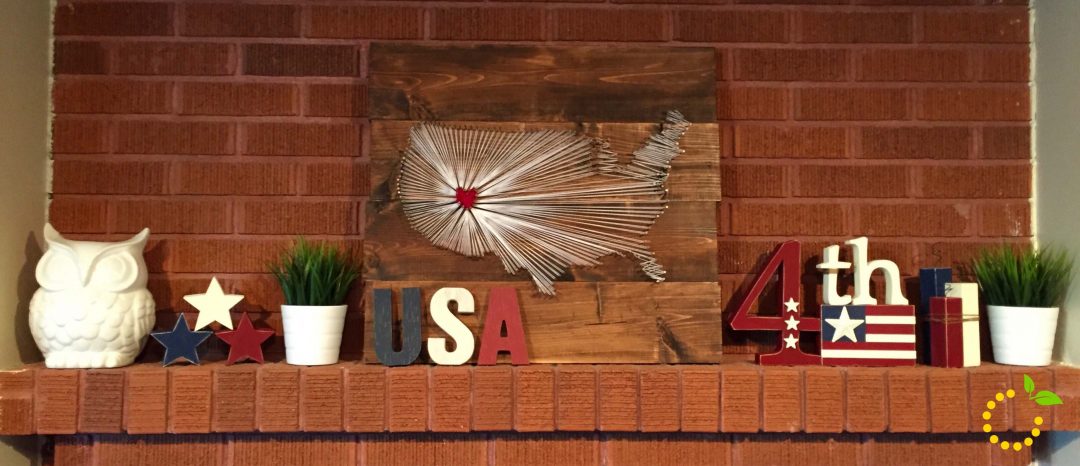
The 4th of July is right around the corner and if you are looking for some decorating ideas to spruce up your mantel, I’ve got a few crafts and DIYs to share with you! DON’T HAVE A MANTEL? Don’t worry…you can recreate these decor ideas using a shelf or bookcase in your house. You can also decorate a console table you may have in your entryway or in your living room. The possibilities are endless!
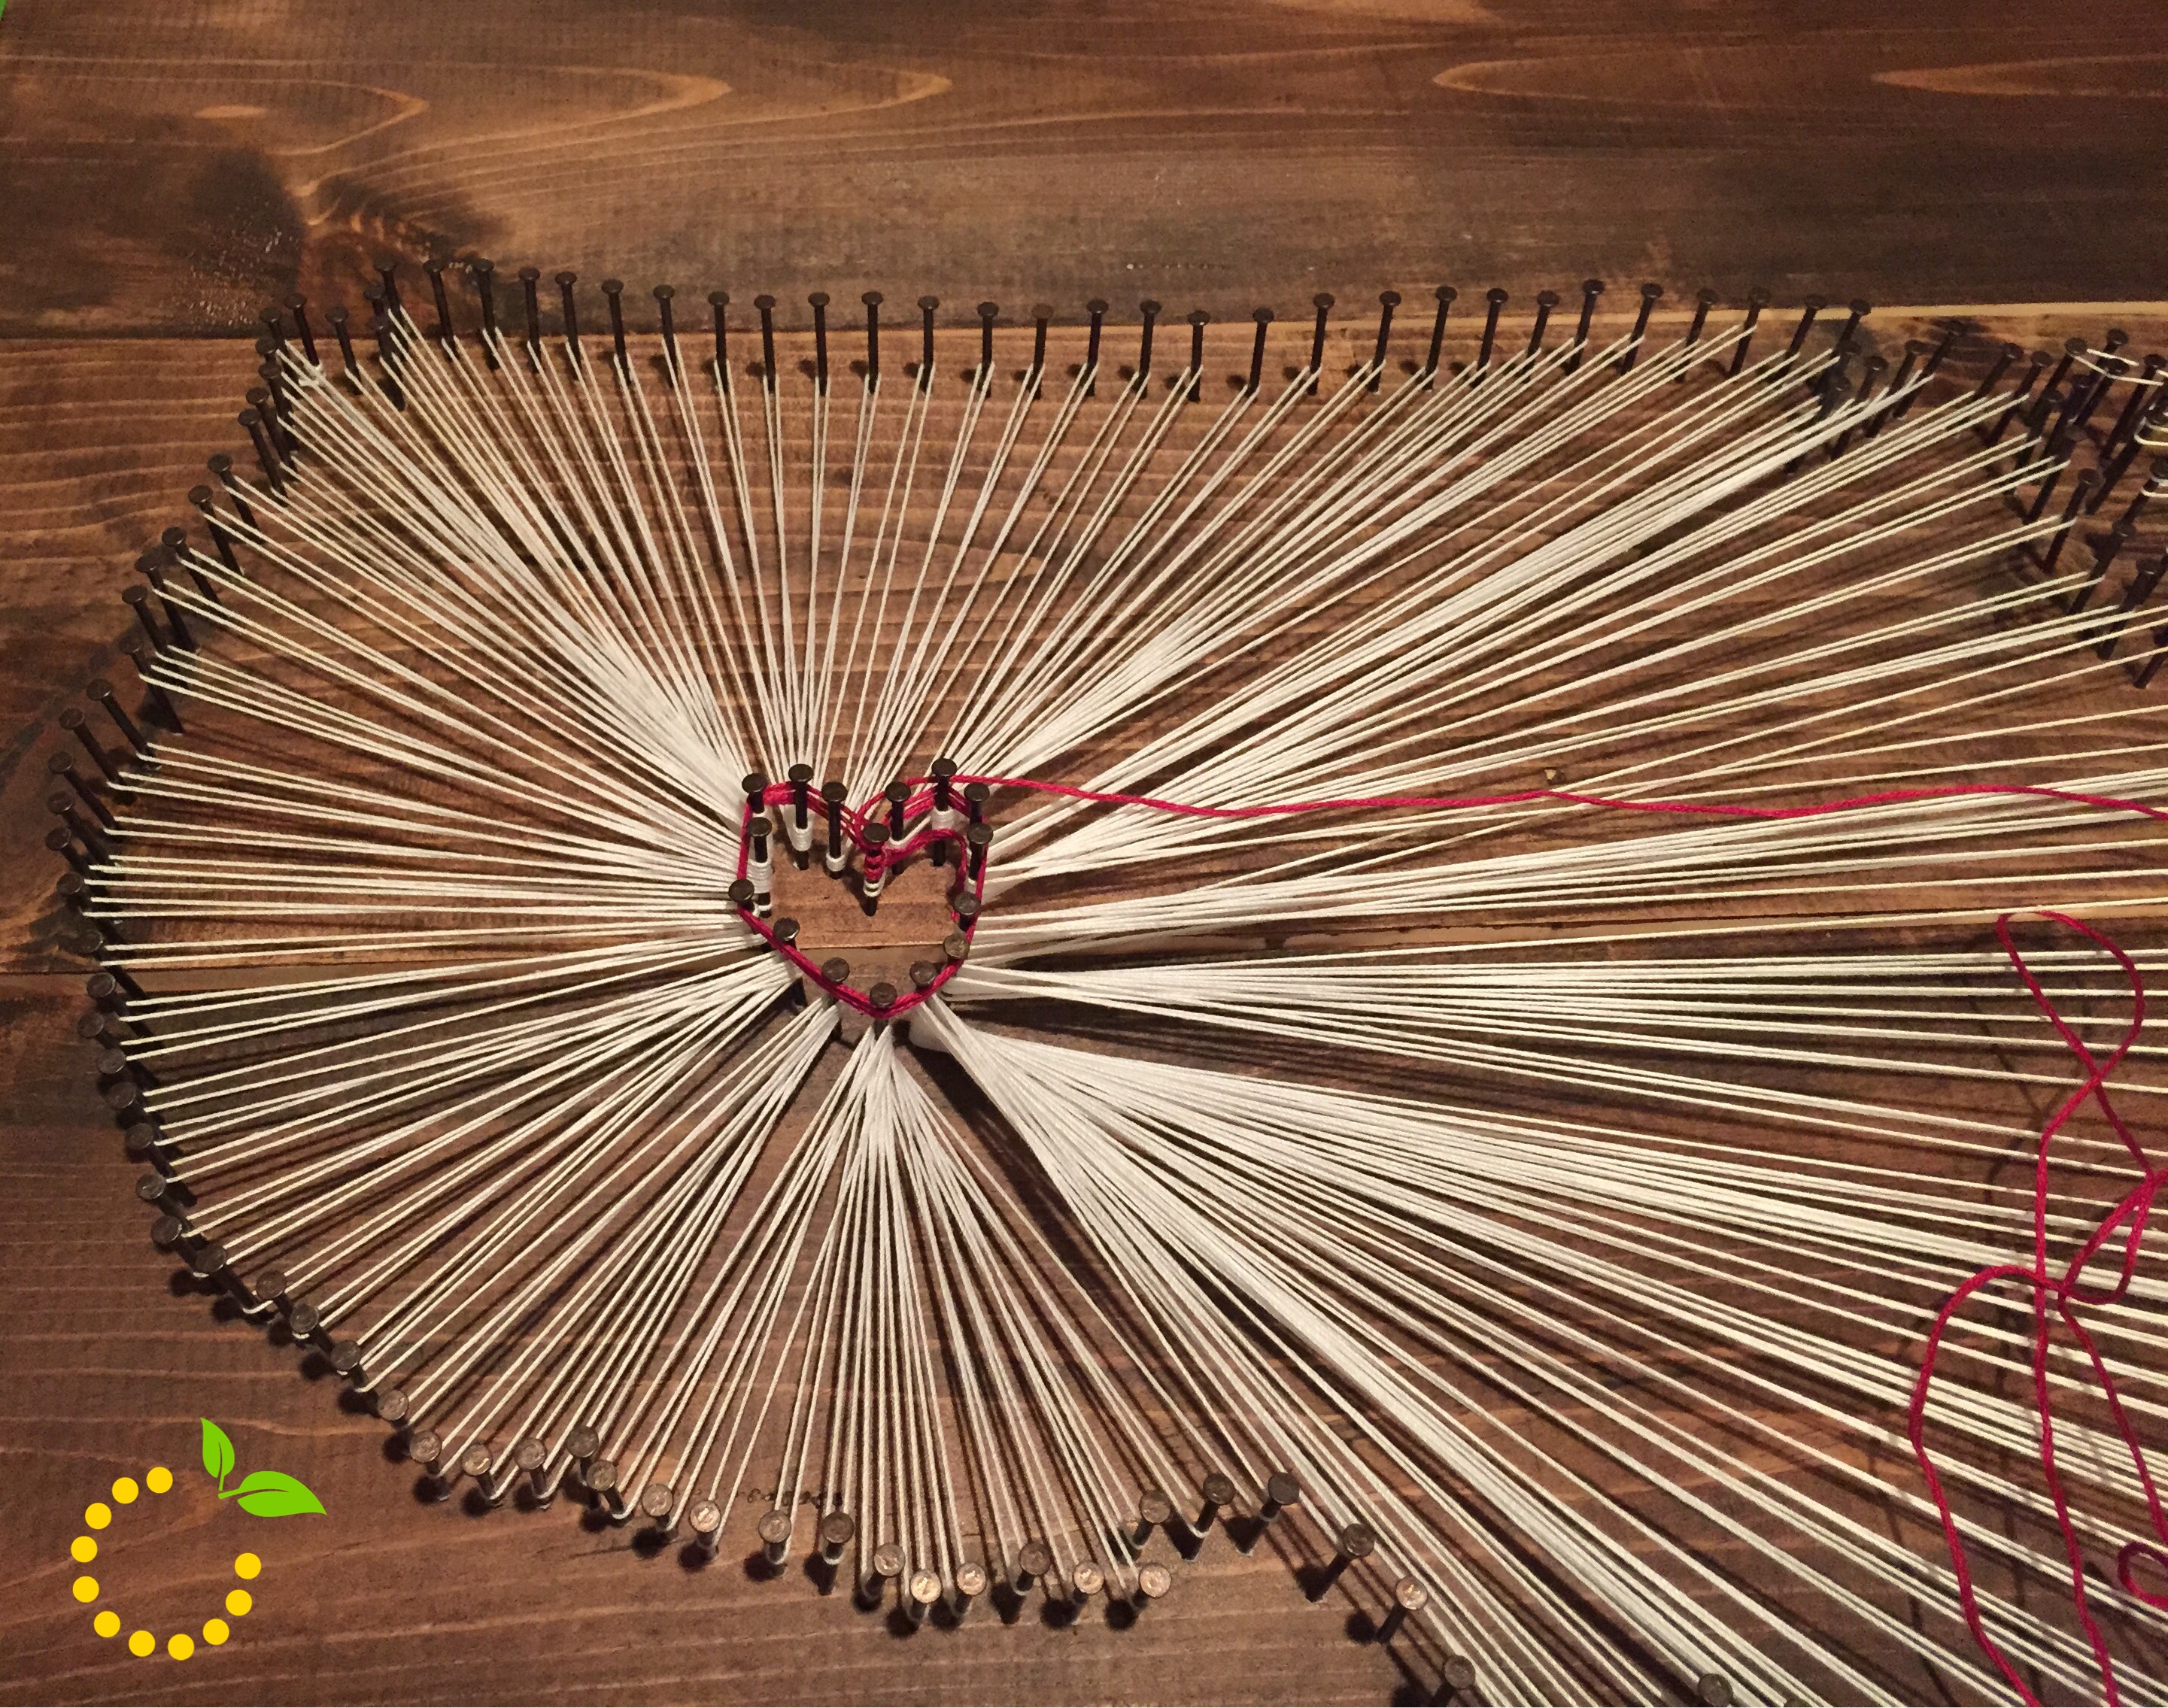
I designed this 4th or July mantel with a big statement piece, a DIY string art of the USA. I have wanted to do a string art piece for a long time but, could never decide on what to do until I saw Wendy from The Paisley Pickle making one at a friends house. Just a warning…this string art project is not for the faint-hearted crafter. This project takes patience and time. But, once it’s finished you will be thrilled with the results! I am! And I love the finished project even though it tested my patience. Look below for all of the materials needed and instructions on how to make your own the string art.

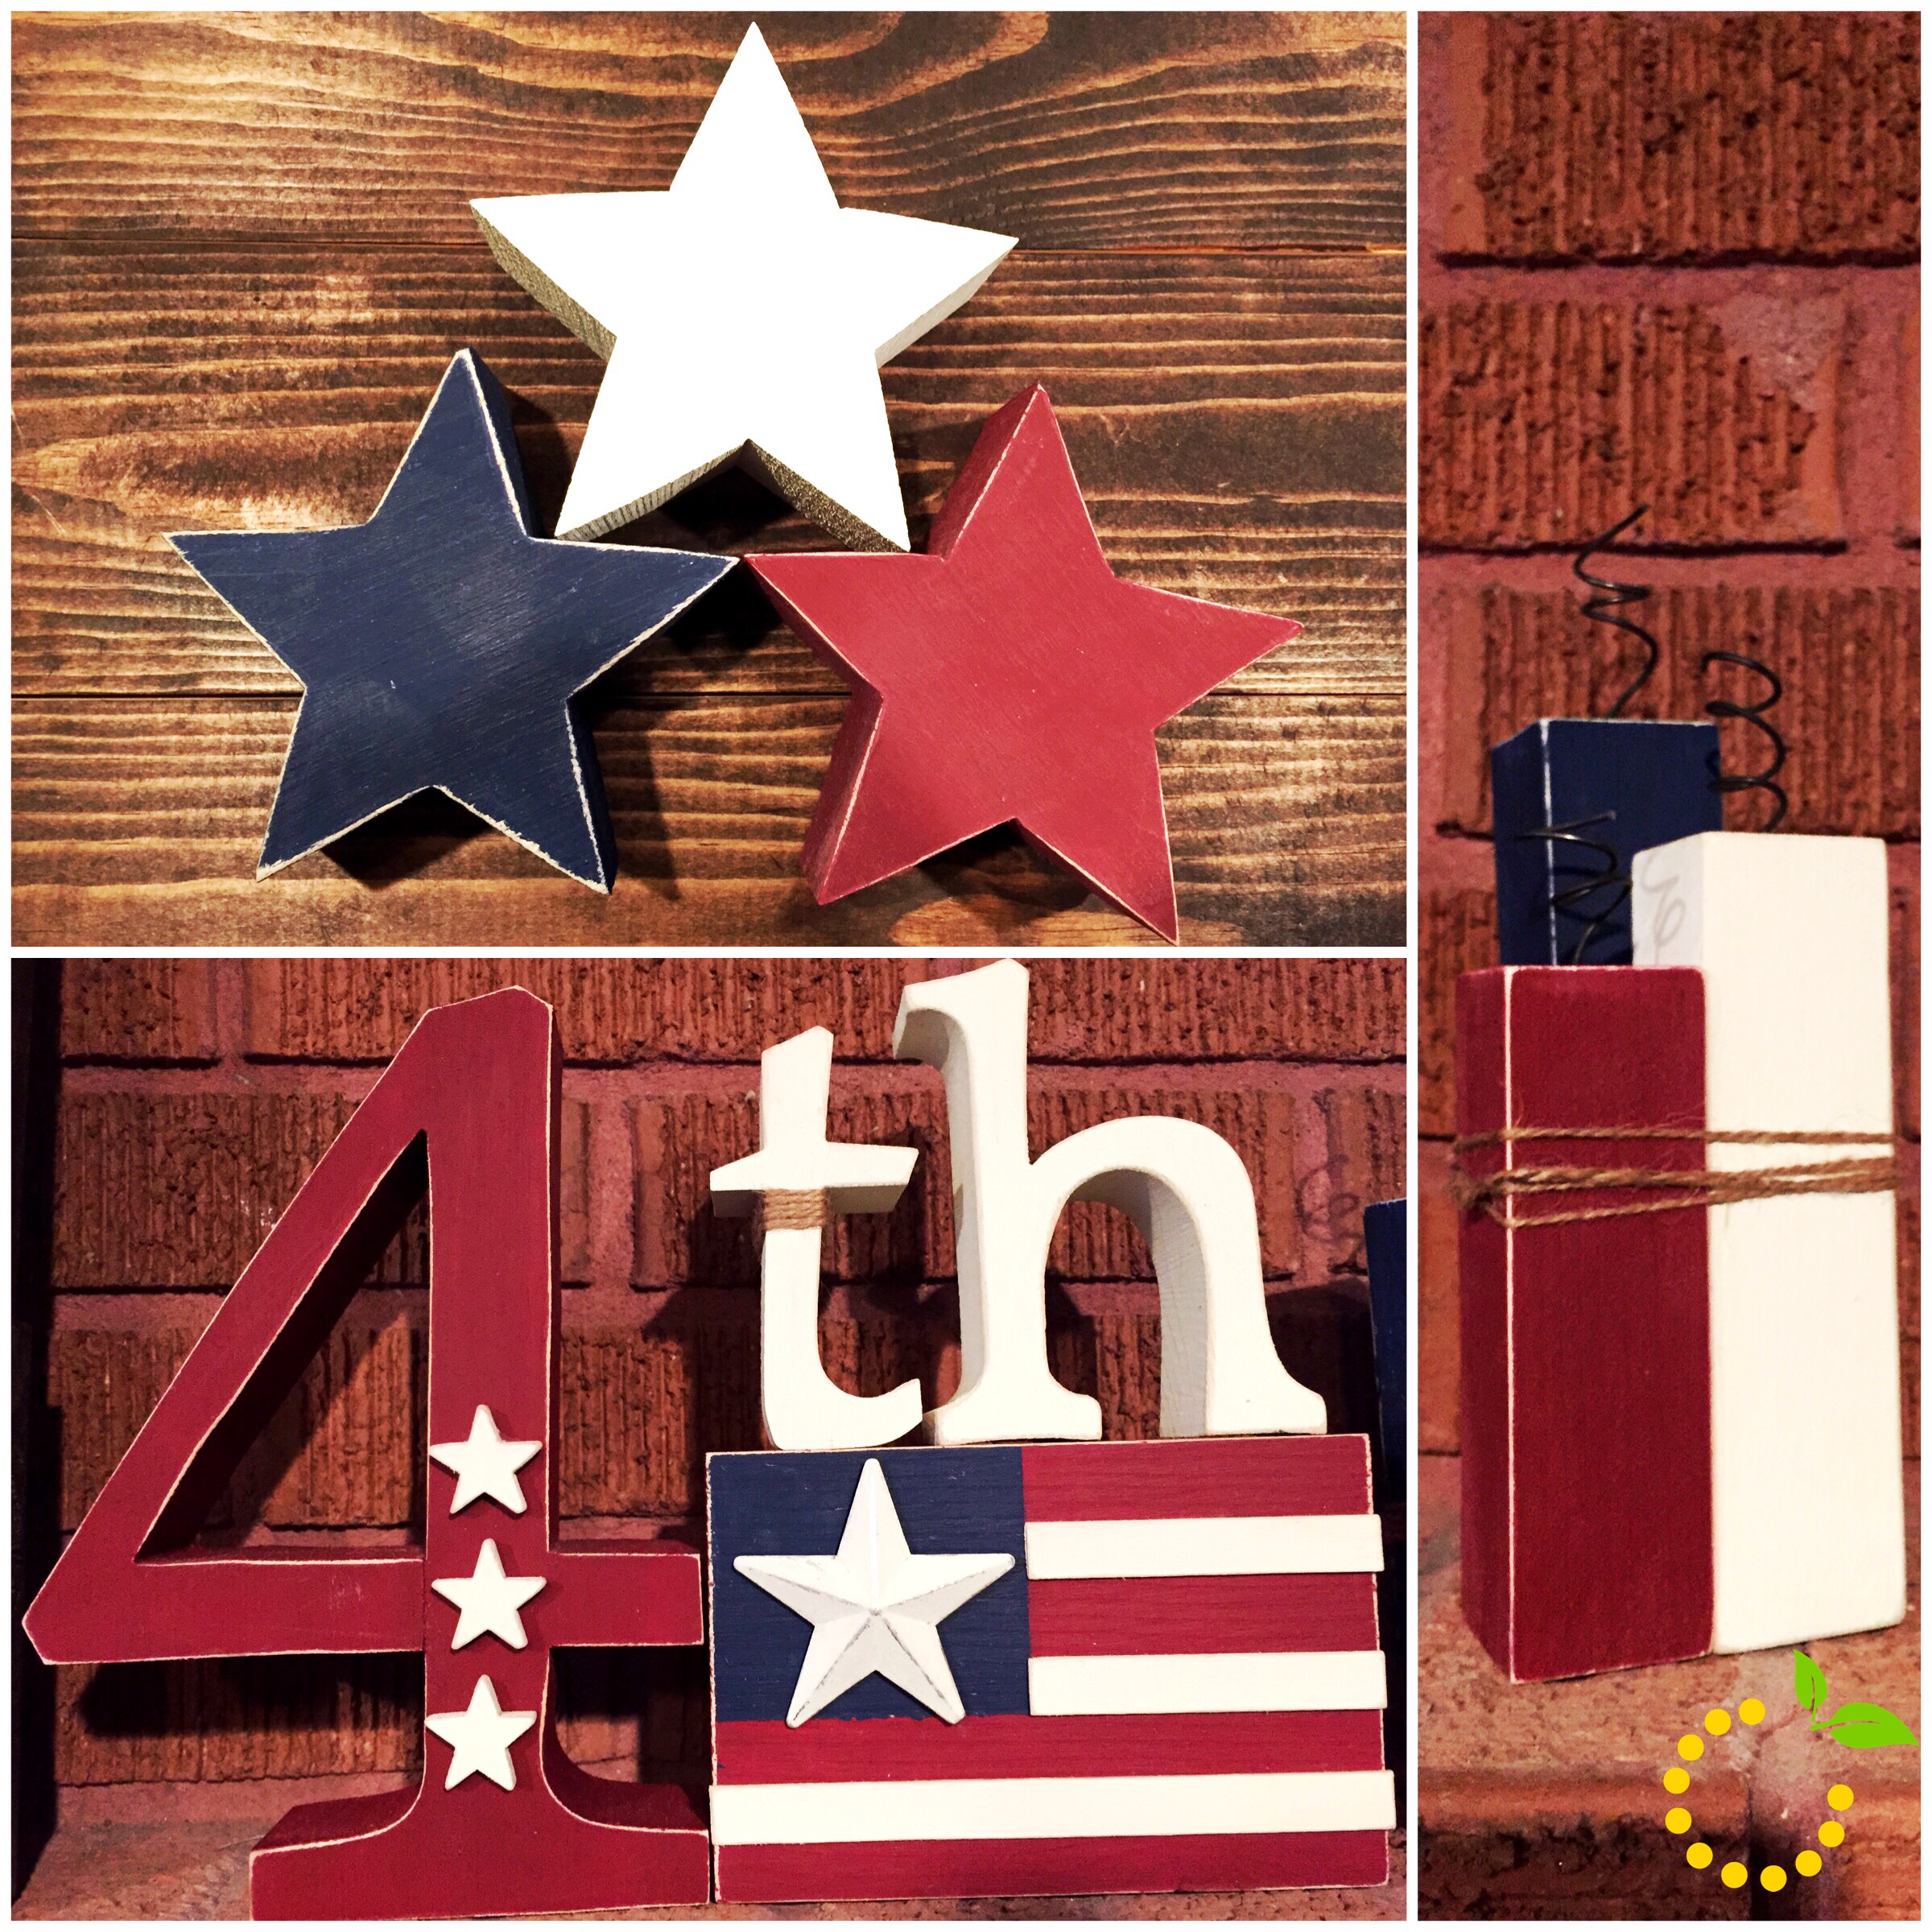
The wood stars, firecrackers, and 4th & flag can be purchased from the Wood Connection. The wood pieces come unfinished and can be decorated and painted however you like. I painted and distressed mine and added a few embellishments to some of the pieces to give them some dimension. And the USA letters were from Target’s dollar spot section.
DIY How To—USA Map String Art
Materials Needed:
- 4 wood boards that are 24″ x 5″ and 2 boards/pieces to nail to the back to hold it together.
- String – I used DMC Baroque Crochet Cotton for the white string and DMC Embroidery Floss for the red string
- Box of nails (you will want a nail with a decent head so the string won’t pop off)
- Stain – I used Rustoleum stain in Kona
- Cheesecloth and vinyl gloves (for staining)
- USA map template (Get it printed at Office Max or your local print shop and ask them for an engineer print.)
Step 1: Cut and nail together wood planks
Step 2: Stain your wood board.
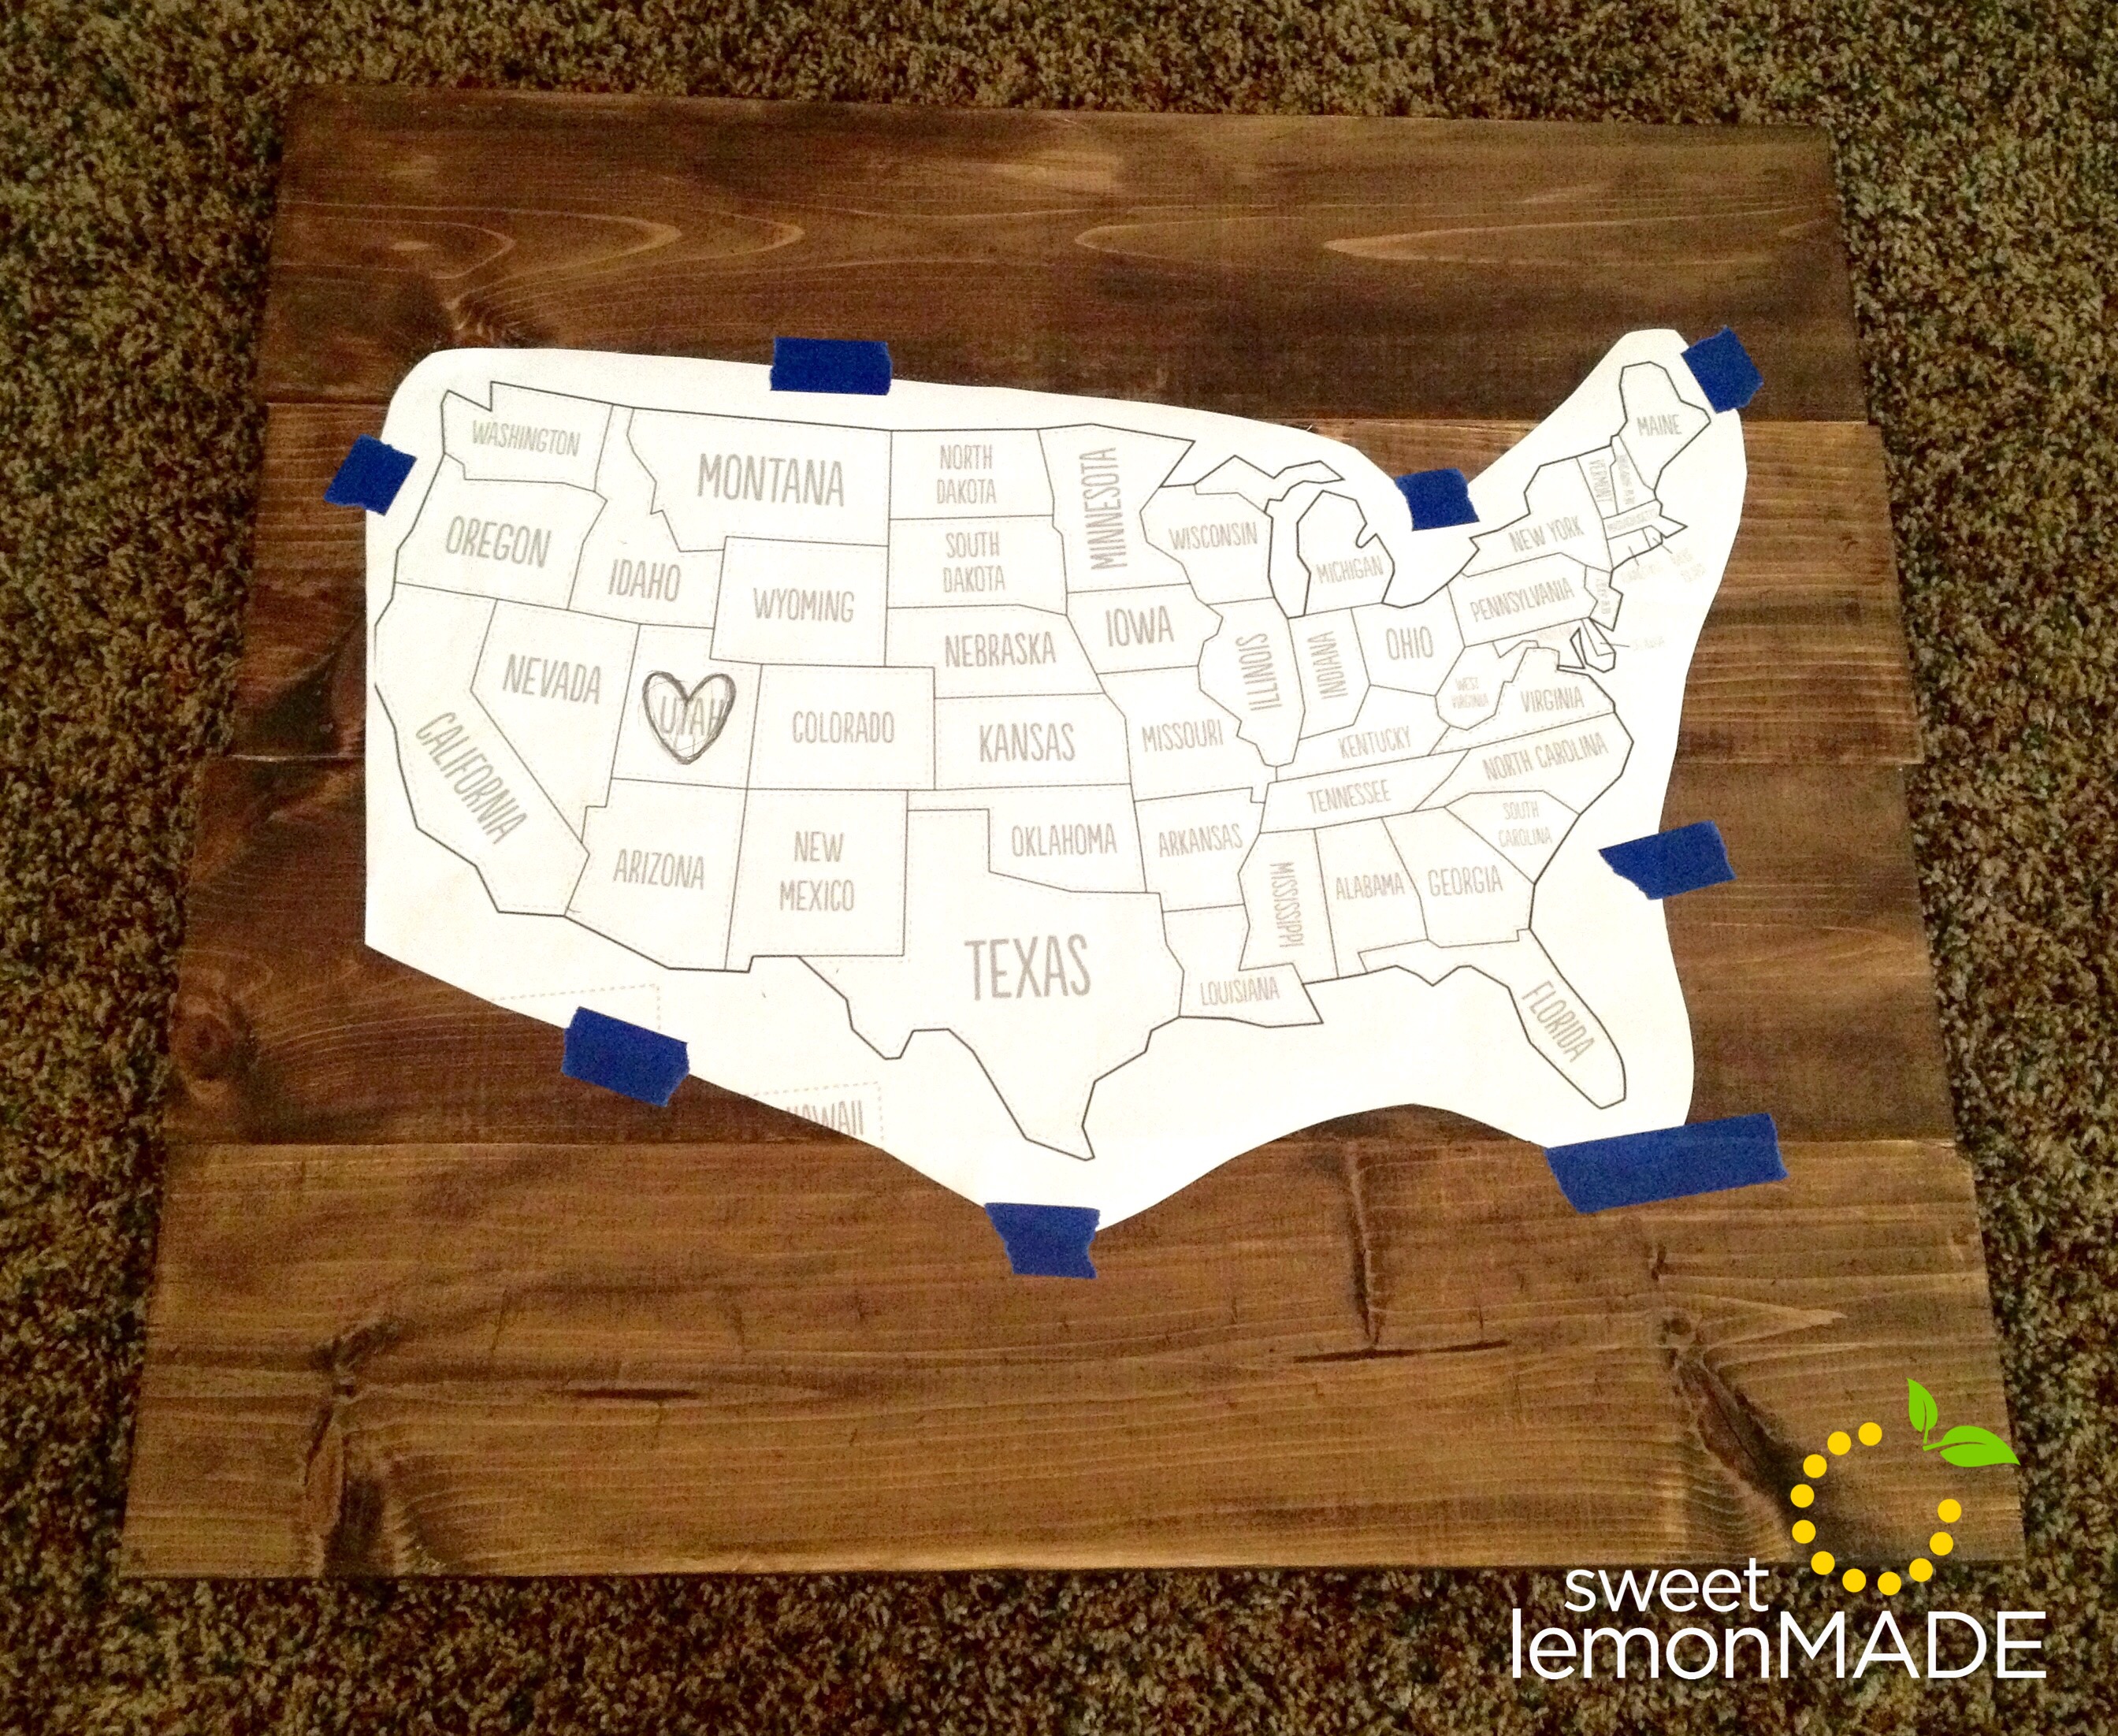
Step 3: Print out the map template.
Step 4: Once your stain is dry, cut out the template and tape it to your board.
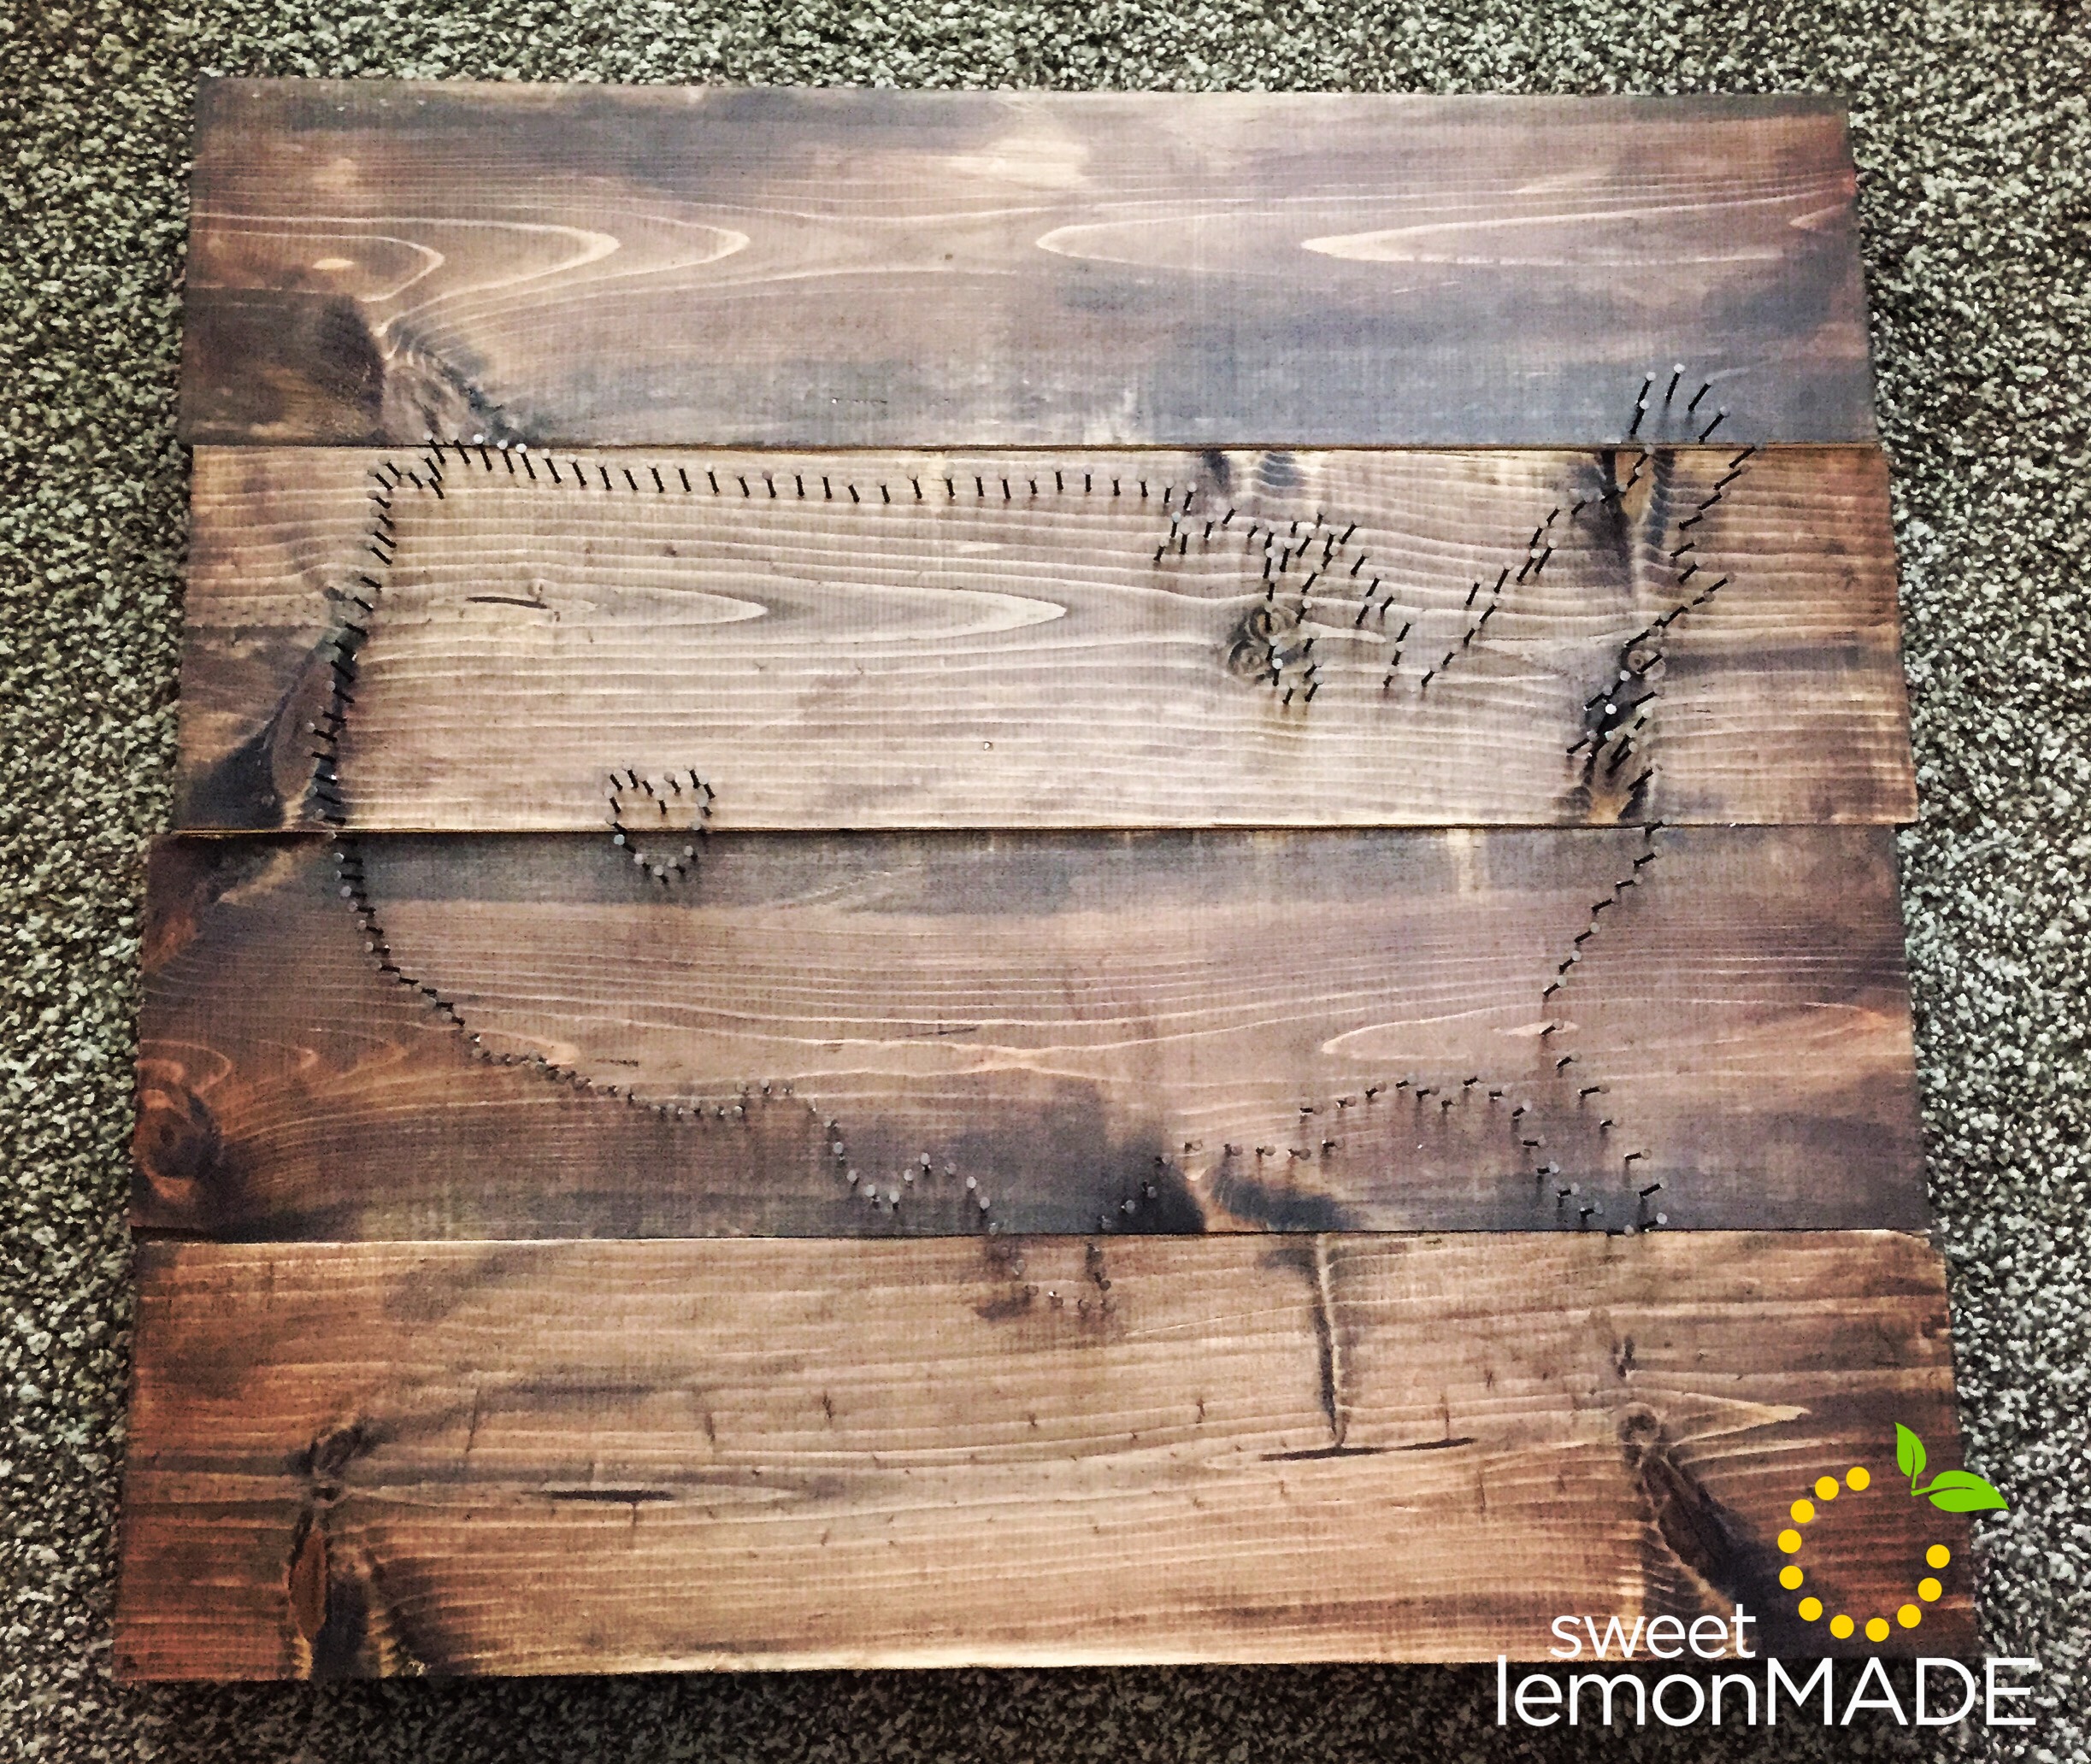
Step 5: Time to get the hammer out! Nail around the entire outline of the map – I spaced out the nails about an inch apart. (Warning: this step is the hardest and longest. Don’t get discouraged.)
Step 6: Once all of your nails are in, remove the paper template.
Step 7: Now for the fun part! Get your string and tie a knot around the head of one of the nails. Start by stringing the string down towards the heart and wrapping the string around one of the nails of the heart. (Tip: since the heart has less nails, you will need to string the outside strings around the nails multiple times.) Keep repeating until you are all done. Once you are done, tie another knot.
Step 8: Get your red DMC Embroidery Floss. Begin by tying a knot around one of the nails around the heart and string the string back and forth criss crossing the string.
Wood Connection Wood Projects
Materials Needed:
- Red, white/cream, and blue paint
- Foam brushes
- Sand paper
- Wood glue
- Painters tape
- Balsa wood sticks (for the stripes on the flag)
- Metal star embellishment
- Twin for embellishment
- Thick wire for the firecrackers (can be purchased from Lowe’s or Home Depot)
- Wire cutters
- A pencil or wooden dowel to wrap the wire around to crate the twisted shape
Step 1: Sand any rough edges and wipe all wood pieces down with a cloth to get rid of any saw dust.
Step 2: Paint all wood pieces the desired colors and let dry. For the flag, I taped off the section for the blue and let dry and then covered the blue to paint the red.
Step 3: Once they have dried, sand the edges to distress (optional).
Step 4: Glue small stars onto the ‘4’, the balsa wood sticks to the flag, and the star to the flag.
Step 5: Cut wire to desired length and wrap it around a pencil/dowel to twist it into shape.
Step 6: Place a tiny amount of glue onto the end of the wire and insert into hole on top of each firecracker.
Step 7: Tie or wrap twine around whatever you want (optional).


No Comments