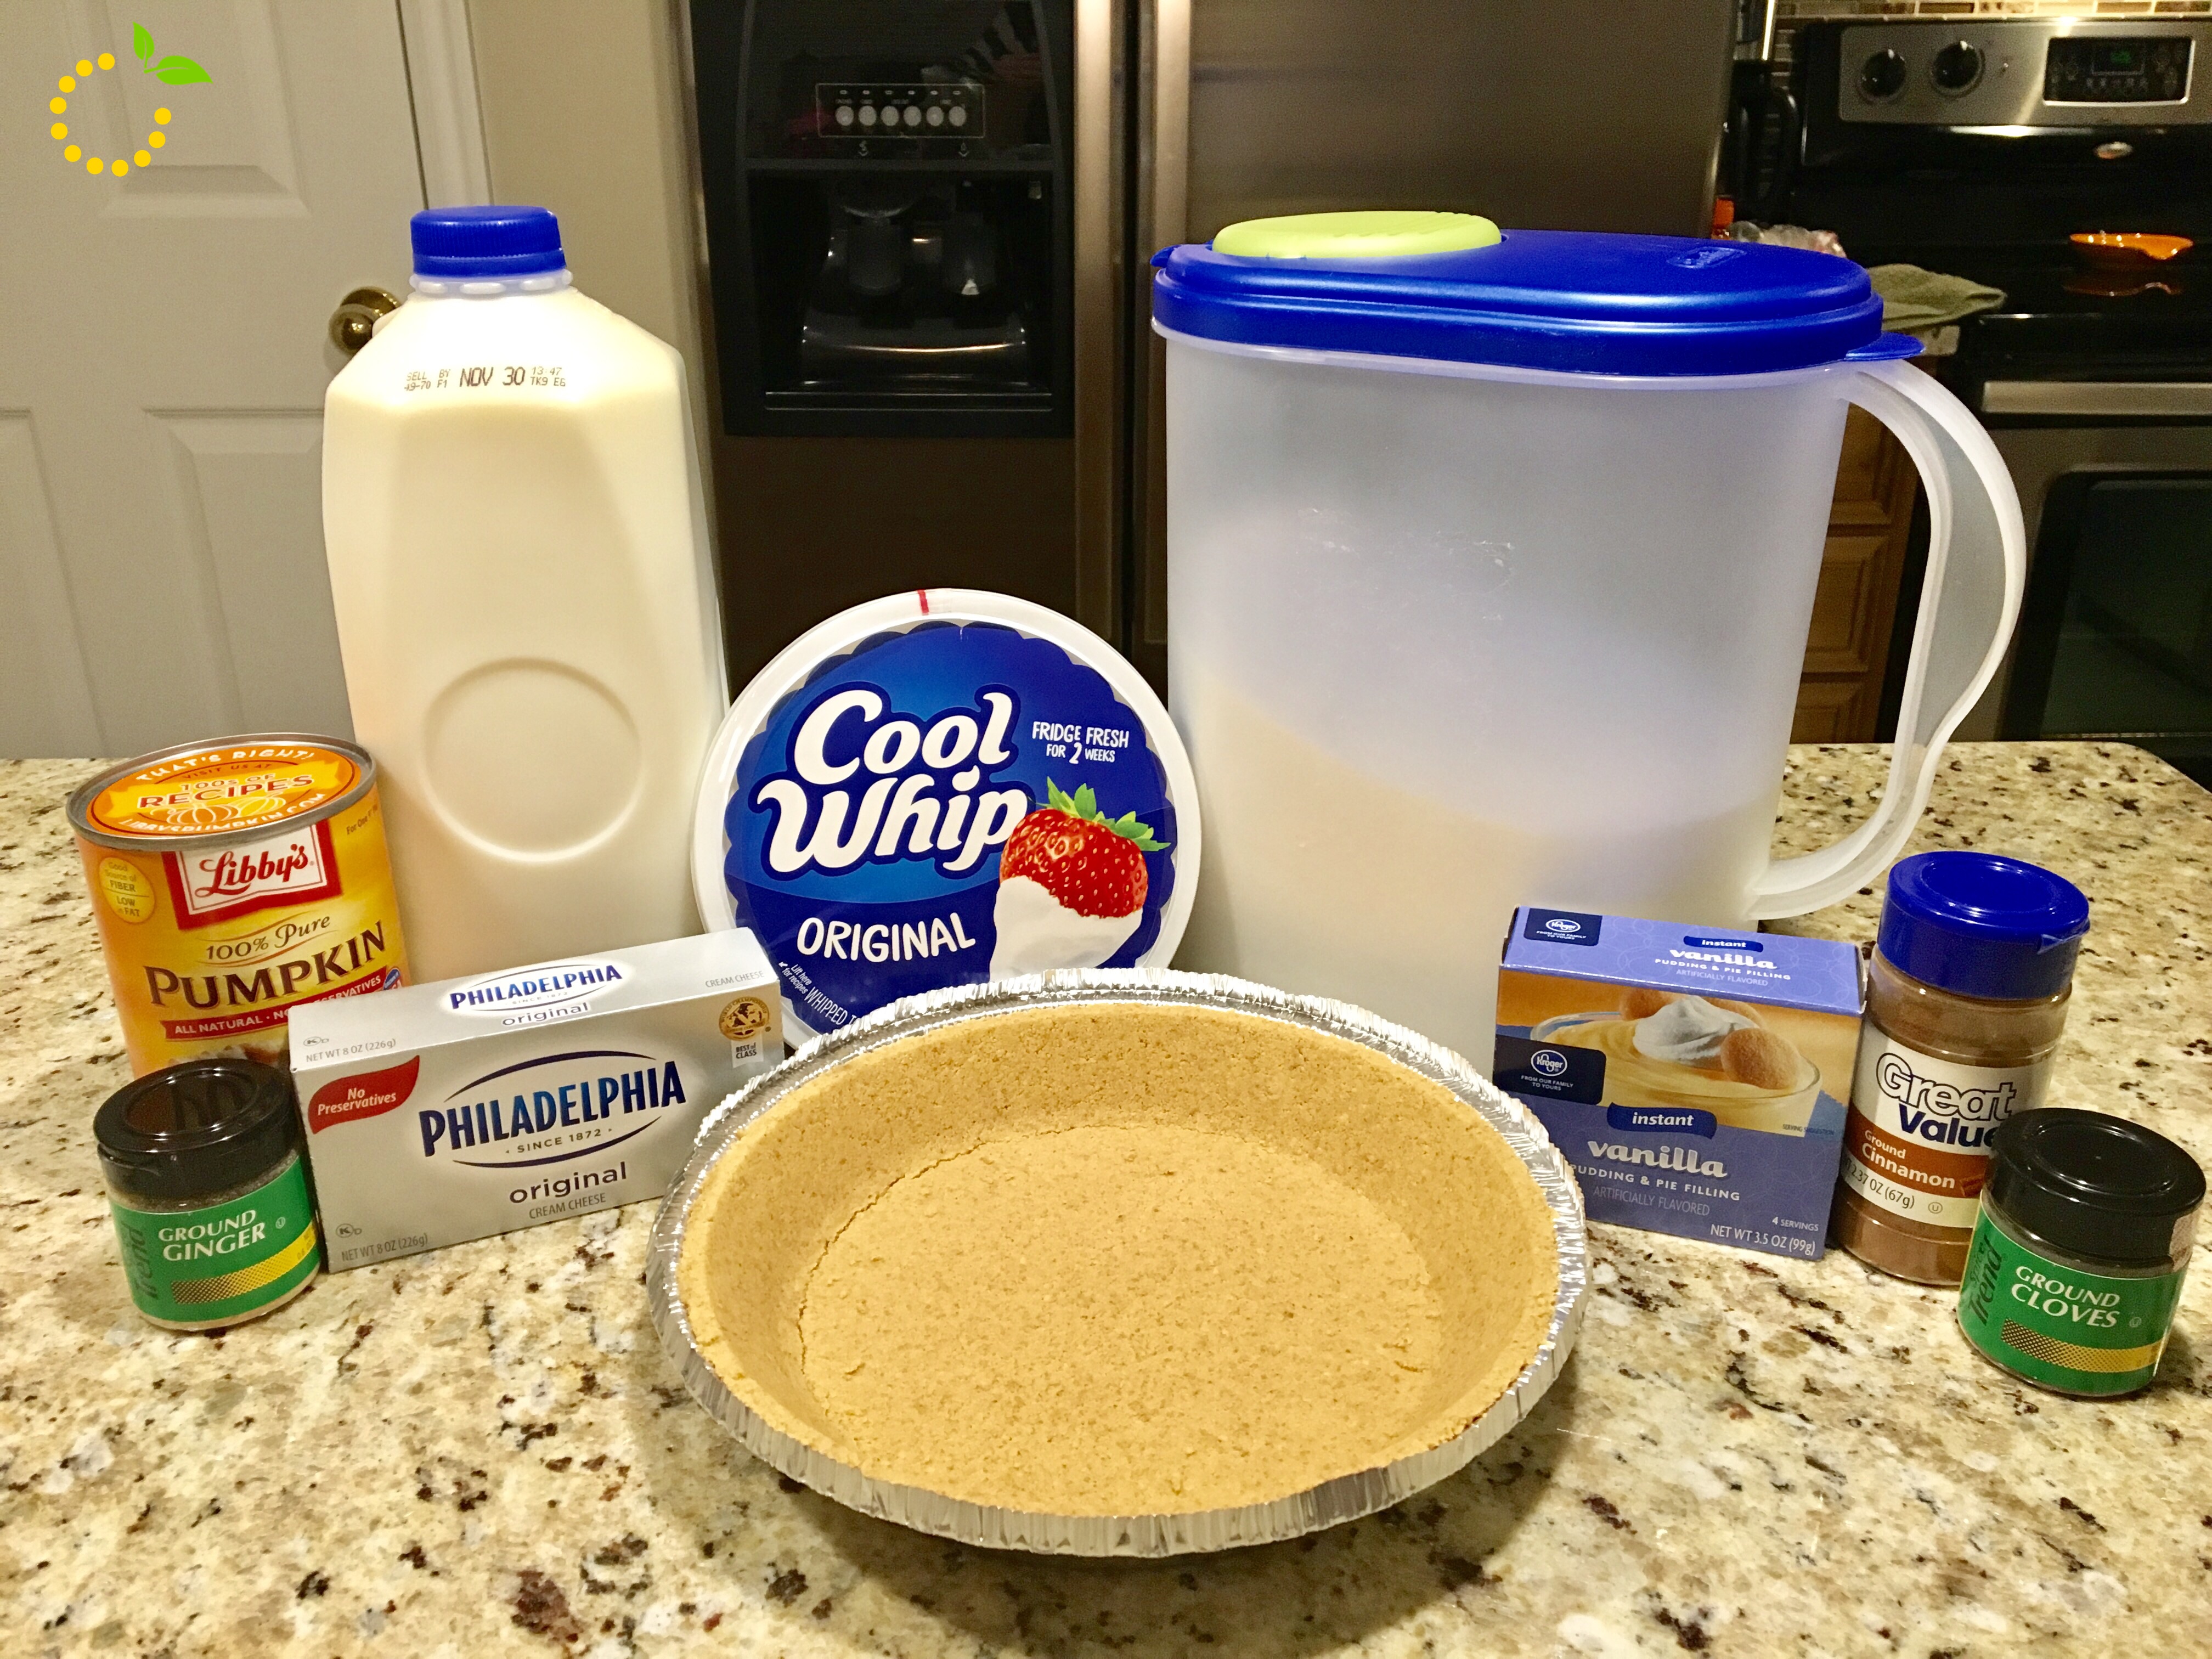
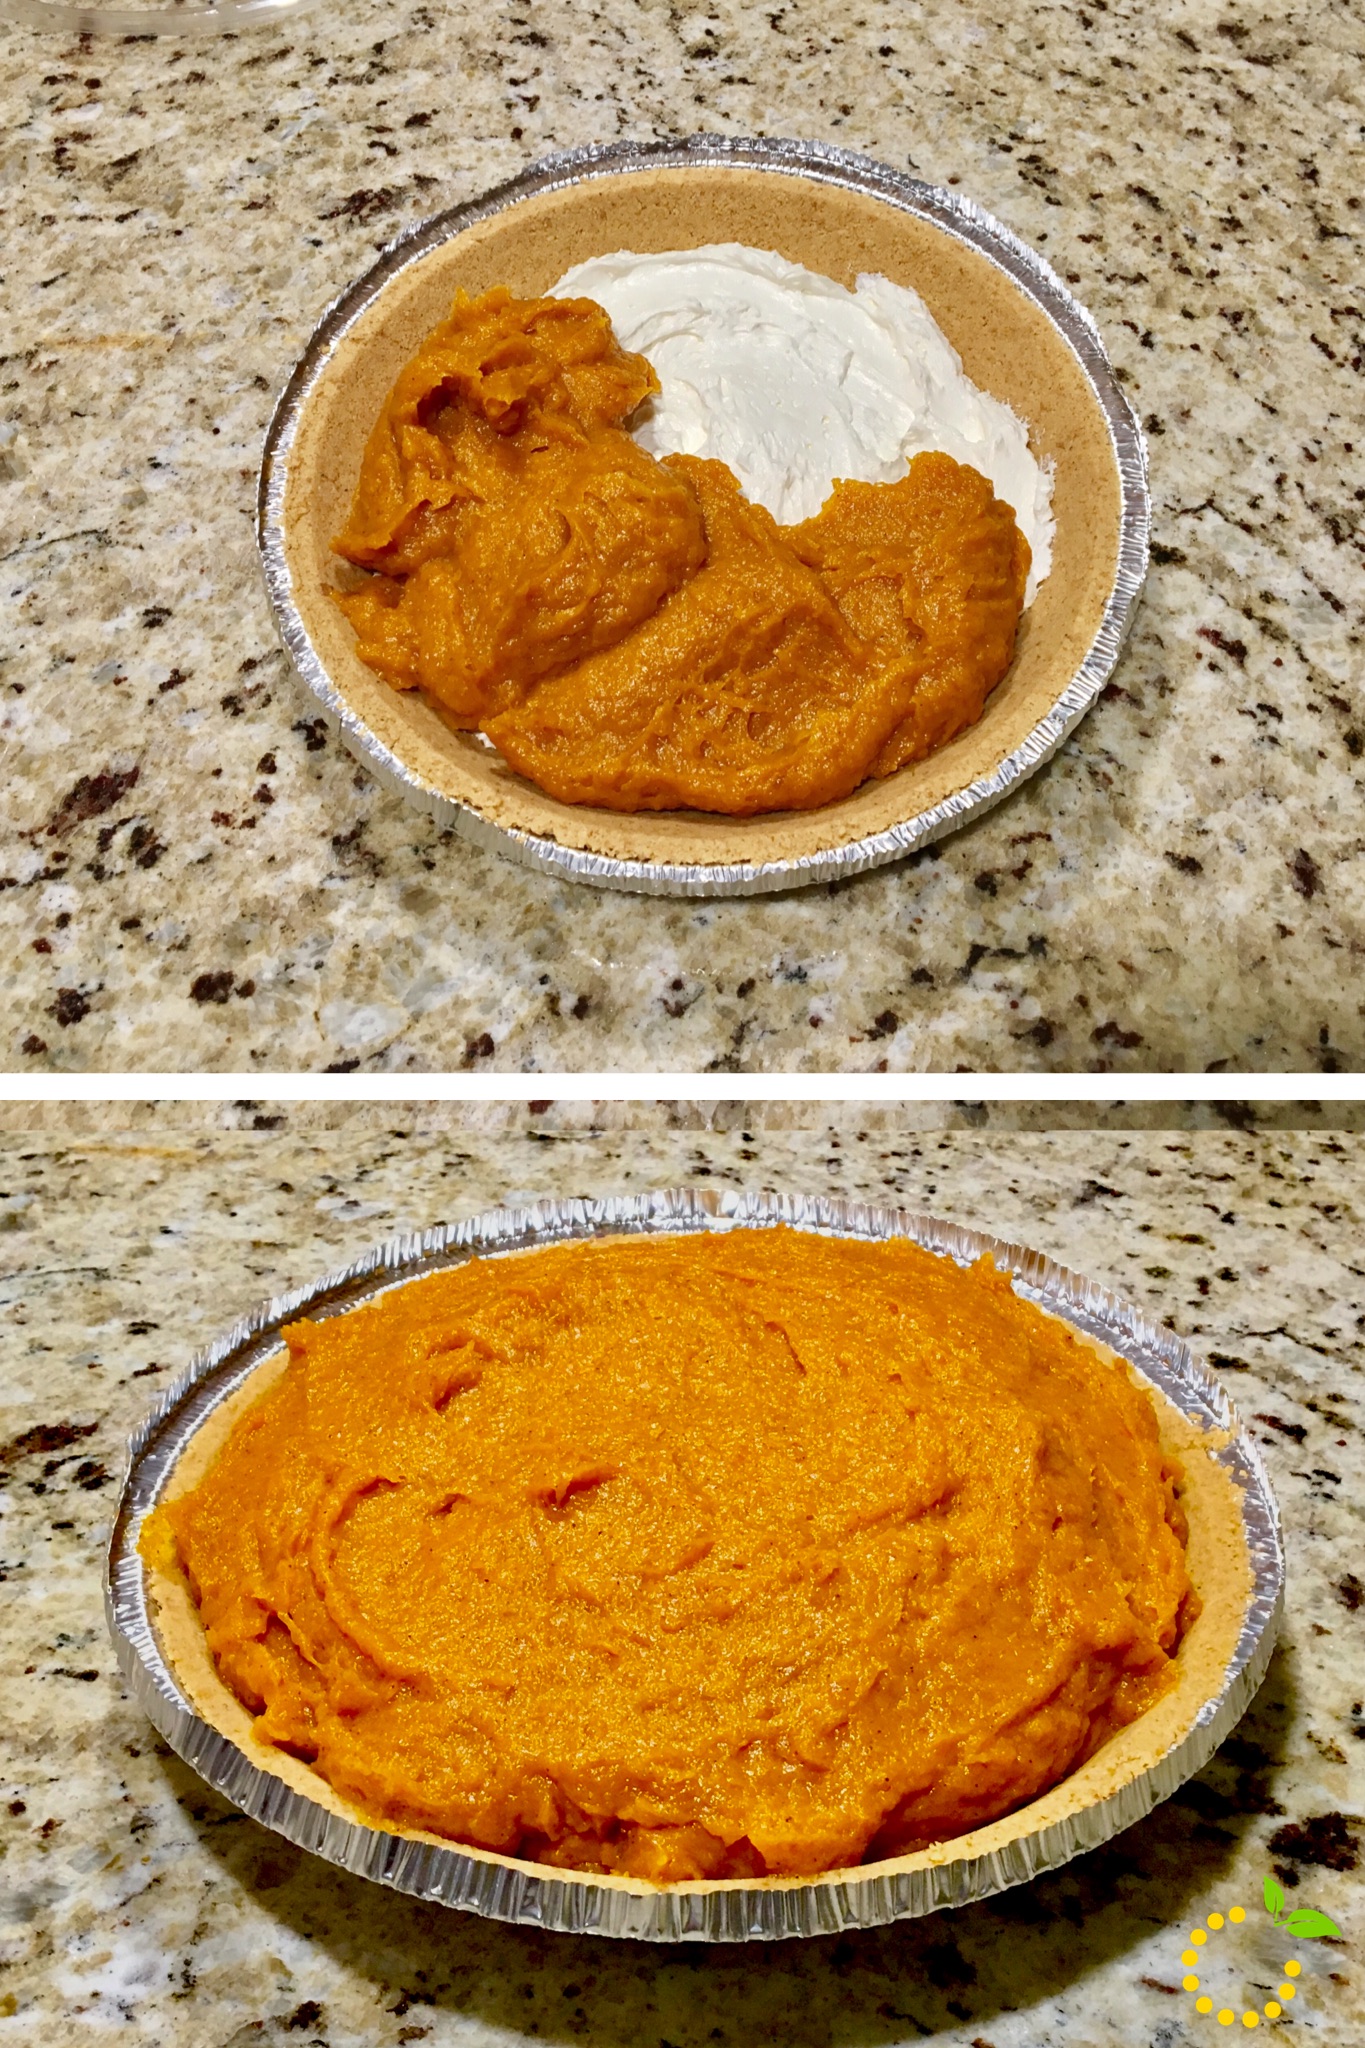
Every Thanksgiving I look forward to getting together with my family and enjoying delicious food, just like everyone else. But the one thing I look forward to the most is my grandma’s creamy pumpkin pie. She’s been making this pie for 20 years and it’s my absolute favorite. It’s lighter than the typical pumpkin pie, but it’s very rich and filling. The best part, it’s super easy to make! This pumpkin pie only takes 15 minutes to make and doesn’t involve baking. You just stick it right in the refrigerator to set. This is my kind of recipe!
I asked my grandma if there was a special story behind the recipe I could share, but she just happened to find it in a magazine one day back in 1996. Either way, it’s delicious and I wanted to share it with all of you. Enjoy!
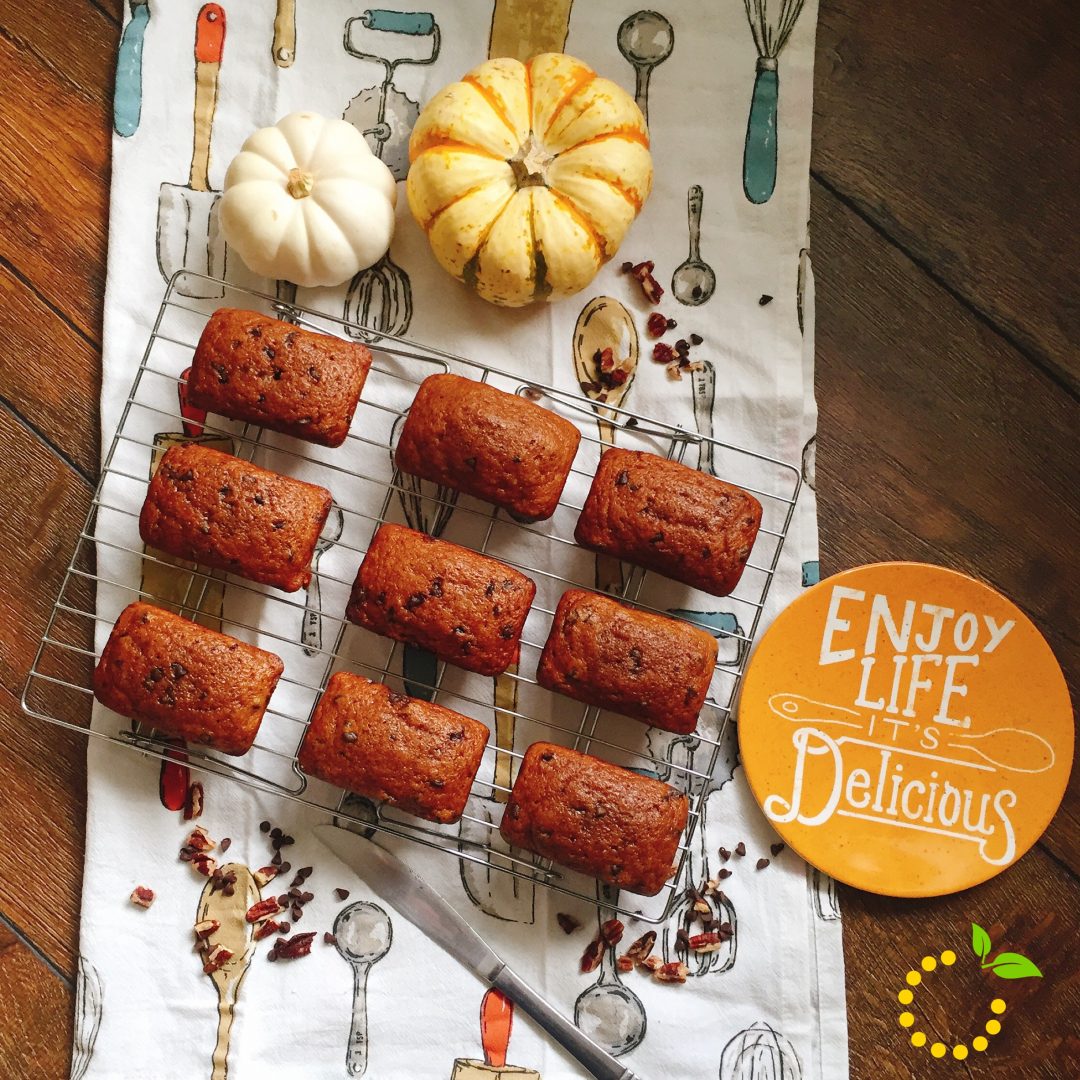
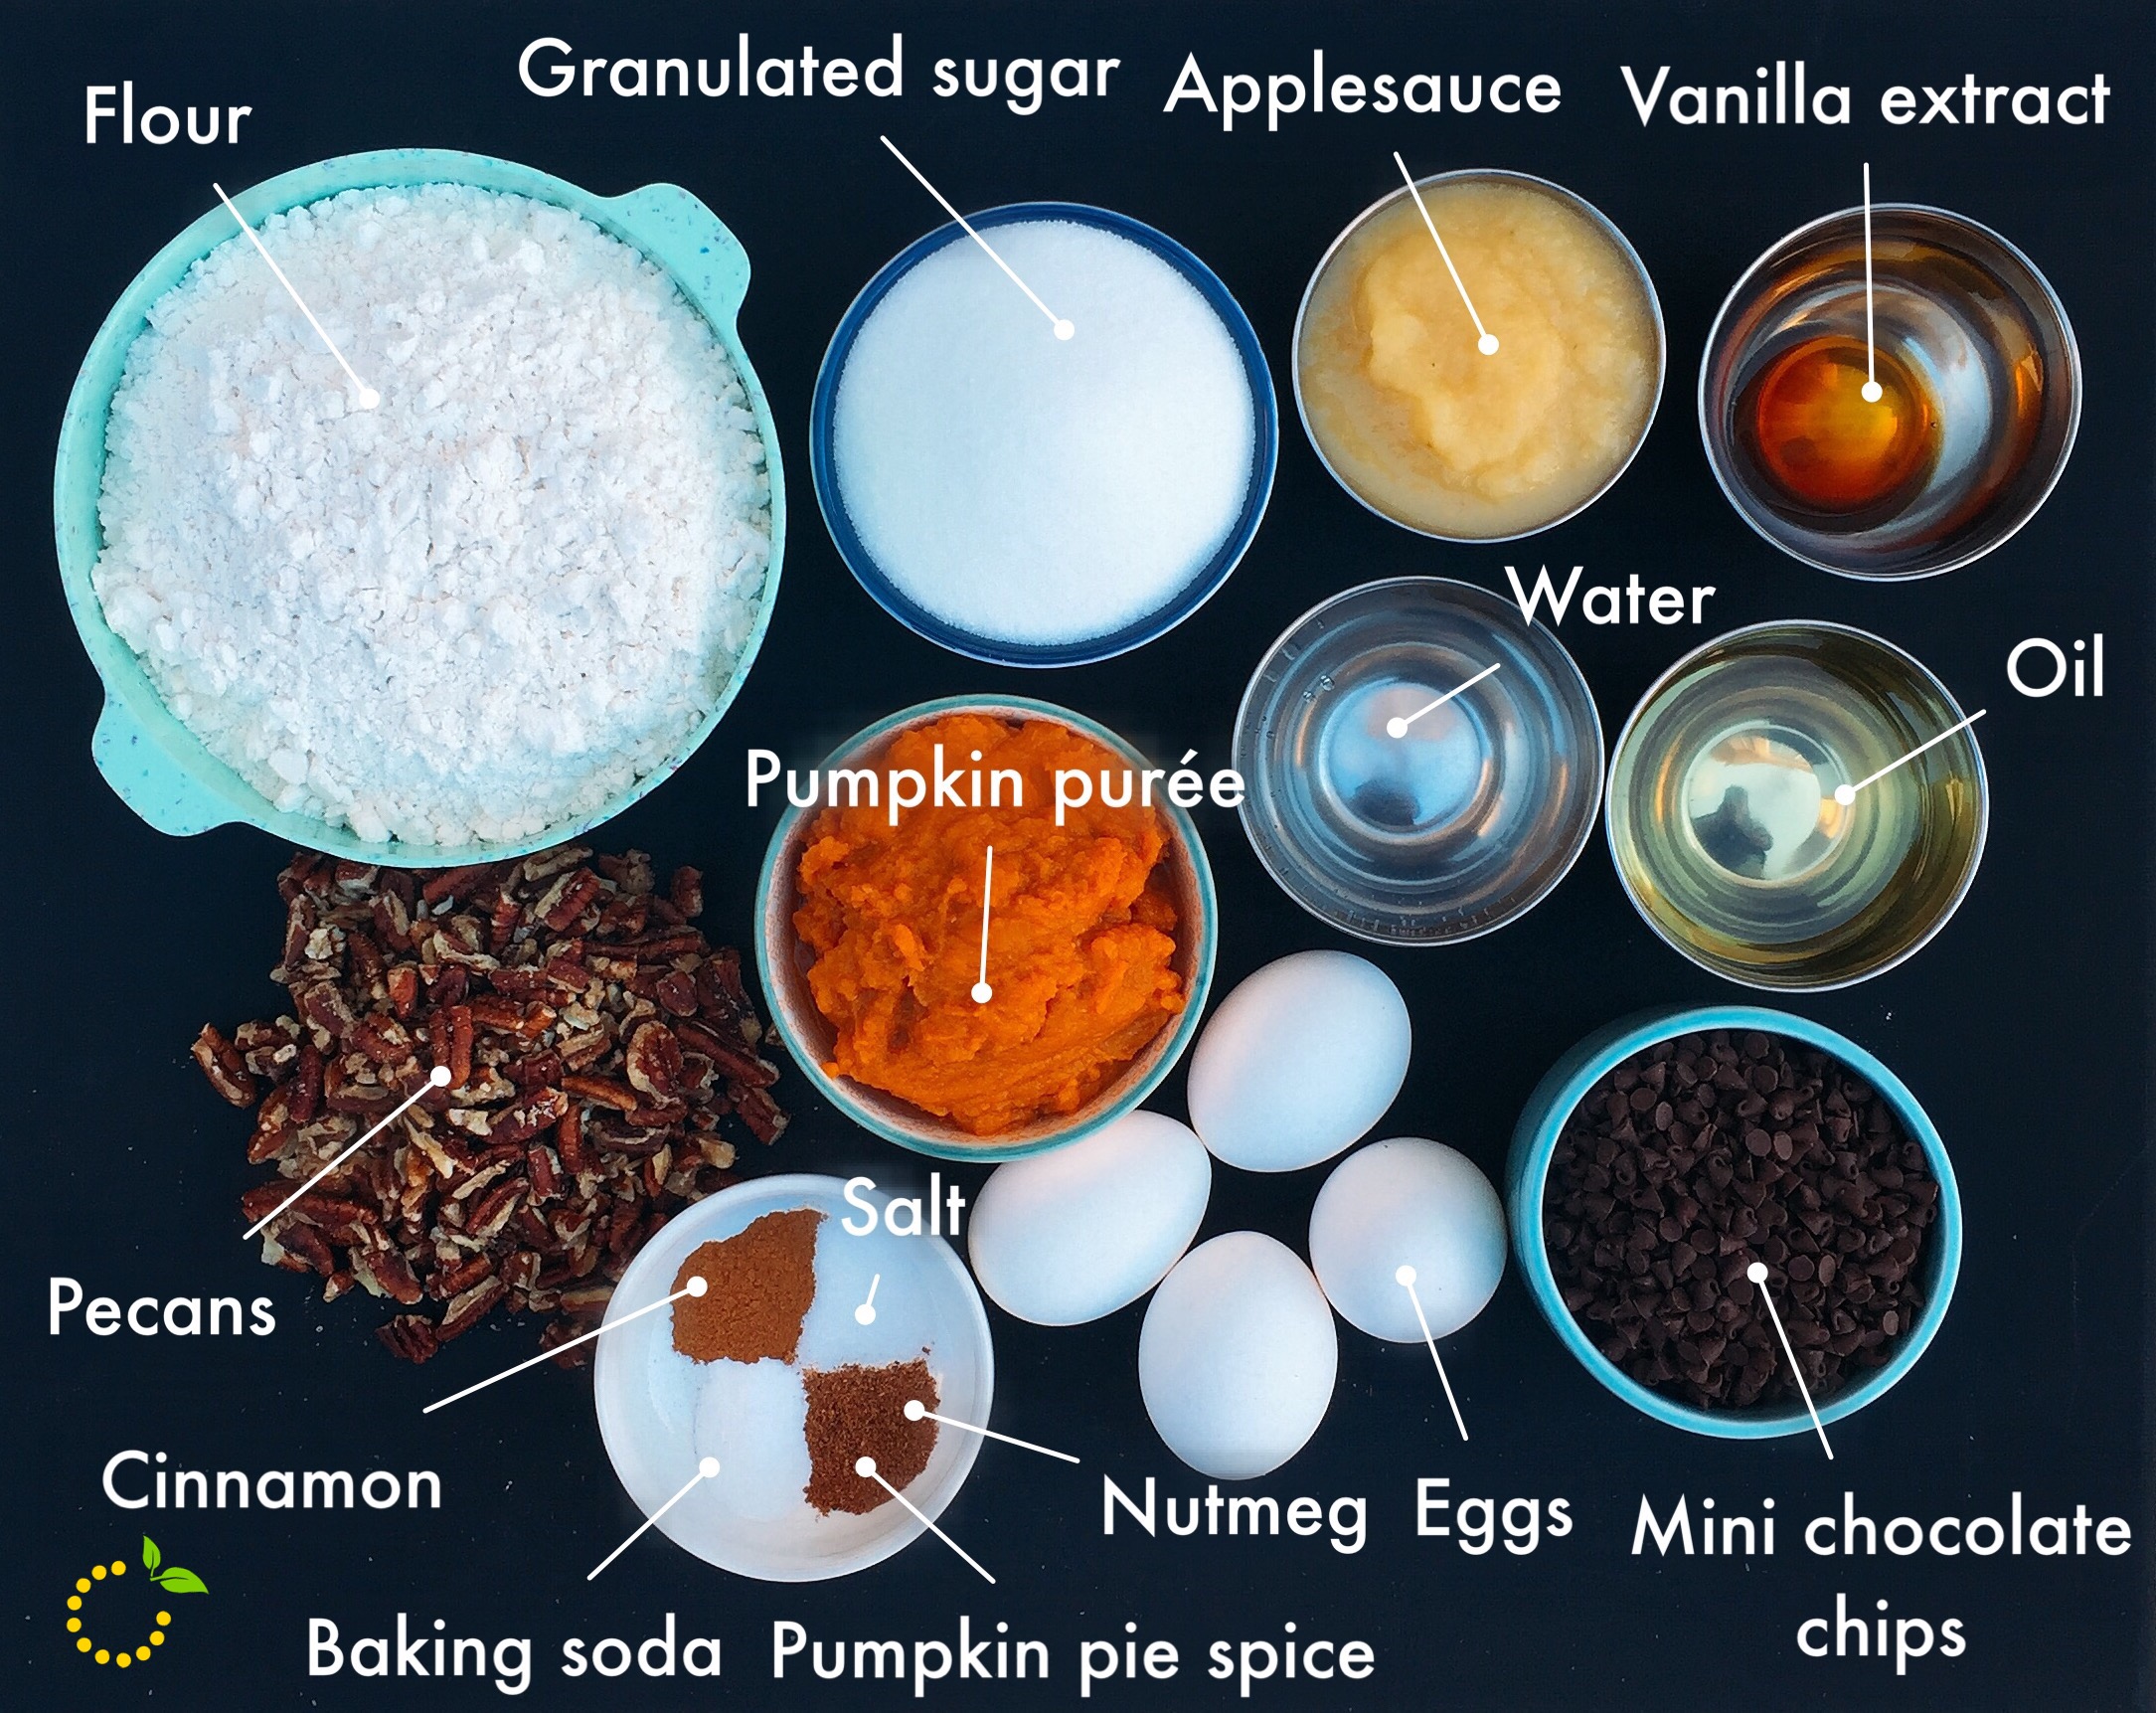
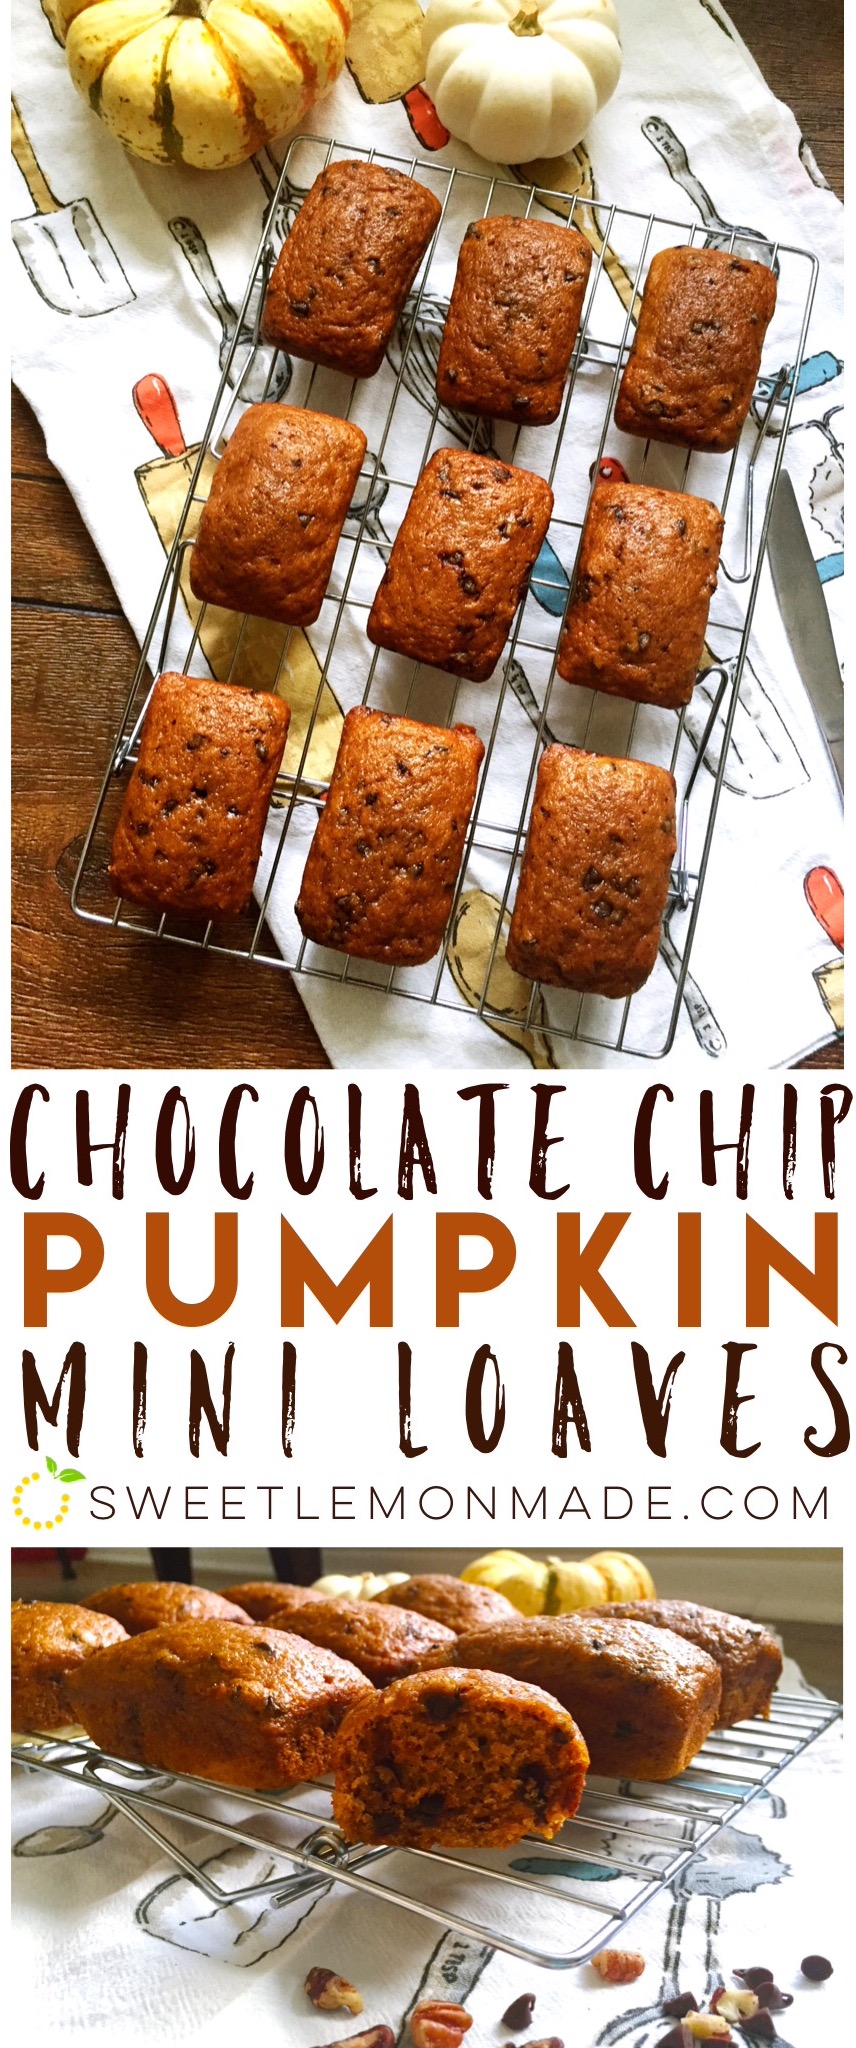
Let the fall baking commence! You can’t celebrate fall without some pumpkin in your life! Am I right? These chocolate chip pumpkin mini loaves have all the flavors you love about fall combined into each little mini loaf—pumpkin, mini chocolate chips, pecans, and bursts of cinnamon and nutmeg. And with the addition of applesauce in this recipe these little loaves are super moist.
As I thought about making pumpkin bread, I remember that I had bought this mini loaf pan and couldn’t resist not using it. I love anything mini so, naturally I knew I had to use this new pan of mine! Because mini foods = happiness! 🙂 Does mini food make anyone else’s heart flutter with happiness? I love how these mini loaves are easily shareable with family, friends, and coworkers. And they also make great holiday treats to pack up individually.
The best part of this recipe is that it is easy and simple. All you need is 2 bowls, a hand mixer, a mini loaf pan, and an oven. I hope I just made your holiday baking one step easier with this simple and delicious recipe.
This was one of those meals that fell together as I was raiding my fridge in search of quick, non-cereal dinner option. I had been out of town on a week-long East coast road trip and was too busy (read: lazy) to go to the grocery store to replenish my barren refrigerator, and eating out again was the last thing I wanted to do. You know how it is, after a road trip sometimes you just want “real food,” that is cooked in a house, and has to be eaten with a fork. It’s only natural after a week of trail mix, apples, donuts, Swedish Fish, and Coke, right?
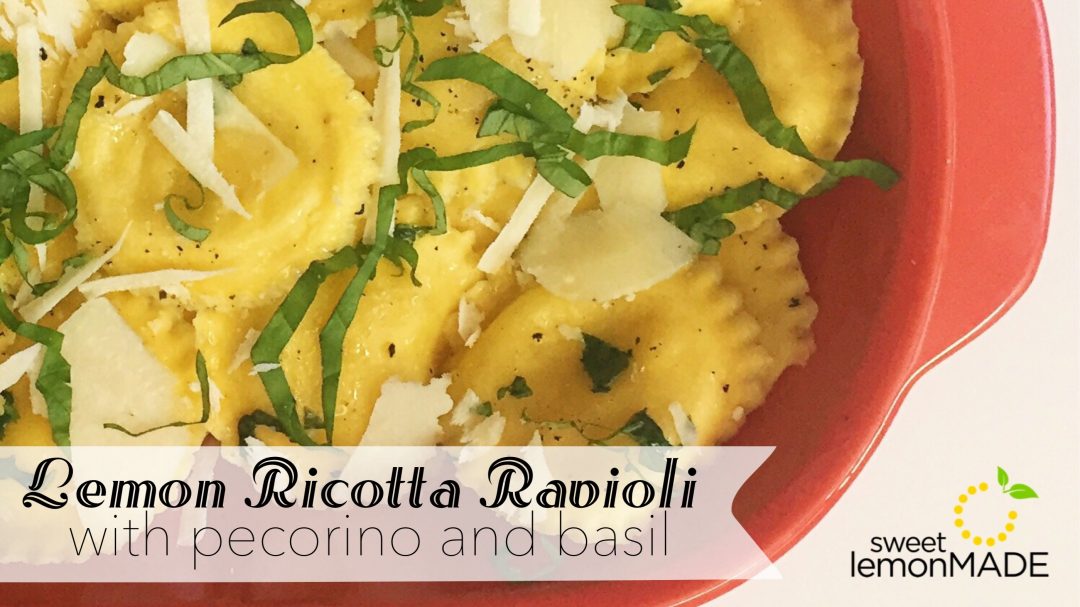
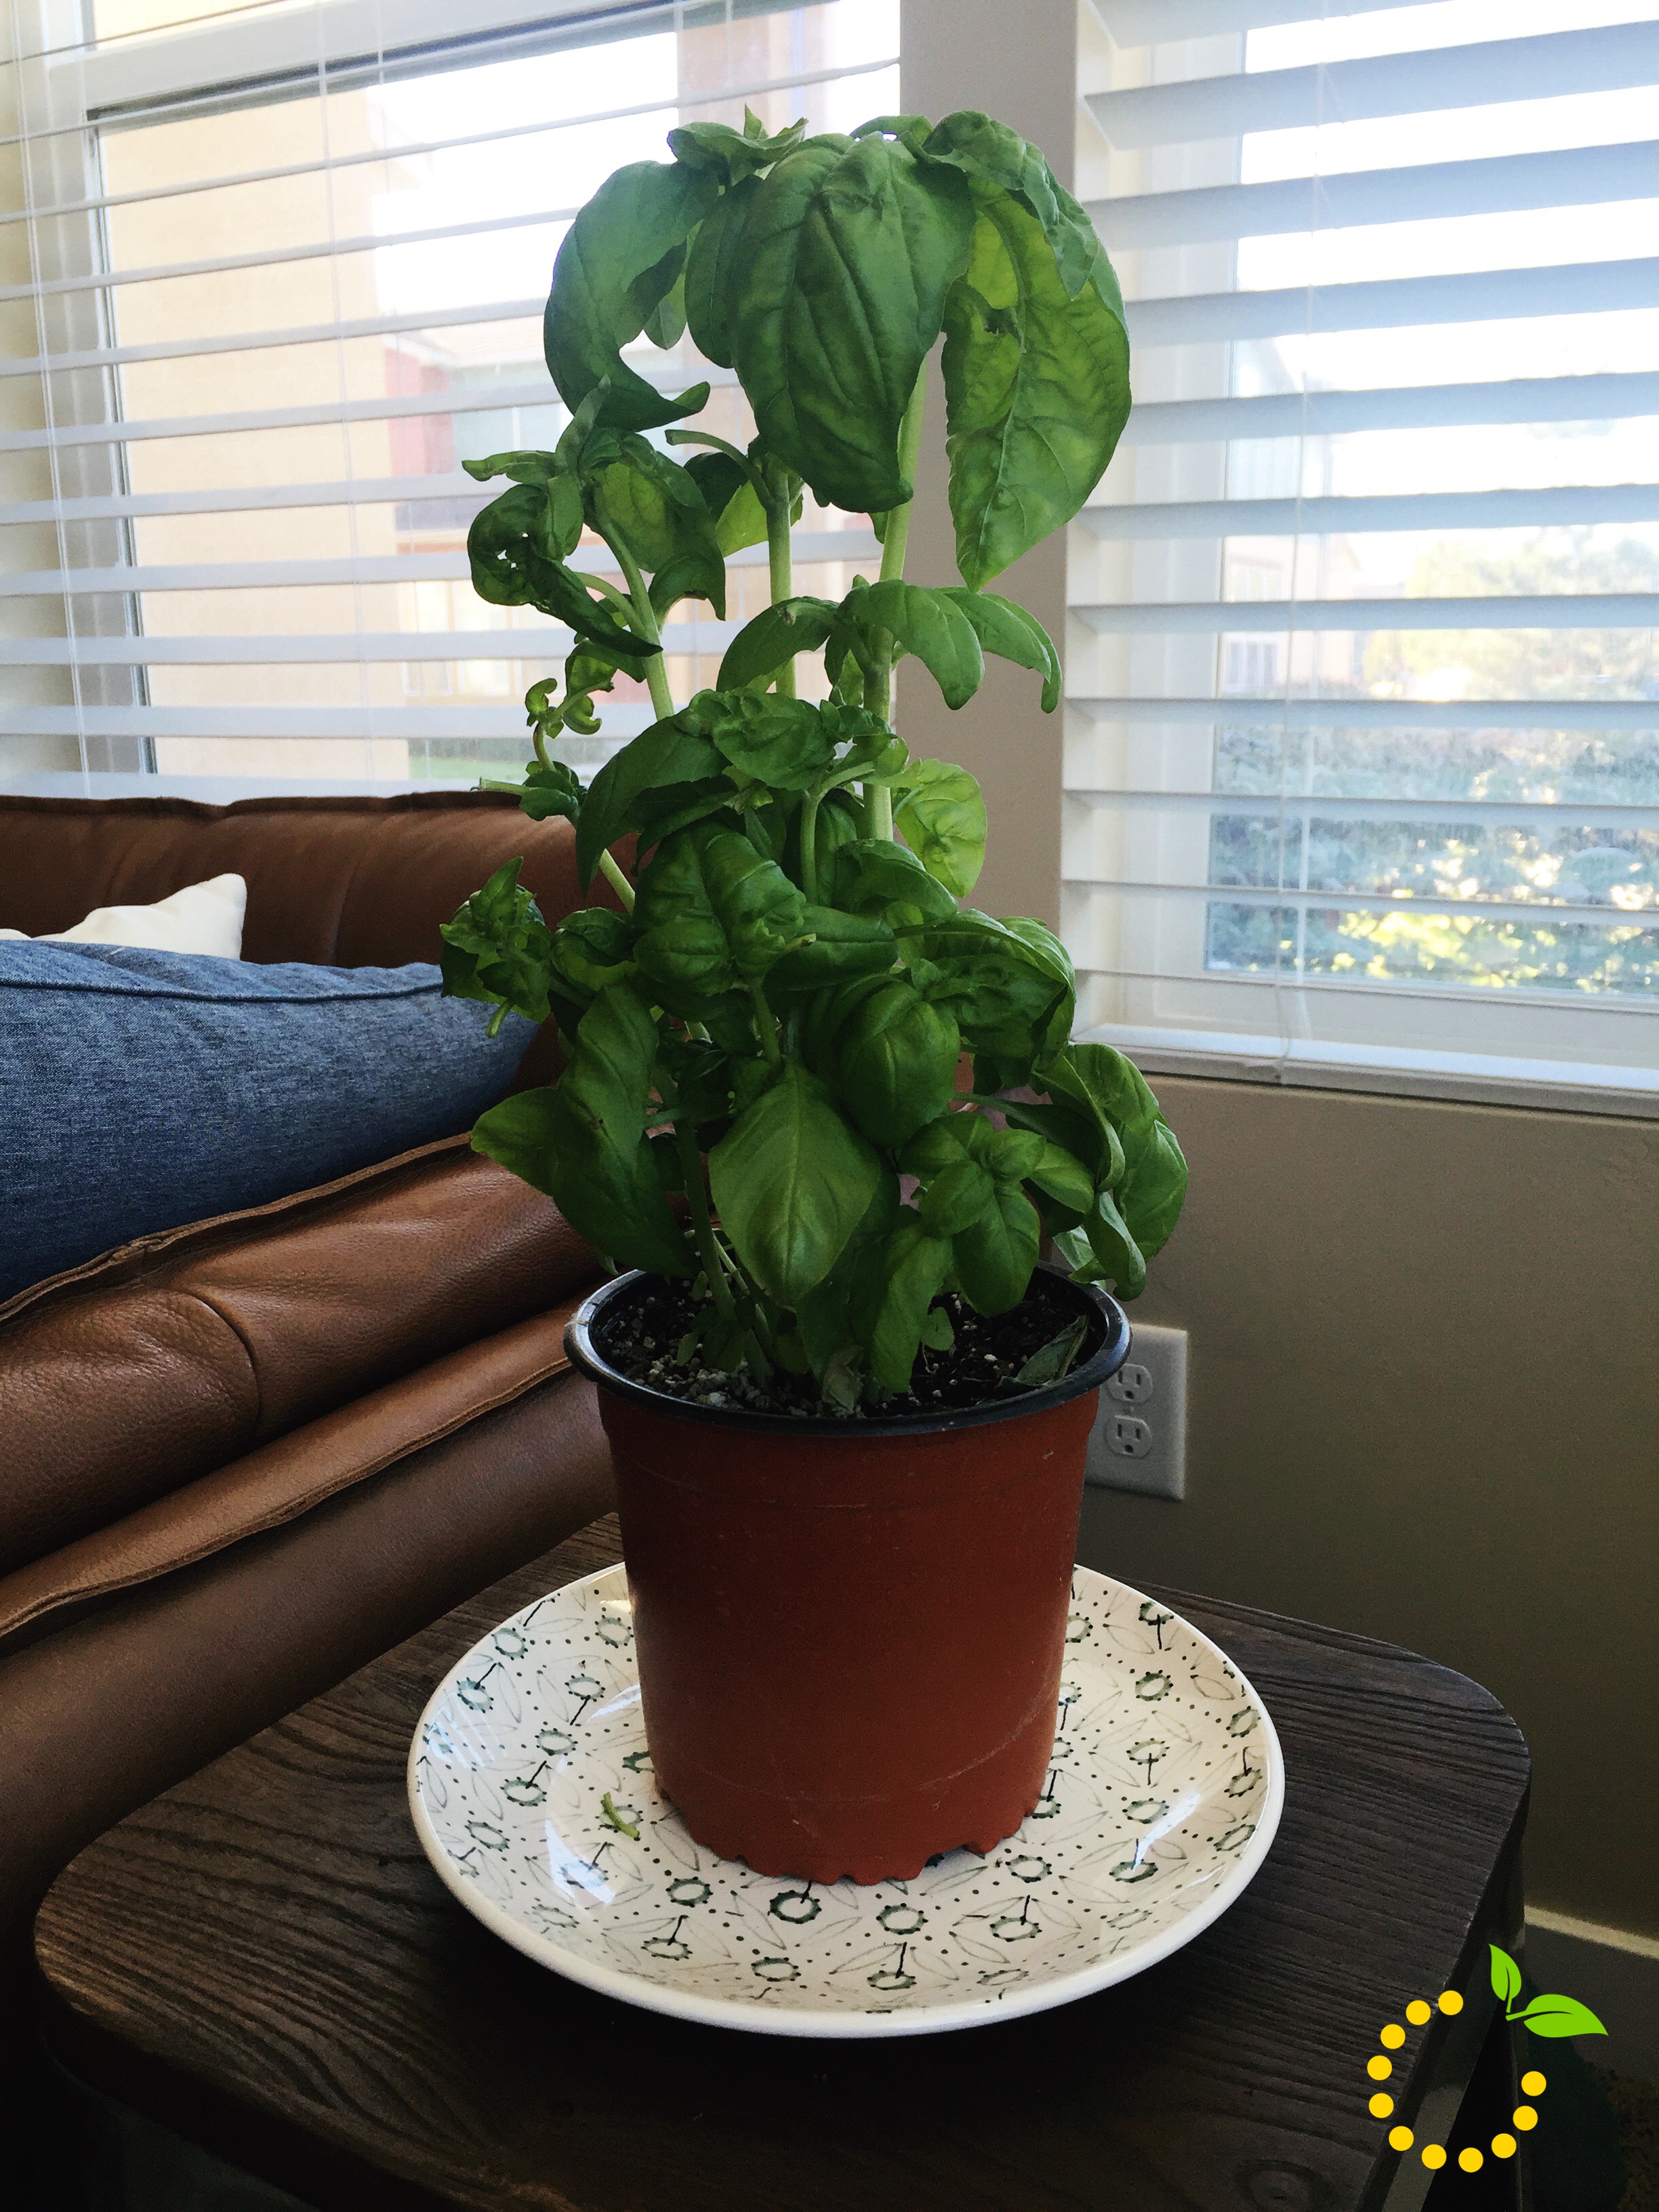
So as I stared deeply into the refrigerator, noticing all of the things that I probably should have thrown away prior to said trip, I saw some Trader Joe’s ravioli perched on top of a two week old birthday cake. Seeing this as a solid start to my meal I grabbed it and noticed that it was a fancier version of ravioli than I typically buy. This was a lemon ricotta flavor. Intrigued and excited about this new flavor I began to think about what I could pair with it. Obviously you can’t go dump regular old tomato sauce on the delicate flavors of a lemon and ricotta, so the jar of pasta sauce was out. Next I thought about making a light cream sauce, but quickly realized I had no cream or milk in the fridge. Bah! And then out of the corner of my eye I saw my little ole basil plant sitting in the living room. I moved it into the living room so it could get more sun and have a fighting chance at survival in this “black thumb” household. And you know what? It was still alive! (Largely in part due to the graciousness of my awesome roommate that watered it for me while I was out of town, so thanks Em).
The little grocery store basil plant was actually flourishing and needed to be harvested. Perfect! Lemon and basil are a perfect combo. I decided to keep the sauce light so the light, fresh flavors of the basil and lemon could shine through and used a little garlic olive oil (side note: are you using flavored olive oils?? If not, do it! They are game changers, for sure), sea salt, cracked pepper, and some Pecorino Romano cheese that I had laying in the fridge. Pecorino is a hard sheep’s cheese with a great salty flavor. I’m a sucker for the fancy cheese station at any grocery store and love trying new flavors and types of cheeses. One thing that is awesome about buying those little fancy blocks (as opposed to the generic pre-shredded cheeses) is that they seriously last forever. Obviously it depends on the cheese, but I’ve had this Pecorino Romano block for over 6 months and it’s still flavorful and mold-free. Just sayin… Also, the Pioneer Woman says to never buy pre-shredded cheese. Always buy the block and shred it yourself. Your taste buds will thank you, I promise.
Ok, so moral of the story is…
Randomness and creativity pay off in the kitchen
Flavored olive oils—go try ‘em
Fancy cheese last forever and can snazz up any plain-jane meal
When it comes to cheese buy the block and shred yourself
Enough chatter, let me give you the deets for this super simple, super easy, super quick meal.
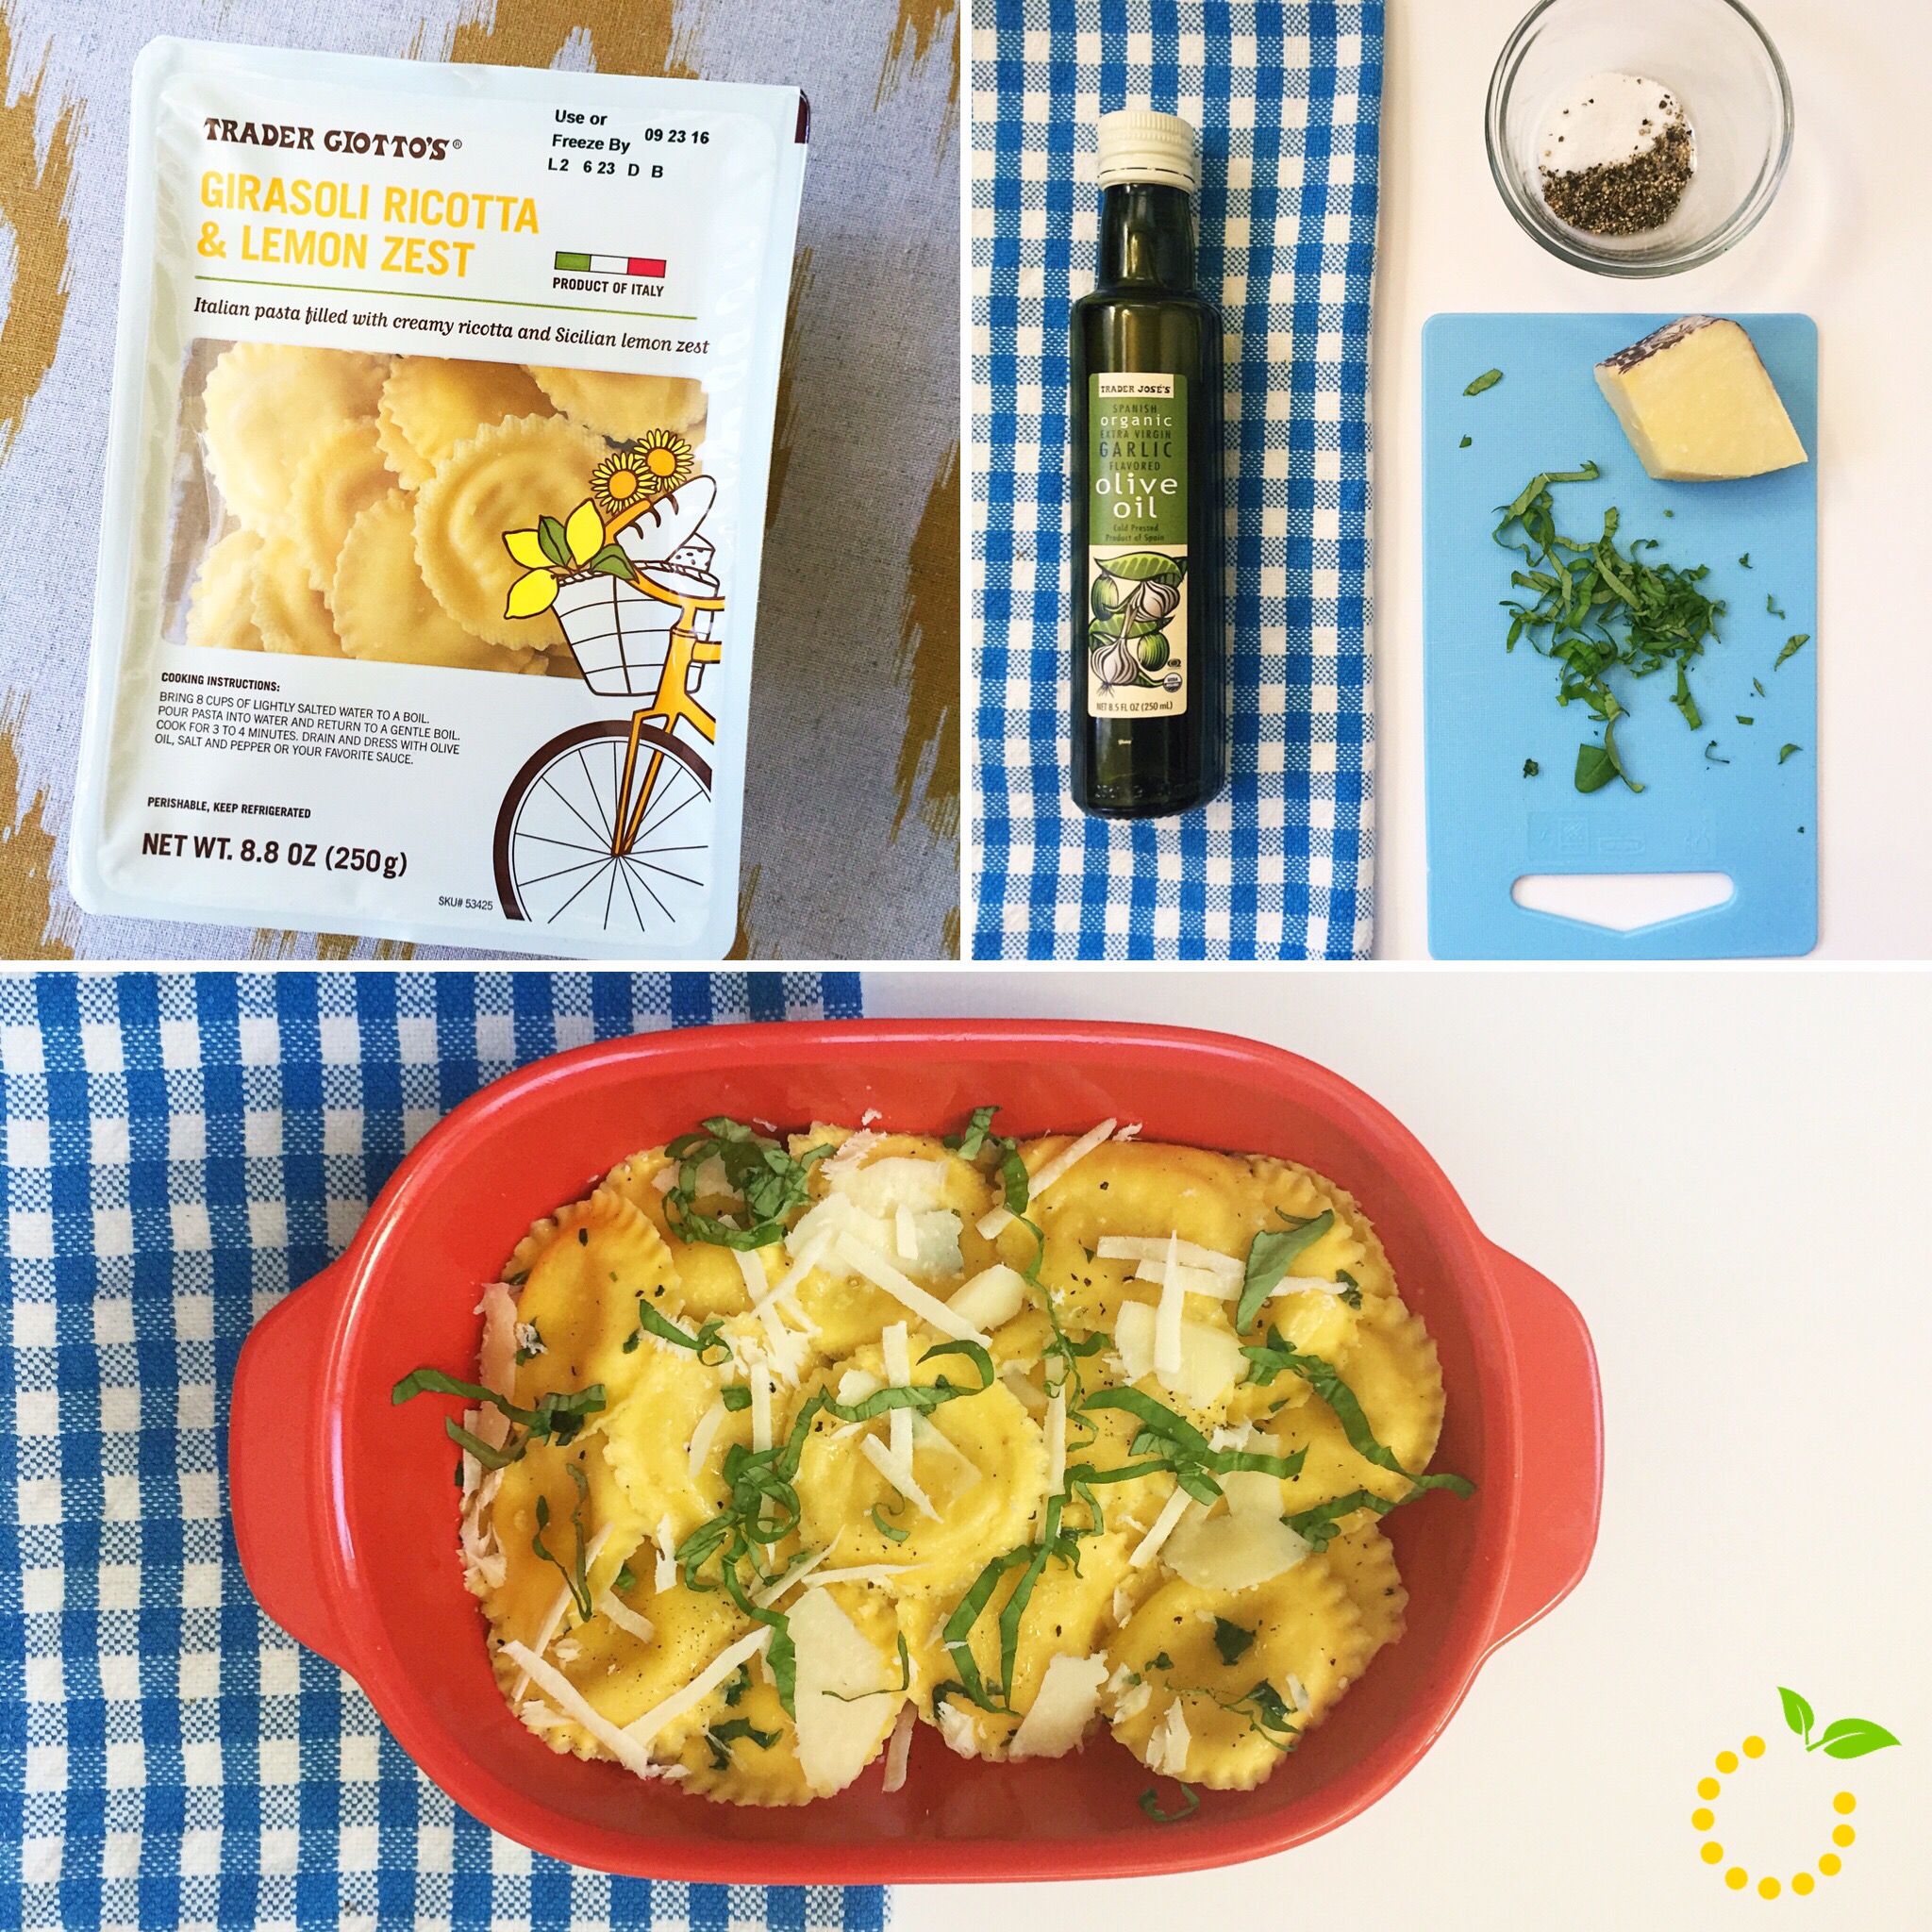
1 package (or two if you’ve got a large crew) of Trader Joe’s Lemon Ricotta Ravioli
1-2 grilled chicken breasts, sliced or shredded (if you’re looking to add a little more substance to the meal, I didn’t this time)
4- 5 fresh basil leaves, cut into long, thin strips
2 teaspoons garlic olive oil
1 teaspoon extra virgin olive oil (you can do all garlic olive oil if you want a real punch of flavor)
1/3 cup Pecorino Romano cheese (or parmesan, mozzarella, whatever you like), use shavings or grated ( I prefer larger pieces of cheese so that you get a nice bite of flavor)
Salt and cracked pepper, to taste
Instructions
Bring pot of salted water to boiling. Once water is boiling add ravioli from package, keeping the heat high enough to allow a rolling boil to continue.
Cook pasta for 3-4 minutes until al dente. Keep your eyes on the prize here and don’t get distracted. Three minutes is not enough time to multi-task and do something else, I promise. Mushy ravioli is THE WORST. The pasta will get soggy, it will tear easily, and before you know it the delicious filling is bursting out and you have goulash instead of ravioli. And let’s be real, nobody wants to eat that.
Once pasta is cooked, place in colander, drain and shake off excess water, and place in serving bowl.
Add the three teaspoons of olive oil and gently stir until ravioli is well coated. Depending on preference you may want to add a little more or a little less. Just follow your heart on this one. You want the pasta to be lightly coated so it doesn’t stick together and so it has some great flavor from the garlic olive oil.
Add cut or shredded chicken (if desired). Note: If you decide to add chicken you will likely need to use a little more olive to coat the chicken as well.
Add cheese, basil, and lightly toss with ravioli to mix well. Add salt and pepper to taste. Note: if you are using a salty hard cheese like a pecorino or a parmesan you will likely need less salt than if you use a mozzarella.
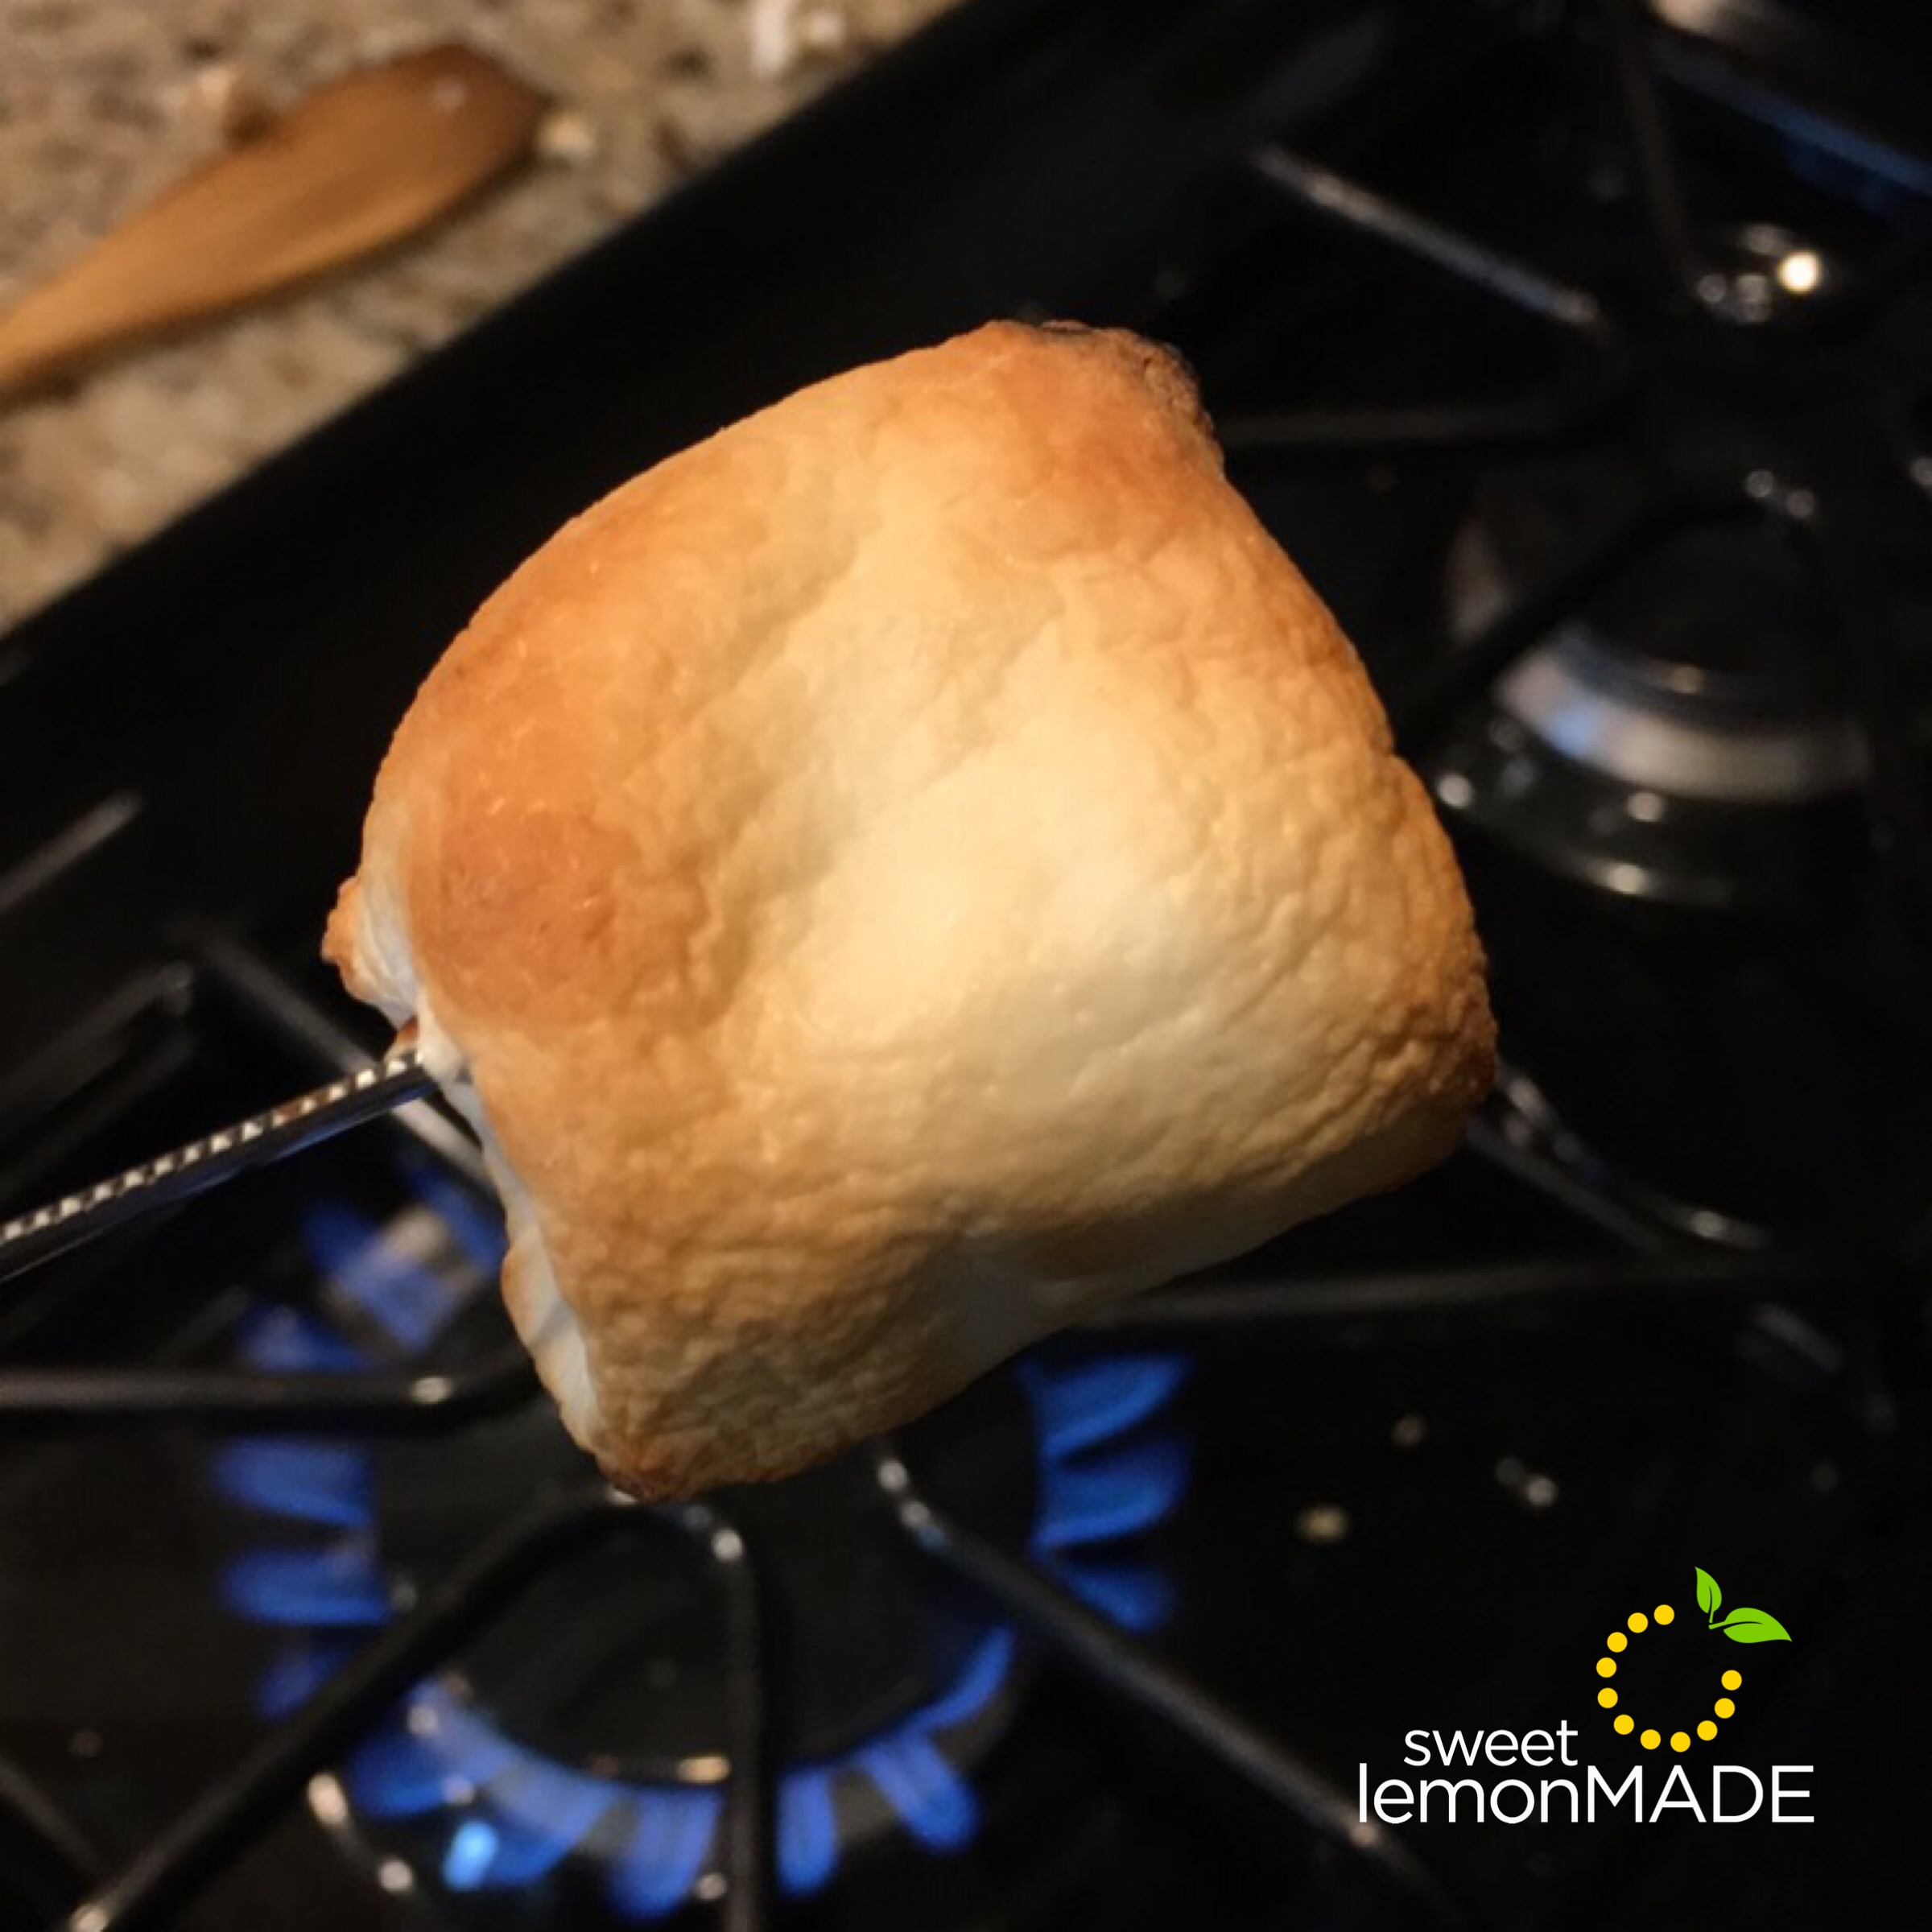
Summer has been awesome. Campfires, sunscreen and treats everyday. I mean, right? You’re eating treats everyday too, no? I don’t know if you’ve heard, but I love s’mores. And this summer has got me hooked—like addicted. I need s’mores like a pregnant lady needs pickles and ice cream. My new found love affair poses a few logistical concerns as you can imagine. I want s’mores way more often than is feasible to build a campfire. However, late one night when the campfire cravings came a knocking, in a stroke of genius I decided to fire up the gas stove in the kitchen to toast my mallow. And IT. Was. Perfect. It’s now become a nightly routine. All you need is a fork to roast the marshmallows gently over that smokin’ blue flame. Once golden and sizzling grab your graham crackers topped with chocolate and squish that s’more into a melty, delicious summer treat. And the best part is you don’t have to wash your hair six times to get the campfire smell out!
As my love (read: addiction) for s’mores continued to blossom I needed to find a way to share it with the masses (aka my family). I needed a way to get a lot of bang for my s’mores buck if you know what I mean. And I remembered having an out-of-this-world s’more pizza in NYC. If I could have flown one in that night, I would have. I think Google is working on an algorithm for telepathic pizza delivery, but apparently there are still a few kinks to work out. So I was forced to go old-school and search “s’mores pizza recipe” on the interwebs. After skimming options, I stumbled upon this great recipe with a homemade graham cracker crust and gooey mallow middle. Insert heart eye emoji. If you’re looking to feed a crowd a campfire classic or just want a flame-less alternative to feed your summer s’mores addiction look no further! This pizza is great hot and gooey, but is also tasty at room temperature. And if you eat it the morning after, go ahead and call it a “breakfast pizza.” That’s a thing, right? It is in my house.
For the crust, crush up graham crackers by hand using a ziploc gallon bag and a rolling pin or with a food processor. Melt butter and mix with sugar.
Mix in egg and vanilla.
In a separate bowl combine the dry ingredients--flour, salt, and baking soda then combine and mix with the butter and sugar. Mixture will be slightly crumbly.
Press the mixture evenly into a greased 12 inch pizza pan.
Break up 6 Hershey's bars and spread even on top of graham cracker crust.
Scoop out marshmallow cream and dollop on top of chocolate using 2 spoons, then gently spread making sure not to get too close to the edge. Otherwise it will melt over the sides when baking.
Bake for 18 minutes.
While the crust is baking, break up 2 remaining chocolate bars into small pieces, 2 graham crackers into small pieces, and crush remaining 1-2 graham crackers into crumbs.
After 18 minutes remove from oven and turn on the broiler.
Top pizza with mini marshmallows, chocolate, graham cracker pieces and crumbs.
Place back into oven and broil for about 1 minute to toast.
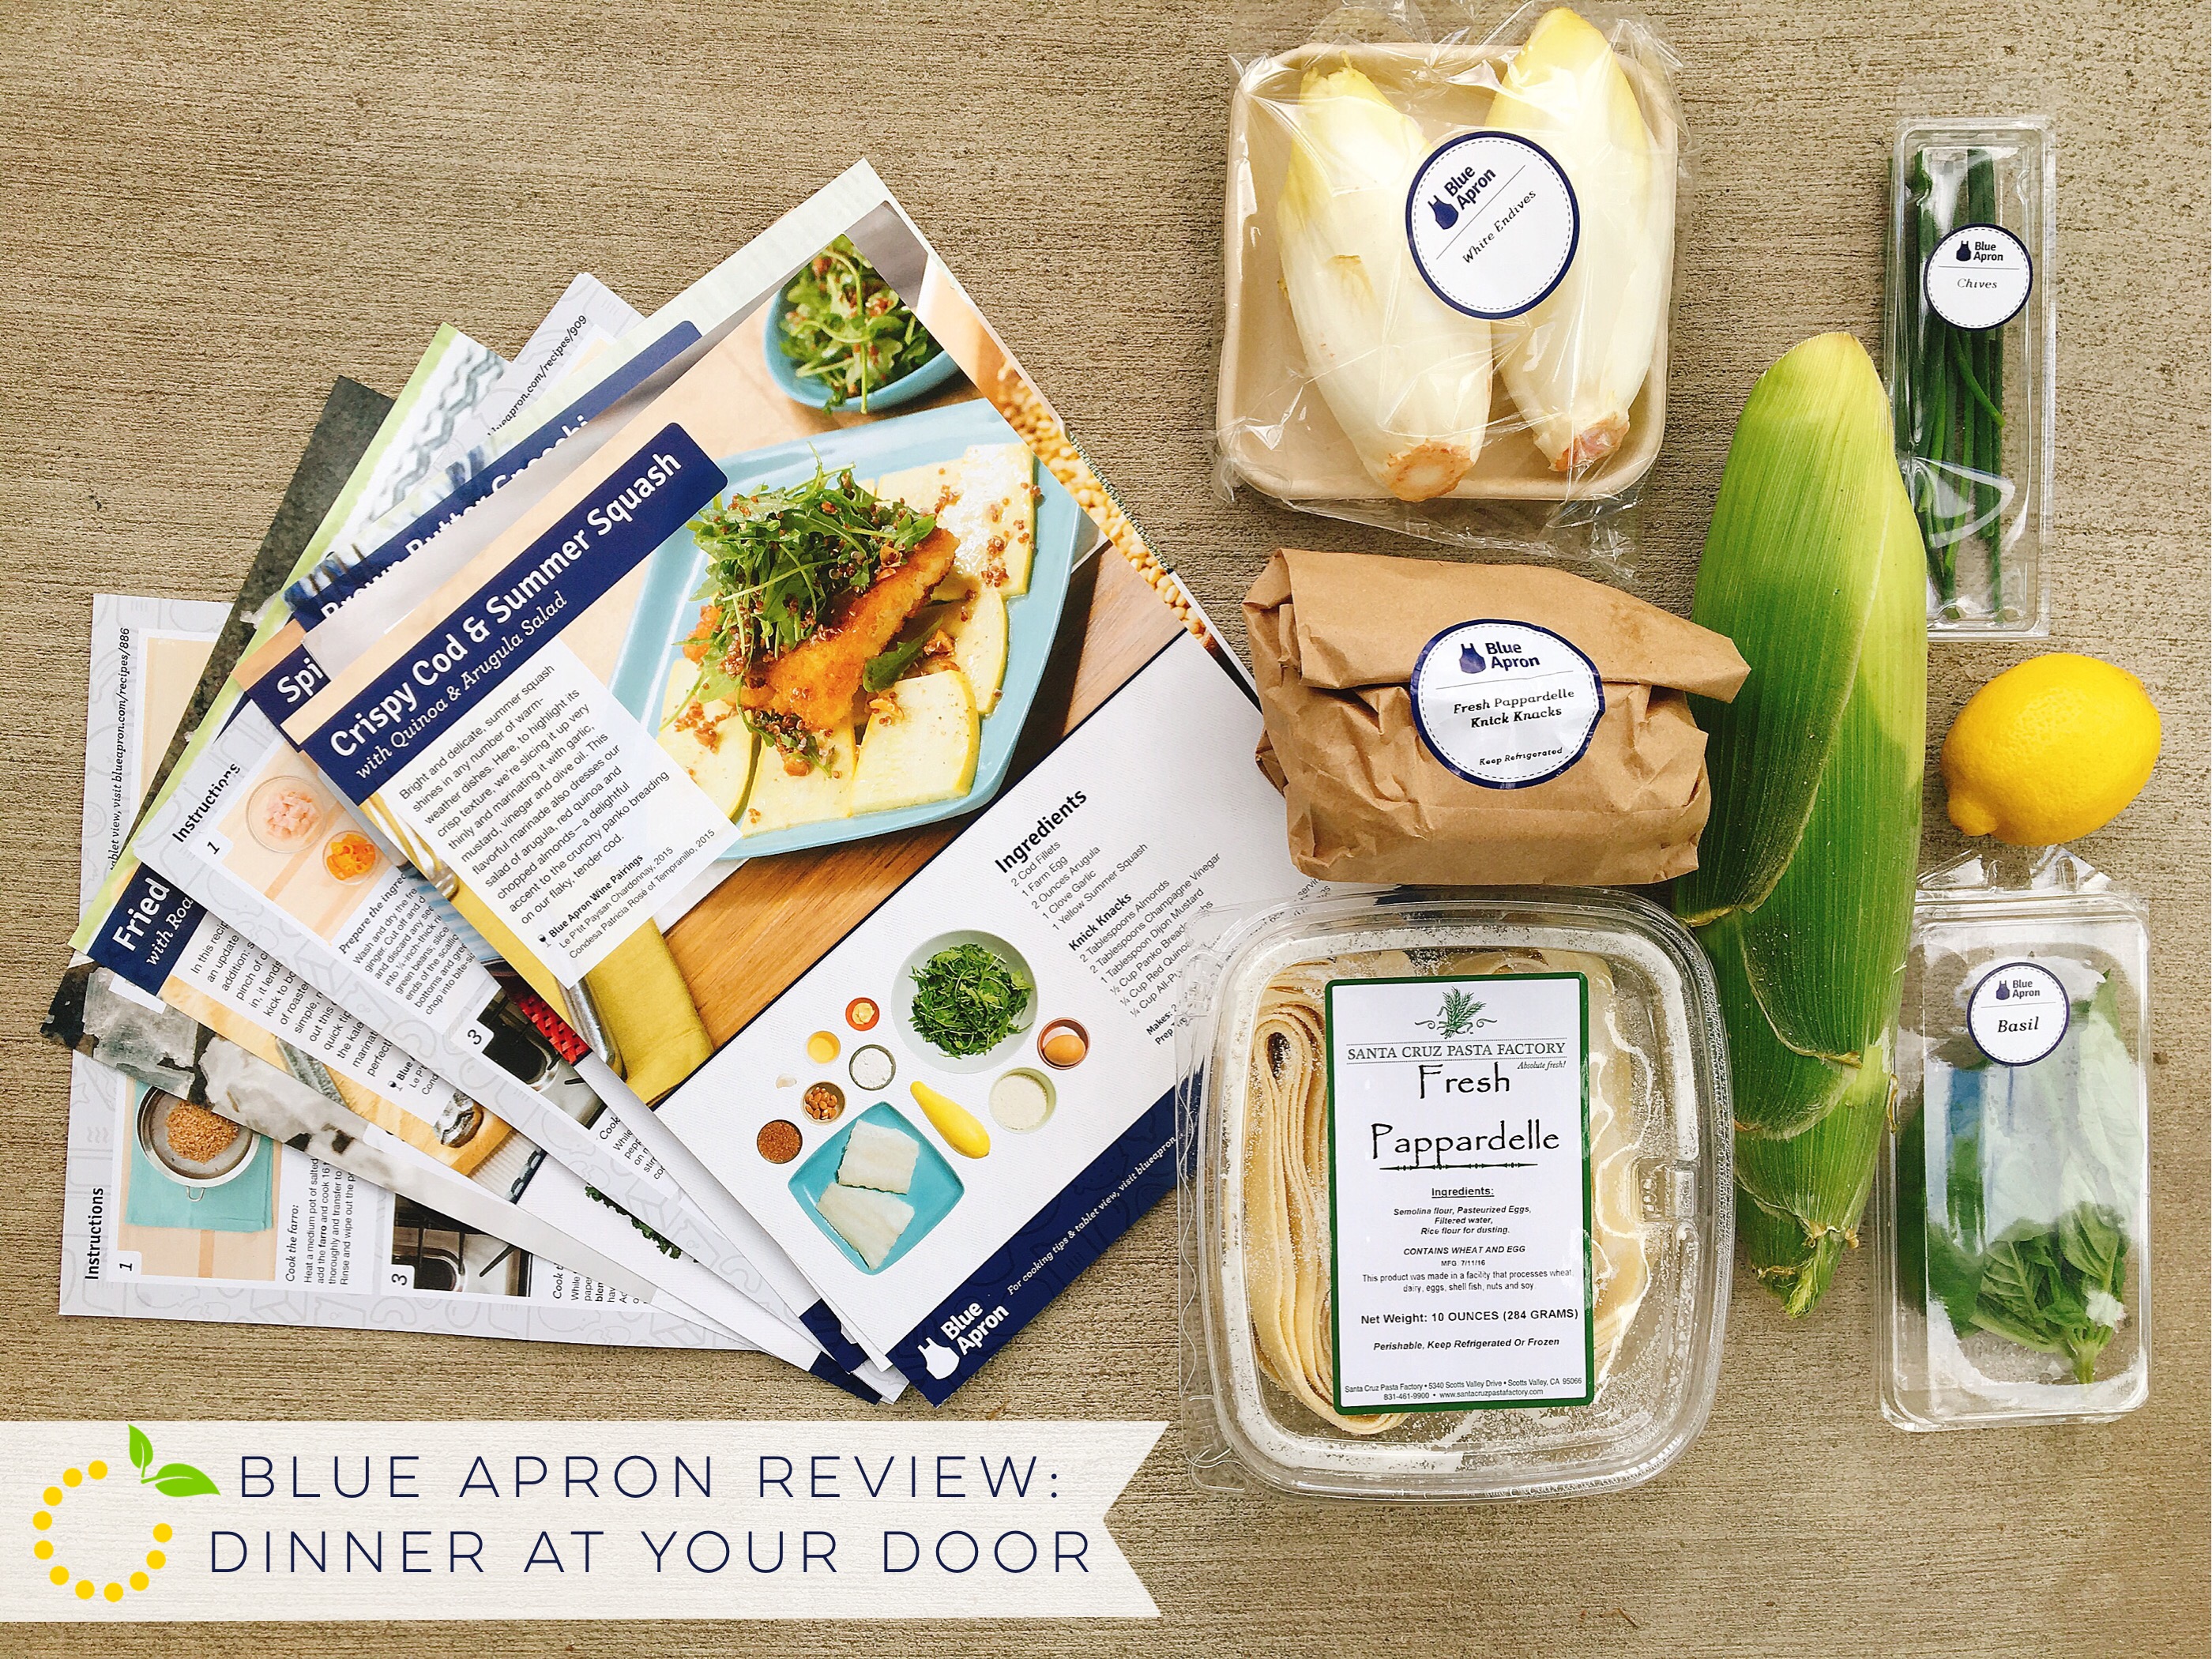
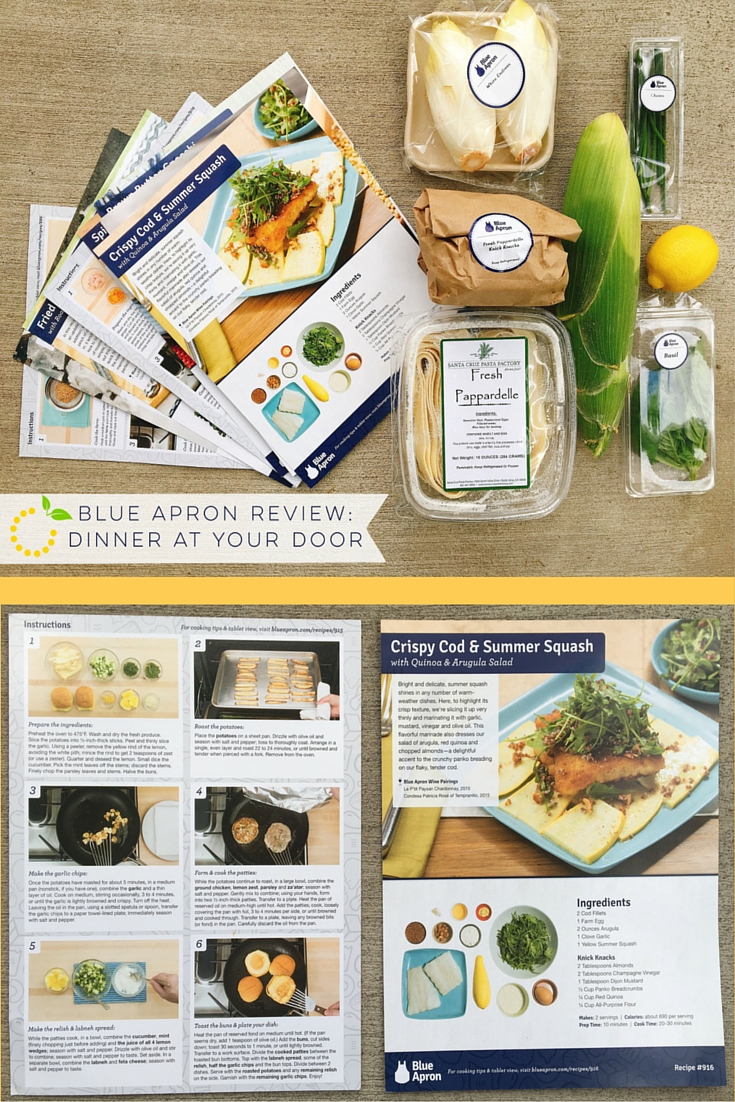
If you’re like me (and everyone else I know) you sometimes get in a rut when it comes to making dinner. At my house, we have our five go-to meals: spaghetti, tacos, pizza, pot roast and eating out! I finally reached a breaking point when not eating started sounding better than actually making the same boring dinner over and over again. That’s when my husband and I decided it was time to give Blue Apron a try. We’ve been cooking with Blue Apron now for about two months and we absolutely love it. Not only do we get to try a variety of new meals, we have fun learning about new techniques and ingredients. With a toddler running around the kitchen during meal prep it might not be a relaxing experience, but we are enjoying our time together in the kitchen.
Below are a few of my thoughts on our Blue Apron experience so far.
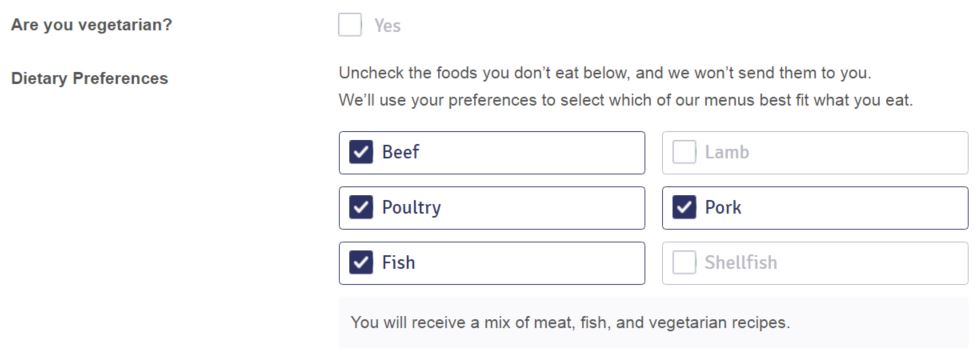
Flexibility My friend told me about Blue Apron and sent me three free meals to check it out and see if I like it. I went online to redeem my freebies and noticed I had to put in a credit card number along with my personal information. I’m always hesitant to sign up for a service like this because I don’t want to commit to something long-term, especially if it costs a good amount of money. I almost didn’t move forward because I didn’t want to get stuck paying $60 per week if I didn’t end up liking it. However, I noticed there was no long-term commitment required and you can cancel at any time. The best part about it is you can even cancel from week to week. So when I’m going to go on vacation or have plans during the week, I can cancel my meals for that week and resume when it’s more convenient. You can also personalize your meals each week to your preference of beef, poultry, pork, fish or vegetarian.
(Unfortunately, all the meals are assembled in the same facility so you won’t want to order Blue Apron if you have a food allergy.)
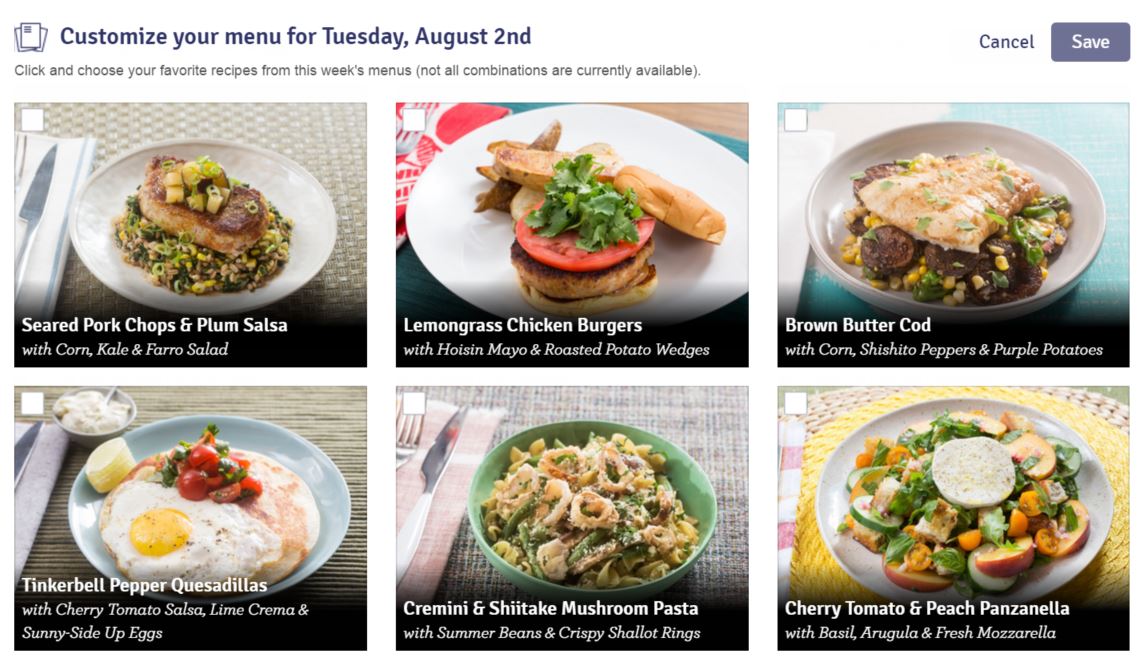
Blue Apron posts the following week’s menu on the website or in the app a week in advance so you have the opportunity to choose your meals. With my plan of three meals per week, I can choose between six options.
Pricing We were a little unsure about the price tag, seeing as how the plan we chose equals about $20 per meal. In theory, that’s just as much as going out to dinner, but then you add-on tax, tip and possibly desert, so we figured it was still cheaper. The other thing we’ve noticed since using Blue Apron, is we only go to the grocery store once per week and have reduced the amount of money we spend on groceries. Since we’ve signed up we haven’t noticed a negative effect on our pocket-book and it’s forced us to eat at home instead of spending money at a restaurant.
Blue Apron has a couple meal plansto choose from depending on your family size and the number of meals you want to receive each week. Delivery is free so you don’t have to worry about any additional cost.
3 meals per week – 2 servings = $59.94
2 meals per week – 4 servings = $69.92
4 meals per week – 4 servings = $139.84
Freshness When researching Blue Apron, one of the benefits that really stood out was the food quality. Blue Apron has a direct relationship with farmers and suppliers so food is boxed and shipped at peak freshness with minimal time in transit. Another huge benefit (especially to my family) is all animals are raised without any added hormones or antibiotics.
You might be wondering how the food tastes, since it comes in a box…in the mail. (I know, it sounds a little crazy.) All food comes in a refrigerated box with ice packs to keep everything cold and fresh. So you don’t need to worry about being home when your box is delivered.
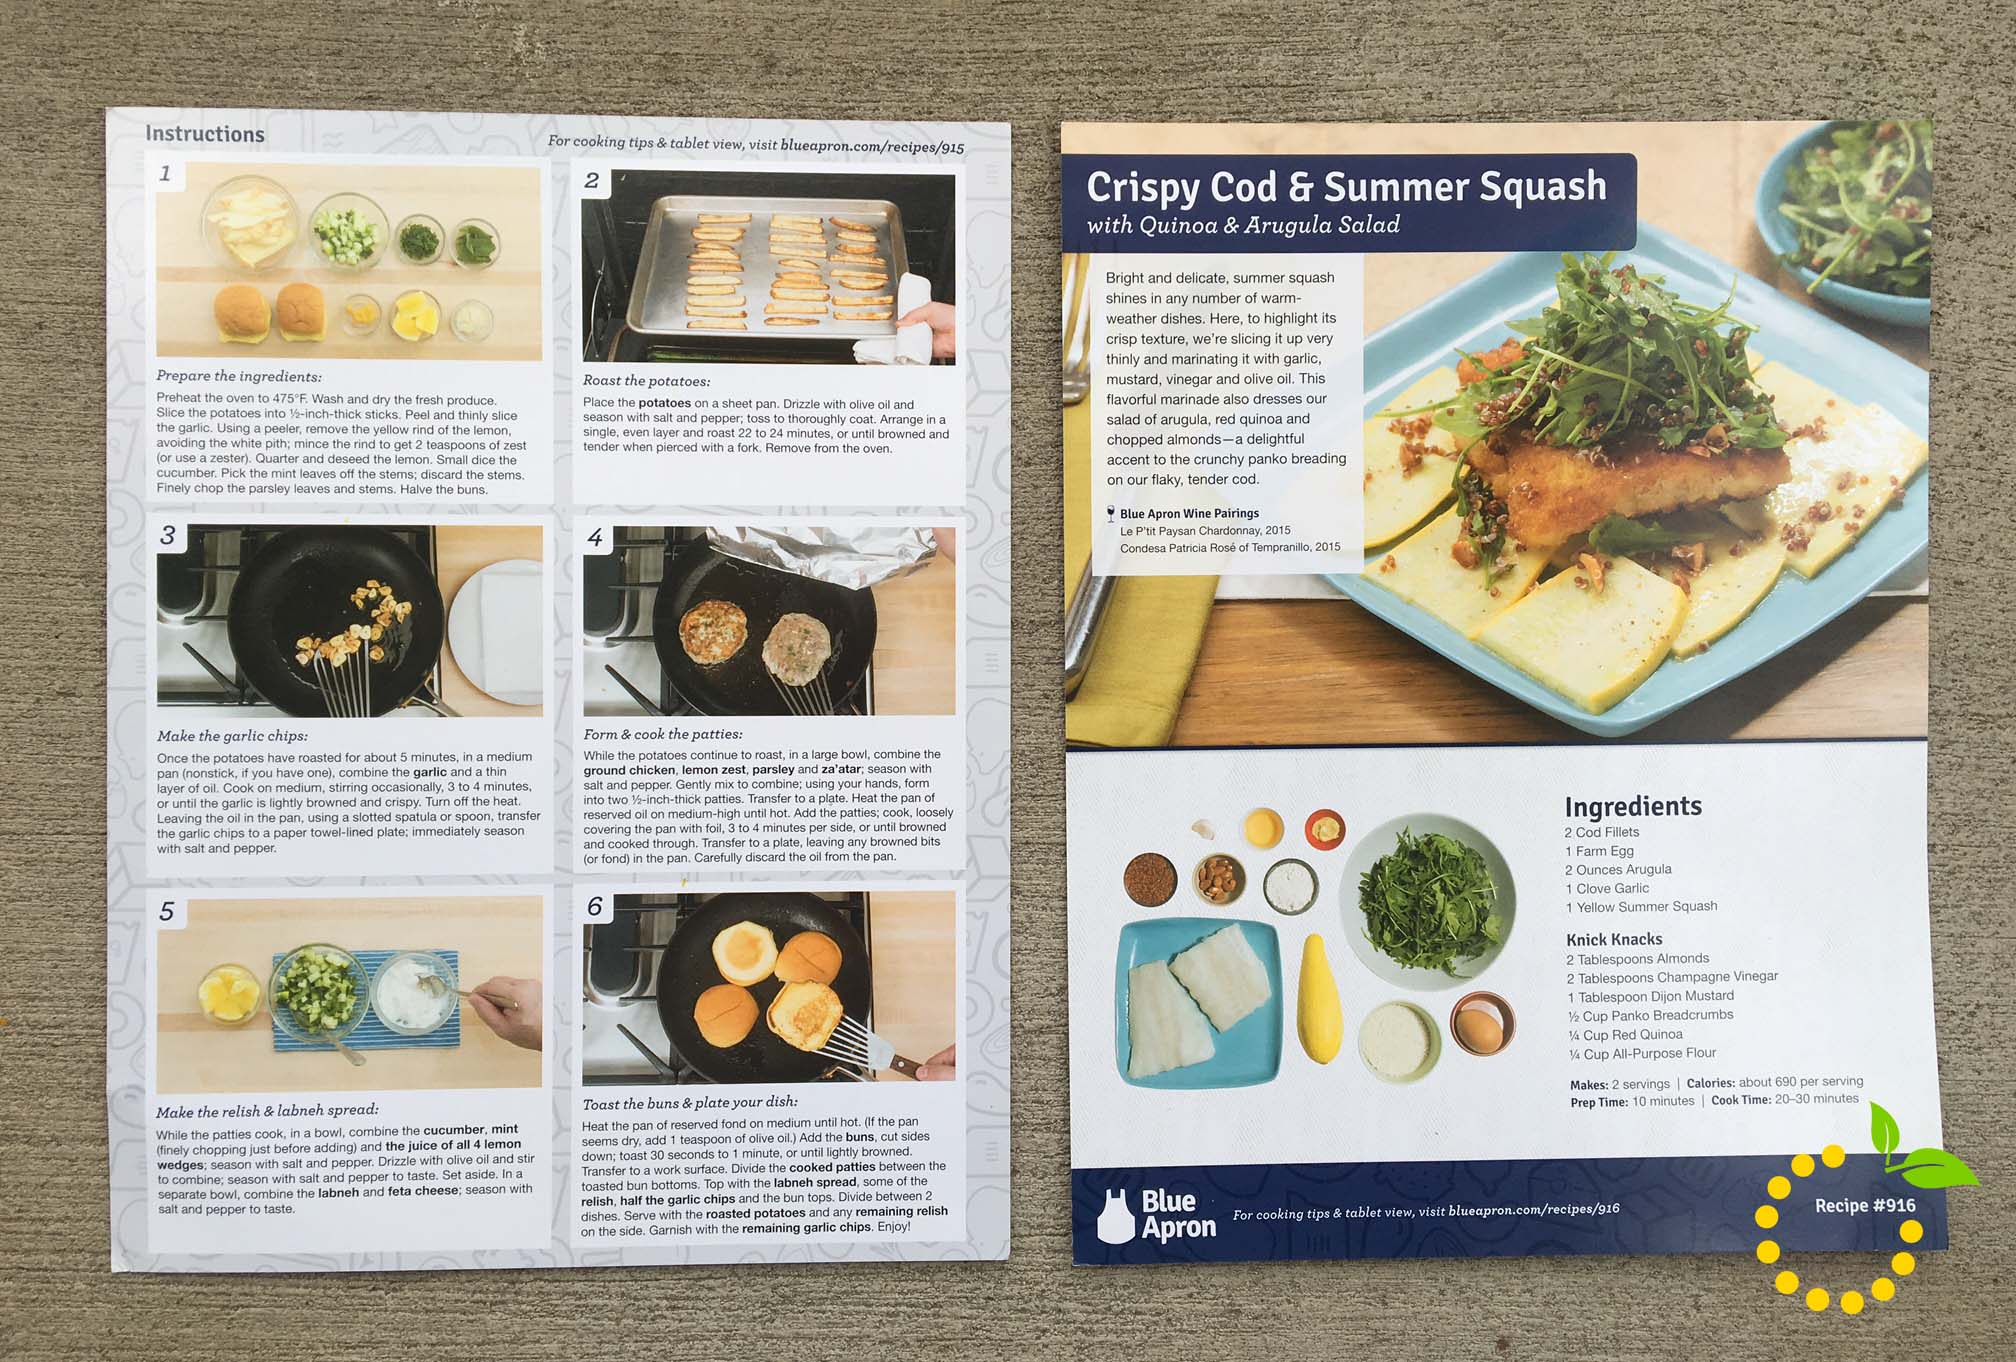
Prep Each box includes a recipe card with step-by-step instructions and color photos, which makes cooking the meal super easy. So far, every meal has been very easy to follow. One of the things I like most about Blue Apron is that all the ingredients are included. If you need a little splash of vinegar, it’s included. If you need one egg, it’s included. The only ingredients you have to provide yourself are olive oil, salt and pepper. What makes this so great is if I wanted to cook these meals on my own, it would cost me a lot more money to buy a whole jar of a certain spice I would never use again. This way, I get to try a unique recipe without committing to a bunch of ingredients that will end up sitting on the shelf.
I’m honestly not a fan of having to cut and prep all of the produce, mostly because it takes a lot of time and I always end up managing to cut myself! However, I will say that preparing everything has shown us new techniques and ways of preparing simple foods in a way I would have never thought before. I don’t know how many times I’ve said to my husband, “I never knew how easy it was to make a sauce” and “I would have never thought of using those ingredients together”. We’ve also learned about fancy techniques like “blanching”! Following these recipes has really opened our eyes to the way we prepare food and combine ingredients.
Blue Apron has an app that is pretty awesome. You can browse entire recipe collection, how-to videos and cooking tips. You can also use the app to customize your menu and manage your deliveries.
Bottom Line All of the meals (except for two) have been incredibly delicious. When I look at the menu for the following week, I’ll be honest that I’m not always excited about what is coming. But then the moment we sit down to eat, I’m always satisfied with what we’ve made. This experience has really opened our eyes on the types of meals we can make at home. Another benefit, is the meals are super healthy and are perfectly portioned so you don’t overeat. It’s been a great experience and we will continue to use Blue Apron moving forward.
The only complaint I have about Blue Apron is the amount of time it takes to cook each meal. As a working mom of a toddler, I look for fast and easy options when cooking. This whole process has opened my eyes to the variety of food I can cook for dinner, however, we don’t end up actually eating until 8 o’clock! The cooking process is really fun and provides a fun activity for my husband and I to do together. However, most of the time one of us is rushing around after our daughter while the other one is trying to prep all the ingredients. It would be nice if everything already came chopped and prepared, but then I guess you would lose in the freshness of your food and the experience of making the meal beginning to end.
If you would like to give Blue Apron a try, I have three free meals to give to five people. Comment below and I’ll send an email your way! If you already use Blue Apron, let us know about your experience.