All Posts By

Danelle

Eats

Cozy Chicken Pot Pie

Cozy Chicken Pot Pie sweetlemonmade.com

Winter is in full swing here in Utah. We’ve got piles of snow everywhere and it was 14 degrees F when I woke up this morning. BRRRR! All I want to do is bury myself in a big pile of warm laundry fresh from the dryer and wait for spring. That’s obviously not a viable option, so if I can’t count on comfy laundry to warm my chilly extremities I guess I’ll have to choose the next best thing…cozy comfort food. I thought about mac and cheese (for the obvious reason that a mix of carby pasta and a decadent cheese sauce can cure WHATEVER ails you), but I was fresh out of cheese (and due to frigid temperatures I was obviously not willing to go buy some). But you wanna know what I did have in my fridge??? Pie crust!

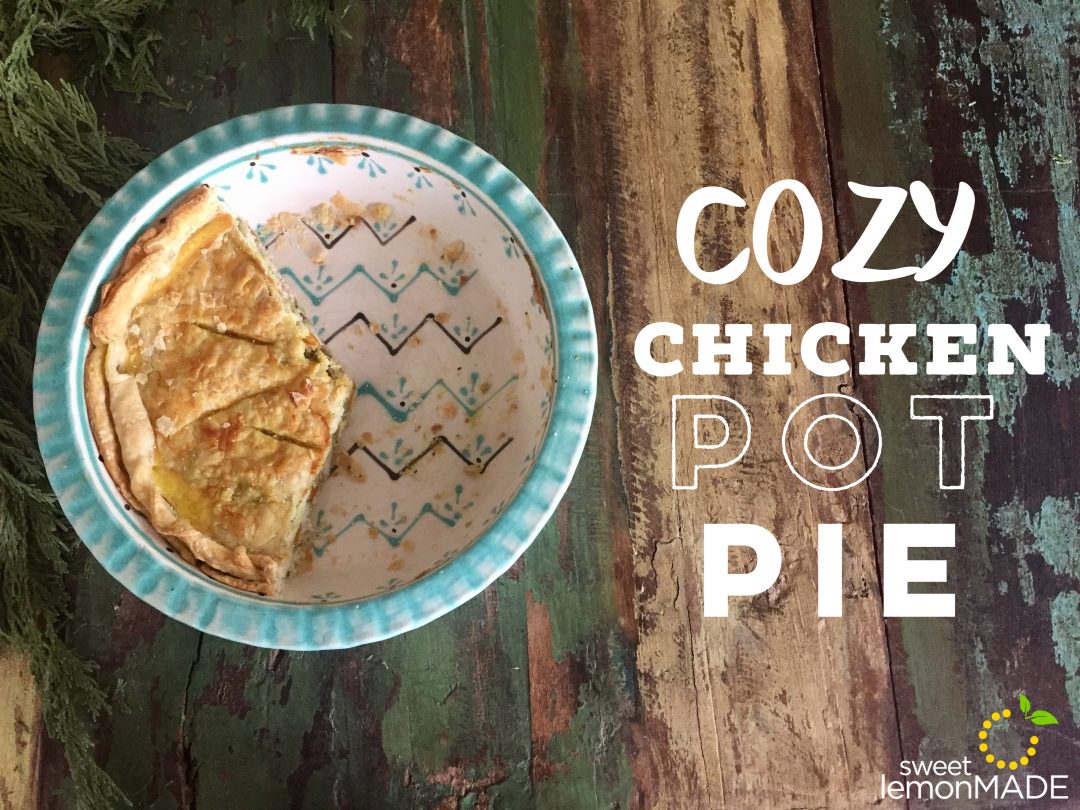
Yep, you know those pre-packaged ones you buy at Thanksgiving because you are too busy to make real ones? Yep, that’s what I found! And yes, it is still in there from Thanksgiving! The beauty of those preservative-enhanced pieces of buttery, flakey goodness is that they have a surprisingly long shelf-life in the fridge or freezer and can save the day in a moment like this! So with a pie crust in hand and thawing chicken in the sink I was struck with a beautiful idea for a creamy chicken pot pie! Um hello comfort food all-star!

Chicken Pot Pie Ingredients sweetlemonmade.com

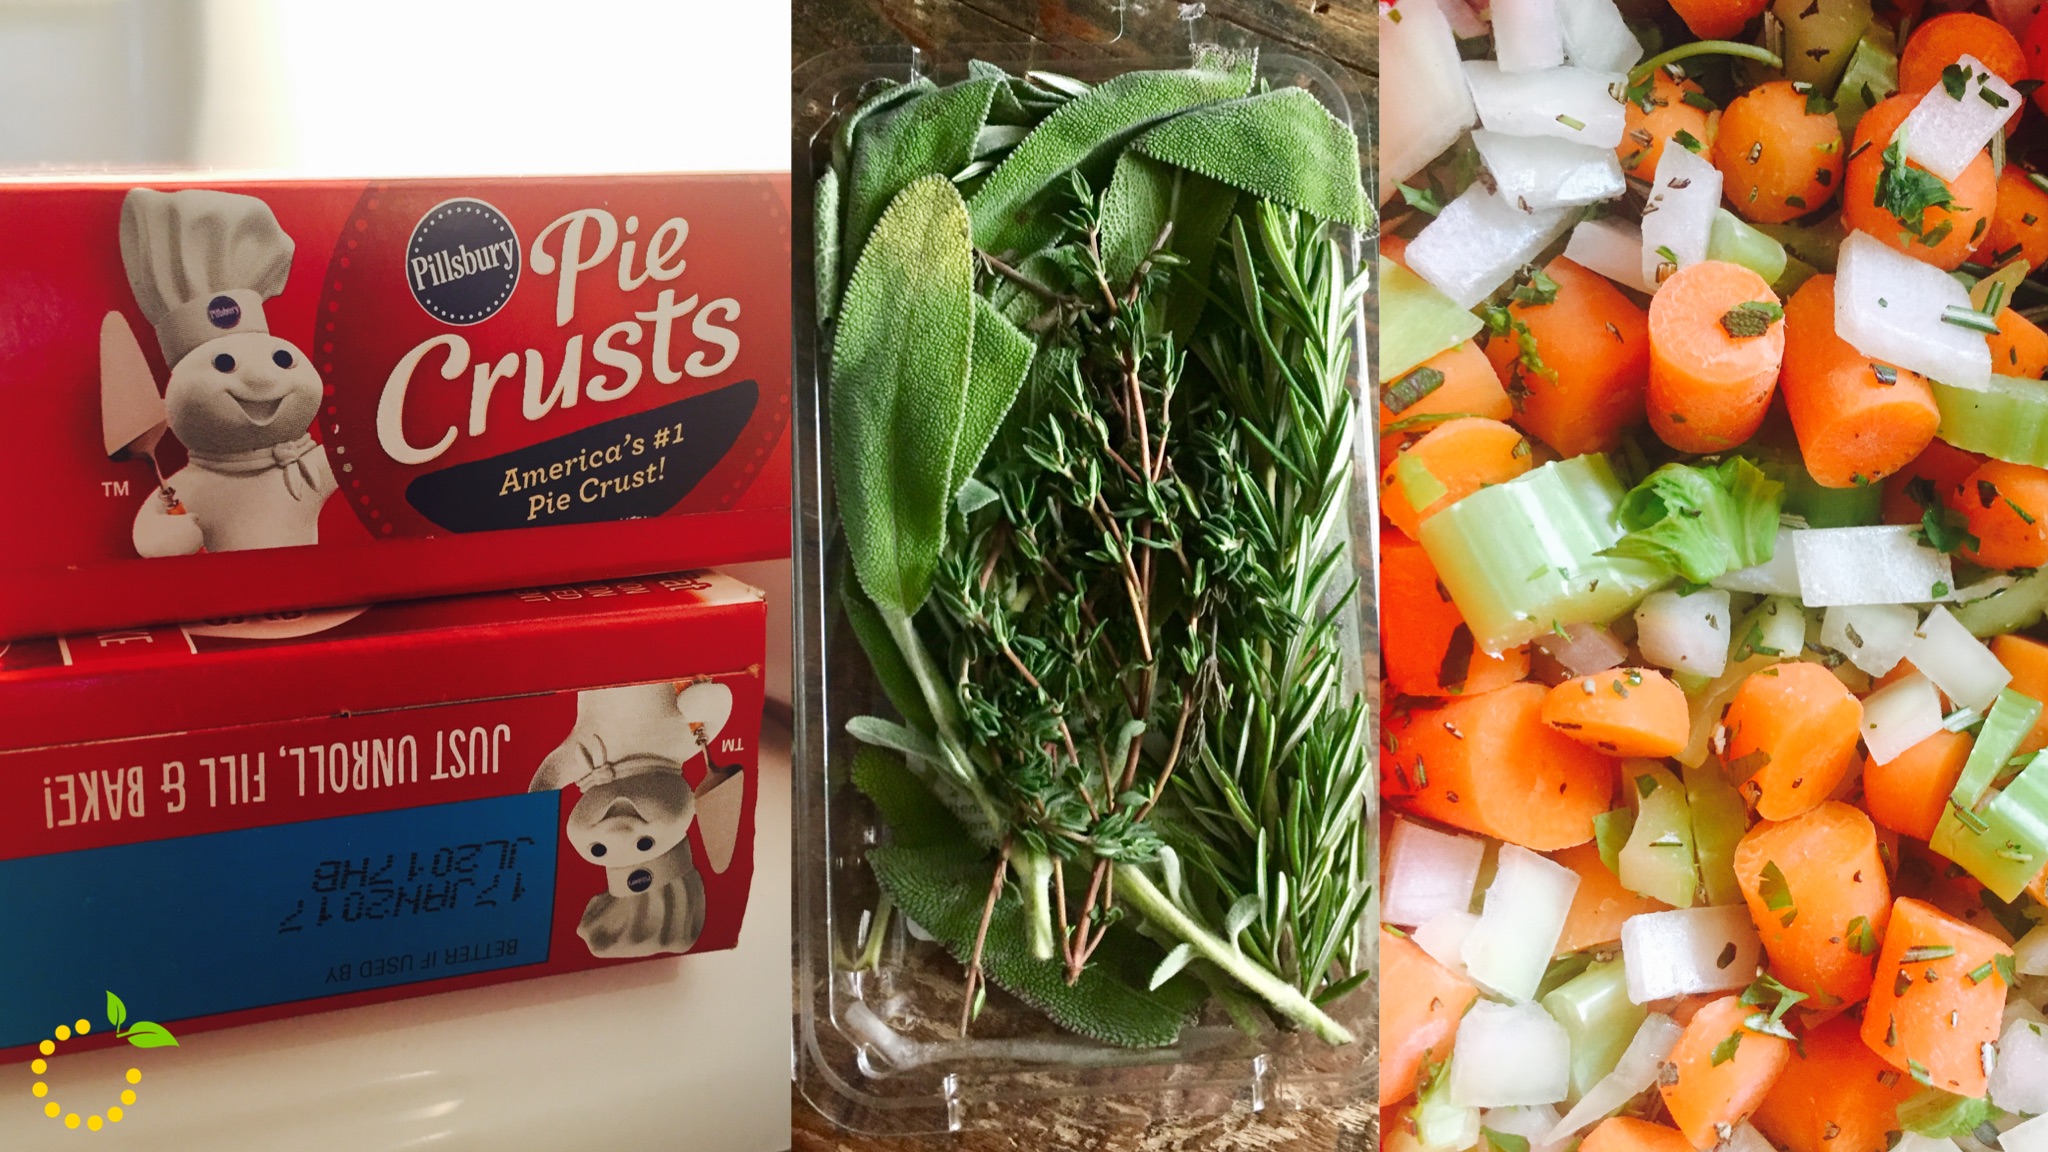
I’ve consumed many a chicken pot pie in my day, yet I’ve never actually made one. So I did what I always do when I’m looking for a perfect, down-home classic family recipe…I google-searched for a Pioneer Woman recipe! She’s the queen of comfort food and her recipes always turn out awesome. So I foraged the fridge for ingredients and lucky for me had some carrot sticks, celery, and an onion on hand! I was GOLDEN. Yesssss! This is recipe is largely hers, but I did make a few changes…I doubled the vegetables, decreased the broth so it was thicker, and put a pie crust on the top and the bottom (because in my mind it’s not chicken pot pie without a delightful crust on the top and the bottom! See recipe details below and google Pioneer Woman “chicken pot pie” if you want her recipe.

Cozy Chicken Pot Pie
Write a review
Print
Ingredients
  1. 3 cups of shredded chicken
  2. 4 tablespoons of butter
  3. 1 cup finely diced onion (usually one onion)
  4. 1 cup finely diced celery
  5. 1 cup finely diced carrots
  6. ¼ cup flour
  7. 2 ½ cups chicken broth
  8. ¼ teaspoon of turmeric (not necessary if you don’ have it)
  9. Salt and pepper, to taste
  10. Chopped fresh herbs (any combination you like—I used thyme, rosemary, sage, to taste (about 3-5 tablespoons)
  11. ¼ cup of cream or half and half (also not necessary if you don’t have it)
  12. 2 unbaked pie crusts
  13. 1 egg
  14. 2 tablespoons of water
Instructions
  1. Preheat oven to 375 degrees F.
  2. Melt butter in a large pot over medium heat. Add onions, carrots, celery and stir until onions become translucent—about 5 minutes.
  3. Add the shredded chicken to the vegetable mixture and stir.
  4. Next sprinkle flour over chicken and vegetable mixture and continue to stir and cook for one minute.
  5. Pour chicken broth over mixture and continue stirring while mixture thickens.
  6. Once it thickens to your desired consistency add in the turmeric, salt, pepper, and herbs.
  7. Add the splash of cream and continue to stir (if mixture is too thick just add more chicken broth).
  8. Remove pan from heat and set aside.
  9. Place one unbaked pie crust in the bottom of a pie dish or pan.
  10. Pour warm chicken and vegetable mixture on top of bottom crust.
  11. Place unbaked pie crust on top of chicken mixture and seal it well with bottom crust by pressing them together using fingers.
  12. Cut 3-5 slits in the top crust to allow for ventilation while cooking.
  13. Mix egg and water to make a basic egg wash and brush egg wash on the crust.
  14. Place in the oven and cook uncovered for 30 minutes (or until the crust is a deep golden brown).
  15. Allow pot pie to cool for about ten minutes prior to serving.
  16. ENJOY!
Sweet Lemon Made http://sweetlemonmade.com/

Eats

Pumpkin Rice Krispie Treats

Okay, so I’m a chronic recipe hoarder thanks to Pinterest and Instagram, but when I saw this “Salted Brown Butter Crispy Treats” posted by Smitten Kitchen it was enough to motivate me to action. I love Smitten Kitchen and have absolute trust in all of her recipes. So when I needed a quick treat for a Halloween party  last night I made a quick adaptation to turn these amazing little guys into a festive party treat!

img_1590-1


Brown Butter and Sea Salt Rice Crispy Treat Pumpkins
Makes about 18 pumpkins (varies based on cookie cutter)
Write a review
Print
Ingredients
  1. 4 ounces unsalted butter
  2. 1 bag marshmallows (10 ounces)
  3. Heaping 1/4 teaspoon coarse sea salt
  4. 6 cups crispy rice cereal (about half a 12-ounce box)
  5. Buttercream frosting to decorate
  6. Food coloring
  7. Parchment paper
  8. Pumpkin cookie cutter (or any shape you want)
Instructions
  1. In a large pot, melt butter over medium-low heat. It will melt, then foam, then turn clear golden and finally start to turn brown and smell nutty. Stir frequently, scraping up any bits from the bottom as you do. Don’t take your eyes off the pot as while you may be impatient for it to start browning, the period between the time the butter begins to take on color and the point where it burns is often less than a minute.
  2. As soon as the butter takes on a nutty color, turn the heat off and stir in the marshmallows. The residual heat from the melted butter should be enough to melt them, but if it is not, turn it back on low until the marshmallows are smooth. Add food coloring to turn the marshmallow magic orange (gel food coloring gives a more vibrant color) and stir well.
  3. Remove the pot from the stove and stir in the salt and cereal together.
  4. Quickly spread onto a piece of waxed or parchment paper.
  5. Spray your hands with non-stick cooking spray (or oil) so the marshmallow concoction won't stick to your hands and then press marshmallow/crisp rice mixture to about 1/2 to 3/4 of inch in thickness.
  6. Then using a cookie cutter, cut out shapes and allow mixture to cool.
  7. While cooling make your frosting. Make 3/4 of the frosting black and 1/4 of the frosting green with your food coloring. Then transfer each color into a Ziploc bag for piping.
  8. Cut a small hole in the corner of the Ziploc bag and begin piping faces on the pumpkins.
Sweet Lemon Made http://sweetlemonmade.com/
The brown butter and sea salt in these little guys will make you come back for more and more. Not to mention everyone will love you and ask you for this recipe. Thanks, Deb (SmittenKitchen)!

Recipe adapted from Smitten Kitchen

 Brown Butter and Sea Salt Rice Crispy Treat Pumpkins

Create

Pumpkin Carving Made Easy!

Raise your hand if you love Halloween and all it’s pumpkin-y fanfare…. Yes, me too. I love decorating and carving pumpkins, but pumpkin guts make me want to barf. Seriously, even the thought of scooping that stringy stuff makes me queasy. I don’t know why, but I hate it. So when my friend showed me this magic tool that cleans out those slimy pumpkin innards in a matter of seconds, I was amazed. Even if you don’t have a hard-core aversion to inner pumpkin mush, you’ll still love this. This little tool attaches to any drill (yeah, like the one your husband has in the garage) and guts the entire pumpkin in a matter of seconds. Score!! Watch the YouTube video below to see this baby in action and click here to buy this little piece of genius right now on Amazon.

image-1-2

Celebrate Create

DIY: Birthday Banners and Decorations

Over here at Sweet LemonMADE this week has been full of celebrating—both Emily and Megan had birthdays this week! I love celebrating birthdays! Growing up my mom always made birthdays a big deal. On the morning of your birthday as you entered the kitchen/family room the kitchen table was always covered with birthday paraphernalia—birthday tablecloth, birthday cake, birthday presents, and sometimes even blown up pictures of you for an added celebratory touch.  My mom would stay up until the wee hours of the morning to ensure this spread was perfectly placed and the cake was perfectly frosted. And although this fantastic tradition was known to us all, my mom would wait until we went to bed before she started creating birthday magic. I’m kind a glad she did. I loved walking out into a celebratory explosion, each year with a slightly different cake and décor.

img_0250


Naturally, I have become very fond of celebrating birthdays and as the years go on, I love putting on a celebration for those I love even more.  As a result I have a clear Rubbermaid packed to the brim with birthday supplies. I call it my birthday box. In here I keep on hand at all times, decorations, candles, crepe paper, banners, birthday plates, etc. Everything you need to pull together an impromptu b-day celebration at the drop of a hat. What? What? Party people in the house!

img_0251

This birthday box and my weird obsession for buying fabric (even though I only barely know how to sew and only sew maybe one project a year) came in handy as my friend, Shelley, and I decorated for Emily’s birthday in the wee hours of the morning before Em got up for work. Em is a classy gal that loves diet Coke and all things gold, so it was easy to know what to surprise her with. And you know what I found out? Shelley has a birthday box too. No wonder we are friends.

img_0252

As you can tell, we pulled some super simple elements together to make a fun, snazzy birthday background. Here’s some info on all the things:

  • Gold curtain
  • Reusable birthday banner
  • Fabric—intended for some other project, unhemmed, but fit most of the table 🙂
  • Balloons—no helium here so we just blew them up and tossed them around like confetti
  • Pitcher of flowers—Target for the pitcher and grocery store flowers (since they are the only flower shop open at 6am)
  • Donut cakeDunford chocolate chocolate donuts stacked into a pyramid (easiest and tastiest birthday cake ever! Those donuts are AMAZING)

img_0253

Seeing how we were working from TWO birthday boxes we had multiple banners, so we hung this little guy in the living room! This homemade cardboard banner is simple, but one of my favorite b-day decorations. All you need is a cardboard box, some twine, and paint and you can create your very own birthday banner.

img_0254

Snazzy Cardboard Birthday Banner:

Supplies:

  • Cardboard box (may need a couple depending on size)
  • Pencil or marker
  • Box cutter (razor cutter)
  • Paint (spray paint or ceramic paint)
  • Twine (long enough to string all your letters on)

Directions:

  1. Find a piece(s) of cardboard to fit the size of letters you want to make and wipe with a dry towel to remove any particles or dust.
  2. Using a pen or pencil draw block letters (or use stencil, or trace letters printed from your computer if your junior high block letter skills have faded) on the cardboard. Make sure to leave about an inch between letters so you can cut them out easily without injuring a close by letter.
  3. Once letters are cut, determine how you want letters to hang on twine and poke two holes near the top of the letter for the twine to thread through. I used a combination of a box cutter and a ball point pen to stab my holes.
  4. Next, paint each of the letters and allow to dry completely. Use two coats of paint to ensure full coverage and vibrant color.
  5. Finally, to complete the banner take the full-length piece of twine and thread each letter through the string. At the beginning and ending of each word tie a not in the twine so the letters don’t’ slide and the words stay distinct. Once all the letters are threaded on the twine, loop the ends (so it can be hung on push pin or nail) and leave at least 6-12 inches of twine on the ends (helpful if you need to tie the banner sometimes rather than hook it on push pins).
  6. Ta Dah! HBD to all your people!

img_0255


Eats

Quick and Easy Lemon Ricotta Ravioli with Pecorino and Basil

This was one of those meals that fell together as I was raiding my fridge in search of quick, non-cereal dinner option. I had been out of town on a week-long East coast road trip and was too busy (read: lazy) to go to the grocery store to replenish my barren refrigerator, and eating out again was the last thing I wanted to do. You know how it is, after a road trip sometimes you just want “real food,” that is cooked in a house, and has to be eaten with a fork. It’s only natural after a week of trail mix, apples, donuts, Swedish Fish, and Coke, right?

So as I stared deeply into the refrigerator, noticing all of the things that I probably should have thrown away prior to said trip, I saw some Trader Joe’s ravioli perched on top of a two week old birthday cake.  Seeing this as a solid start to my meal I grabbed it and noticed that it was a fancier version of ravioli than I typically buy. This was a lemon ricotta flavor. Intrigued and excited about this new flavor I began to think about what I could pair with it. Obviously you can’t go dump regular old tomato sauce on the delicate flavors of a lemon and ricotta, so the jar of pasta sauce was out. Next I thought about making a light cream sauce, but quickly realized I had no cream or milk in the fridge. Bah! And then out of the corner of my eye I saw my little ole basil plant sitting in the living room. I moved it into the living room so it could get more sun and have a fighting chance at survival in this “black thumb” household. And you know what? It was still alive! (Largely in part due to the graciousness of my awesome roommate that watered it for me while I was out of town, so thanks Em).

Basil

The little grocery store basil plant was actually flourishing and needed to be harvested. Perfect! Lemon and basil are a perfect combo. I decided to keep the sauce light so the light, fresh flavors of the basil and lemon could shine through and used a little garlic olive oil (side note: are you using flavored olive oils?? If not, do it! They are game changers, for sure), sea salt, cracked pepper, and some Pecorino Romano cheese that I had laying in the fridge. Pecorino is a hard sheep’s cheese with a great salty flavor. I’m a sucker for the fancy cheese station at any grocery store and love trying new flavors and types of cheeses. One thing that is awesome about buying those little fancy blocks (as opposed to the generic pre-shredded cheeses) is that they seriously last forever. Obviously it depends on the cheese, but I’ve had this Pecorino Romano block for over 6 months and it’s still flavorful and mold-free. Just sayin… Also, the Pioneer Woman says to never buy pre-shredded cheese. Always buy the block and shred it yourself. Your taste buds will thank you, I promise.

Ok, so moral of the story is…

  1. Randomness and creativity pay off in the kitchen
  2. Flavored olive oils—go try ‘em
  3. Fancy cheese last forever and can snazz up any plain-jane meal
  4. When it comes to cheese buy the block and shred yourself

Enough chatter, let me give you the deets for this super simple, super easy, super quick meal.

Ingredients


Lemon Ricotta Ravioli with Pecorino and Basil
Write a review
Print
Ingredients
  1. 1 package (or two if you’ve got a large crew) of Trader Joe’s Lemon Ricotta Ravioli
  2. 1-2 grilled chicken breasts, sliced or shredded (if you’re looking to add a little more substance to the meal, I didn’t this time)
  3. 4- 5 fresh basil leaves, cut into long, thin strips
  4. 2 teaspoons garlic olive oil
  5. 1 teaspoon extra virgin olive oil (you can do all garlic olive oil if you want a real punch of flavor)
  6. 1/3 cup Pecorino Romano cheese (or parmesan, mozzarella, whatever you like), use shavings or grated ( I prefer larger pieces of cheese so that you get a nice bite of flavor)
  7. Salt and cracked pepper, to taste
Instructions
  1. Bring pot of salted water to boiling. Once water is boiling add ravioli from package, keeping the heat high enough to allow a rolling boil to continue.
  2. Cook pasta for 3-4 minutes until al dente. Keep your eyes on the prize here and don’t get distracted. Three minutes is not enough time to multi-task and do something else, I promise. Mushy ravioli is THE WORST. The pasta will get soggy, it will tear easily, and before you know it the delicious filling is bursting out and you have goulash instead of ravioli. And let’s be real, nobody wants to eat that.
  3. Once pasta is cooked, place in colander, drain and shake off excess water, and place in serving bowl.
  4. Add the three teaspoons of olive oil and gently stir until ravioli is well coated. Depending on preference you may want to add a little more or a little less. Just follow your heart on this one. You want the pasta to be lightly coated so it doesn’t stick together and so it has some great flavor from the garlic olive oil.
  5. Add cut or shredded chicken (if desired). Note: If you decide to add chicken you will likely need to use a little more olive to coat the chicken as well.
  6. Add cheese, basil, and lightly toss with ravioli to mix well. Add salt and pepper to taste. Note: if you are using a salty hard cheese like a pecorino or a parmesan you will likely need less salt than if you use a mozzarella.
  7. Enjoy!
Sweet Lemon Made http://sweetlemonmade.com/