All Posts By

sweet lemonMADE

Uncategorized

Travel Guide: California’s Central Coast


I’ve visited California more times than I can count. By now, I should know San Diego and Los Angeles like the back of my hand. Little did I know, I had yet to experience the best California has to offer. That’s right, I said it. Southern California is no longer my favorite west coast destination. Recently, my little family and I had the opportunity to spend one full week in Central California. The main reason for our trip was to visit my cousin and two really close friends. I have to say I was concerned we might be a  little bit bored. I wasn’t sure if  there would be enough “entertaining” activities for my three-year-old daughter, Olivia. But I knew it would be a fun adventure, visiting new places and having new experiences.

The best part about our vacation, was experiencing the area as a local and not a tourist. Having our family and friends as tour guides led us to some really cool hidden gems. Take a look below to learn more about each of the areas we visited.

San Jose
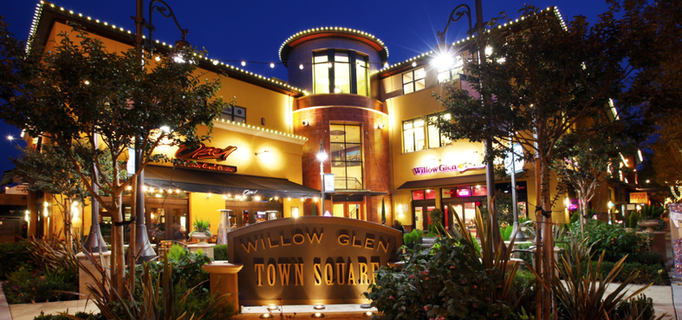
San Jose is home to many of the world’s largest technology companies, including eBay, Cisco, Adobe, Facebook and more. It was incredible to see all of these major companies as we drove through the city from the airport. My first impression left me wondering why people would want to live in the middle of this ongoing business park atmosphere, but then we drove a little further south into Willow Glen and I immediately fell in love with San Jose. One of our favorite things to do during this part of our trip (besides driving through the neighborhood, day dreaming of what house we would buy) was to walk up and down the tree lined streets of downtown Willow Glen. We’re talking about the adorable town you see only in the movies.

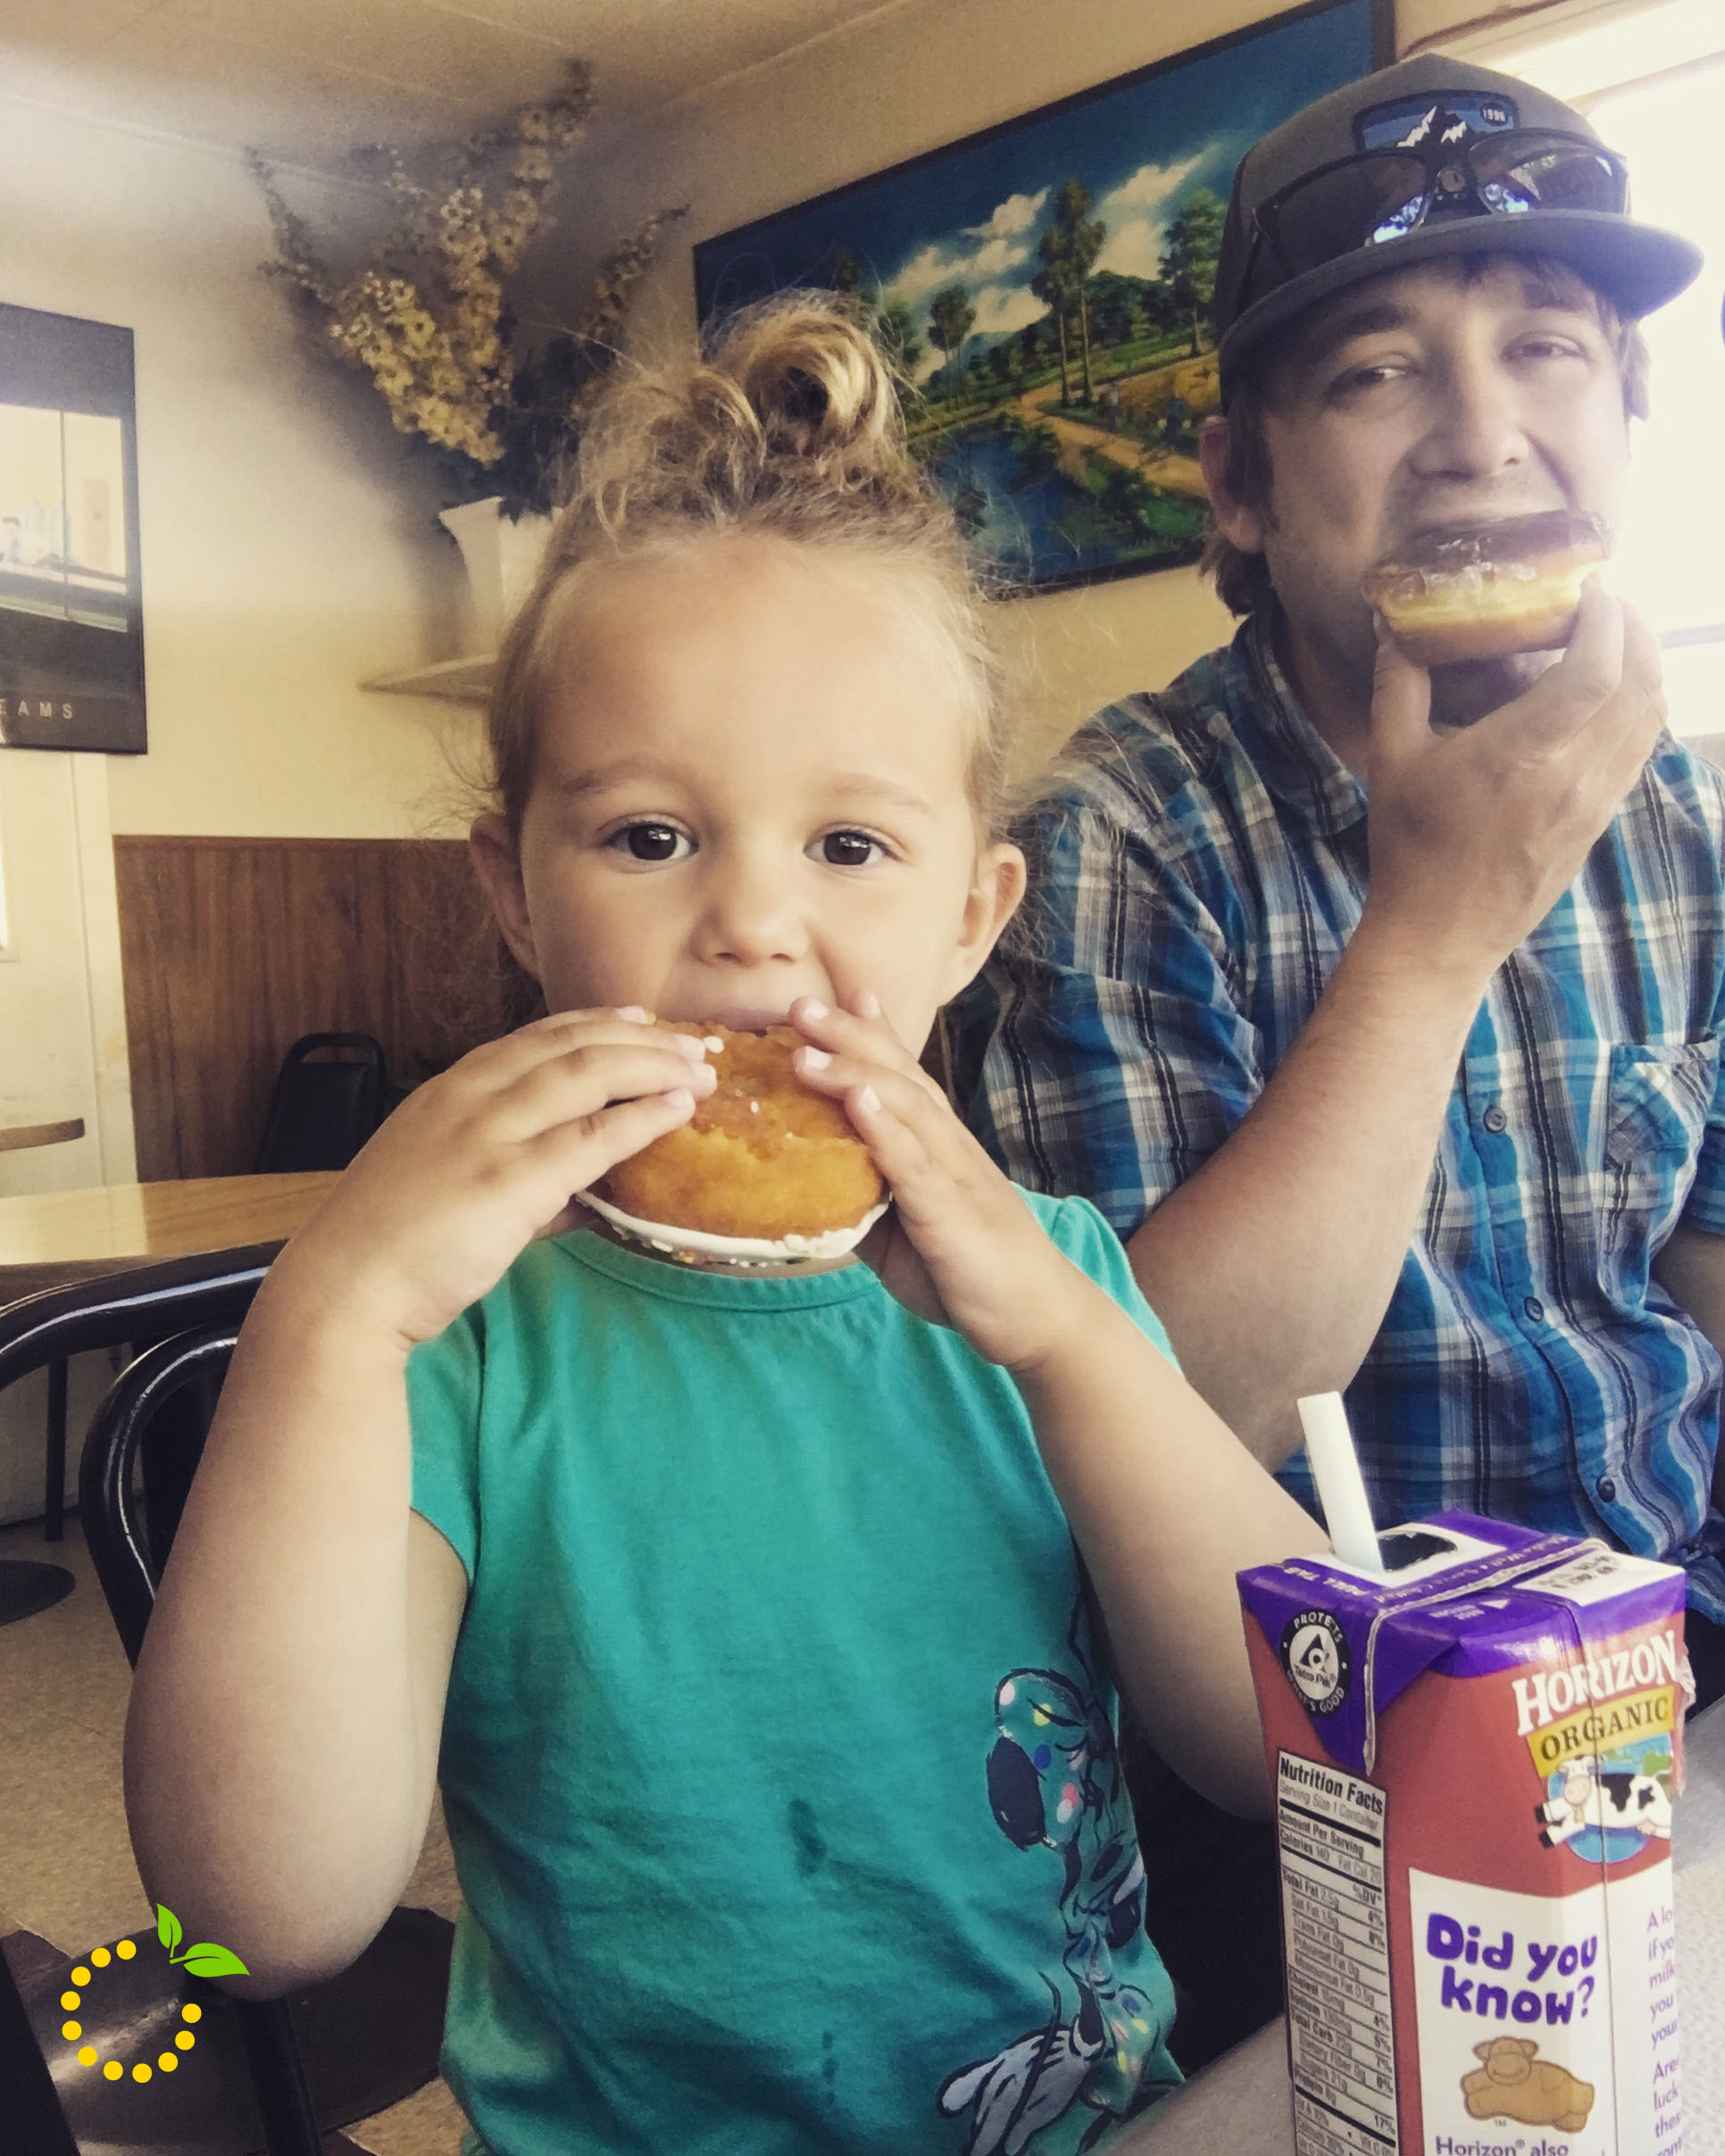
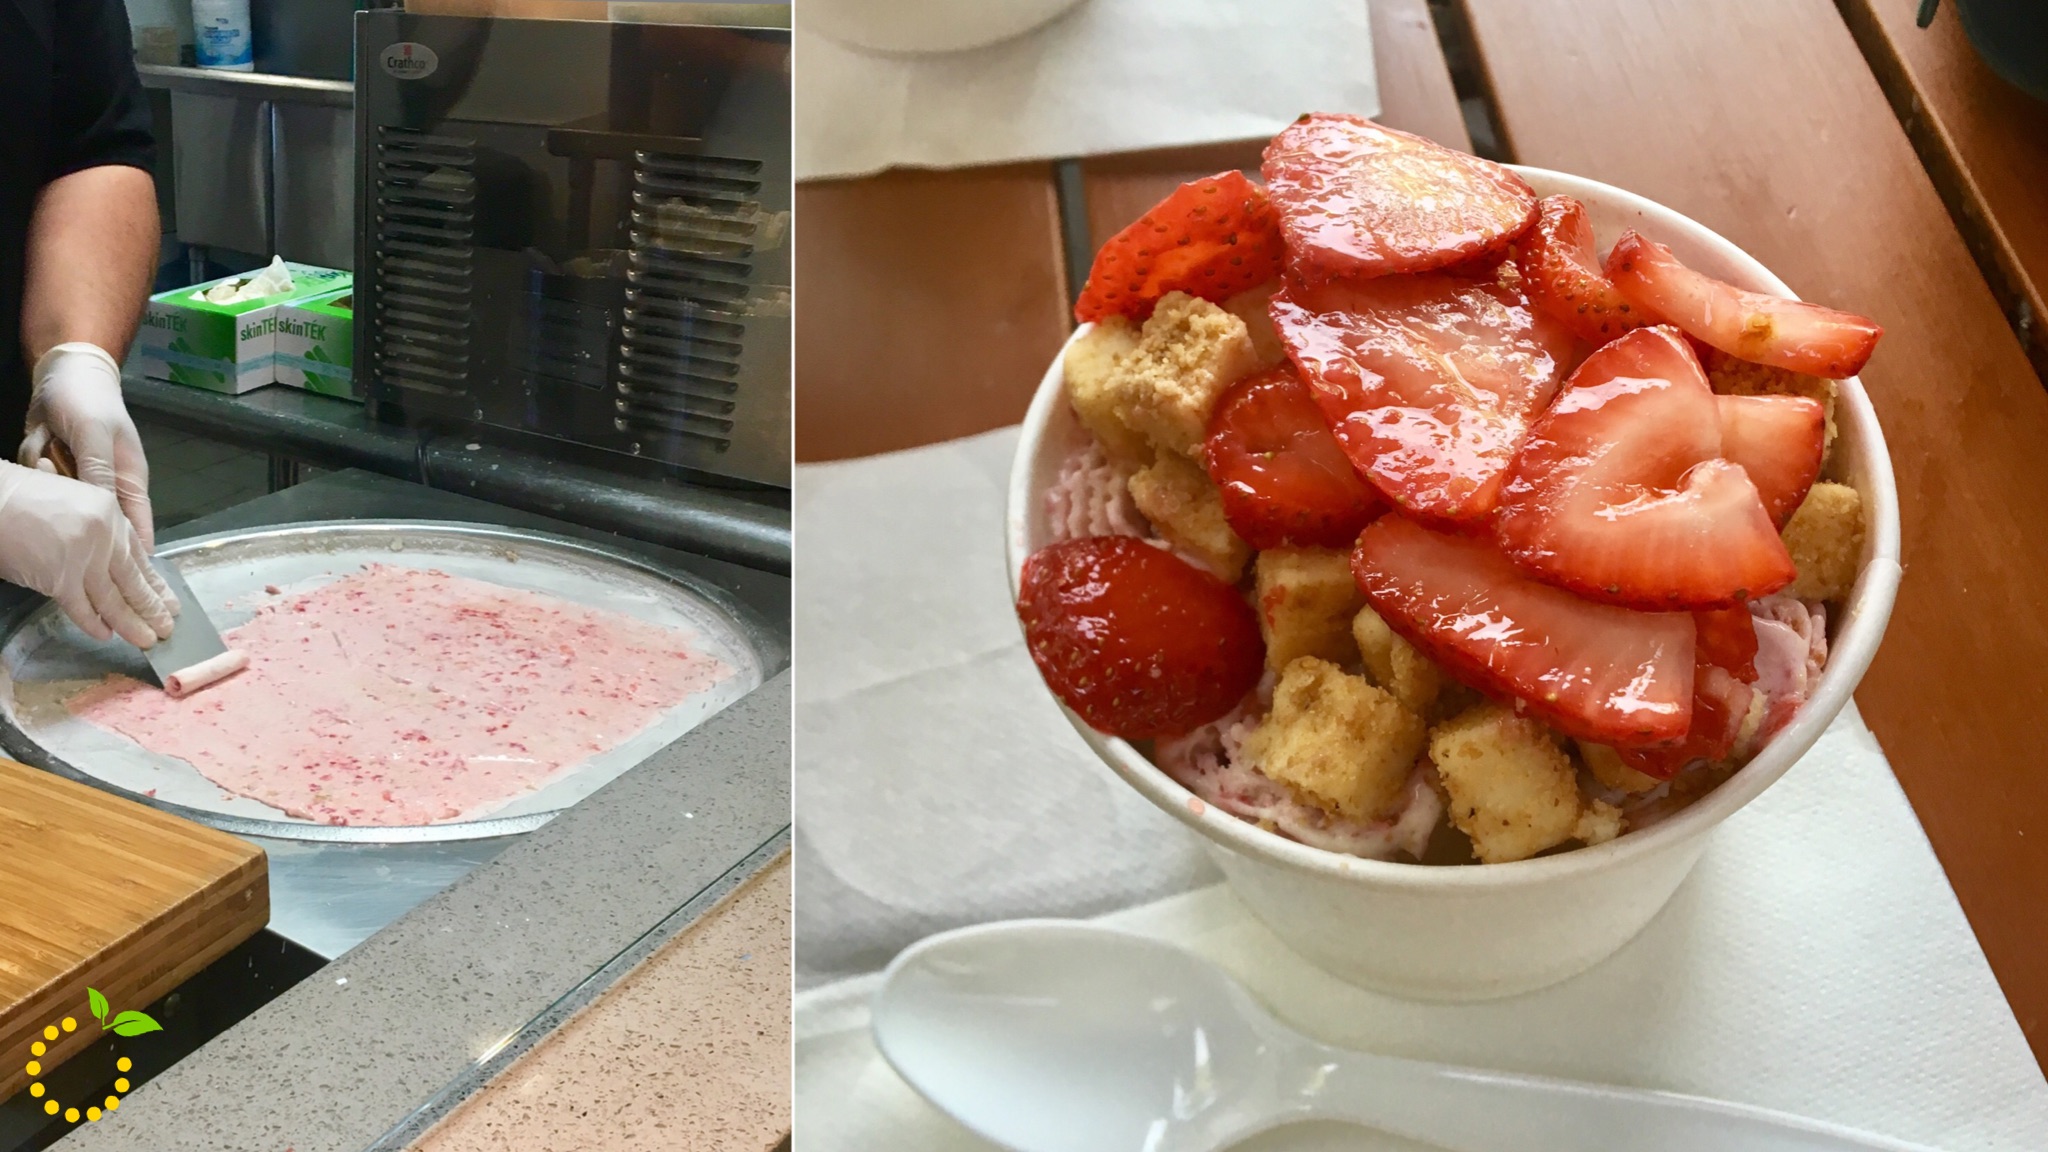
Nestled in the 10th largest city in the nation, Willow Glen has a small-town feel with cafes, coffee shops, boutiques, restaurants and more! We, of course, took every opportunity we had to enjoy as many restaurants and sweet shops we could get to during our time downtown. We had the most delicious pizza at Jake’s of Willow Glen, yummy donuts at a mom and pop shop called Manley’s Donuts and rolled ice cream at Icicles.

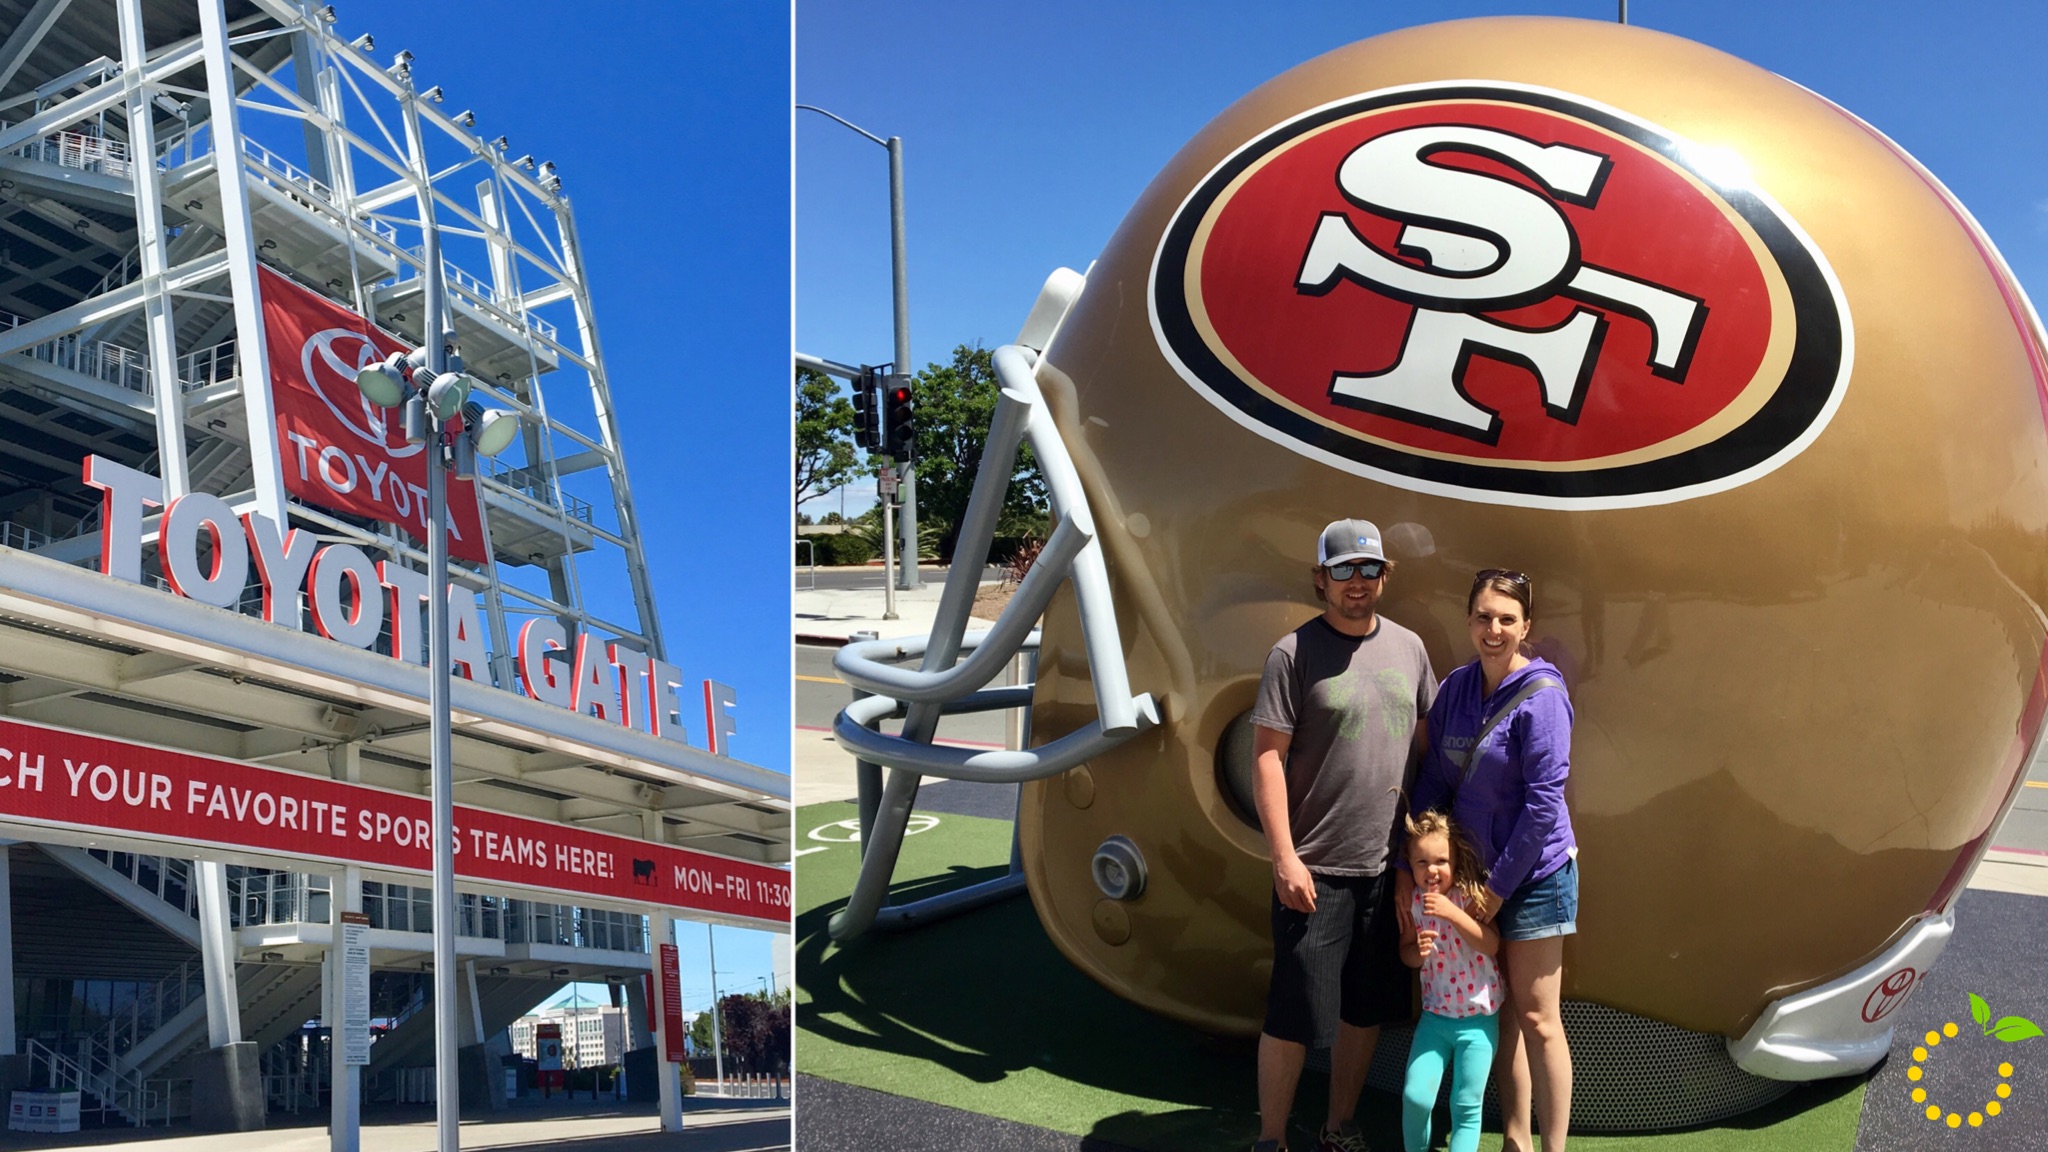
Of course we couldn’t leave San Jose without stopping at Levi Stadium, the home of the best team in the NFL! Marc and I have been 49ers fans ever since we were little kids, so this was kind of a big deal for us.

 Willow Glen TimeSquare

Manleys


ice cream sweetlemonmade.com

49ers sweetlemonmade.com

Half Moon Bay
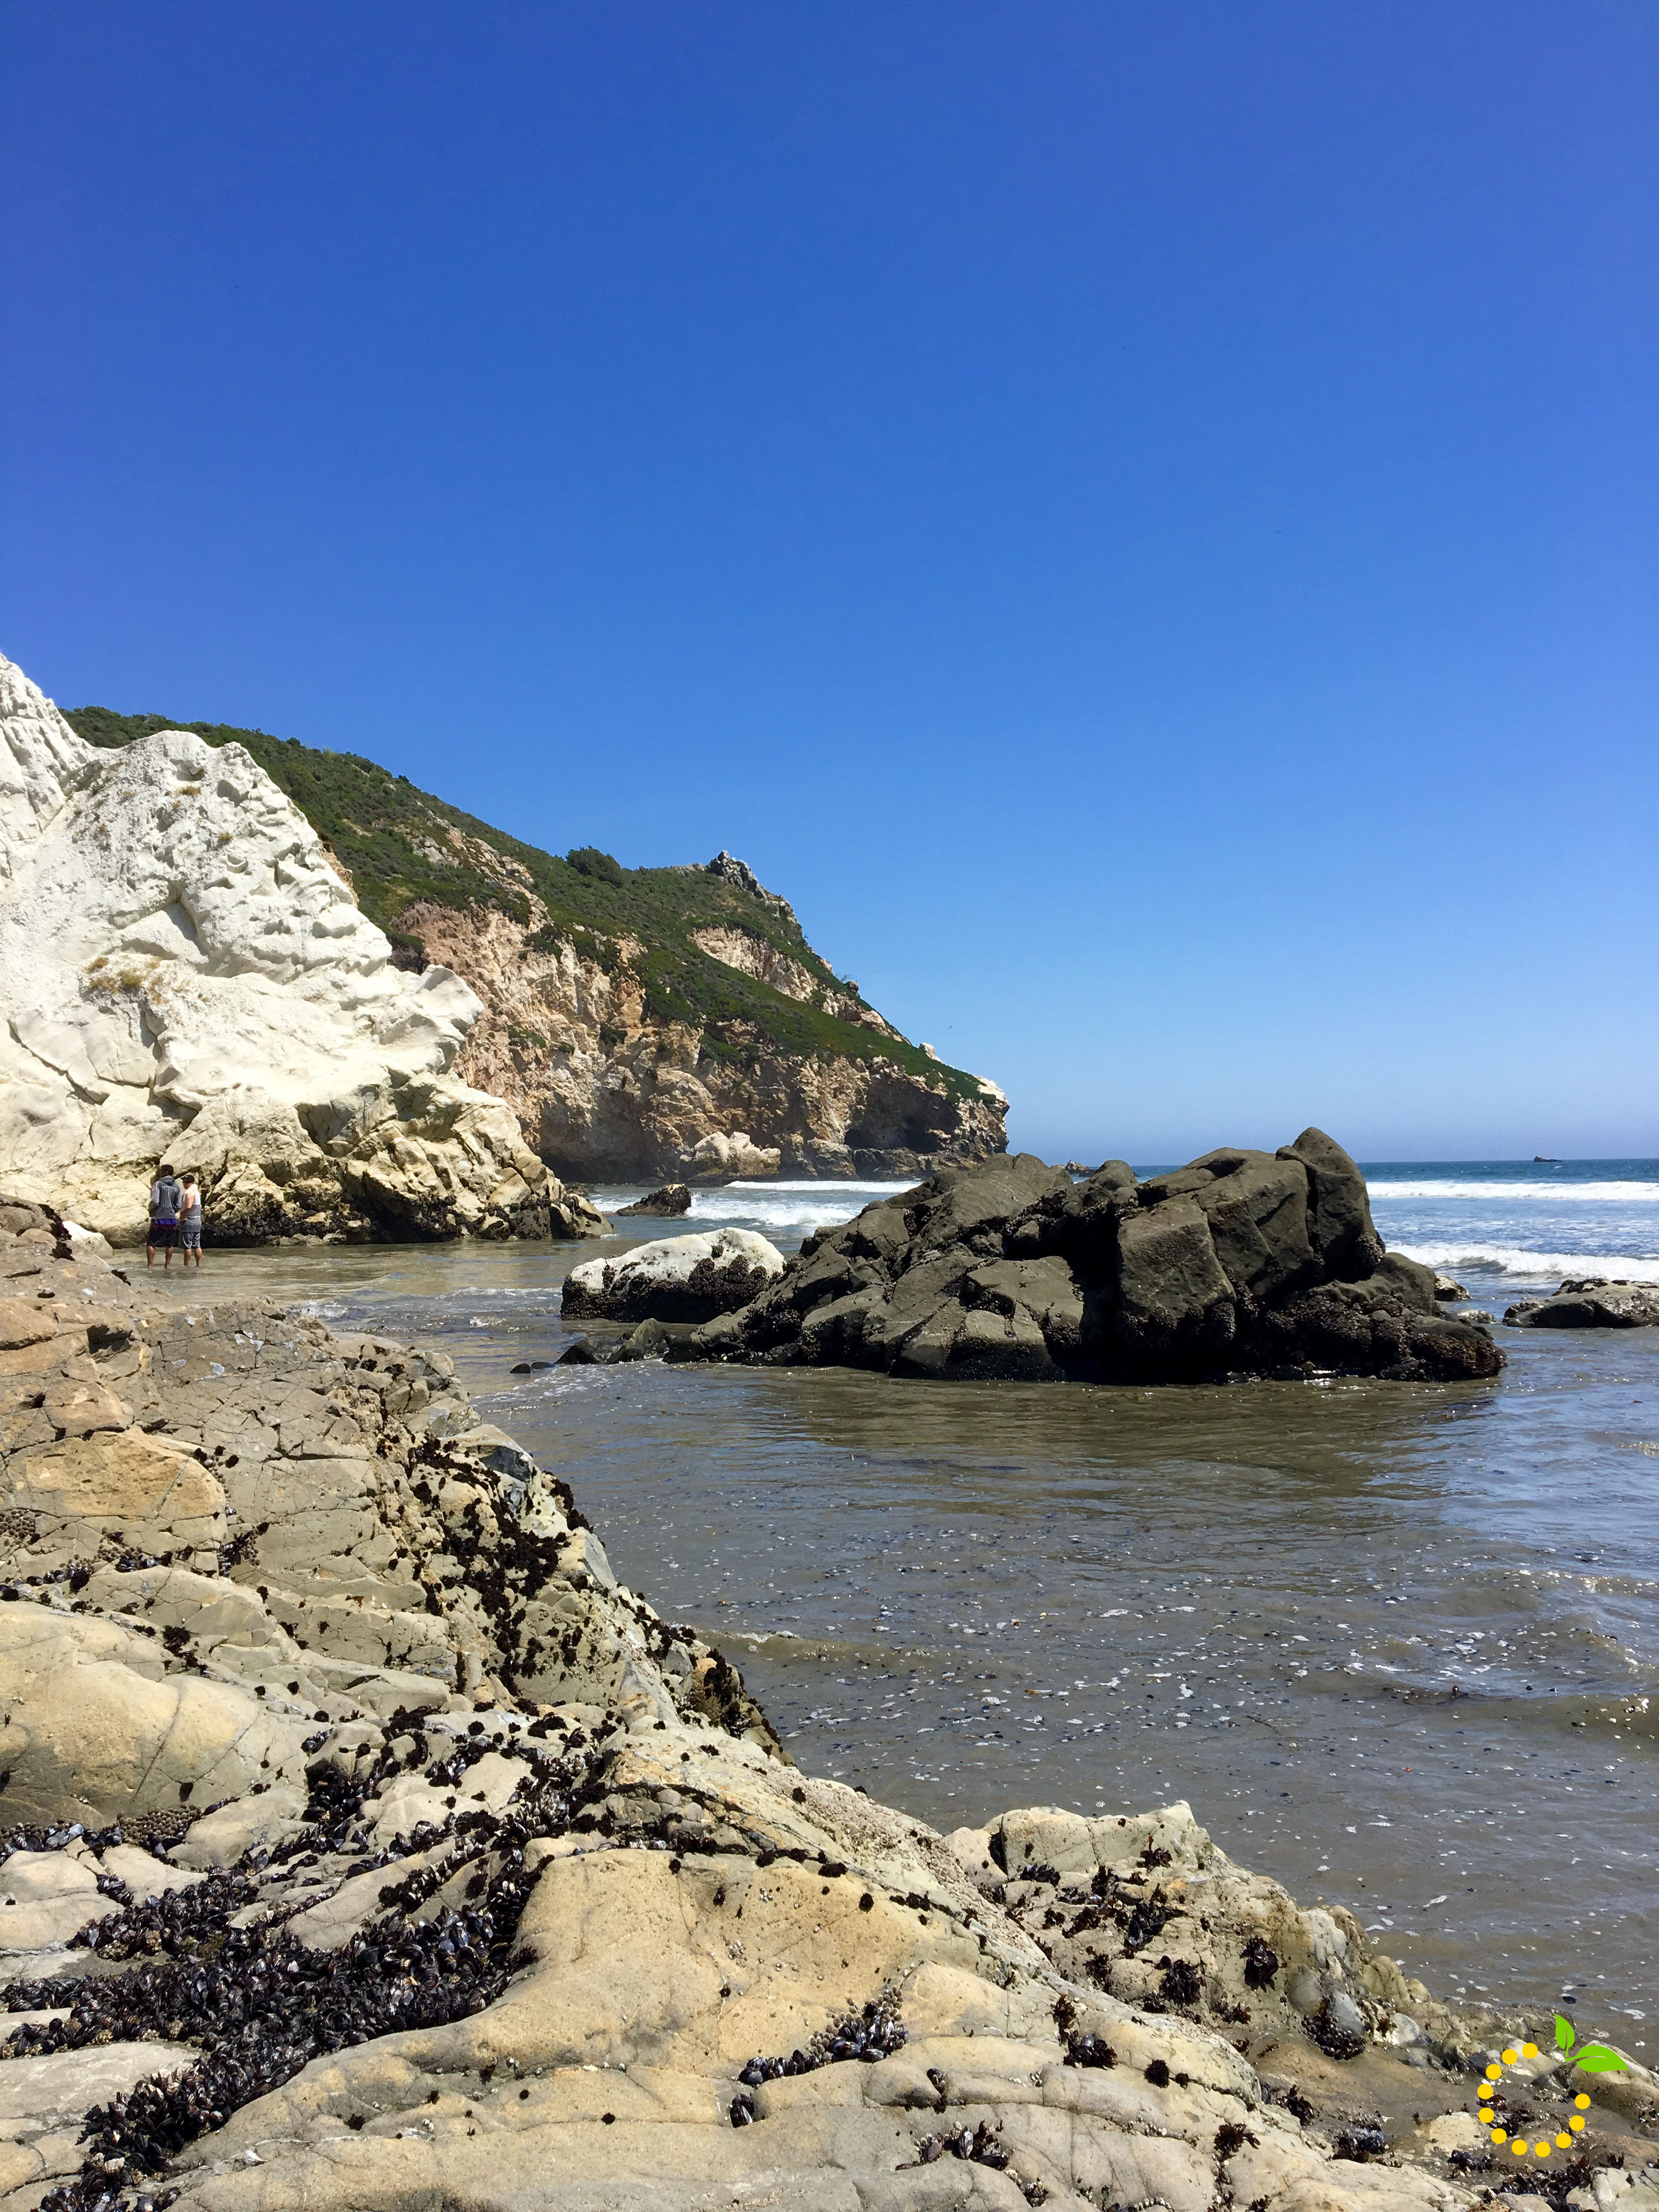
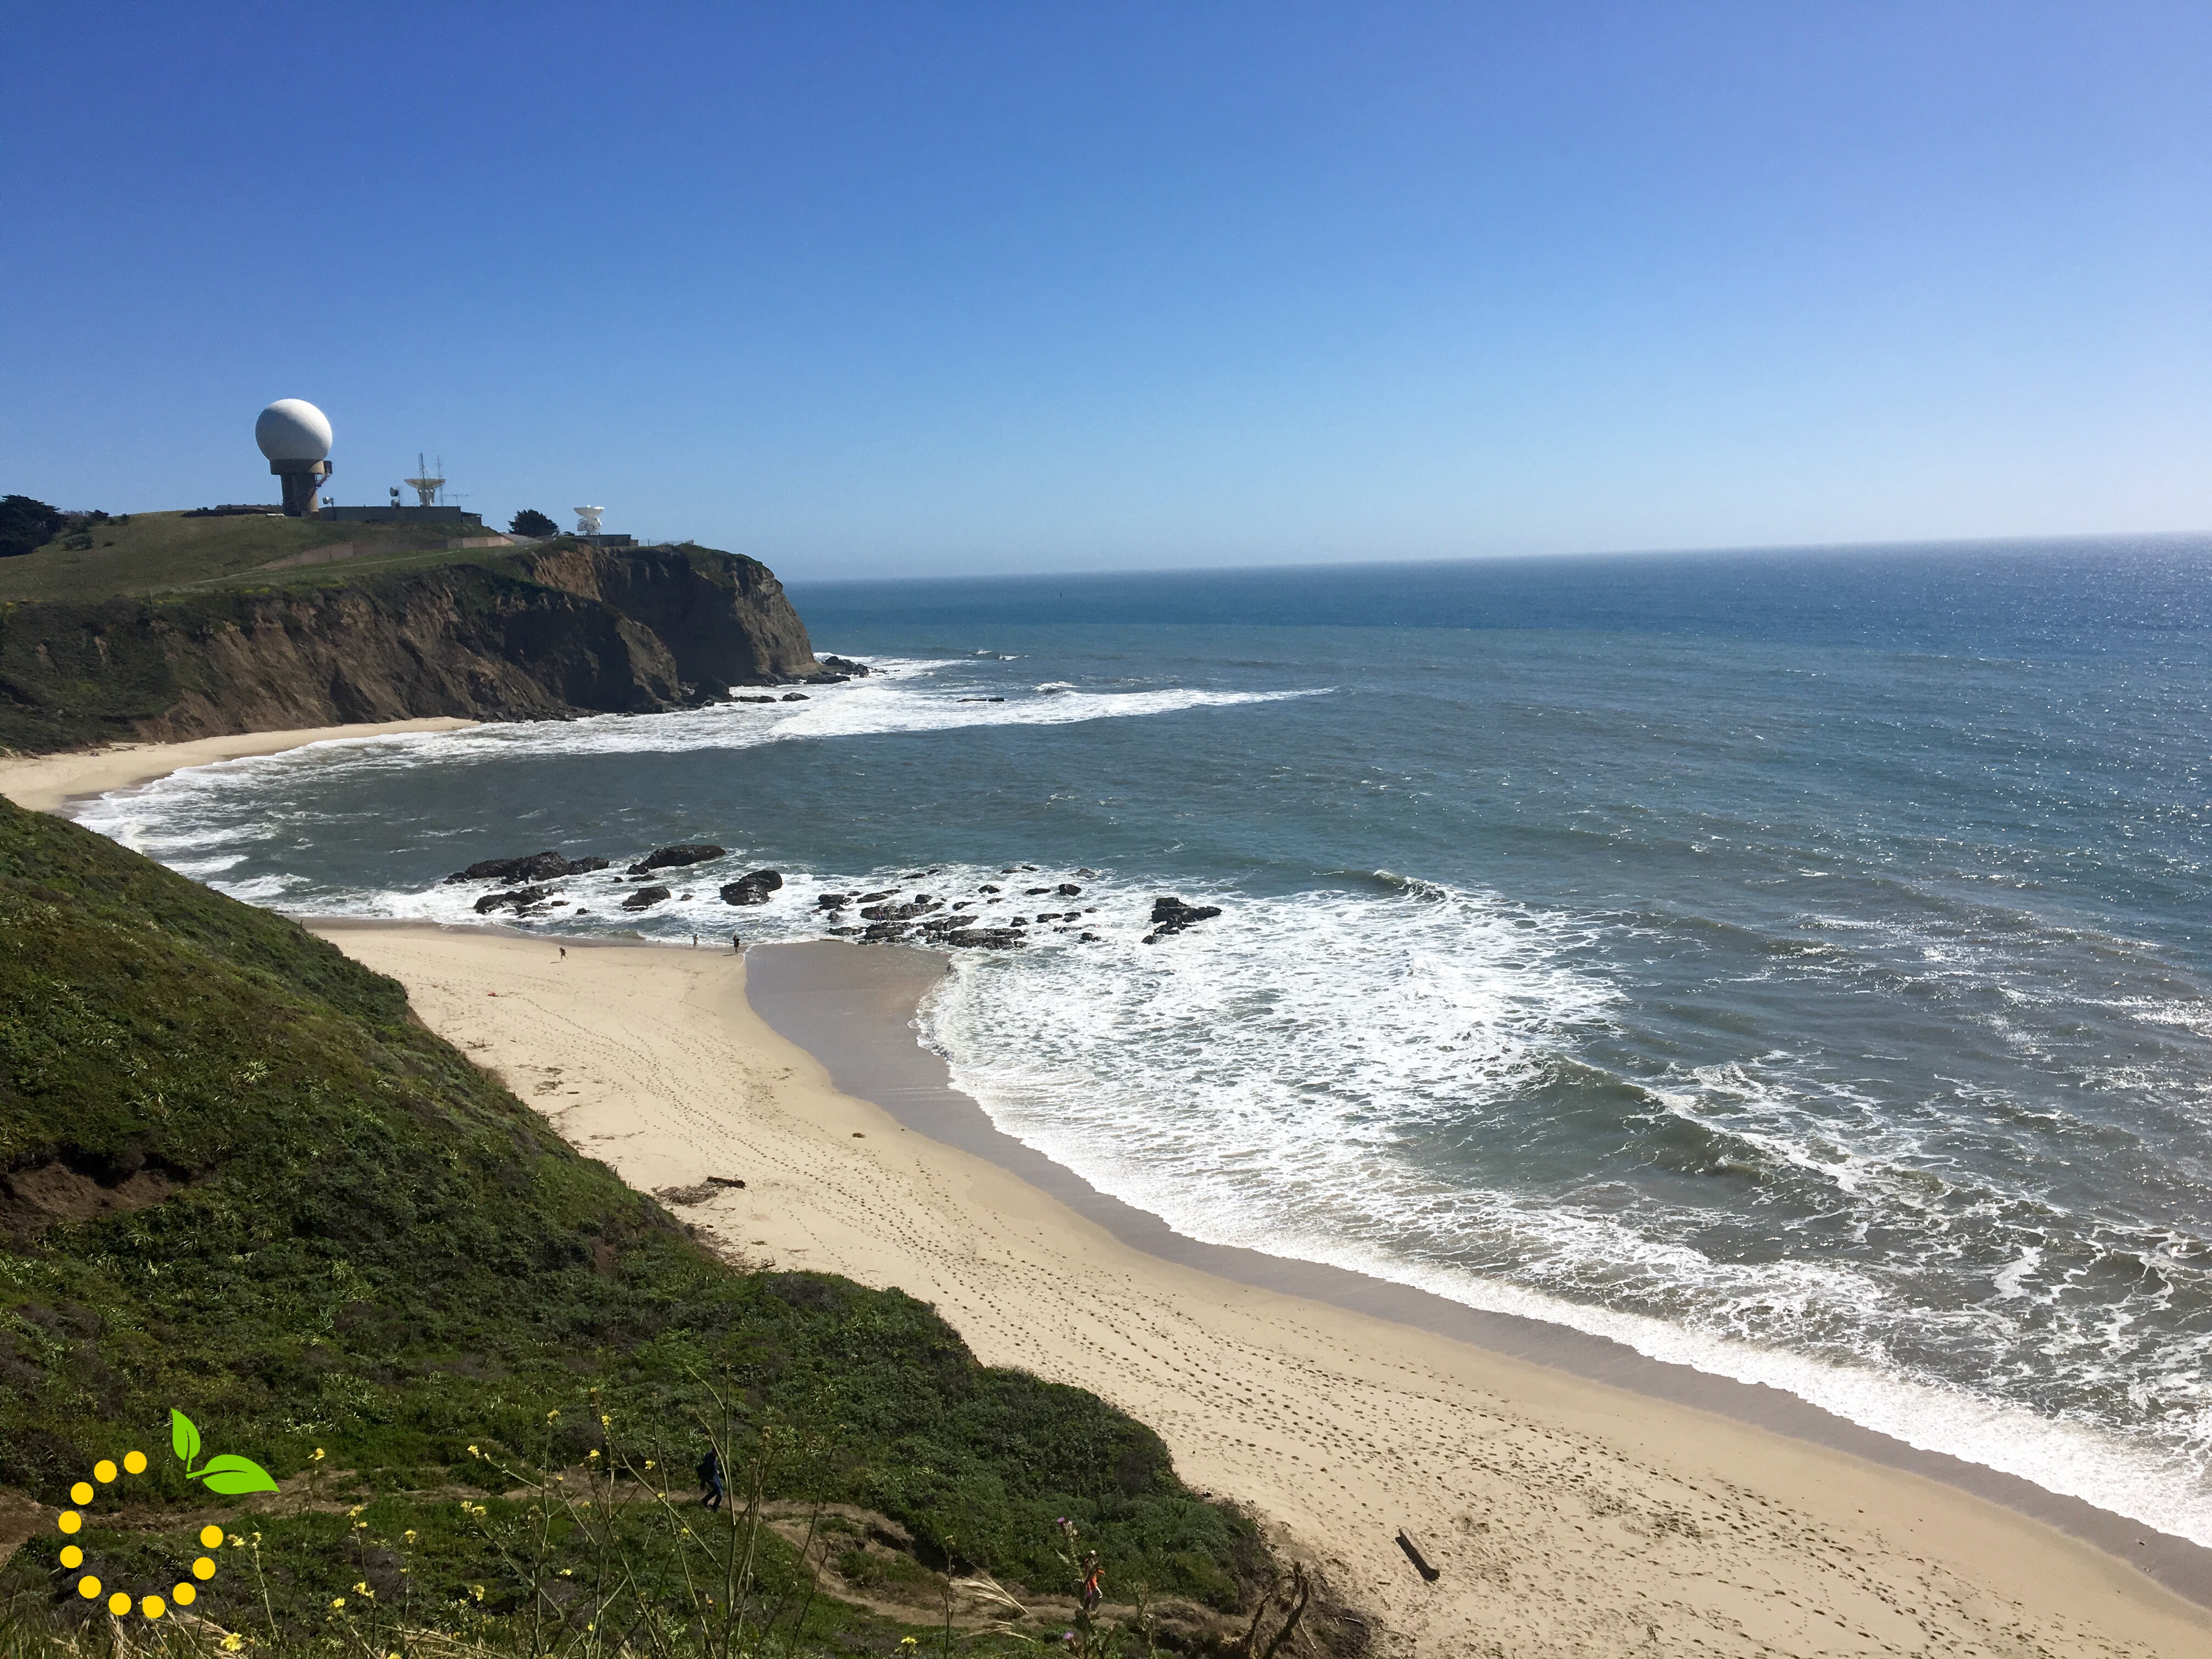
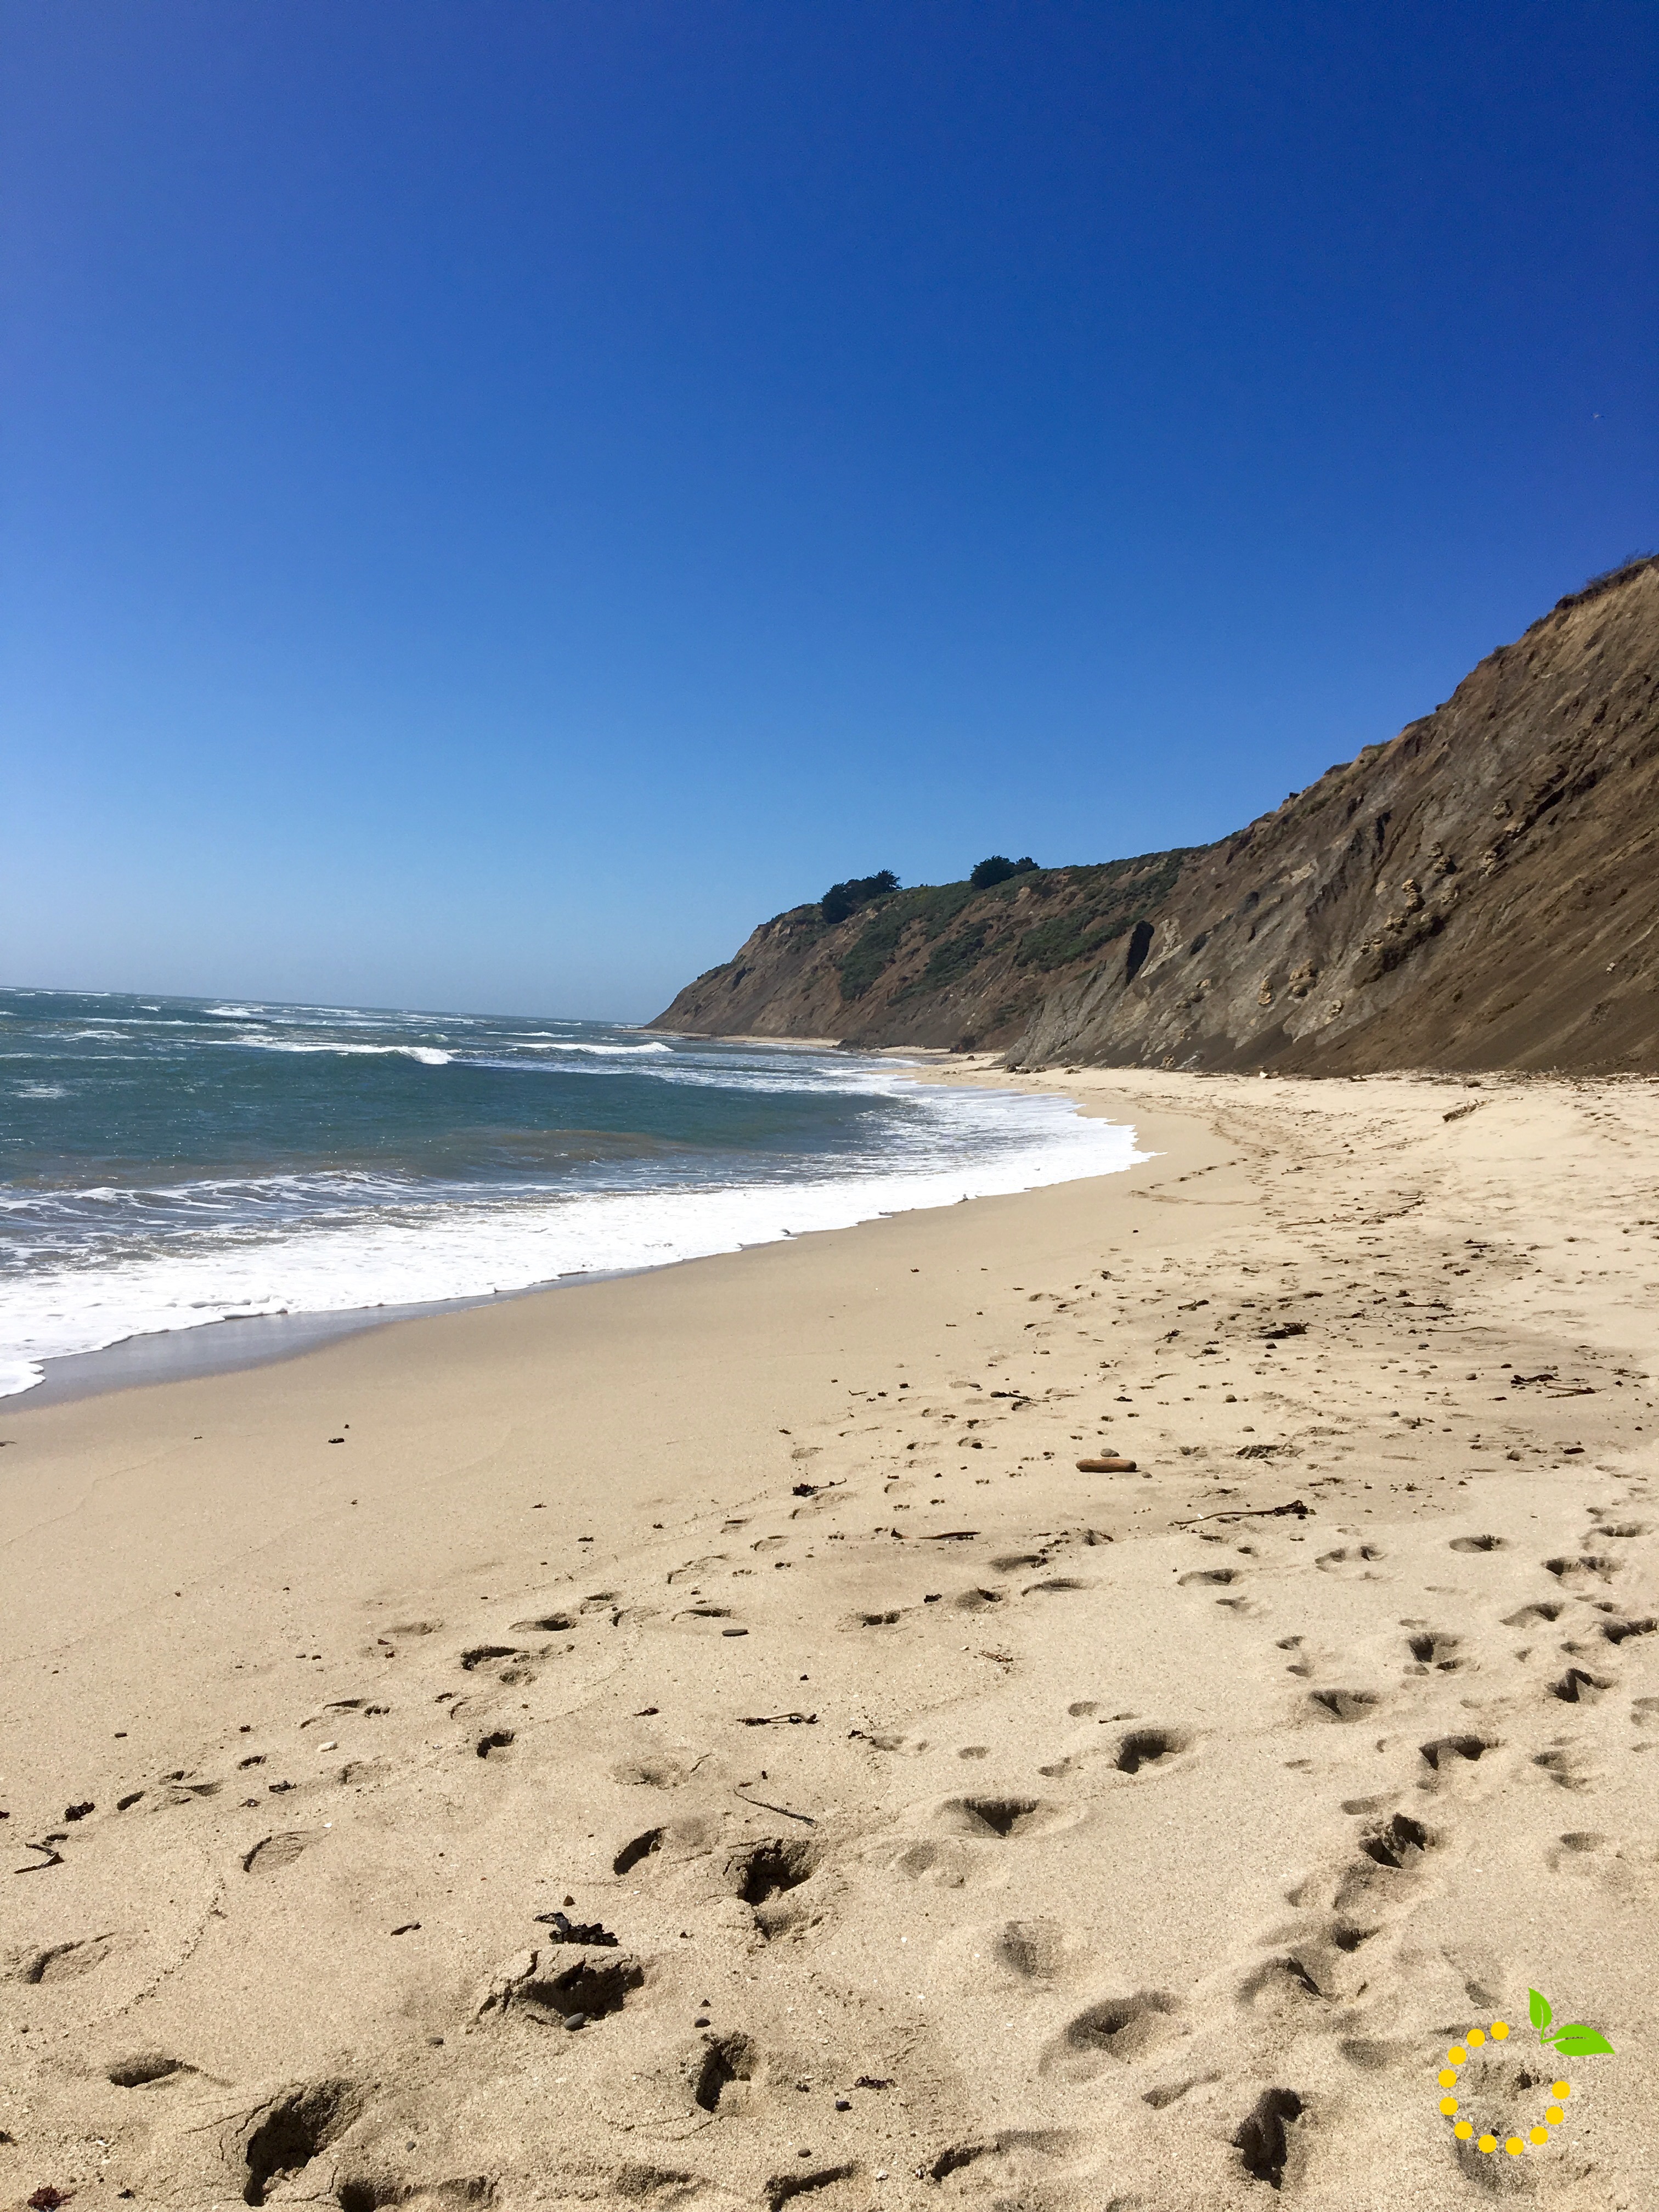
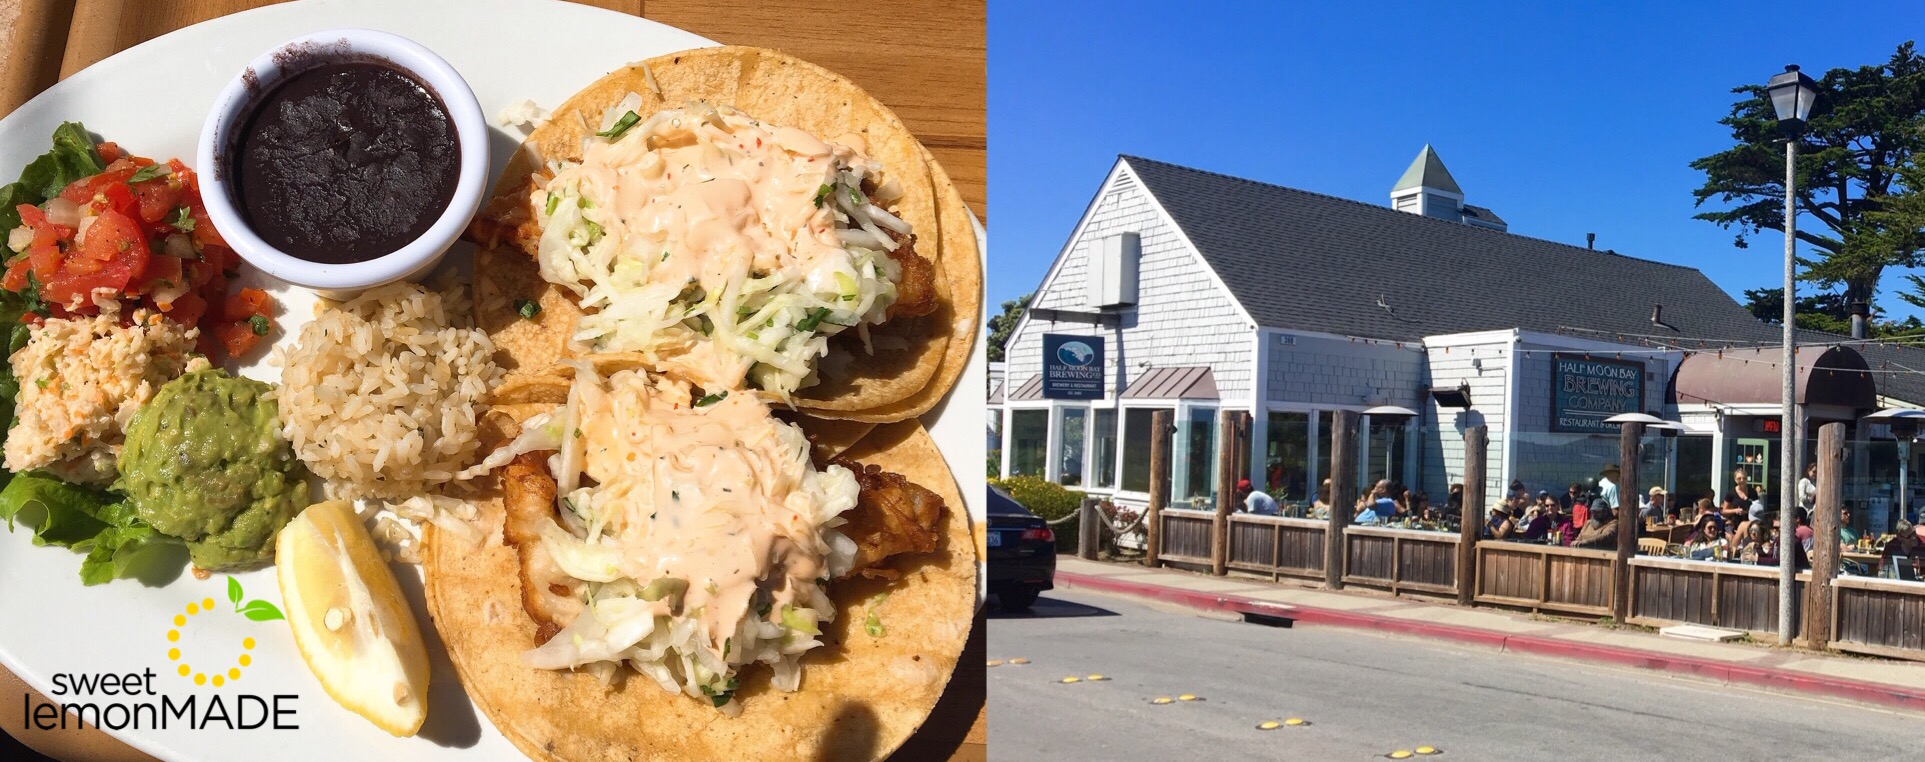
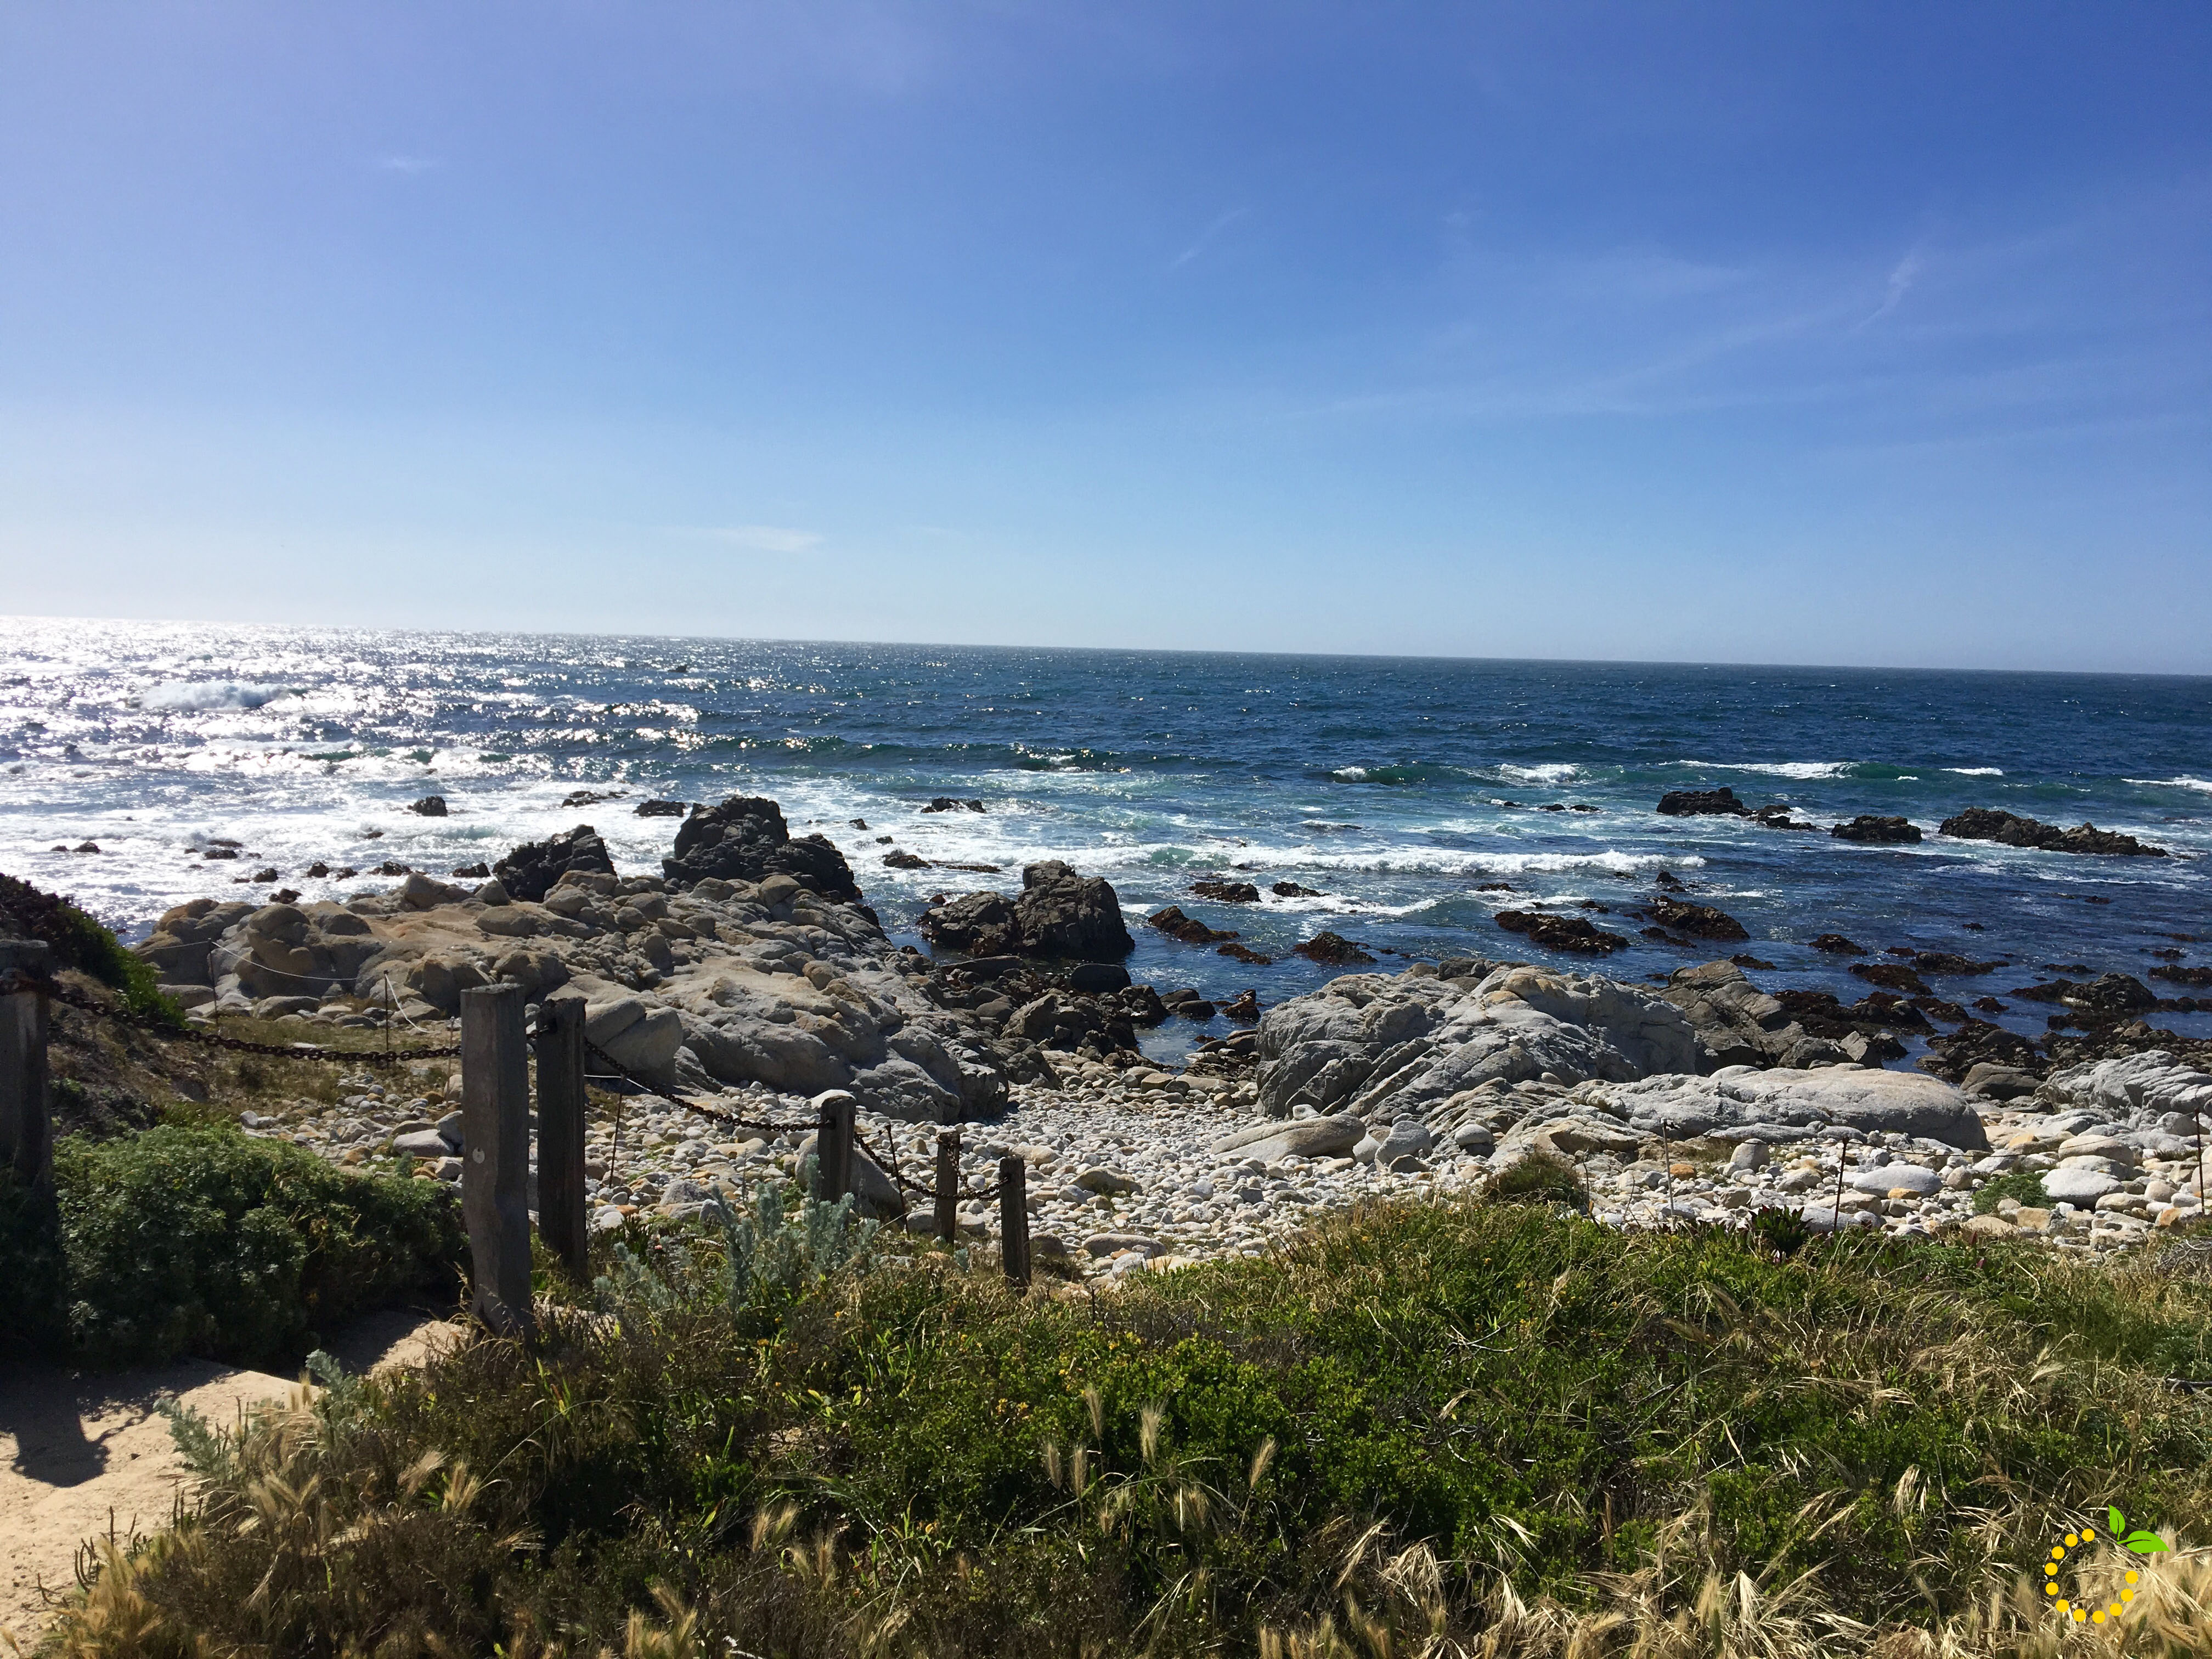
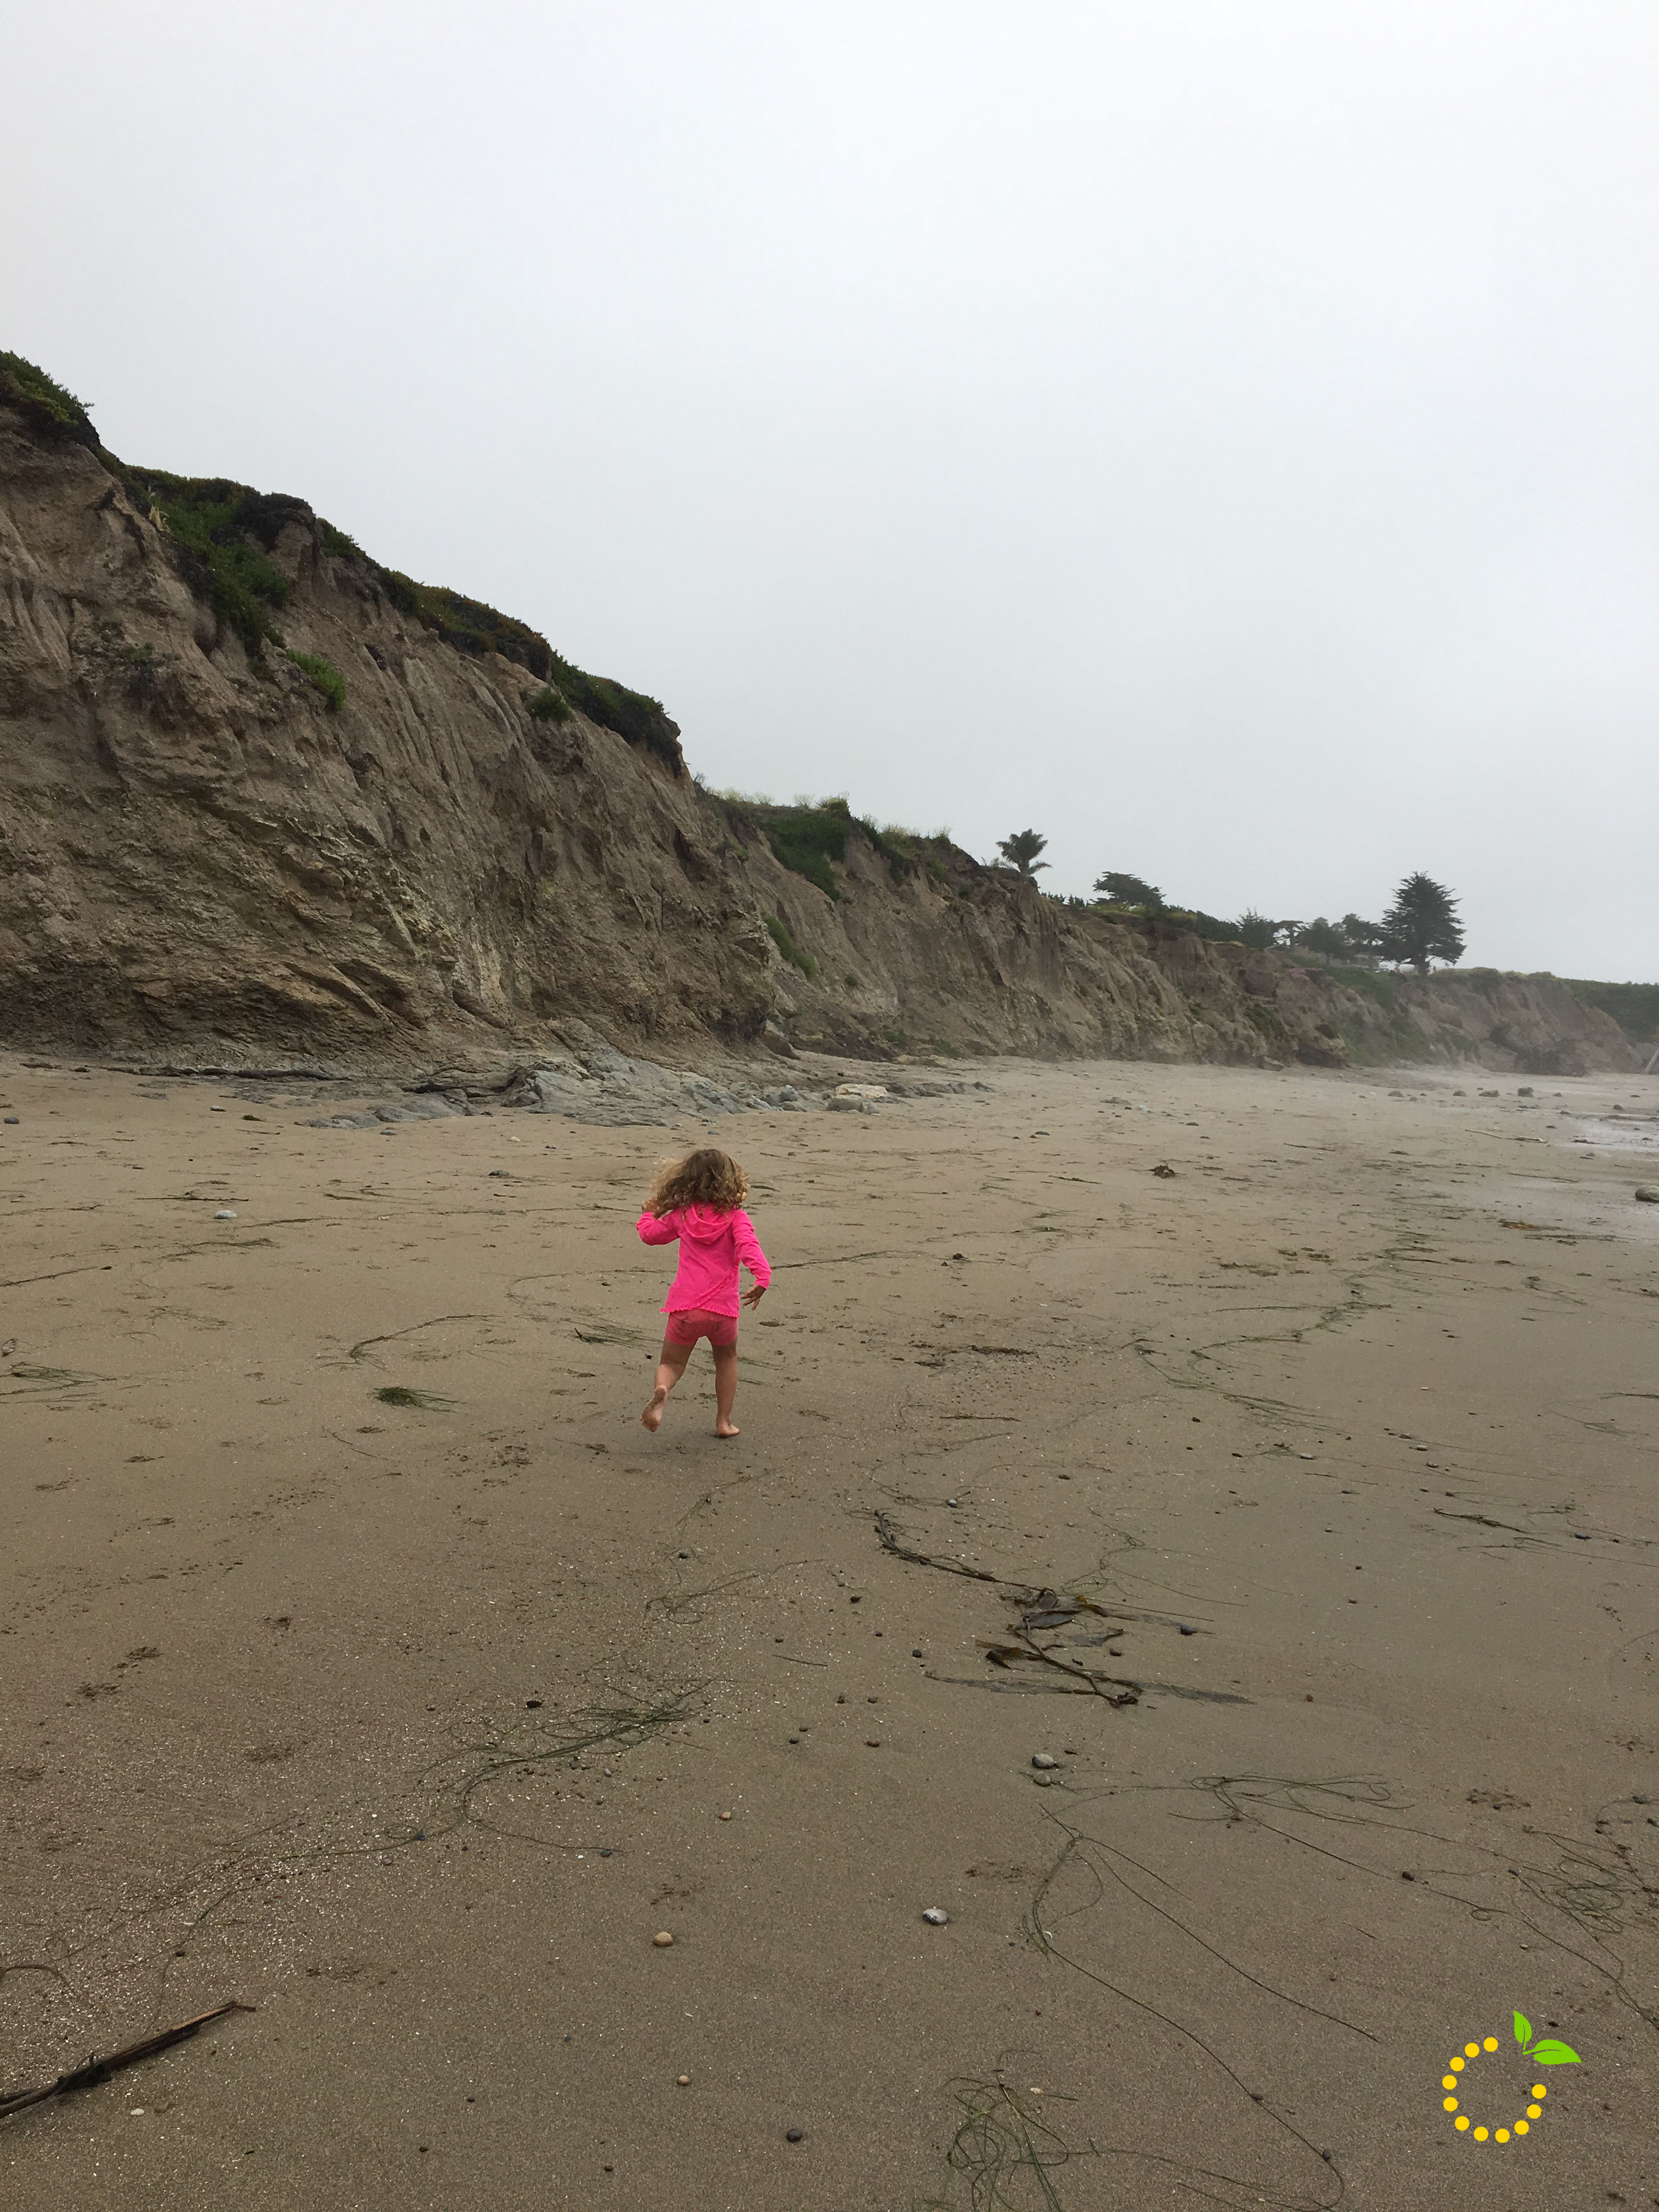
Half Moon Bay is the perfect summer beach town. It reminds me of a quaint little summer spot you would see in the movies. The main reason for our visit was to see the location of the famous Mavericks big-wave surf contest. We trekked up a paved road by the Air Force Facility and then took one of the many trails down the cliff side to Ross Cove Beach. Let me tell you, this is one of the most peaceful places I’ve ever been. We were the only ones on the beach. The view of the cliffs and waves splashing against the rocks was like nothing I had ever seen before. We could have spent all day just laying in the sand. On our way out of town, we had lunch at Half Moon Bay Brewing Co. for some delicious fish tacos and local beer. We enjoyed the patio seating and ocean views.

IMG_1065

IMG_1066

IMG_1064

Santa Cruz
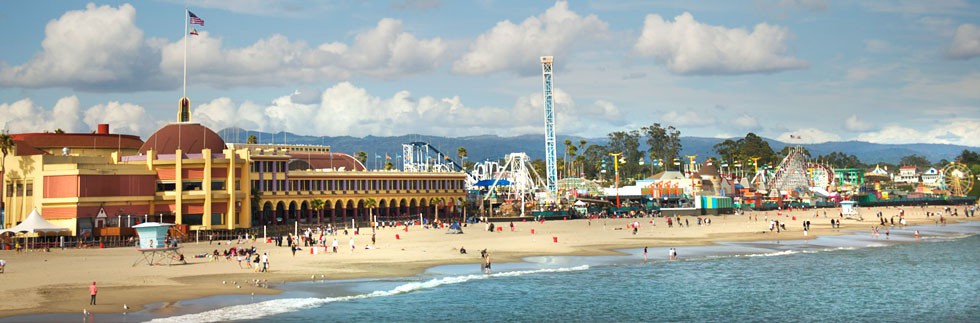
Our time in Santa Cruz was short lived, but definitely a place we want to go back and visit. The beach was really busy, which was surprising for how cold the water was. Olivia enjoyed splashing around for an hour before we made our way up to the boardwalk. You can walk around and enjoy the atmosphere of the board walk for free. There is a huge building at one end of the boardwalk where you can play arcade games, mini-golf, laser tag and other fun indoor activities. The boardwalk is such a fun place to hang out, enjoy the ocean view, ride carnival rides and fill up on carnival themed food like cotton candy and deep fried everything! The only downside is the cost of rides. It’s comes out to $5 per ride, unless you buy a season pass. I was pretty shocked at the price of tokens and thankful we were only there for about an hour or it would have taken a majority of our vacation budget!
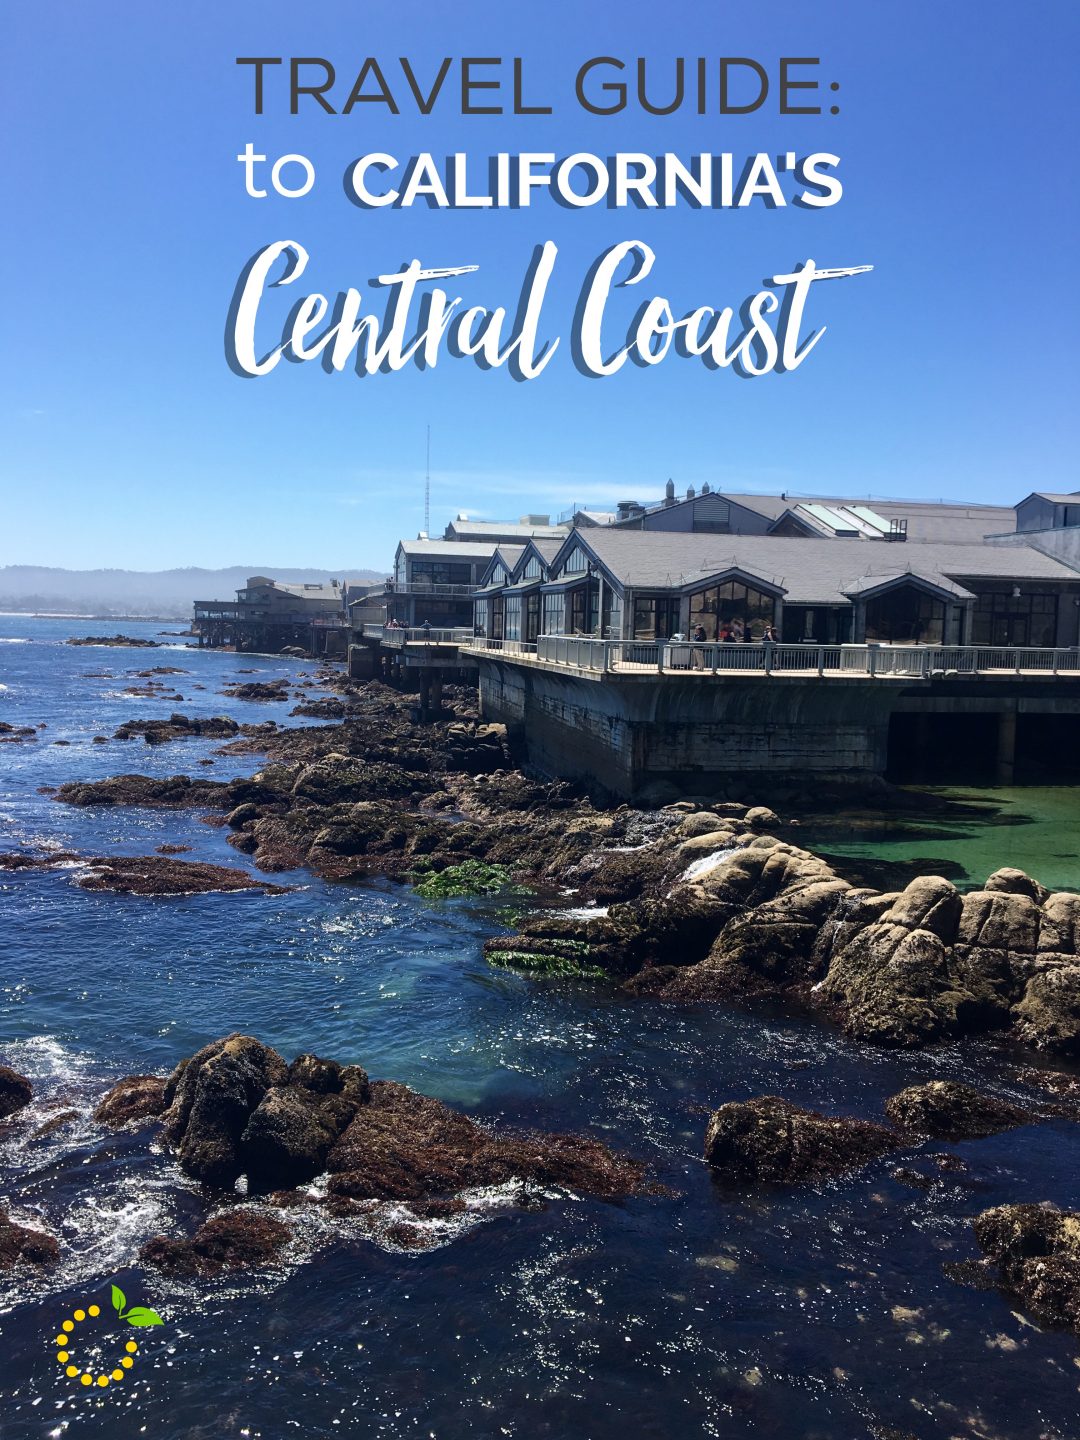
Santa bruz


Monterey Bay
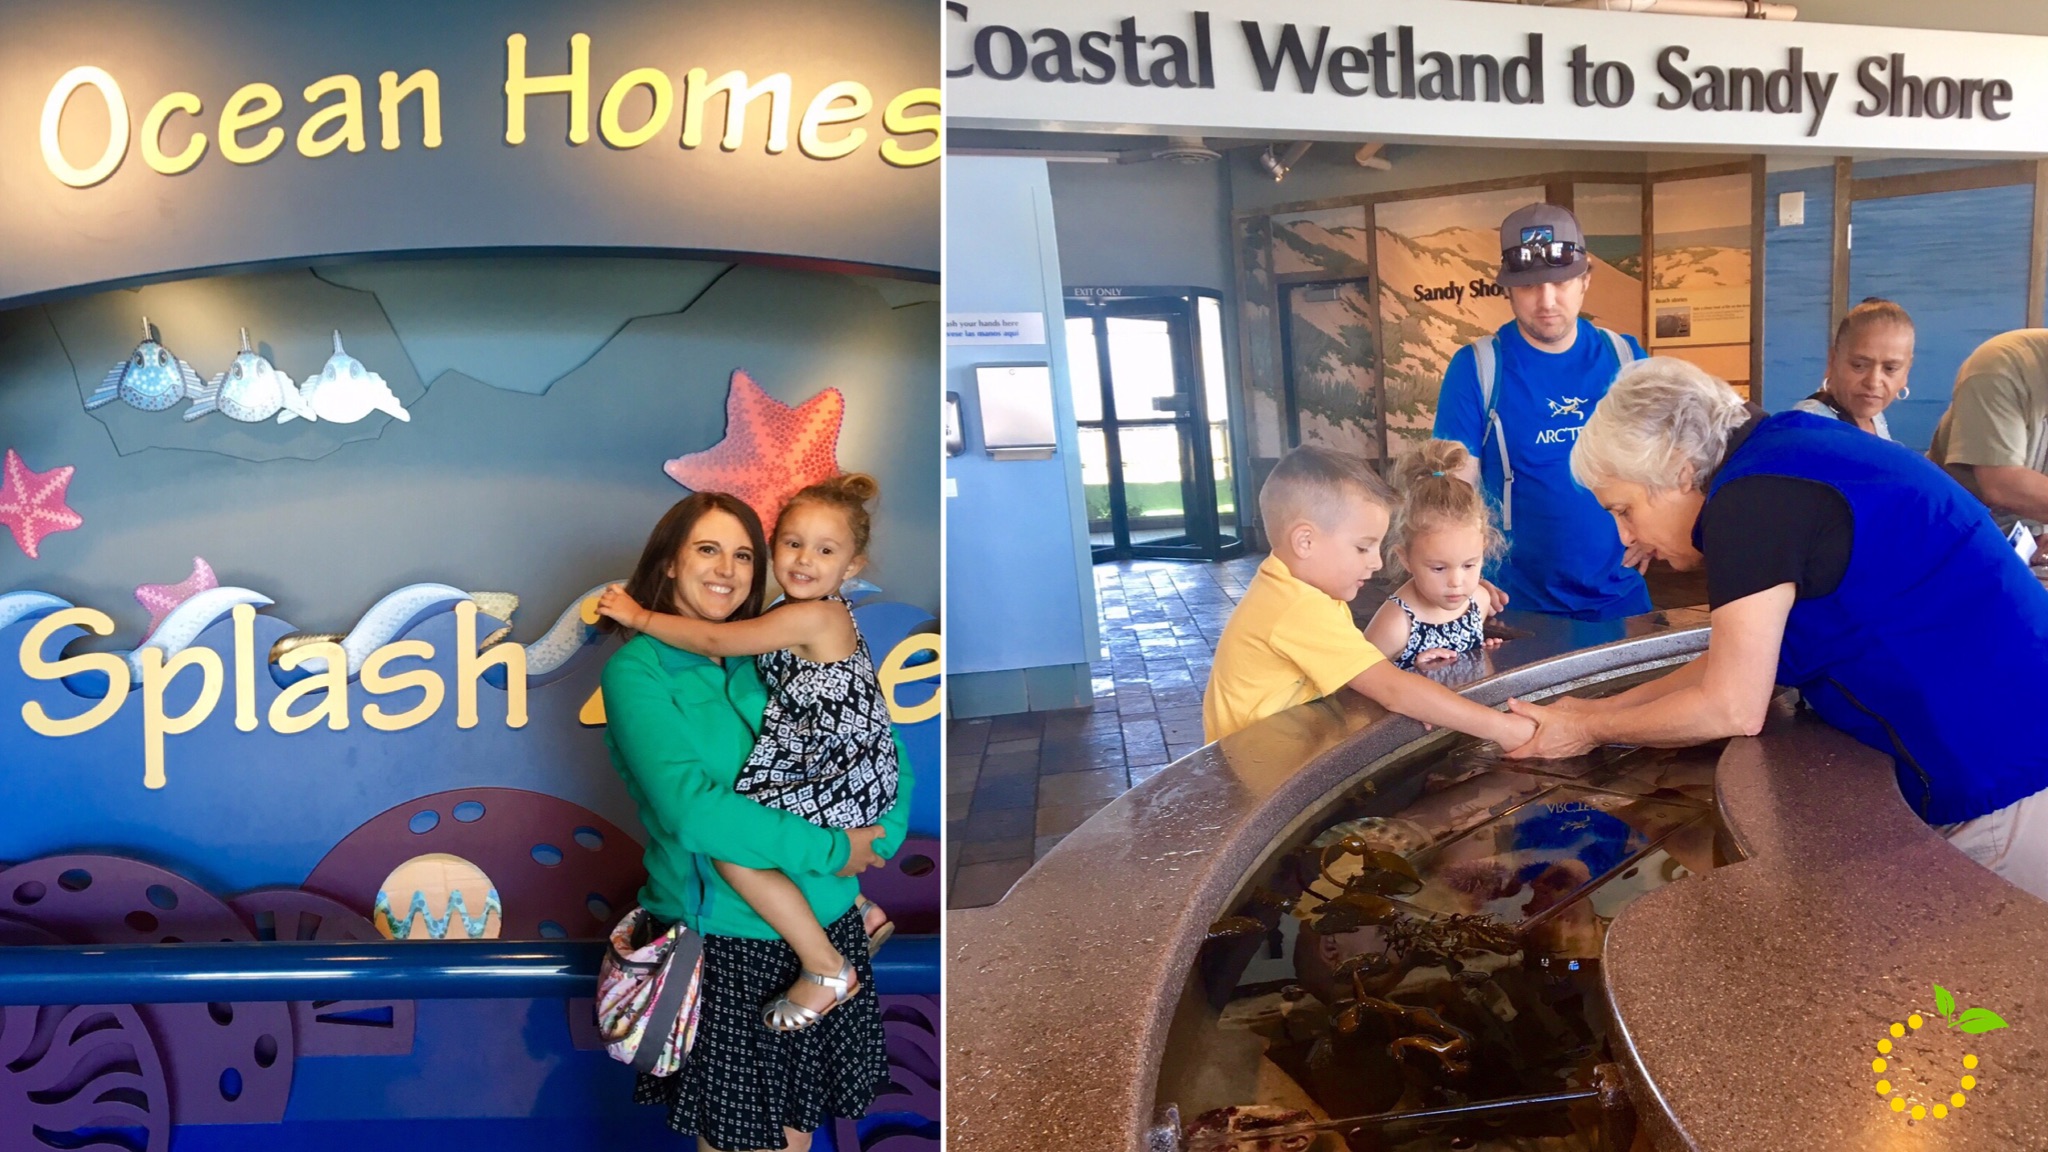
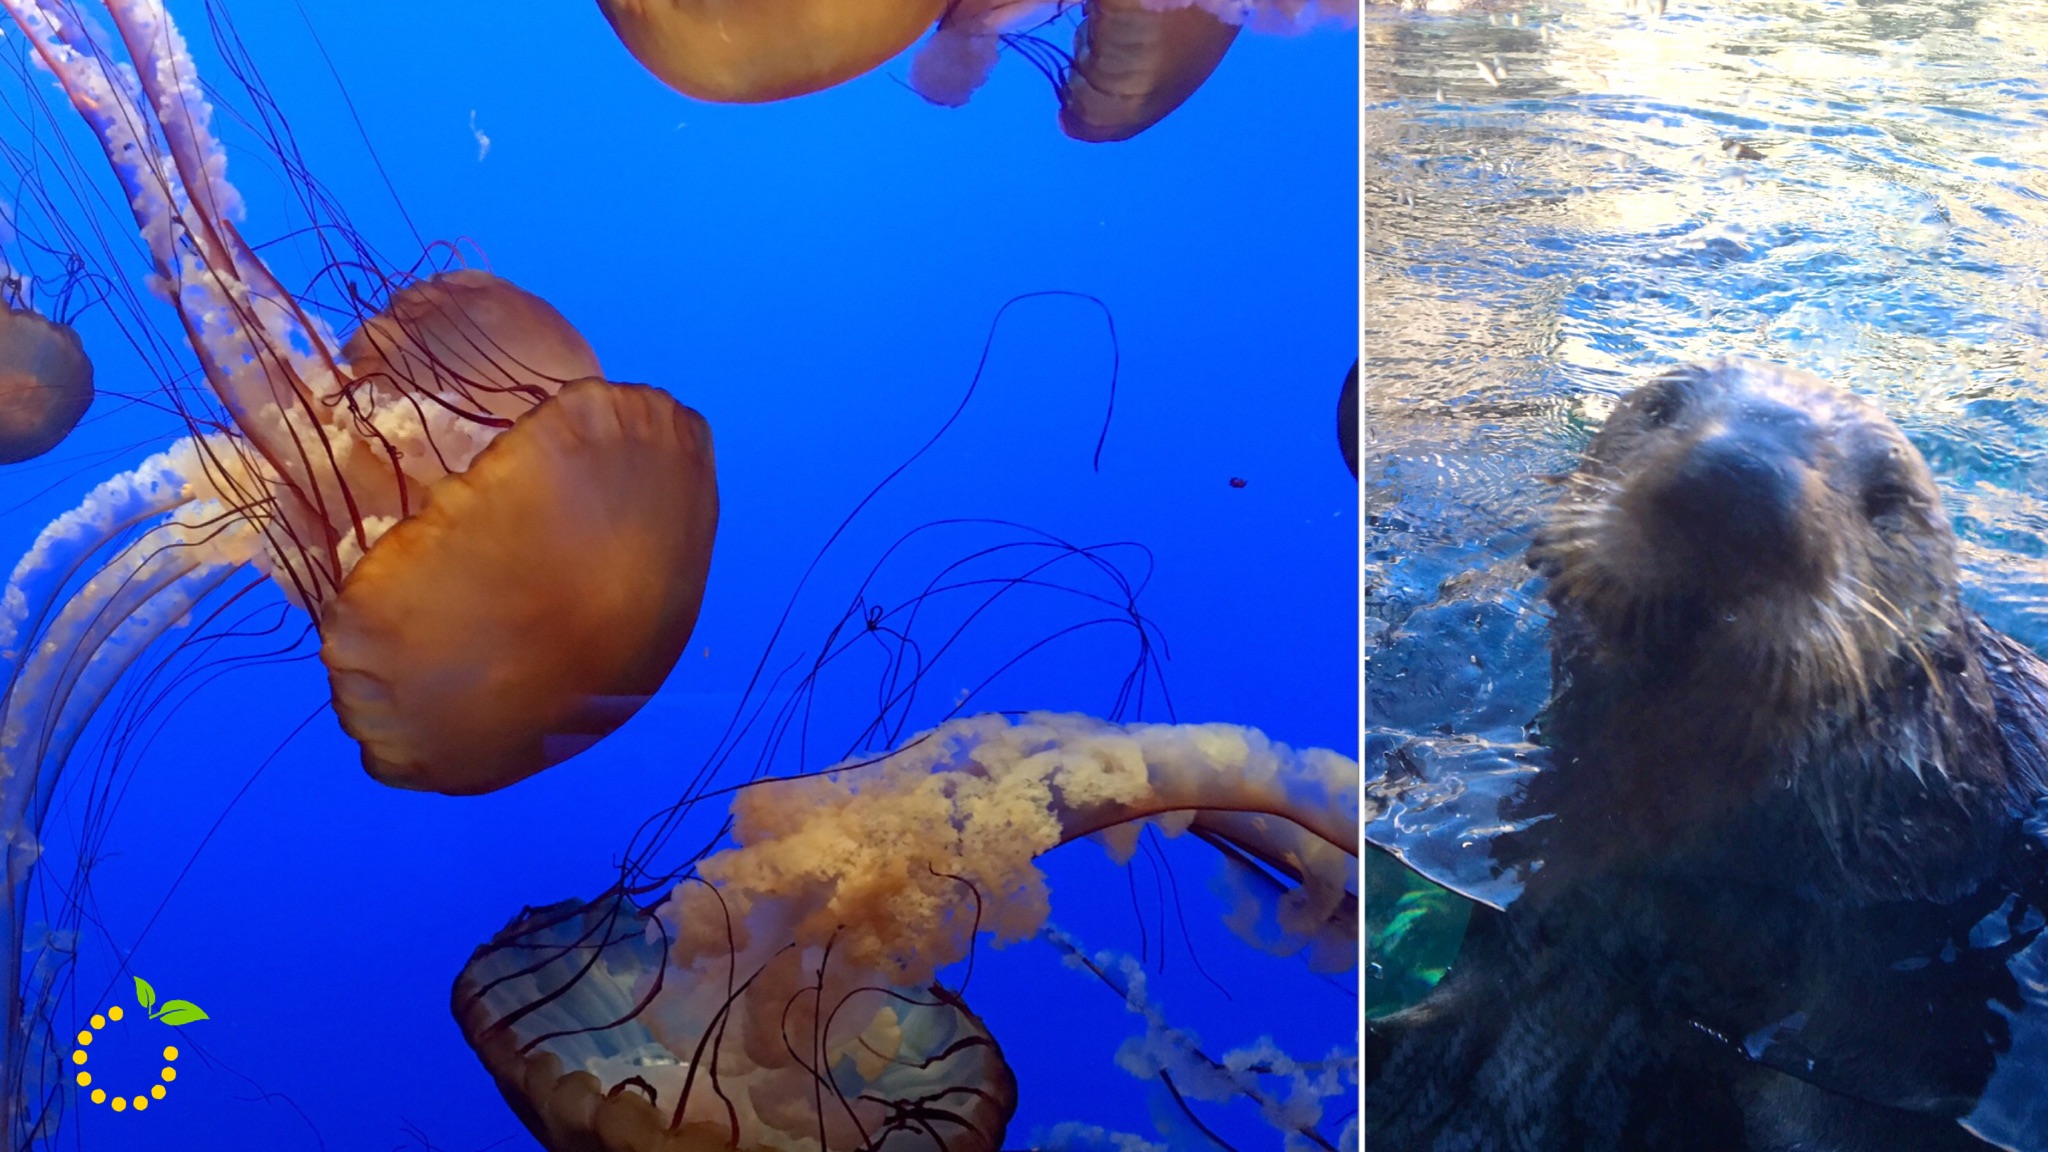
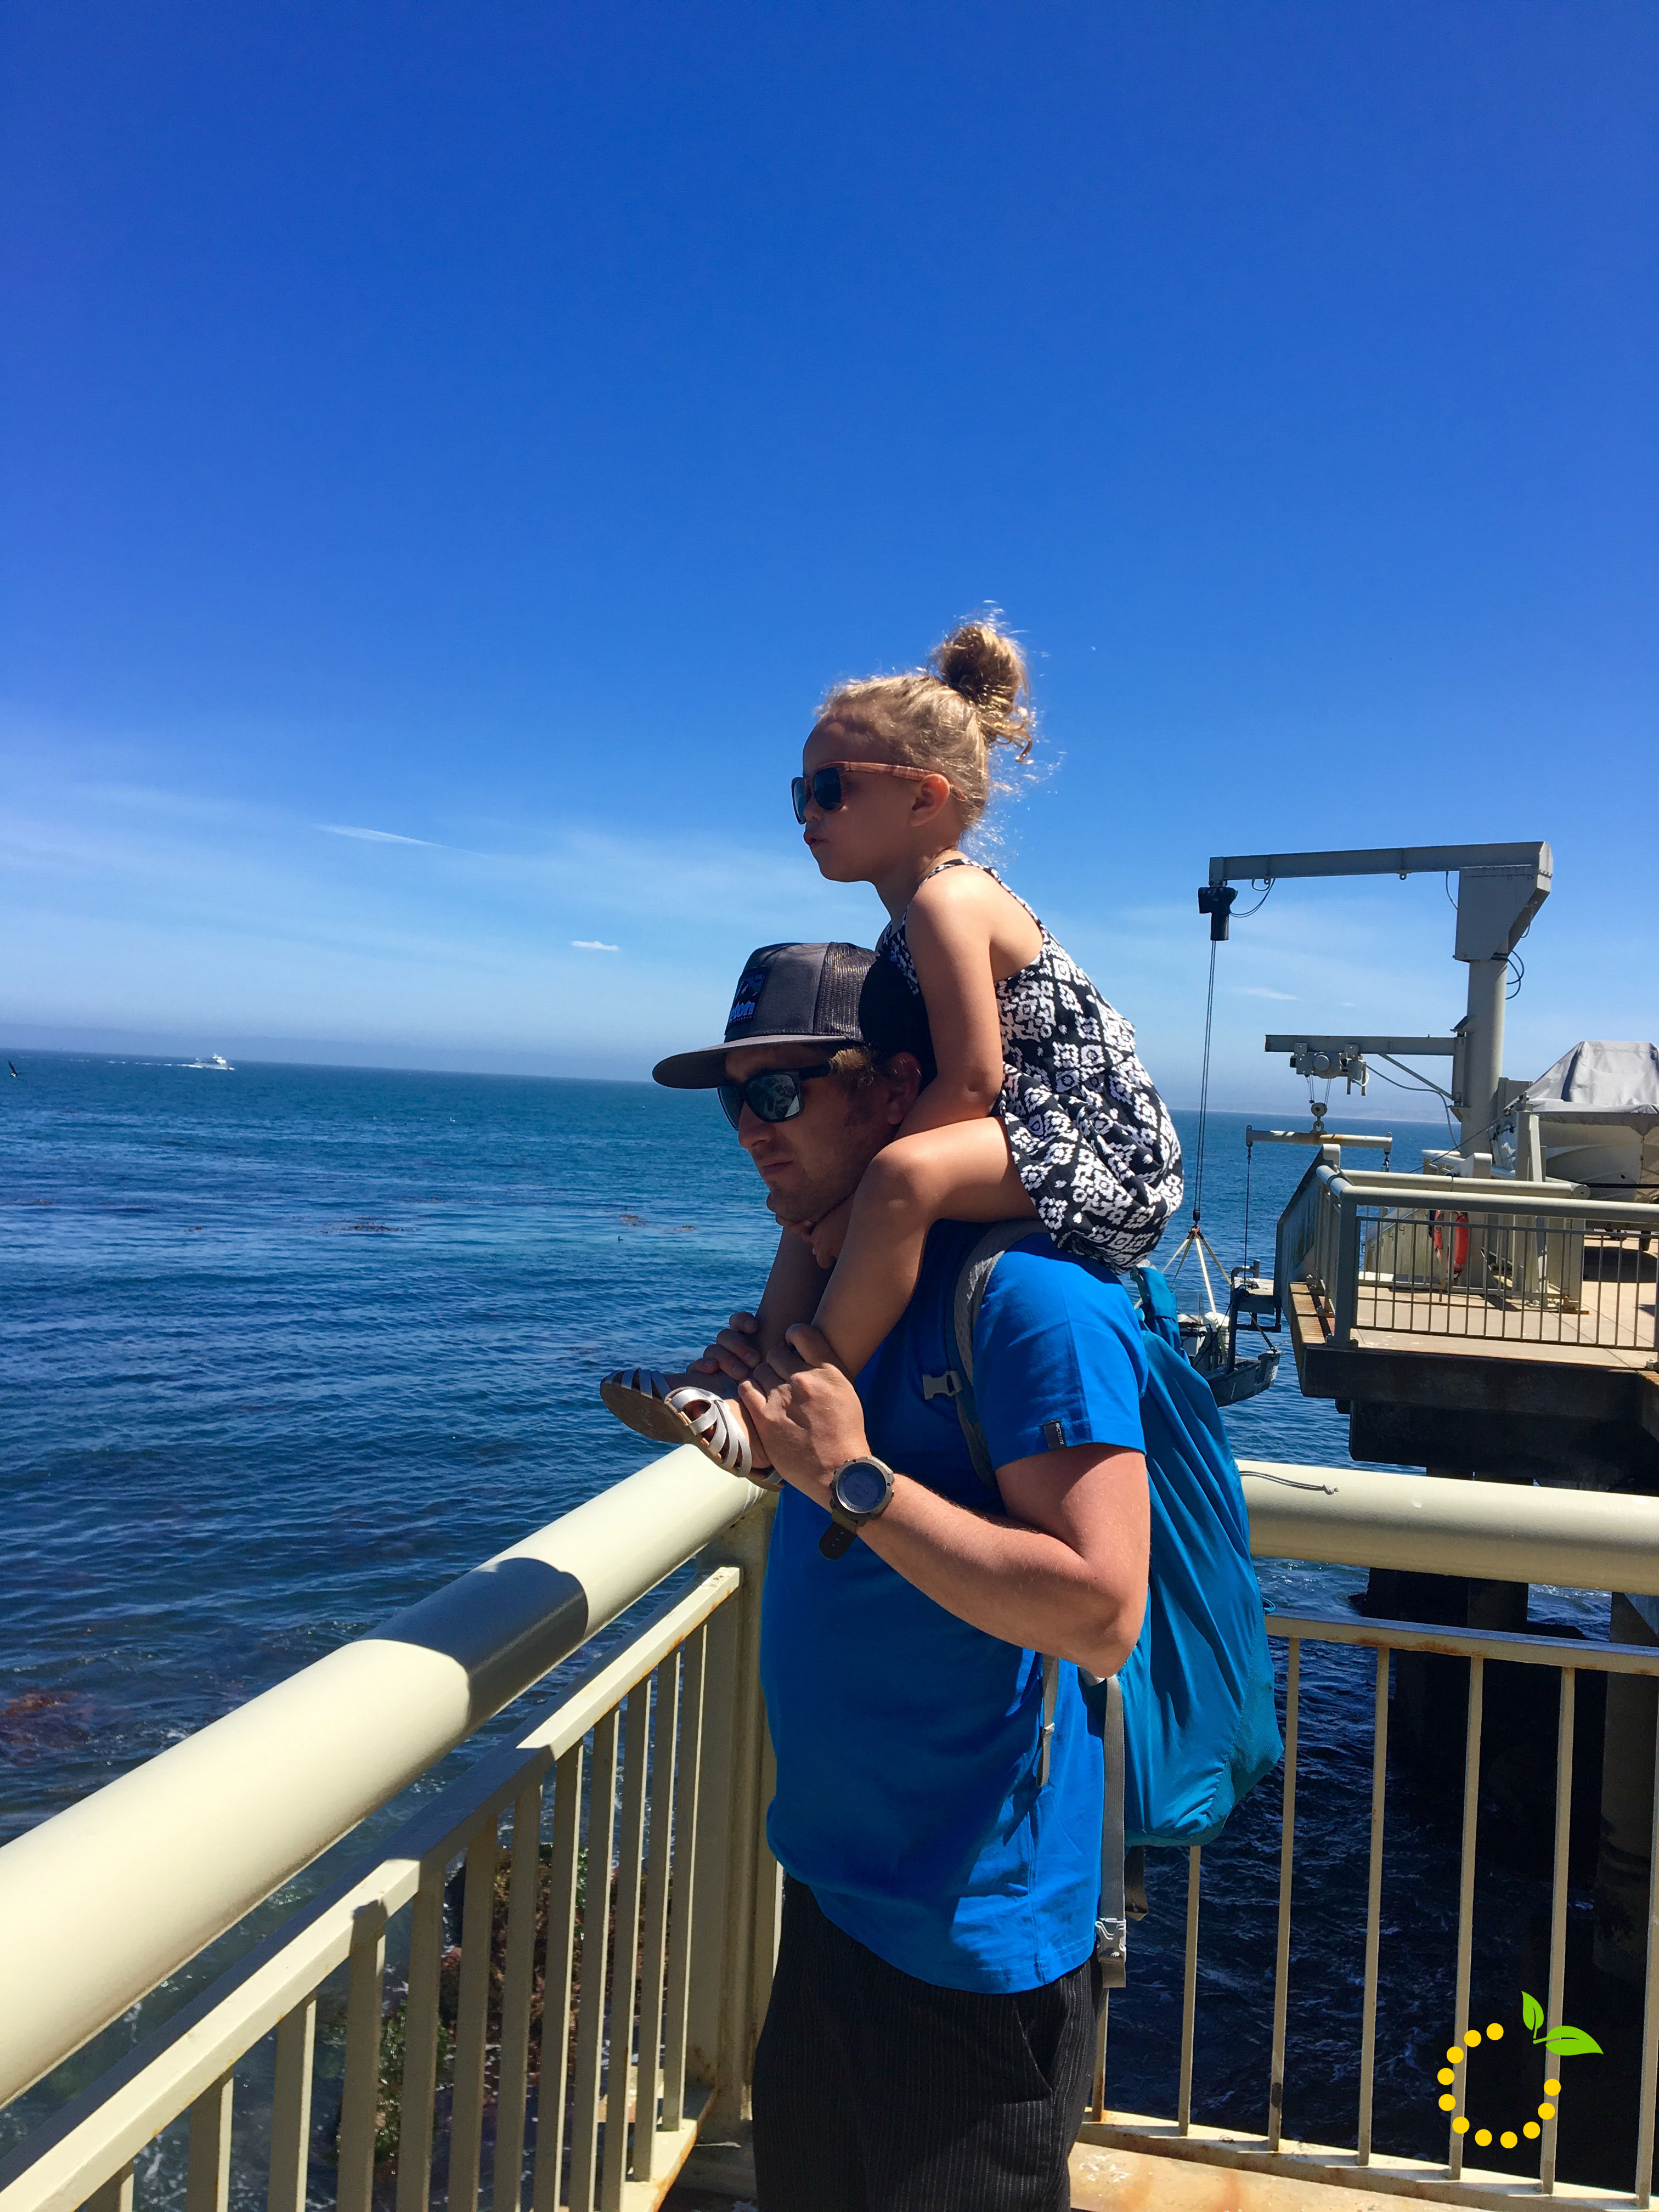
The main attraction we were looking forward to in Monterey was the famous Monterey Bay Aquarium. Everyone we told about our trip said we had to stop and check it out. I must say, it didn’t disappoint. There were so many fun things to do including behind-the-scenes tours, shows throughout the day and live feedings. There was also an interactive area called the splash zone, where kids could play in the water and touch all sorts of creepy crawly sea life!

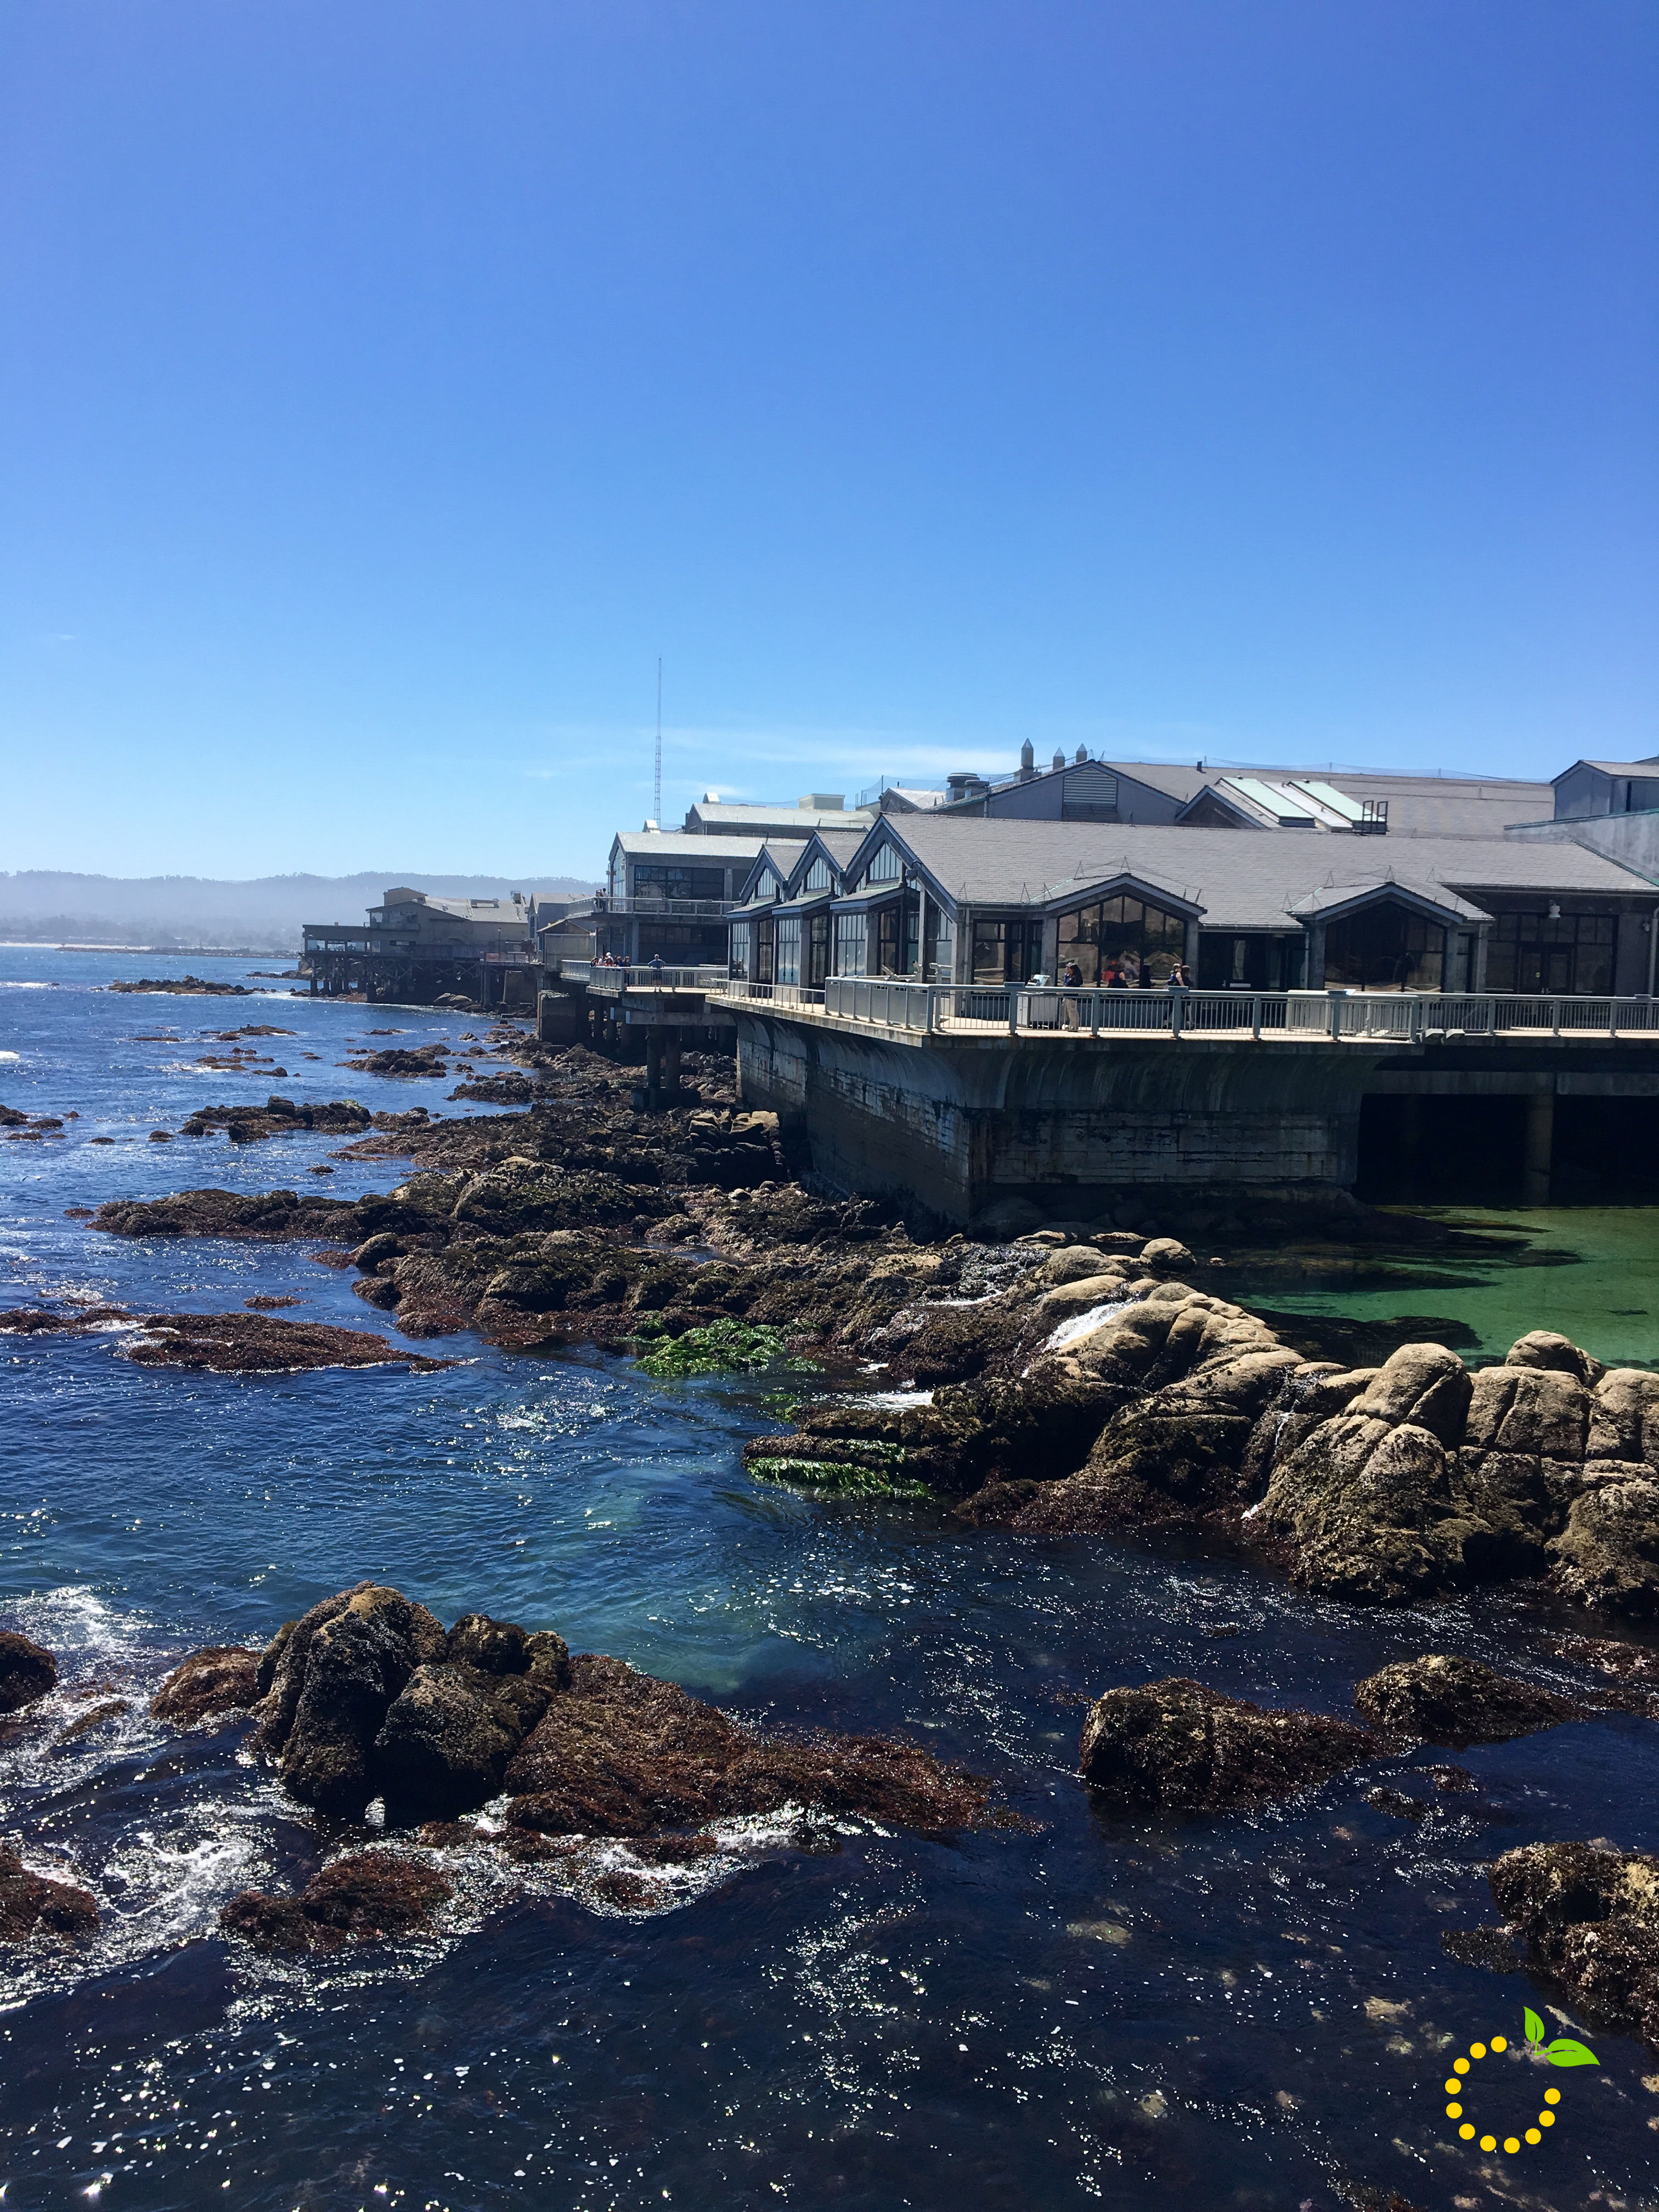
The aquarium was also a great place to take in the gorgeous views of the shores of Monterey Bay. We sat outside for almost an hour enjoying snacks and watching sea lions swim by. If you want to take a peek at the view I’m talking about, check out the live cam from the aquarium’s ocean-view deck. 

The Monterey Bay Aquarium is by far one of the best aquariums I’ve visited. However, if you are planning a trip, keep these things in mind:

  1. Schedule: You could spend all day enjoying everything the aquarium has to offer, so plan to spend a good 3 – 5 hours.
  2. It’s expensive. General admission costs $50 for adults and $30 for children 3-12.
  3. Food options. The cafe has a variety of food options and it’s pretty tasty. Just be prepared for steep prices.

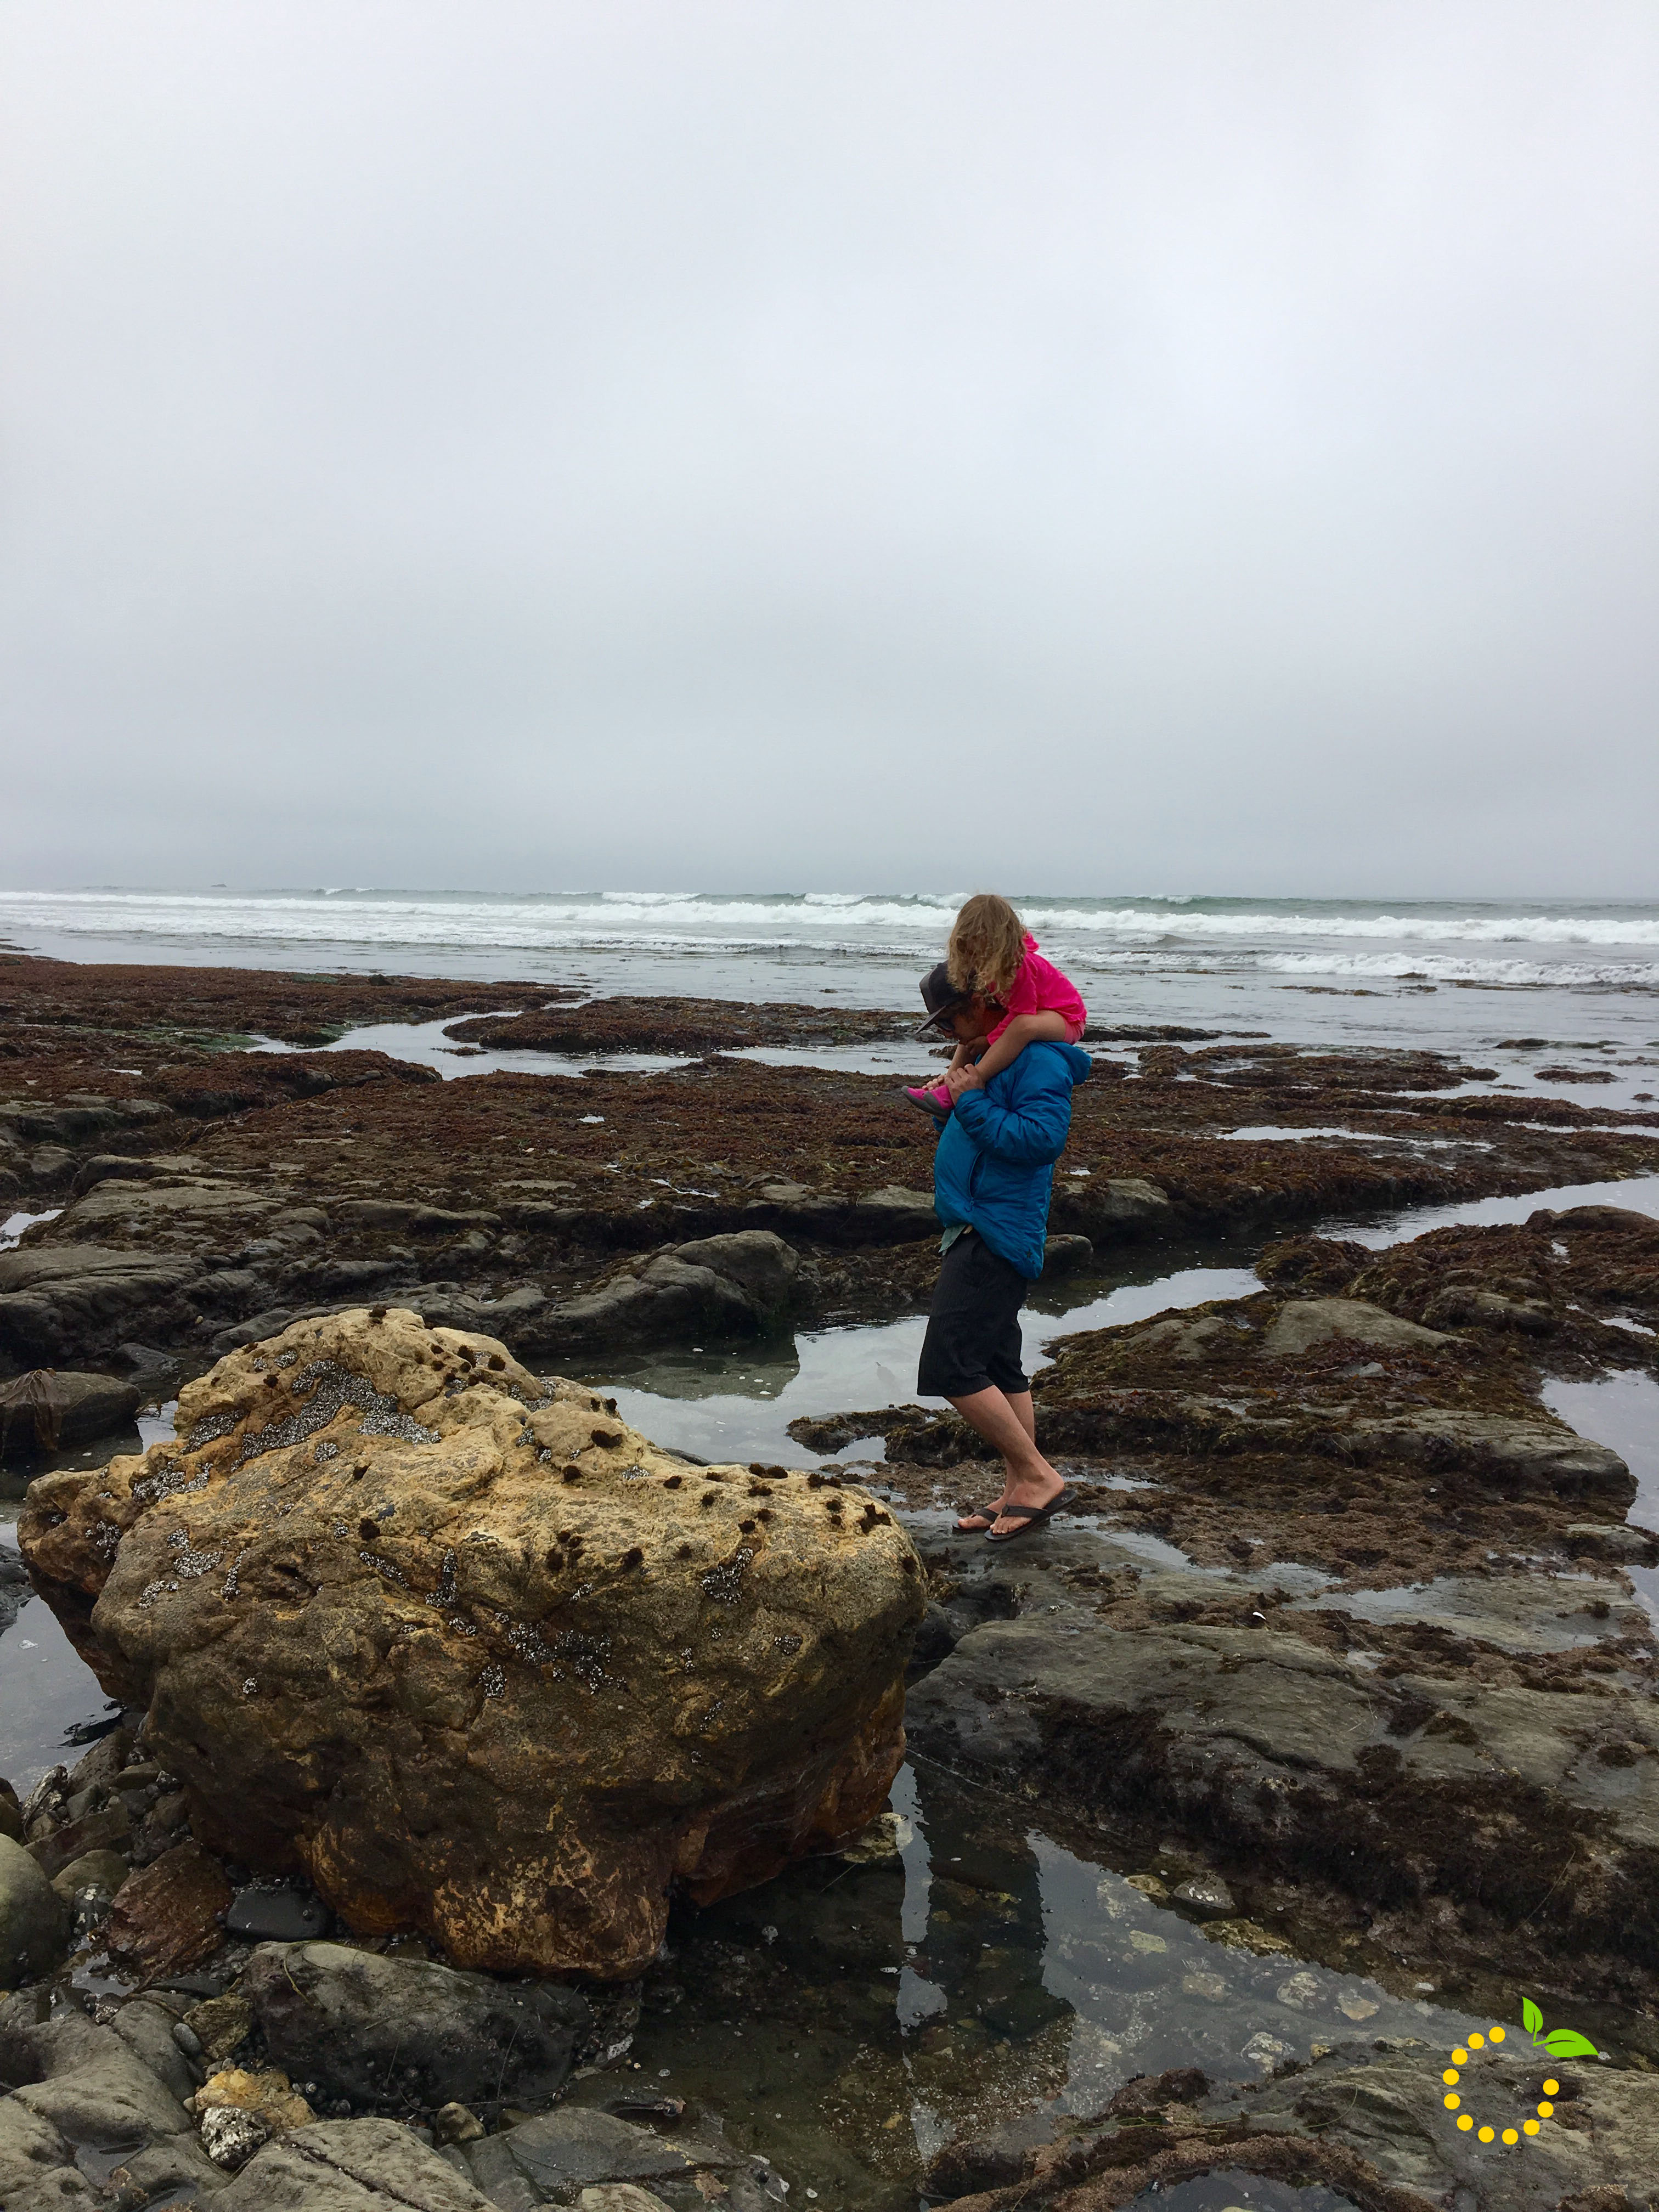
Before we left Monterey, we decided to drive along Ocean View Blvd to check out some tide pools. We could’ve spent all day searching for star-fish, watching crabs and enjoying the waves as they splashed against the rocks.

Image-1 (11)
Image-1 (20)
1 1
2 2
3 3
4 4

San Luis Obispo – SLO
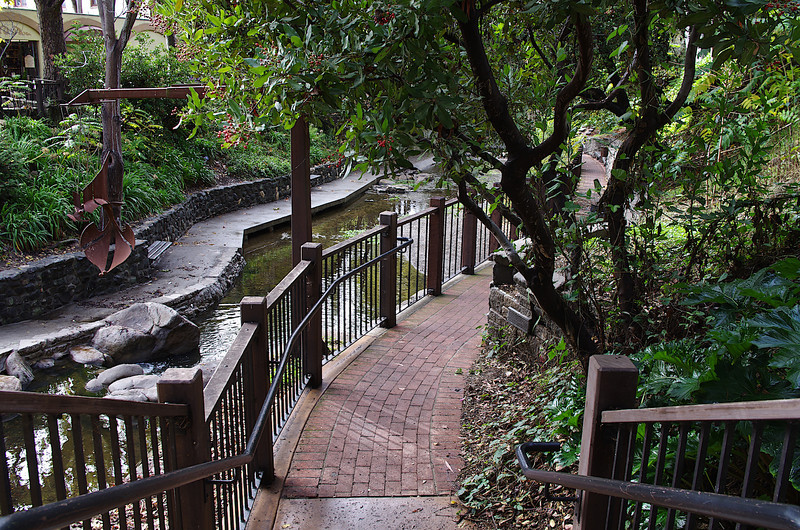
San Luis Obispo, in my opinion, is a hidden gem. However, it might not be so hidden since it was recently named the “The Happiest Place in America”. I had never heard of the city until our friend moved there a year ago. After spending two days in “SLO” and the surrounding small towns, Marc and I were sold and ready to move. Home to California Polytechnic State University, this college town has such a laid back vibe and an adorable historic downtown, filled with hip restaurants and bars. There is also an incredible river walk that flows down the middle and is the backdrop to a lot of the restaurants. 
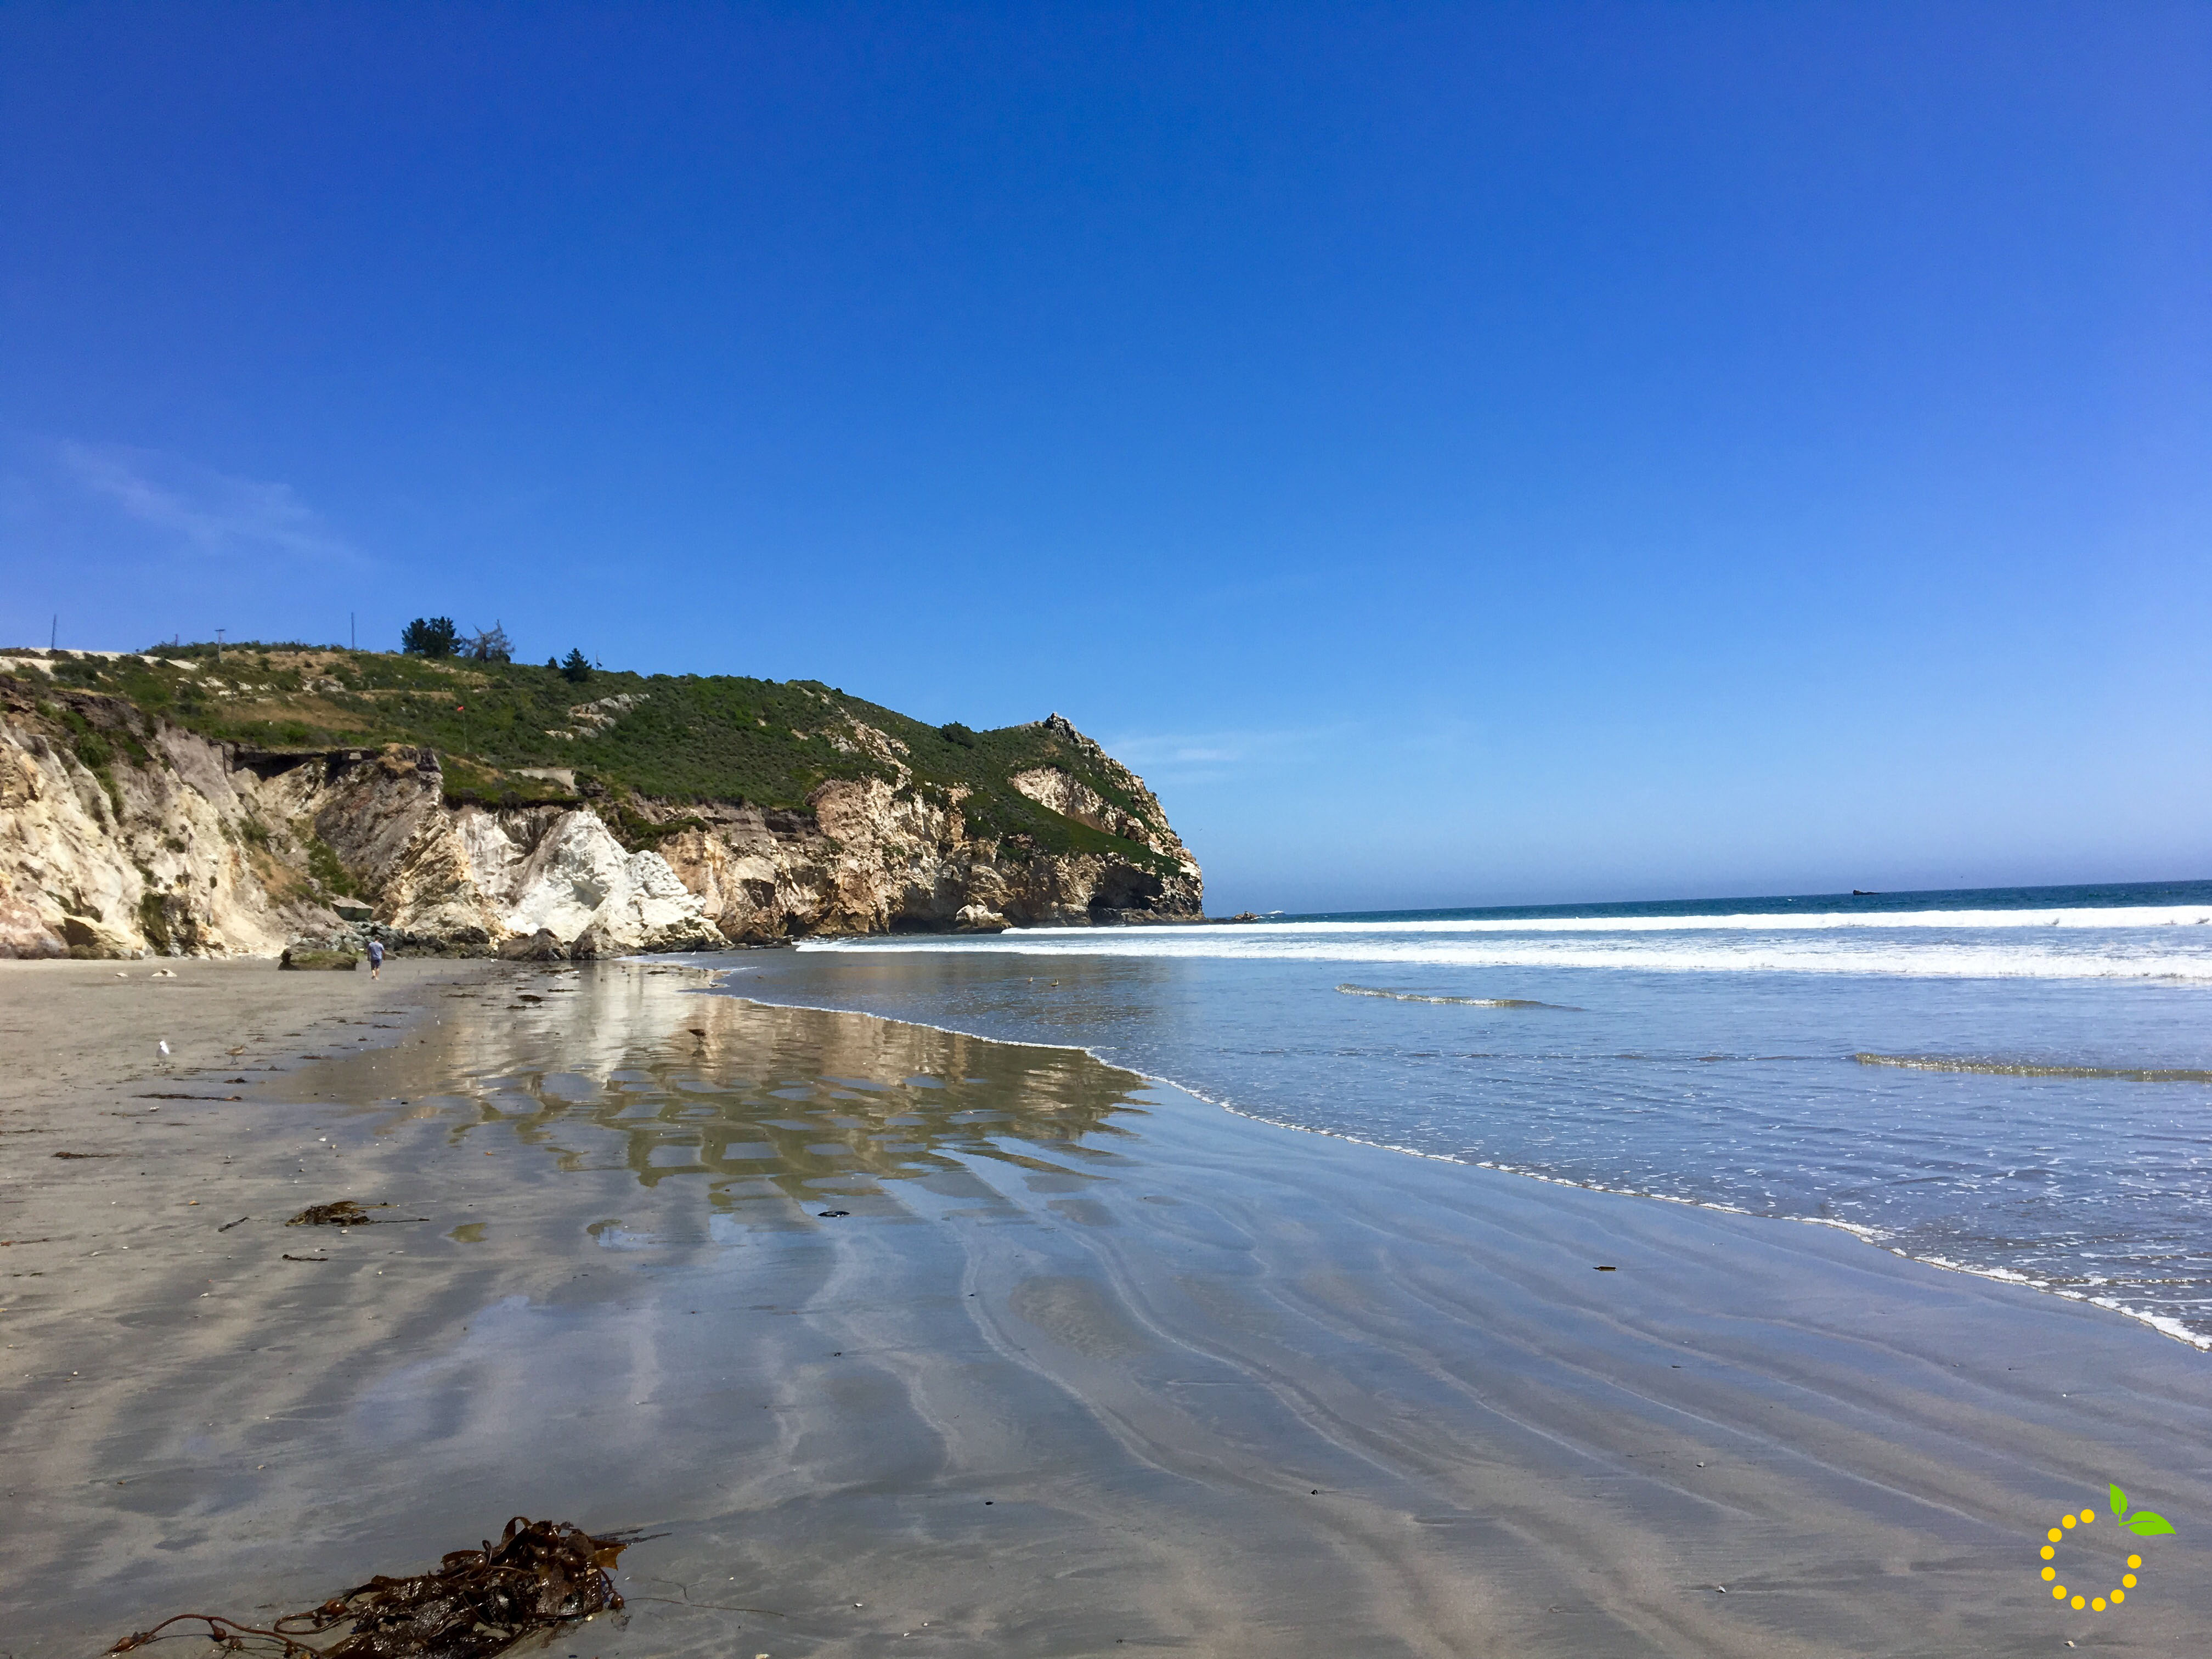
san louis

Shell Beach
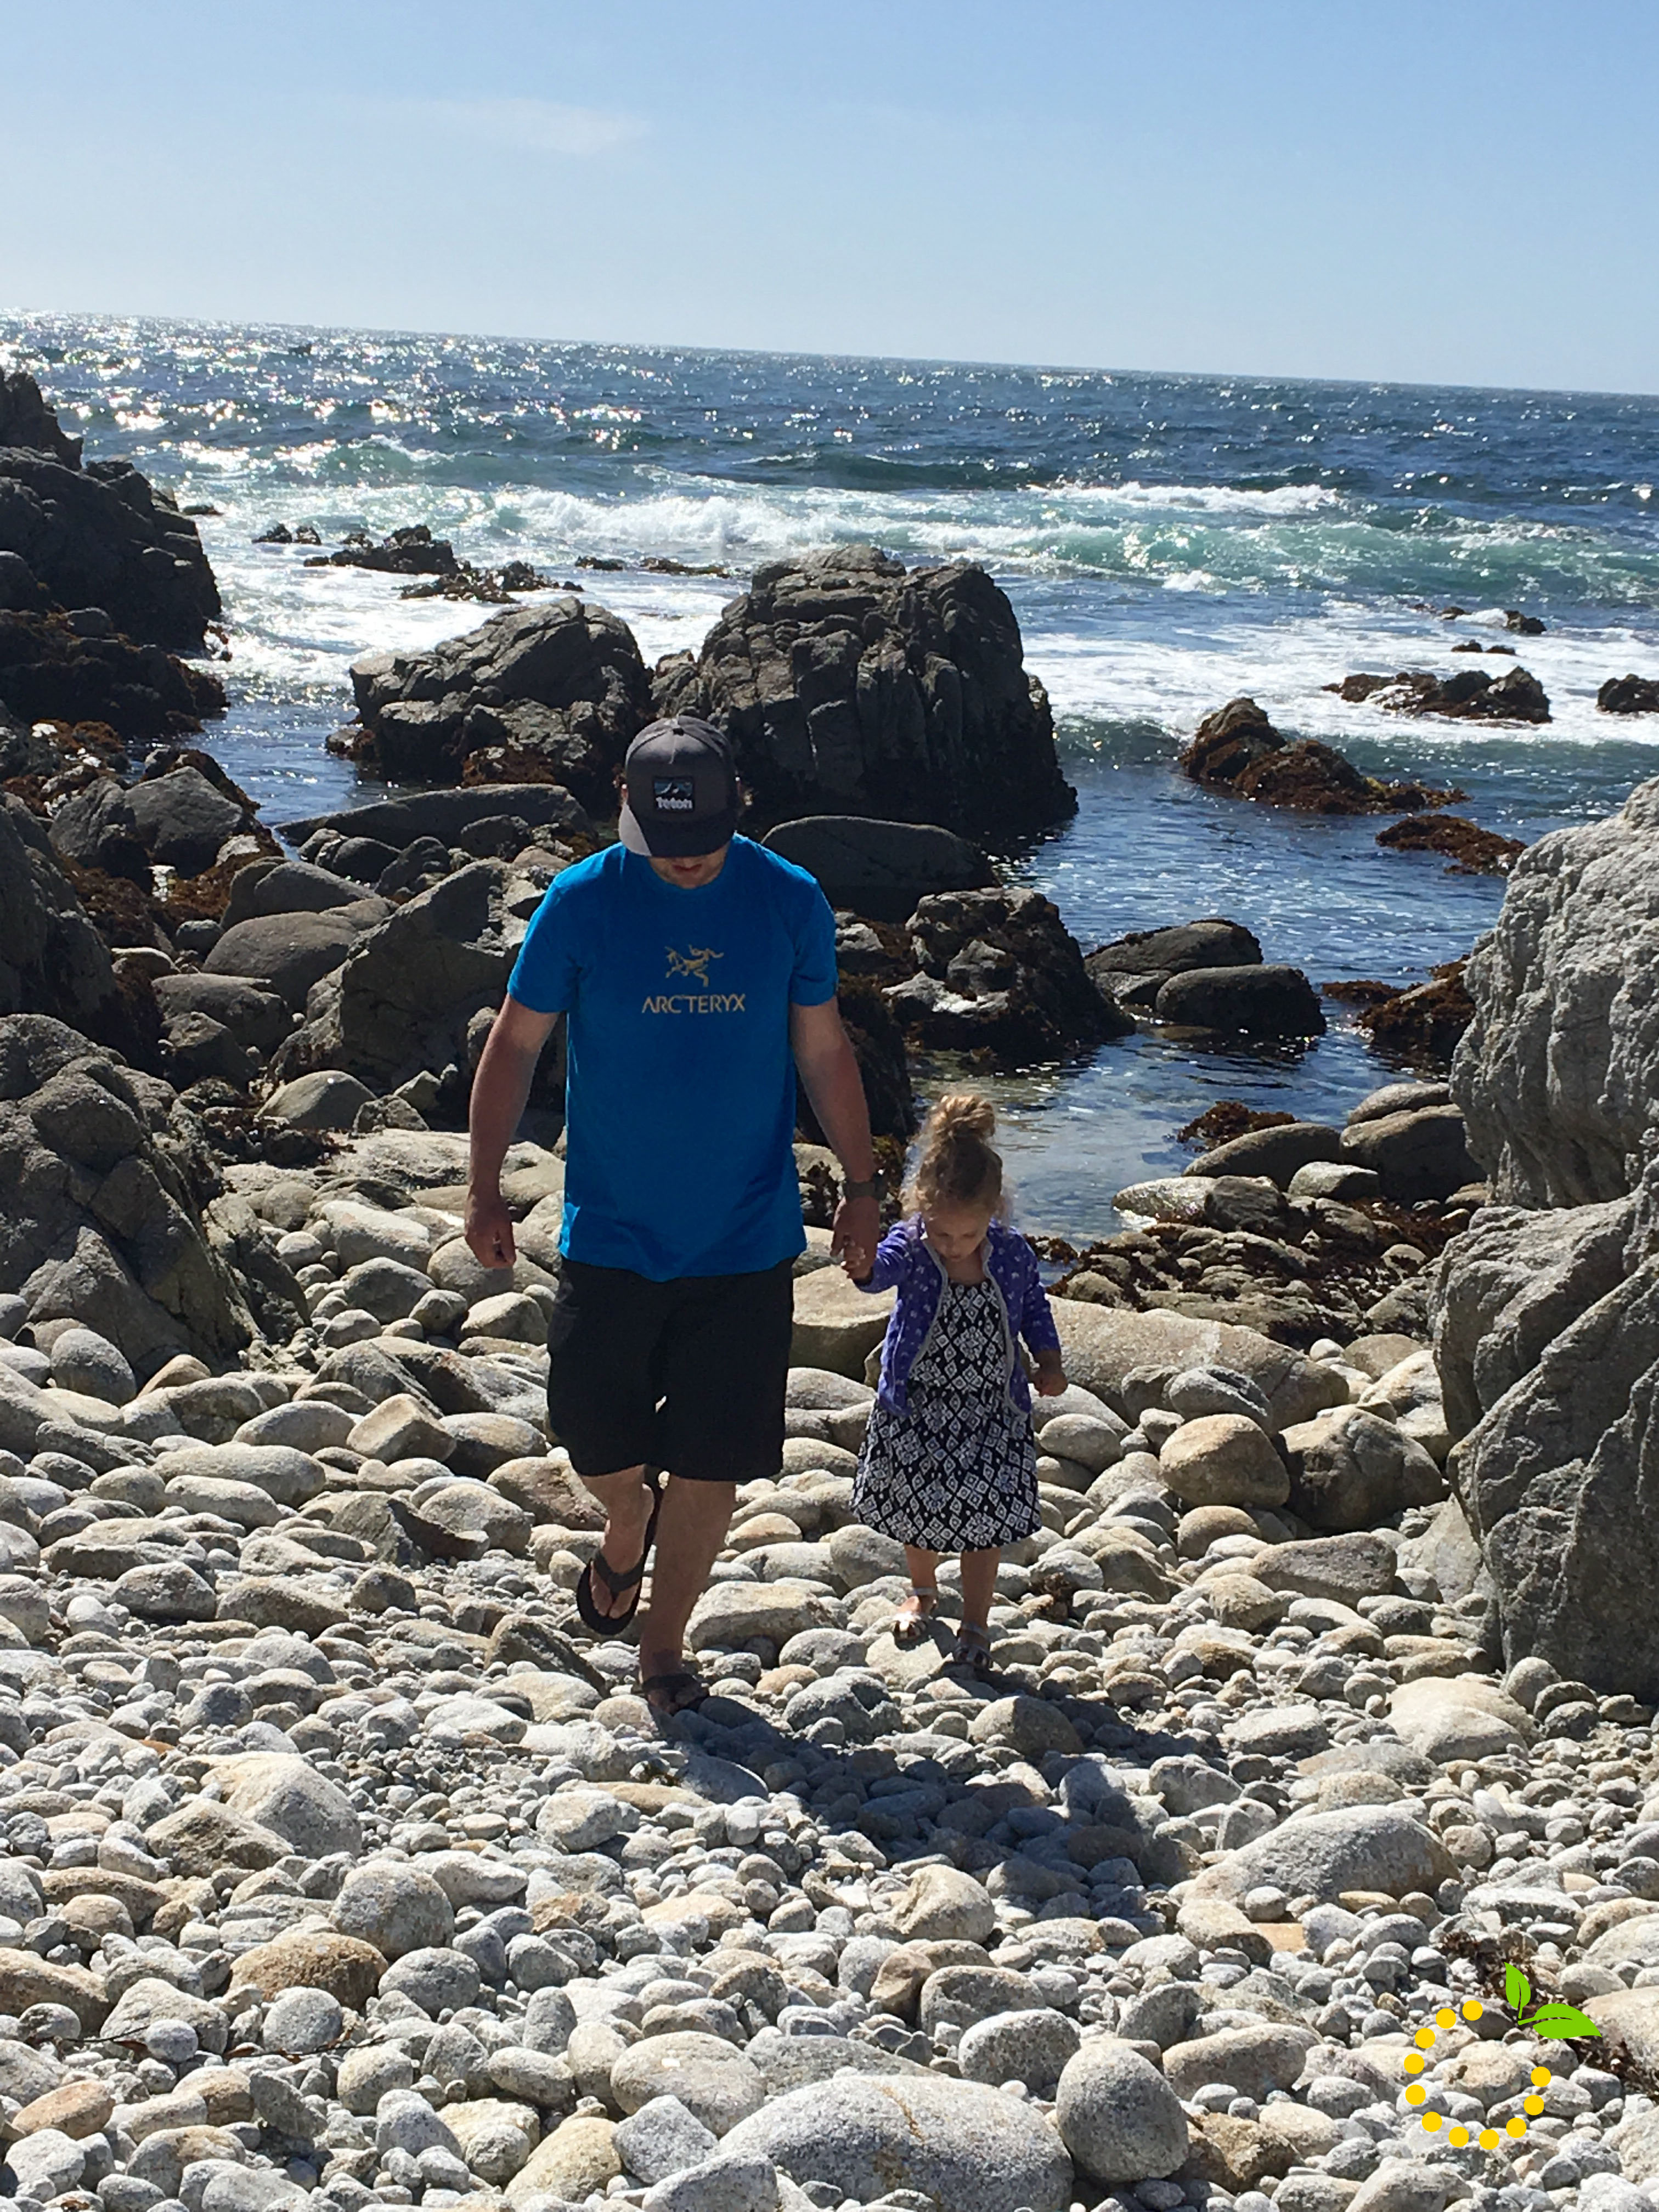
Our friend lives in an adorable beach house neighborhood, one street away from Shell beach. The homes are absolutely incredible and unique. We spent the evenings walking along the cliff side, looking down at the waves splashing against the rocks. It was so peaceful and relaxing. I can’t believe they live there! One morning we explored the beach and searched the tide pools for sea creatures. It was pretty foggy, but still made for a beautiful sight.  
0315016
0123456
123456
Avila Beach
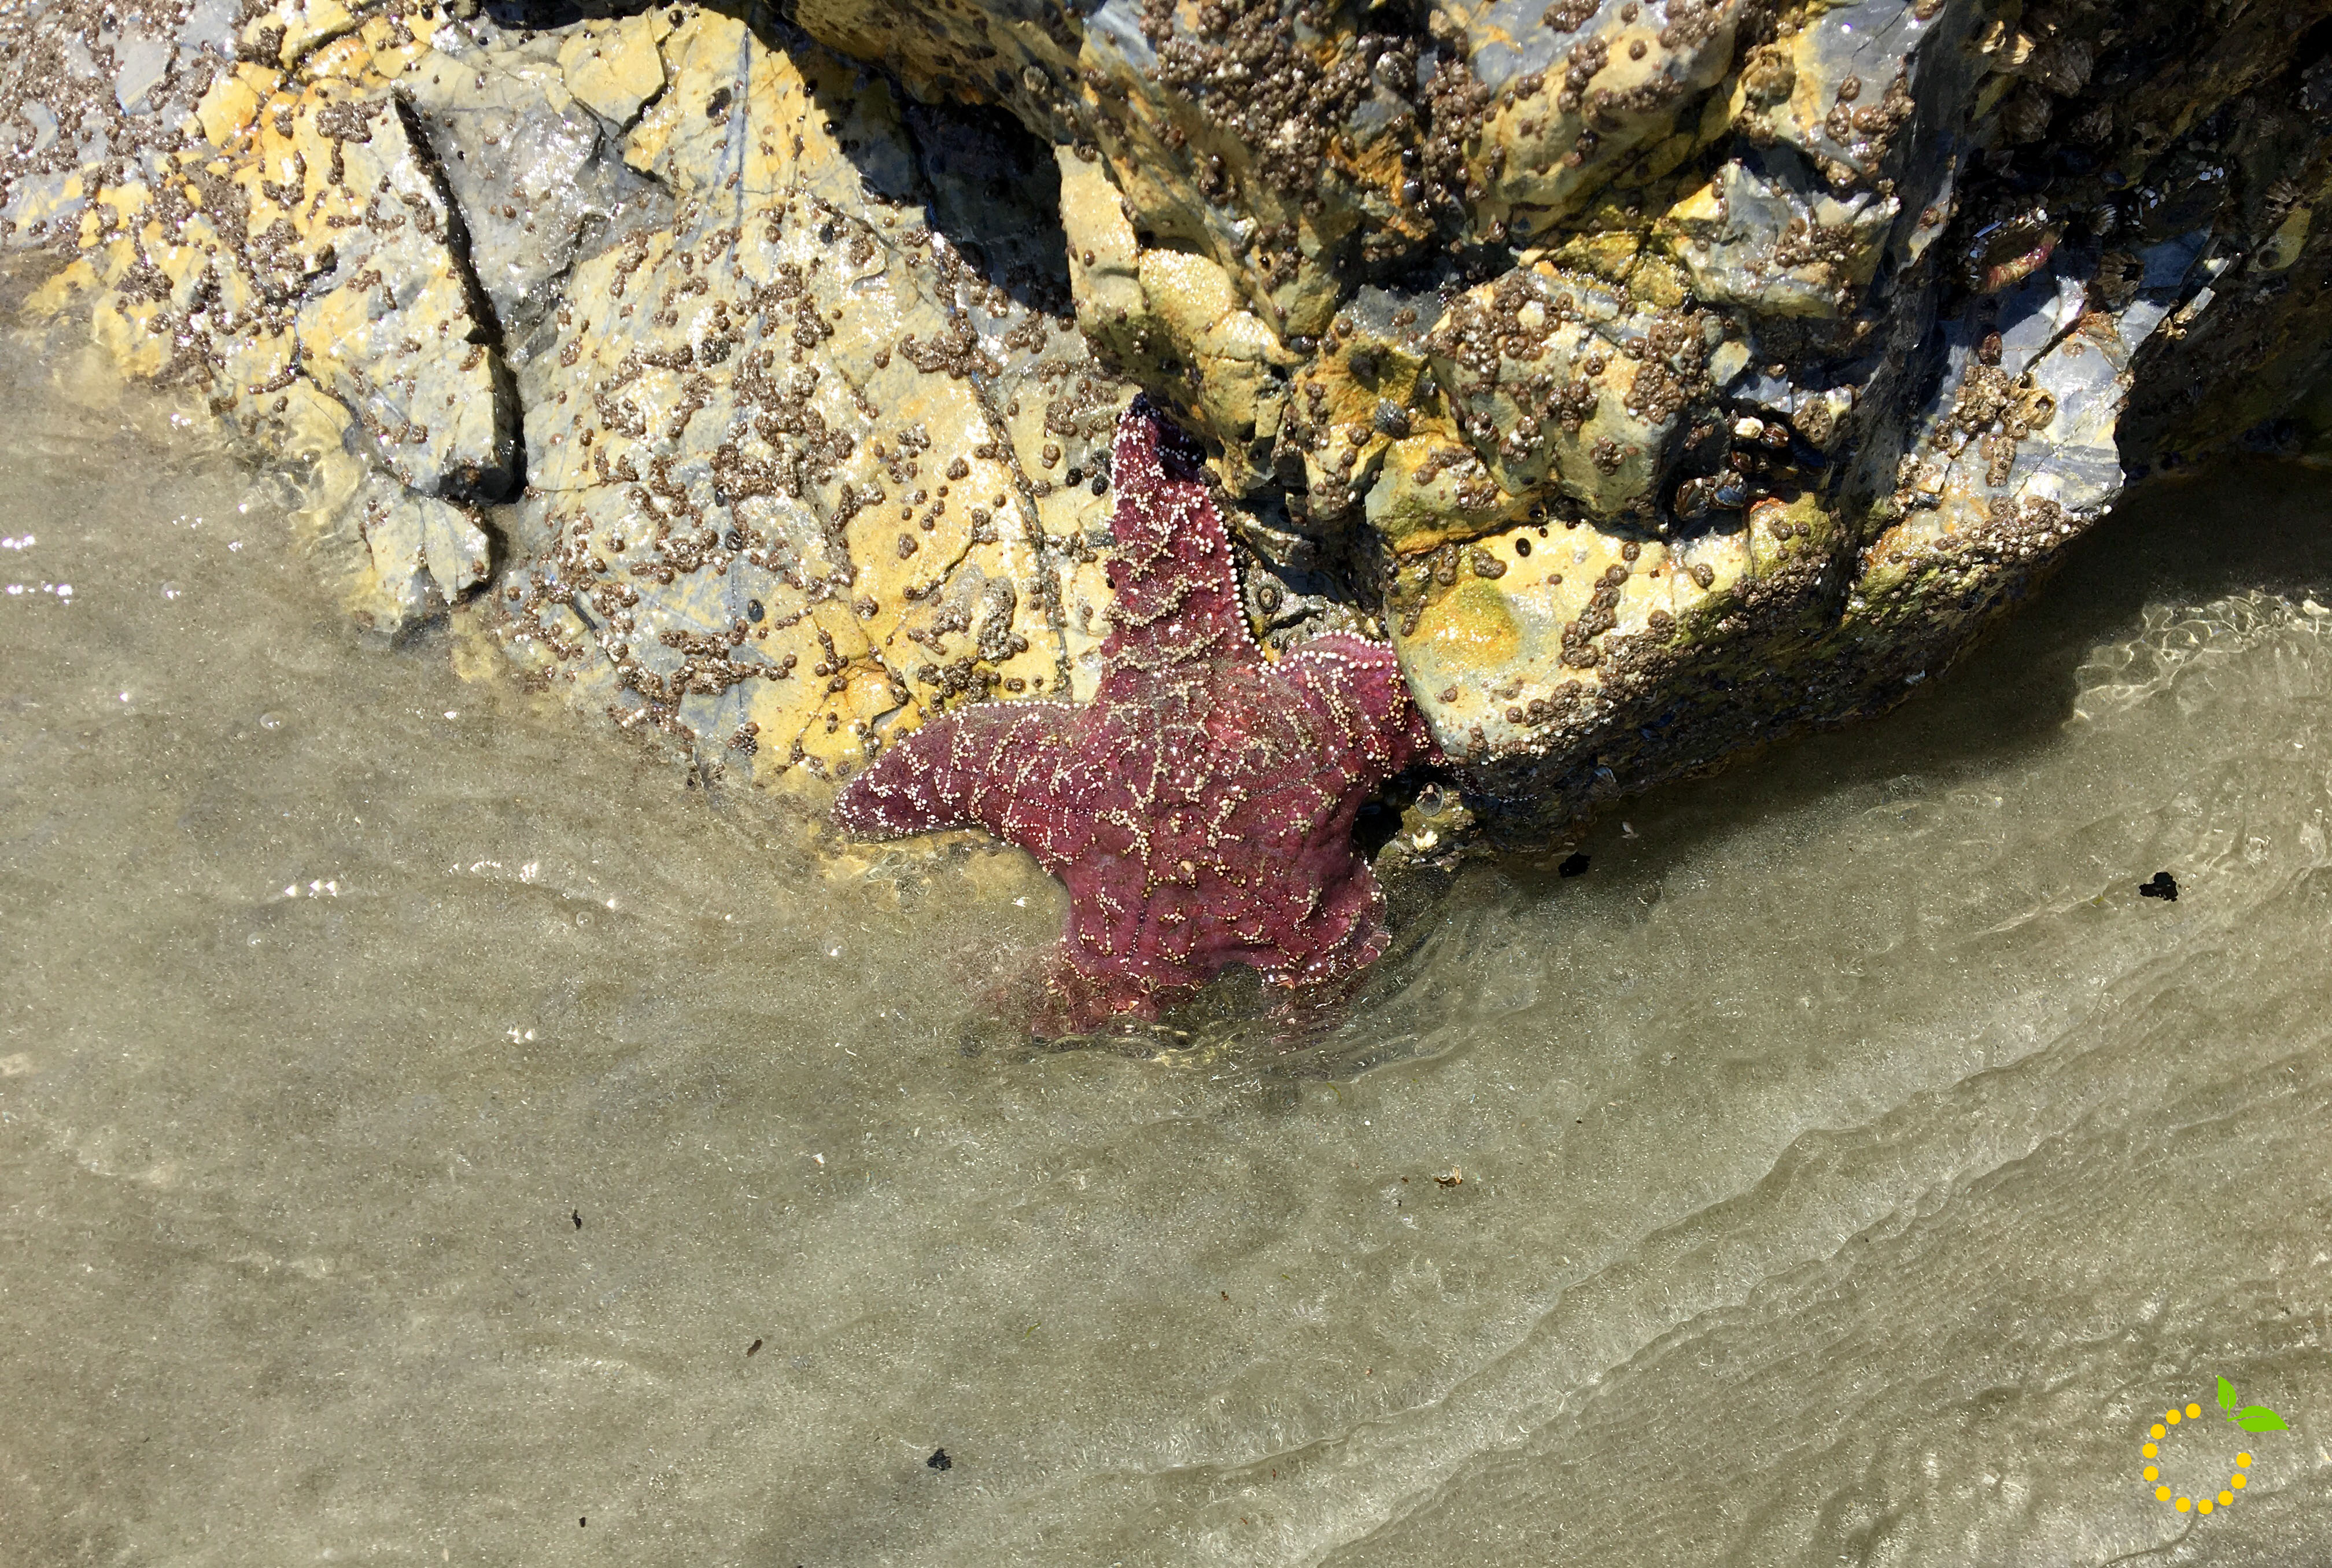
Avila is a small beach community with restaurants, bars, shops, golfing, fishing and more. The beach was really nice and had beautiful views. Our friend said when he surfs this beach, he is always accompanied by friendly dolphins! Although we didn’t see any marine life, we walked up and down the shore and found a star fish! That was the main event for our little one. I can’t even begin to explain how beautiful the beaches are in central California, with the cliffs and rocks. It’s so different than southern California. 
010101010123
0501650
01010123

Sweet Picks

Summer Sweet Picks

Albion Clementine Peplum Tankini: I have a love hate relationship with swimsuit season. I love the idea of soaking up the sun poolside, but hate the idea of doing it in a skintight, barely there swimsuit. That’s why I fell in love with Albion Fit’s swim line and this peplum tankini in particular. The fabric is awesome, holds you in all the right places and the peplum bottom disguises those troublesome tummy spots! Perfection!
Image Source: Albion

Round Beach Towel: This cute patterned round beach towel is a summer must have! Not only is it cute, but it’s multifunctional as a beach towel, picnic blanket, regular blanket, or a mat for your tent while camping. It’s a microfiber towel which is awesome because it is super absorbent and dries quickly compared to normal beach towels that don’t seem to get you dry and stays wet all day after you towel off after your first swim. So grab one of these towels and your friends and head to the beach! And if a friend forgets to bring their towel, this one is big enough for the both of you!
Image Source: Amazon

Starbucks Cold Cup: Beat the summer heat in style with this magenta cold cup from Starbucks. I don’t know about you, but if I have a cute tumbler to carry around, I tend to drink a lot more water. This is also perfect for cold brew iced coffee or iced tea, whatever your summertime drink may be! It’s easy to clean, BPA free and only $16. 
Image Source: Starbucks

Create

Easy Summer Project: DIY Doormats!

I’m the kind of person that thinks in seasons. On Pinterest I literally have my food boards split into seasons (summer food, fall food, etc). Eating a watermelon basil salad in November just feels wrong, almost as weird as eating cozy chicken pot pie in May. Am I right?? This seasonal framework carries over into my decor, especially on my porch! You guys know what I mean…you have the winter wreath, the spring wreath, the summer wreath,etc. Now I’m kind of obsessed with having seasonal doormats as well. I’m in the process of helping my mom do a “porch makeover” (stay tuned for the big reveal next week) and we needed some fun, summery doormats! My fellow blogger and Target partner-in-crime, Ashley, found some good options, but my parent’s house is tricky and it has three front doors (yeah, three?!?) and we couldn’t find three of the same mat! But sitting next to the picked-over piles of cute mats, was a pile of plain, natural doormats and that’s when the idea struck! Let’s just paint our own! So we did some googling and figured out what we needed, thought about some designs, and went at it. We decided to do a fun watermelon theme on one set and a patriotic theme on the other set (perfect for the upcoming 4th of July holiday).

Some projects we get ourselves into seem super easy, but end up being more complicated and time consuming than we ever thought possible. This project was the opposite! It was super simple and worked out just as easy as had hoped it would. It would even be a fun project to do with kids. It also makes a great gift idea for a new home-owner or anyone that appreciates a little pizazz on their porch! Check out all the details below.

Image-1 (1)

Supplies:

  • Plain, natural doormat (you can buy them for $10 at Target, Home Depot, or Ikea)
  • Large all purpose sponge (with curved edge)
  • Painter’s tape (you know, the green or blue stuff)
  • Outdoor acrylic craft paint (2 oz bottle of each color)
  • Waterproof clearcoat/sealer (for extra protection)
  • Large all-purpose scissors (for cutting sponge)
  • Small sponge paint brush (for touch ups)
  • Fine bristle paint brush (for accents/details)
  • Paper plate (for paint)
  • Sharpie marker (to make sponge stencil)
  • Tarp or sheet (to protect floor from paint)


Directions for Watermelon Doormat:

  1. Lay down the tarp to cover your floor.
  2. Shake or wipe off doormat with a towel to get any dirt or dust off.
  3. Using a stencil or freehand, take the curved end of the sponge and draw a triangle coming to a point in the middle of the sponge, making the shape of a watermelon slice. Then draw the curved line about ½ inch to ¾ inch from the curved edge to make the watermelon rind.
  4. Cut out the watermelon shape using scissors. Our sponge was really thick, so we also cut the shape in half so it was easier to work with. You should have one piece cut for the watermelon slice and one piece for the rind.
  5. Pour entire 2 oz bottle of pink paint onto paper plate (don’t pour the green paint yet–it will dry out) and dip watermelon slice into the paint. Make sure there is a thick coating of paint on the sponge.
  6. Stamp the watermelon slice onto the mat and press firmly around the entire shape to ensure the paint transfers from the sponge to the mat. Repeat this process until the mat is covered with a random pattern of watermelon slices.
  7. Allow pink slices to dry about 15 to 20 minutes before stamping the green rind.
  8. Once the slices are dry, pour green paint onto a new paper plate and begin stamping the rinds on each watermelon slice. Allow to dry.
  9. Next, taking the fine bristle paintbrush and black paint, begin painting small oval-shaped seeds on each slice of watermelon. Allow to dry.
  10. Finally, spray the mat with two coats of craft clear coat/sealer (waiting 15 minutes between coats). If you use outdoor paint this isn’t necessary, but will help protect the mat even more. 

IMG_8286
IMG_8287


Directions for Patriotic Design:

  1. Shake or wipe off doormat with a towel to get any dirt or dust off.
  2. Find center of the doormat by folding in half and marking subtly with Sharpie.
  3. Starting in the center, take the painter’s tape and make a line from the center of the mat to the bottom left-hand corner. Repeat and make a similar line from the center to the right-hand corner.
  4. Press the tape firmly into the mat (I rubbed the closed paint bottle over and over the tape until it was fully adhered). This is key to ensure that you have crisp lines and your paint won’t bleed through!
  5. Continue applying the tape in the same fashion to complete the pattern shown.
  6. Gather the paint, you will need a full 2 ounce bottle for each of the three colors, red, blue, silver.
  7. Determine which sections will be which color, I did an alternating pattern of red, blue, silver, blue, red, silver.
  8. Starting with the red, pour paint onto paper plate and paint ALL the red sections. Next, pour the blue paint onto a new paper plate and paint ALL the blue sections. Lastly, pour the silver paint onto a new paper plate and paint ALL the silver sections.
  9. Allow the paint to dry for 15 to 20 min (faster if you put it in the sun) before removing the tape! It’s worth the wait…you’ll mess up your crisp lines if you don’t wait.
  10. Finally, spray the mat with two coats of craft clear coat/sealer (waiting 15 minutes between coats). If you use outdoor paint this isn’t necessary, but will help protect the mat even more.


IMG_8292

Tip: we tried it using both the sponge paint brush and a cut square of the large sponge used for the watermelon and FYI the piece of the big sponge worked way better and had better pain coverage than the sponge paintbrush.

Image-1 (10)

IMG_1036

Eats

Banana Pudding Poke Cake

Grab yourself a cake mix and once it’s done and cooled down, grab your wooden spoon and start poking those holes!
IMG_0786

Next, whip up your banana pudding and pour it all over the cake and spread evenly making sure to get it into all of the holes.

IMG_0788

Then slice your bananas and layer them on top of the pudding in a single layer.

IMG_0790

Then, top the cake with cool whip.

IMG_0792

Refrigerate for 1-2 hours or overnight if possible. It taste so much better the next day! Right before serving sprinkle crushed Nilla Wafers on top. Garnish with banana slices and a whole Nilla Wafer and ENJOY!

IMG_0800

Banana Pudding Poke Cake
Write a review
Print
Ingredients
  1. 1 box yellow cake mix
  2. ingredients to make the cake: eggs, oil, water
  3. 2 (3.4 oz) packages of instant banana pudding
  4. 4 cups milk
  5. 1 (8 oz) tub of Cool Whip
  6. 20 Nilla Wafers, crushed
  7. 3-4 bananas
Instructions
  1. Prepare cake mix according to package for 9x13 pan.
  2. Once cake is done and comes out of the oven, allow it to cool for about 10-15 minutes.
  3. Then, with a wooden spoon poke holes in the cake making sure the holes are big enough for the pudding to get down into the cake.
  4. In a bowl, whisk together the pudding and the milk until smooth and begins to thicken.
  5. Pour pudding all over the cake and getting it into the holes. Using the back of a spoon or an off set spatula, spread the pudding out and gently pressing pudding into the holes.
  6. Slice bananas and top cake with a single layer of bananas.
  7. Top with cool whip and place in fridge for at least 1-2 hours before serving.
  8. Crush Nilla Wafers and sprinkle on top before serving.
  9. Garnish with banana slices and whole Nilla Wafers.
Sweet Lemon Made http://sweetlemonmade.com/
Do you know a banana lover? Or maybe it’s you? Either way, you or the banana lover in your life are going to go bananas over this banana pudding poke cake! Not only is it yummy, it’s super easy and simple to make, and you can make it ahead of time. And when I say super easy, I mean it. All you need is a box cake, pudding, bananas, Cool Whip, and Nilla Wafers!

Celebrate Sweet Picks

Baby Shower Sweet Picks

Sleep Sheep Sound Machine: Talk about counting sheep to go to sleep! This adorable Sleep Sheep was the ultimate sleep-aid for my little girl when she was still in her crib. The sound machine inside plays a variety of sounds and melodies, and even includes time options that will automatically turn off the sound. The sounds and melodies include: Mother’s Heartbeat, Ocean Waves, Twinkle Twinkle and a Classical Lullaby.  The best part about the Sleep Sheep is you can remove the sound machine and use the Sheep as a snuggly toy. And that also means it’s washable! This is the perfect gift for a brand new mom and one that I give often!
Image Source: Target

aden + anais Swaddle Blankets: Anyone who has used these swaddle blankets can tell you they are the softest and most comfy blankets you will ever find. I wish they made them for adults! Any expecting mother would be so excited to recieve this gift for their new bundle of joy. They are light-weight and breathable, so you can even use them to cover the car seat or stroller. They also come in adorable colors and patterns so you have a lot of variety to choose from.
Image Source: aden +anais

BabyLit Books: You will fall in love at first sight with these adorable children’s books! A compact, cardboard version of your favorite classic books… what’s not to love?! The cover alone is enough to make you fall head over heels for them and lure you into thinking you need every book they ever put out, whether you’ve got kids of your own or not. (I may or may not be guilty of just that.) They are perfect for story time of any age while incorporating the classic book characters we all love. They are my go-to baby gift. Go grab yourself one or two or all of them.
Image Source: BabyLit