Browsing Category

Eats

Eats

Blue Apron Review: Dinner at your Door

Welcome Blue Apron sweetlemonmade.com

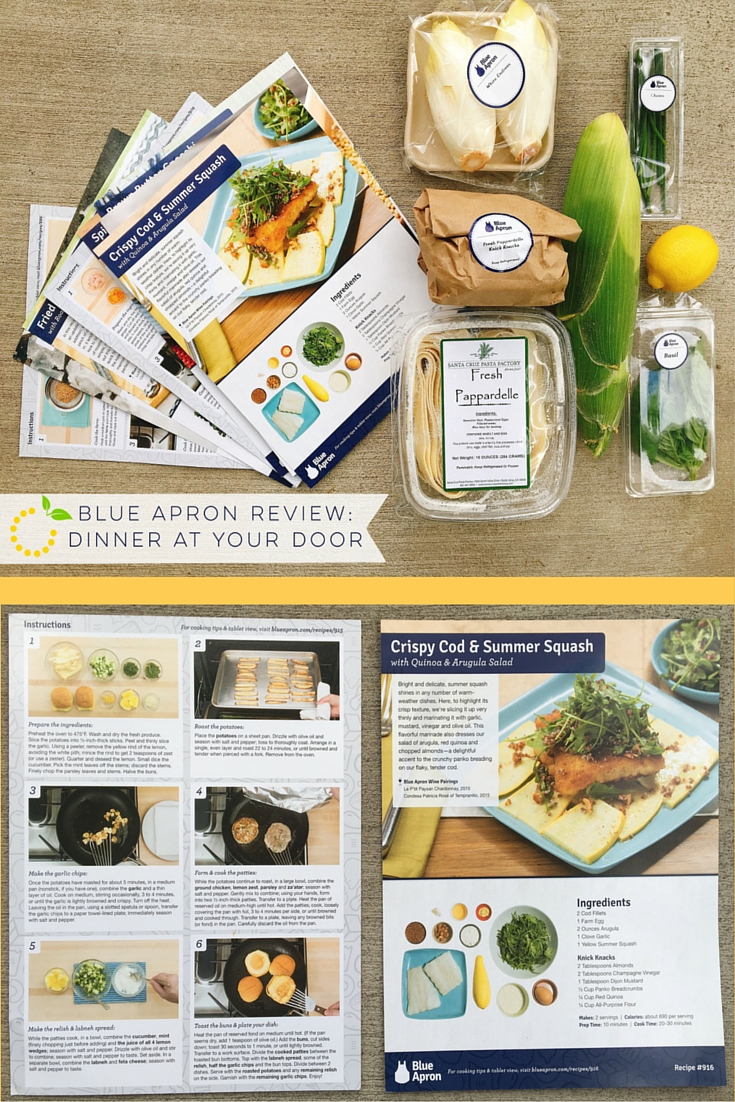
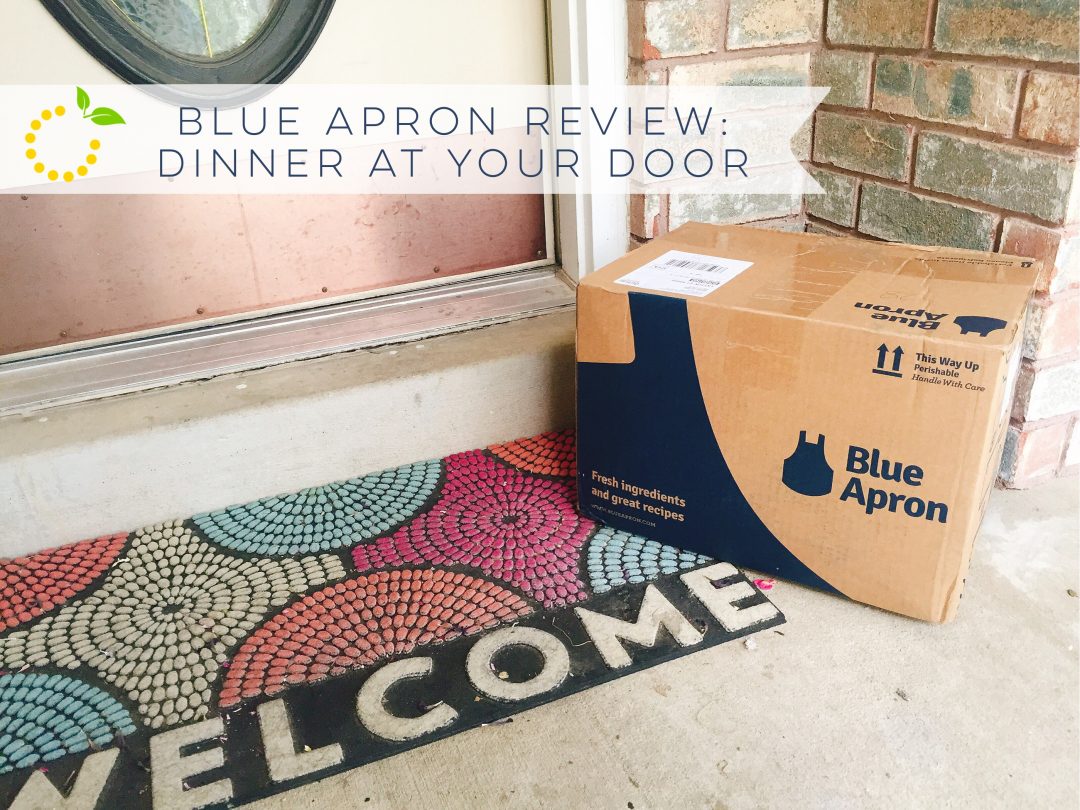
If you’re like me (and everyone else I know) you sometimes get in a rut when it comes to making dinner. At my house, we have our five go-to meals: spaghetti, tacos, pizza, pot roast and eating out! I finally reached a breaking point when not eating started sounding better than actually making the same boring dinner over and over again. That’s when my husband and I decided it was time to give Blue Apron a try. We’ve been cooking with Blue Apron now for about two months and we absolutely love it. Not only do we get to try a variety of new meals, we have fun learning about new techniques and ingredients. With a toddler running around the kitchen during meal prep it might not be a relaxing experience, but we are enjoying our time together in the kitchen.

Below are a few of my thoughts on our Blue Apron experience so far.

Flexibility
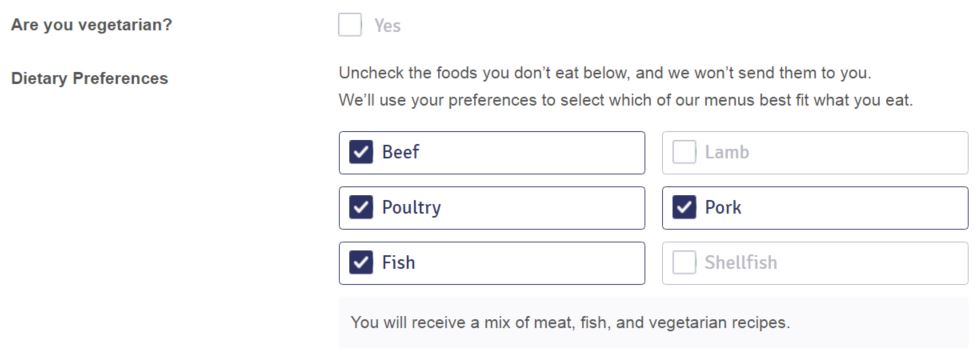
My friend told me about Blue Apron and sent me three free meals to check it out and see if I like it. I went online to redeem my freebies and noticed I had to put in a credit card number along with my personal information. I’m always hesitant to sign up for a service like this because I don’t want to commit to something long-term, especially if it costs a good amount of money. I almost didn’t move forward because I didn’t want to get stuck paying $60 per week if I didn’t end up liking it. However, I noticed there was no long-term commitment required and you can cancel at any time. The best part about it is you can even cancel from week to week. So when I’m going to go on vacation or have plans during the week, I can cancel my meals for that week and resume when it’s more convenient. You can also personalize your meals each week to your preference of beef, poultry, pork, fish or vegetarian. 

(Unfortunately, all the meals are assembled in the same facility so you won’t want to order Blue Apron if you have a food allergy.) 

Meal Types sweetlemonmade.com

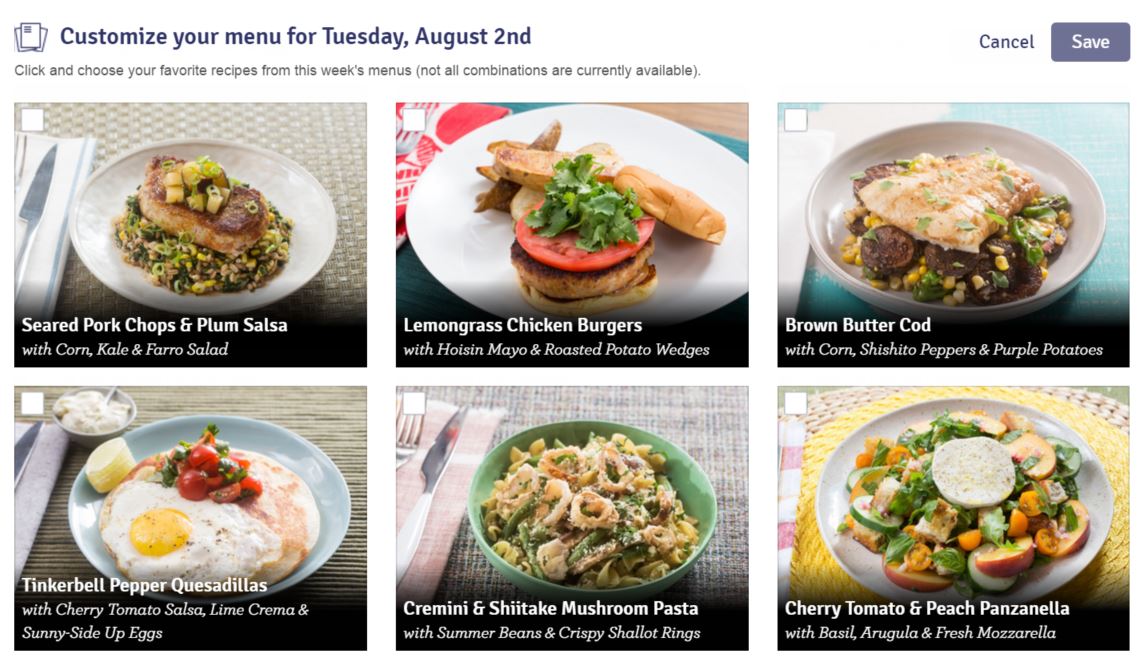
Blue Apron posts the following week’s menu on the website or in the app a week in advance so you have the opportunity to choose your meals. With my plan of three meals per week, I can choose between six options.

Customized Menu sweetlemonmade.com

Pricing
We were a little unsure about the price tag, seeing as how the plan we chose equals about $20 per meal. In theory, that’s just as much as going out to dinner, but then you add-on tax, tip and possibly desert, so we figured it was still cheaper. The other thing we’ve noticed since using Blue Apron, is we only go to the grocery store once per week and have reduced the amount of money we spend on groceries. Since we’ve signed up we haven’t noticed a negative effect on our pocket-book and it’s forced us to eat at home instead of spending money at a restaurant. 

Blue Apron has a couple meal plans to choose from depending on your family size and the number of meals you want to receive each week. Delivery is free so you don’t have to worry about any additional cost. 

  • 3 meals per week – 2 servings = $59.94
  • 2 meals per week – 4 servings = $69.92
  • 4 meals per week – 4 servings = $139.84


Freshness
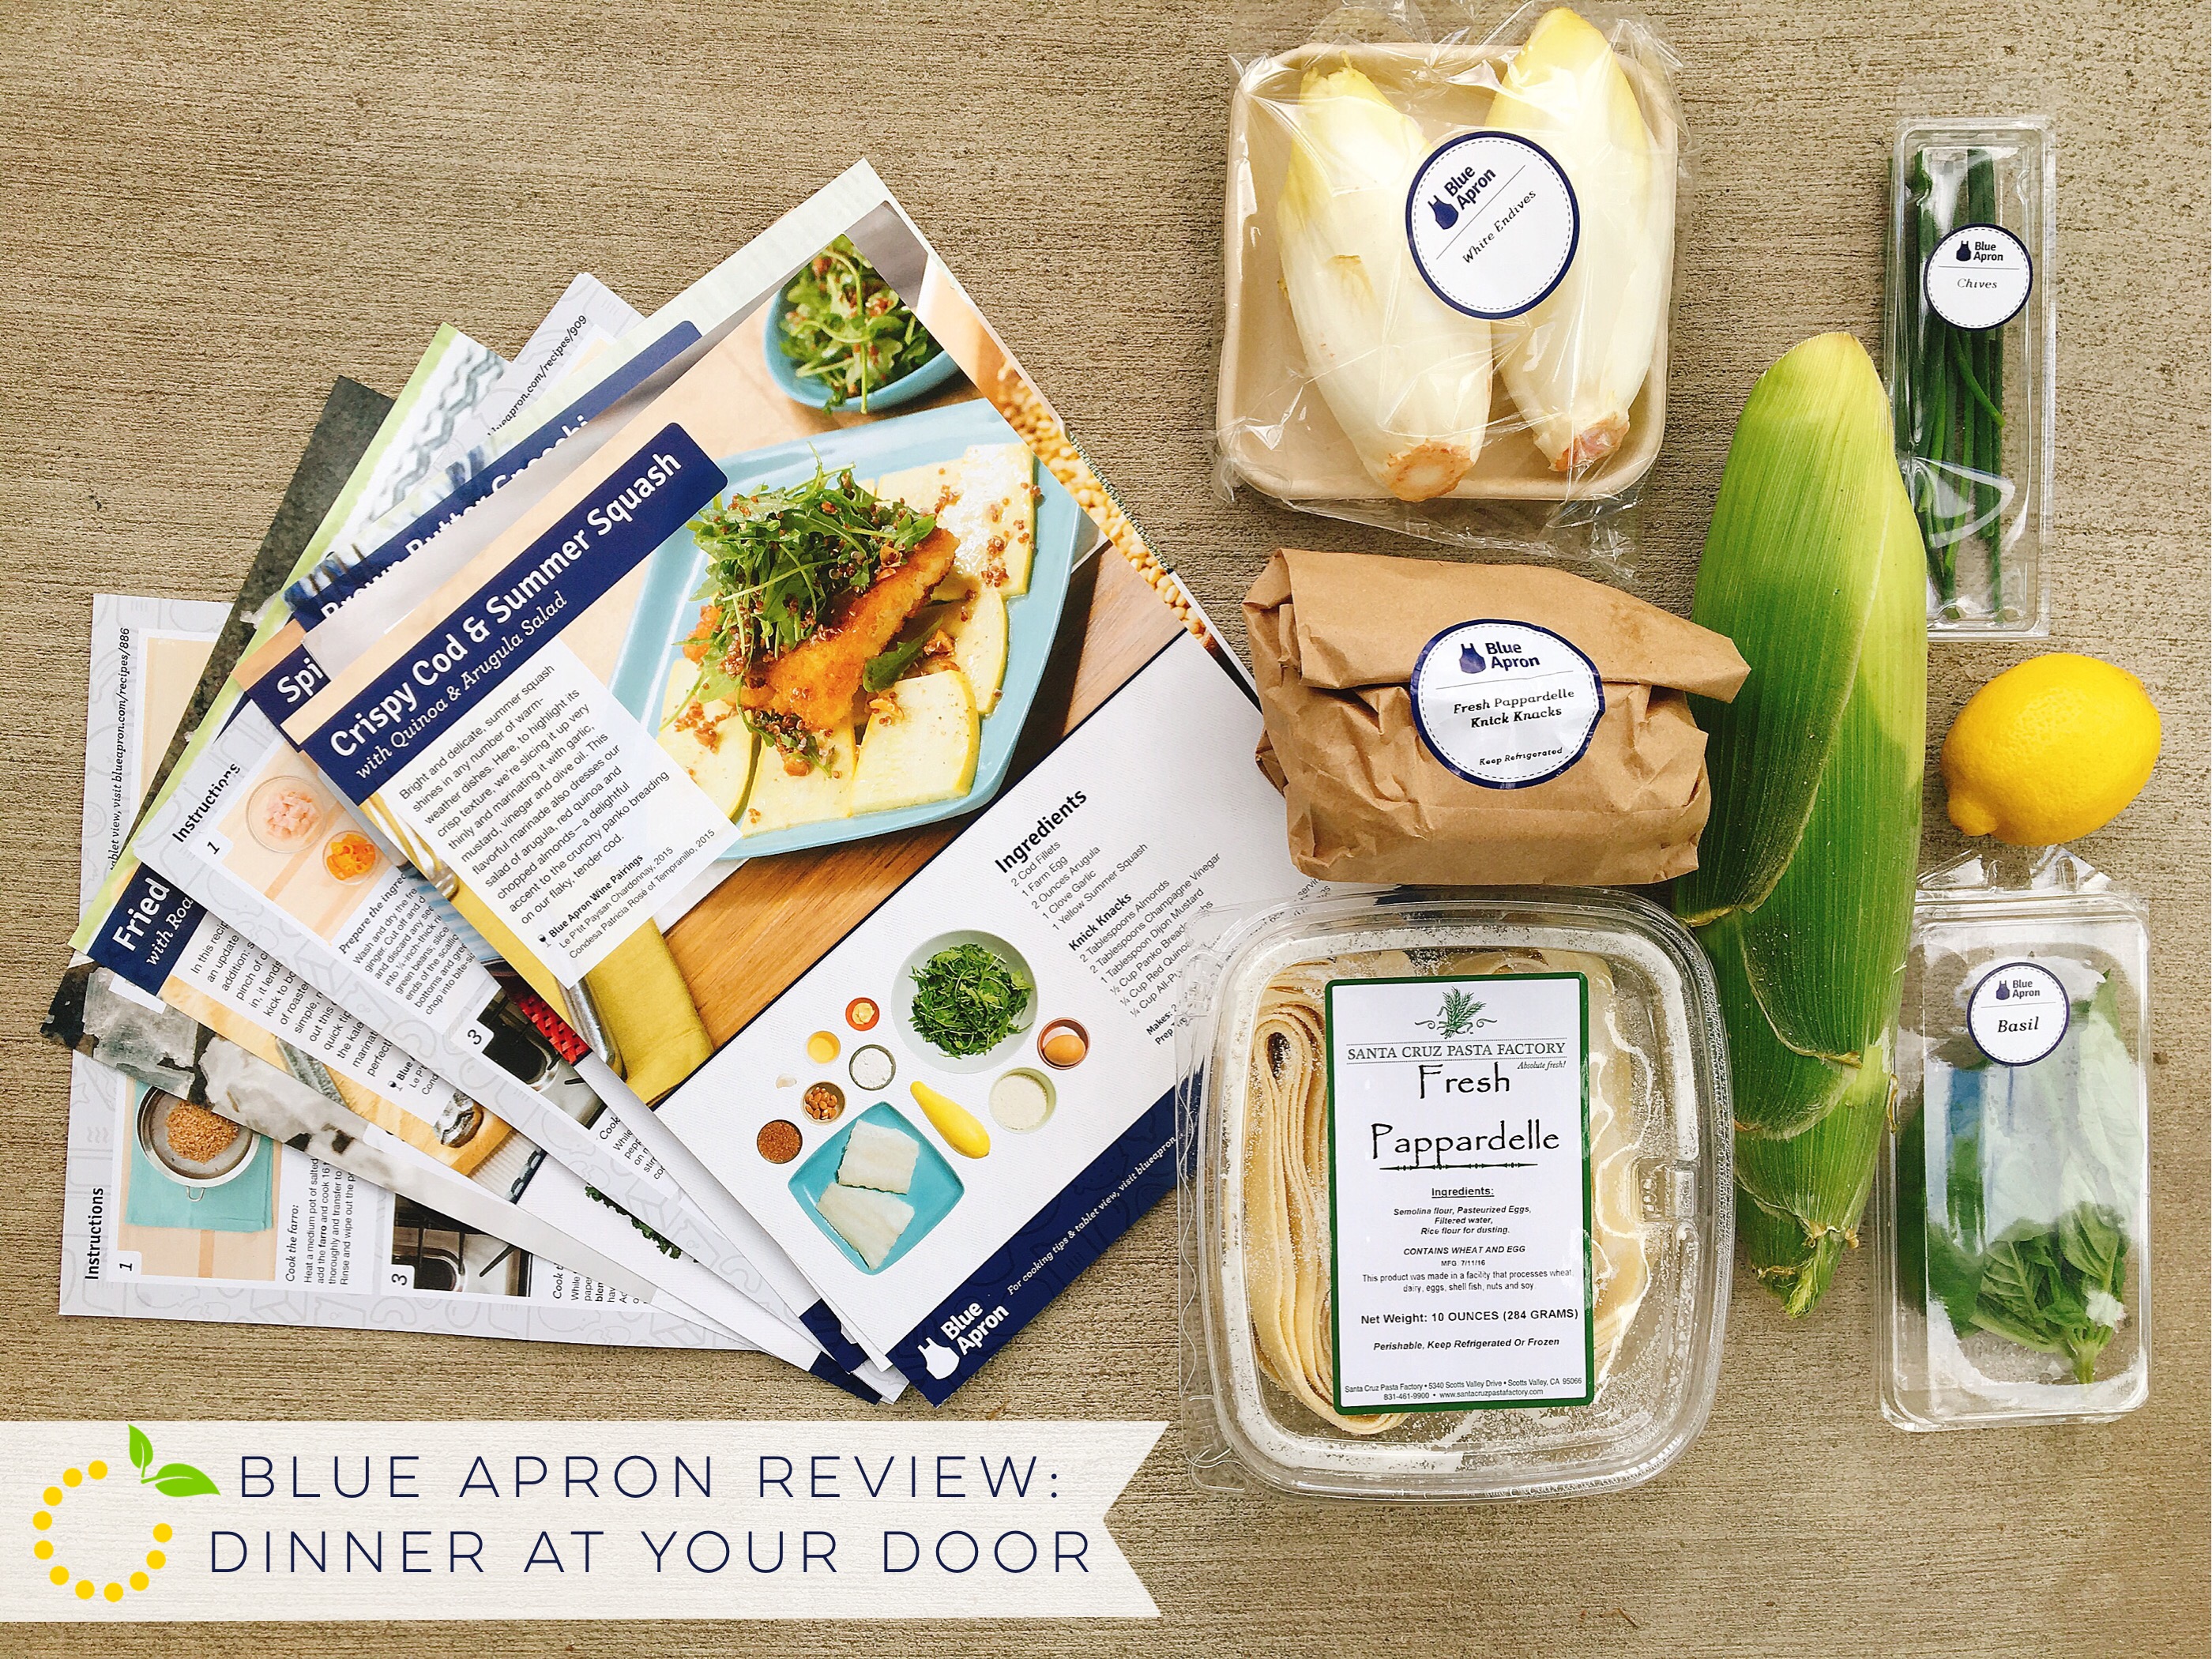
When researching Blue Apron, one of the benefits that really stood out was the food quality. Blue Apron has a direct relationship with farmers and suppliers so food is boxed and shipped at peak freshness with minimal time in transit. Another huge benefit (especially to my family) is all animals are raised without any added hormones or antibiotics. 

You might be wondering how the food tastes, since it comes in a box…in the mail. (I know, it sounds a little crazy.) All food comes in a refrigerated box with ice packs to keep everything cold and fresh. So you don’t need to worry about being home when your box is delivered.

Prep
Each box includes a recipe card with step-by-step instructions and color photos, which makes cooking the meal super easy.  So far, every meal has been very easy to follow. One of the things I like most about Blue Apron is that all the ingredients are included. If you need a little splash of vinegar, it’s included. If you need one egg, it’s included. The only ingredients you have to provide yourself are olive oil, salt and pepper. What makes this so great is if I wanted to cook these meals on my own, it would cost me a lot more money to buy a whole jar of a certain spice I would never use again. This way, I get to try a unique recipe without committing to a bunch of ingredients that will end up sitting on the shelf. 

Recipe Cards sweetlemonmade.com

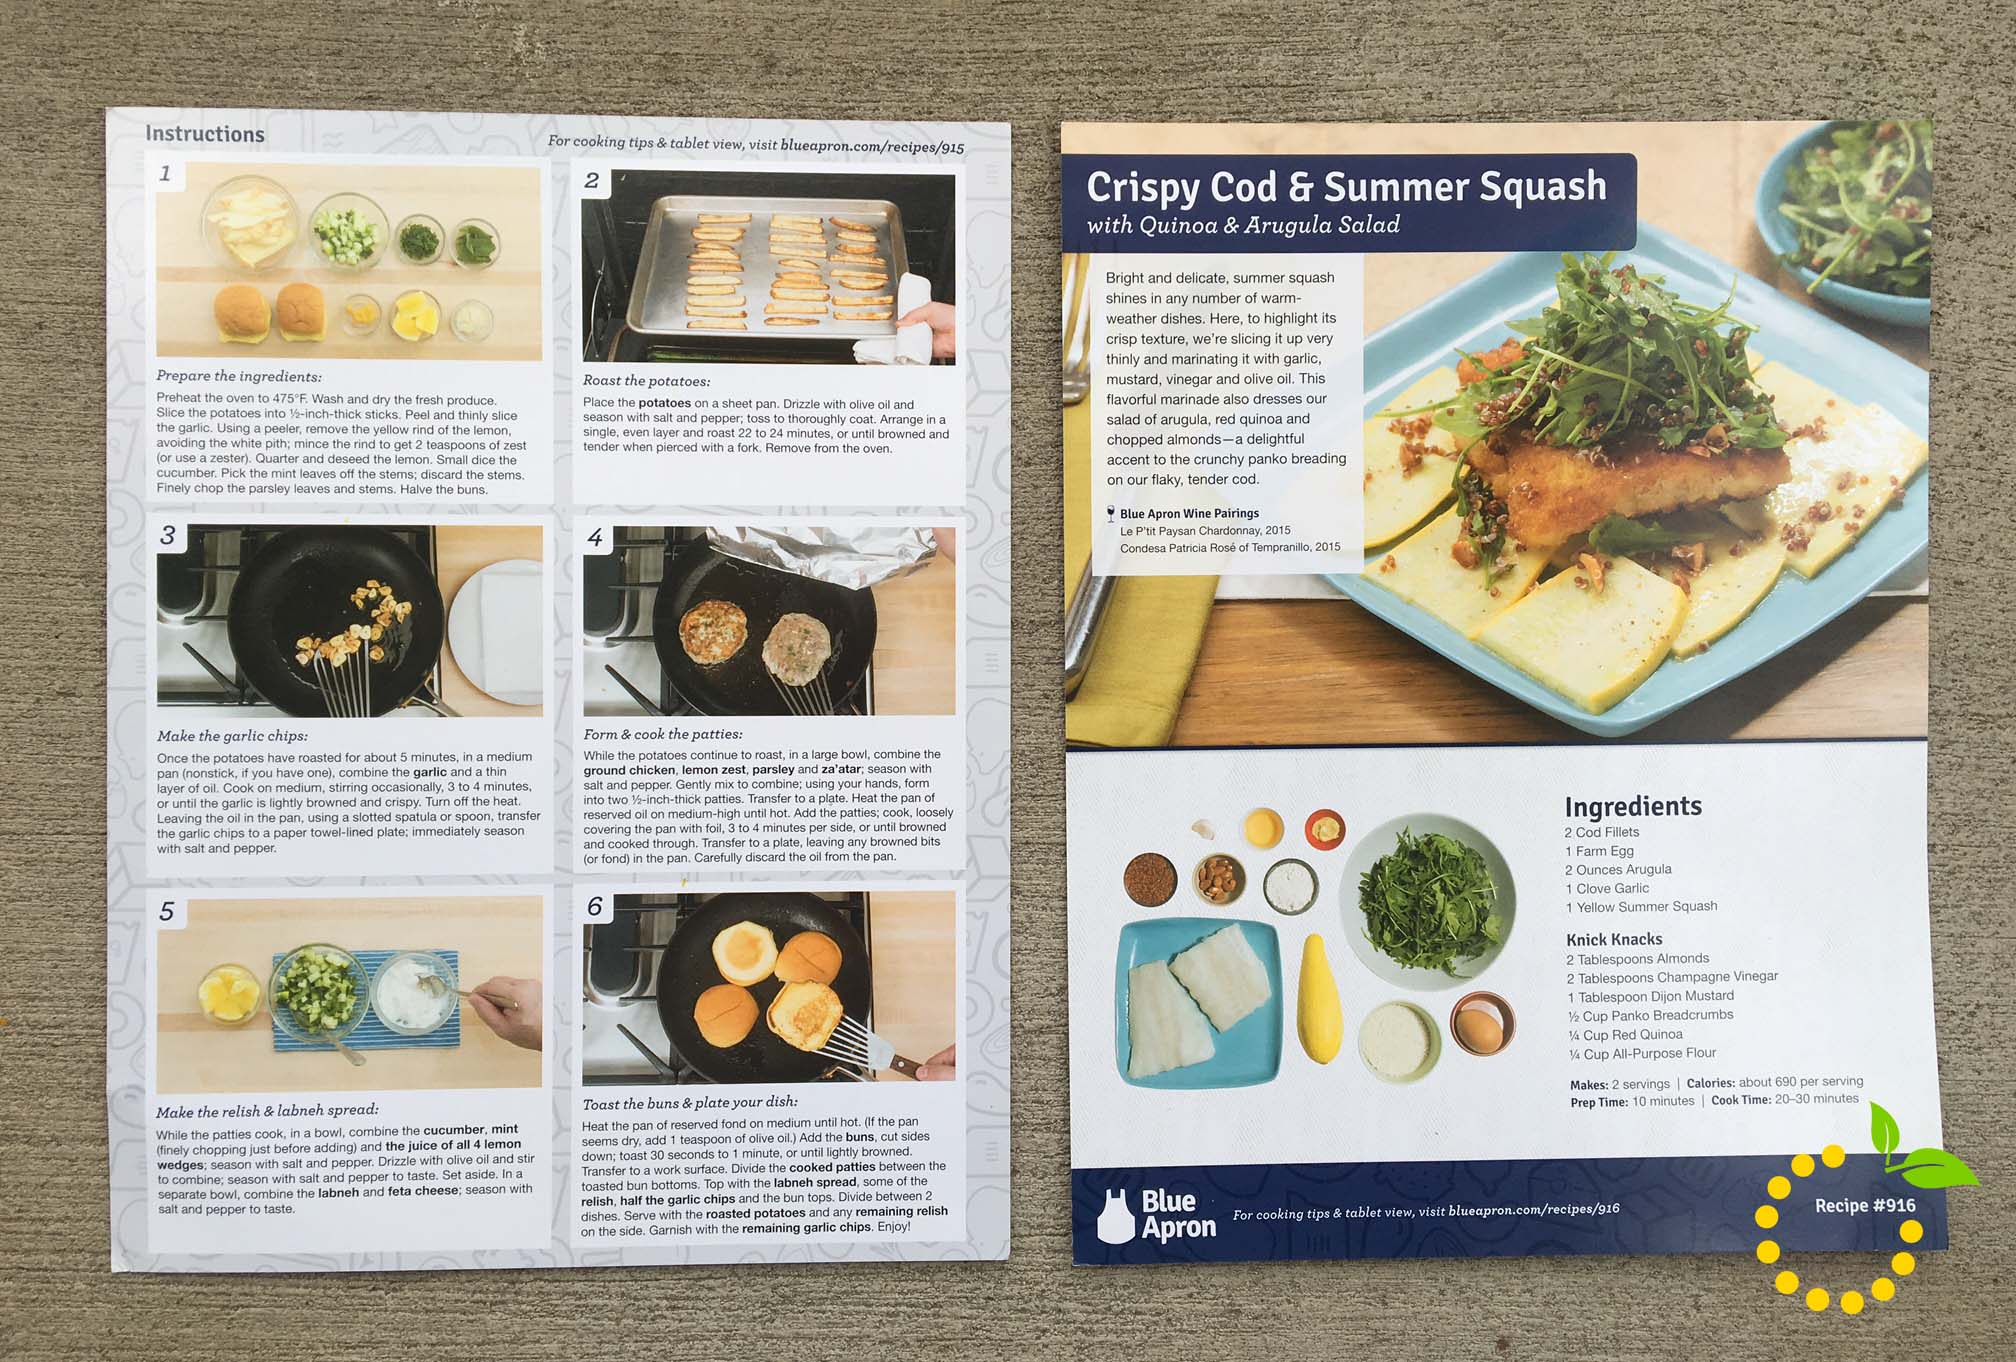
I’m honestly not a fan of having to cut and prep all of the produce, mostly because it takes a lot of time and I always end up managing to cut myself! However, I will say that preparing everything has shown us new techniques and ways of preparing simple foods in a way I would have never thought before. I don’t know how many times I’ve said to my husband, “I never knew how easy it was to make a sauce” and “I would have never thought of using those ingredients together”. We’ve also learned about  fancy techniques like “blanching”!  Following these recipes has really opened our eyes to the way we prepare food and combine ingredients.

Blue Apron sweetlemonmade.com

Blue Apron has an app that is pretty awesome. You can browse entire recipe collection, how-to videos and cooking tips. You can also use the app to customize your menu and manage your deliveries.

Bottom Line
All of the meals (except for two) have been incredibly delicious. When I look at the menu for the following week, I’ll be honest that I’m not always excited about what is coming. But then the moment we sit down to eat, I’m always satisfied with what we’ve made. This experience has really opened our eyes on the types of meals we can make at home. Another benefit, is the meals are super healthy and are perfectly portioned so you don’t overeat. It’s been a great experience and we will continue to use Blue Apron moving forward.

The only complaint I have about Blue Apron is the amount of time it takes to cook each meal. As a working mom of a toddler, I look for fast and easy options when cooking. This whole process has opened my eyes to the variety of food I can cook for dinner, however, we don’t end up actually eating until 8 o’clock! The cooking process is really fun and provides a fun activity for my husband and I to do together. However, most of the time one of us is rushing around after our daughter while the other one is trying to prep all  the ingredients. It would be nice if everything already came chopped and prepared, but then I guess you would lose in the freshness of your food and the experience of making the meal beginning to end.

If you would like to give Blue Apron a try, I have three free meals to give to five people. Comment below and I’ll send an email your way! If you already use Blue Apron, let us know about your experience. 

Blue Apron Meal sweetlemonmade.comBlue Apron Review: Dinner at Your Door sweetlemonmade.com

Eats

Blue Moon Cupcakes

Blue Moon Cupcakes with Cream Cheese Frosting sweetlemonmade.com

These Blue Moon cupcakes are light and fluffy topped with zesty orange cream cheese frosting. When I first came across these on Pinterest, I knew I needed to pin it for later so that I could make them for one of my friends who loves Blue Moon beer! So surprise a Blue Moon loving friend with these scrumptious cupcakes!

Blue Moon Cupcakes sweetlemonmade.com

Blue Moon Cupcakes
Write a review
Print
Ingredients
  1. FOR THE CUPCAKES
  2. 1/2 cup unsalted butter, room temperature
  3. 1 1/4 cup granulated sugar
  4. 1 2/3 cup all-purpose flour
  5. 1 teaspoon baking powder
  6. 1/8 teaspoon salt
  7. 2 eggs, room temperature
  8. 1 teaspoon vanilla extract
  9. 1 orange, zested (save some for garnishing)
  10. 2/3 cup Blue Moon beer
  11. 2 tablespoon whole milk
  12. ORANGE CREAM CHEESE FROSTING
  13. 8 oz. cream cheese, softened
  14. 3/4 cup unsalted butter, softened
  15. 4 1/2 cups powdered sugar, sifted
  16. 4 tablespoons freshly squeezed orange juice
Instructions
  1. Preheat oven to 375 degrees. Line a muffin tin with 12 cupcake liners.
  2. In a mixing bowl, sift together flour, baking powder and salt. Set aside.
  3. In a stand mixer fitted with the paddle attachment, cream butter for 1 minute, until pale and fluffy. Add sugar. Cream together butter and sugar for 3-4 minutes.
  4. Add eggs, one at a time, scraping down sides of the bowl after each addition. Add vanilla and orange zest; mix until just combined.
  5. In a medium mixing bowl, whisk together beer and milk. Alternatively add beer mixture and flour mixture to butter mixture until fully incorporated.
  6. Fill cupcake liners 1/2 – 2/3 full. Bake for 15-18 minutes until slightly golden brown and cupcakes bounce back at the touch of a finger, or a toothpick inserted in center comes out clean. Transfer cupcakes to a cooling rack and allow to cool completely.
  7. In a stand mixture fitted with the paddle attachment, cream together butter and cream cheese.
  8. Add powdered sugar, 1/2 cup at a time, until all sugar has been added, scraping down sides of bowl after each addition. Stir in orange juice until fully incorporated.
  9. Pipe frosting onto cupcakes and top with fresh orange zest and small orange slice, if desired.
Sweet Lemon Made http://sweetlemonmade.com/


Recipe adapted from Sweet Caroline’s Cooking


Eats

Fruit Cheesecake Sugar Cookie Cups

Fruit Cheesecake Sugar Cookie Cups sweetlemonmade.com

These fruit cheesecake sugar cookie cups combine the soft, chewiness of the sugar cookie, the smooth no-bake cheesecake, and the pop of freshness from the assortment of fruit! It’s summer and what is the best summertime dessert? For me it’s none other than fruit pizza! I know a few (a lot) of people that would agree with me. So to put a little twist on everyone’s favorite classic dessert the fruit pizza, I made the sugar cookie into a portable cup.

The ingredients are simple yet, the combination of it all is just so delicious! Mmm! You know the recipe is a winner when they are the most requested (and 7 batches later) your friends are still wanting more! And getting a non-fruit lover to like these is another testament as to how yummy these little treats are. My friend’s husband who doesn’t  particularly like fruits  was a bit skeptical to try one of these fruit cheesecake cups but, once she finally convinced him to try one he was sold!

So for your next hangout or BBQ, whip up a batch (or maybe 2 or 3) to take with you to your next get together!

sugar cookie cup sweetlemonmade.com

Fruit Cheesecake Sugar Cookie Cups
Write a review
Print
Ingredients
  1. Cookie Cups
  2. 3/4 cup unsalted butter, room temp
  3. 1 cup granulated sugar
  4. 1 egg
  5. 2 teaspoons vanilla extract
  6. 2 cups all-purpose flour
  7. 1 teaspoon baking soda
  8. 2 teaspoons cornstarch
  9. Cheesecake Filling and Fruit Topping
  10. 12 ounces cream cheese
  11. 1 and 1/2 teaspoons vanilla extract
  12. 1 and 3/4 cups powdered sugar
Instructions
  1. Spray cupcake pan with nonstick cooking spray. Preheat oven to 350 degrees.
  2. Cream butter and sugar together for 5 minutes, until light and fluffy.
  3. Add the egg and vanilla and beat until well combined.
  4. Add the dry ingredients to the wet ingredients and mix until smooth. Dough will be thick.
  5. Scoop dough balls into muffin tin with a cookie scooper. Press cookie dough into the bottom and about 1/3-1/2 way up the sides of each cupcake cup, forming a cup shape.
  6. Bake for 8-10minutes.
  7. Remove from oven and allow to cool for about 5 minutes, then remove to cooling rack to finish cooling. If the centers aren't cupped enough to add filling, use the end of a wooden spoon or the bottom of a tablespoon to press the center down a bit.
  8. Once cookies have cooled, make the cheesecake filling. Blend the cream cheese, vanilla and powdered sugar together until smooth.
  9. Pipe cheesecake filling into cookie cups.
Sweet Lemon Made http://sweetlemonmade.com/

Eats

Fruity Pebbles Cookies

Fruity Pebbles Cookies sweetlemonmade.com

Fruity Pebbles cereal in a cookie…ummm YES! When my friend Taylor sent me this pin on Pinterest I was intrigued! Some of my favorite cereals are fruity pebbles and fruit loops so naturally, I had to try them! And the best part is they are pudding cookies! I may seem a bit excited about these because pudding cookies are one of my favorite types of cookies because they are so soft and chewy.

I wasn’t sure how the cereal was going to hold up in a cookie but, surprisingly it works. Even after the cookies were baked, the cereal still had a bit of a crunchy/chewy texture that bursted with fruity flavors, which was surprising. After the first bite I was sold…these were DELICIOUS! So good I could have eaten the whole batch! These Fruity Pebbles cookies encompass the fruity flavors of the fruity pebbles cereal, creaminess of the white chocolate chips, and the soft and chewiness of a pudding cookie.

A friend of mine had a birthday coming up and I asked what he wanted for his birthday treat. He wasn’t sure and wanted a surprise so, I told him it was going to be something with fruity pebbles. He was a little leery and excited at the same time. So, I gave him the cookies and the next day I saw him I started to ask him how he liked them and before I even finished asking he was gushing about how goood they were and that he loved them! He gave me the ultimate compliment any baker or chef would love to hear when someone eats their food and loves it but, to keep it PG (haha!), let’s just say that he said “it was like a party in his mouth!” He said that they were one of the best cookies he has ever had and didn’t think that cereal would be good in a cookie.

After a testament like this, does it make you want to give them a try? And don’t they look so fun?!? Once you eat one you will want another and another! If you decide to give them a try, let me know in the comments below what you thought of them!

Fruity Pebbles Cookies sweetelmonmade.com

Fruity Pebbles Cookies
Write a review
Print
Ingredients
  1. 3/4 cup unsalted butter, room temp
  2. 1 cup granulated sugar
  3. 1 (3.4 oz) package instant vanilla pudding mix
  4. 2 eggs
  5. 1 teaspoon vanilla extract
  6. 1 teaspoon baking soda
  7. 2 1/4 cups all purpose flour
  8. 2 cups Fruity Pebbles cereal
  9. 1 cup white chocolate chips
Instructions
  1. Preheat oven to 350° F. Line cookie sheets with parchment paper and set aside.
  2. Whisk together baking soda and flour and set aside.
  3. Cream together butter and sugar.
  4. Add the pudding package(dry...don't prepare it) and beat until well blended. Add eggs and vanilla extract. Slowly add the flour and mix until just combined.
  5. Stir in Fruity Pebbles and white chocolate chips.
  6. Scoop 1” balls and place on cookie sheets.
  7. Bake for 10-12 minutes or until slightly golden brown around the edges. Let cool.
Sweet Lemon Made http://sweetlemonmade.com/
Recipe sourced from Crazy For Crust

Eats

Watermelon Salad with Basil and Fig Balsamic

Fresh Watermelon Salad with Basil and Fig Balsamic sweetlemonmade.com

Bring on the flip flops, BBQs, sunscreen and pool time. Memorial Day is on it’s way and in my book that means summer is practically here.  Everyone loves summer, duh, but one of the reasons I love it is for the food. Summer is full of simple, fresh, healthy food. And ice cream. Those sunny days make me crave salads, fruit and grilled anything. And let’s be honest, you know you’ll be going to a few BBQs this summer and sometimes the old pasta-salad-with-Italian-dressing-cucumbers-tomatoes-olives gets a little humdrum. This fresh watermelon salad will liven up any potluck spread and it is guaranteed to elicit some recipe requests. Oh, and did I mention that it’s easy?? Like, really easy. Fresh watermelon + basil + pine nuts + olive oil + balsamic vinegar + salt + pepper, that’s it.

Watermelon Salad Ingredients sweetlemonmade.com

Perhaps for some of you, adding savory ingredients like olive oil, salt, pepper, and basil to a sweet, summery fruit feels weird.  I hear you. But trust me, it works. The vanilla fig balsamic keeps the sweetness of the dish in-check and adds an exciting depth of flavor, while the olive oil brings a richness that seems to smooth the flavors together, the salt enhances the natural watermelon flavor, the pepper gives it a gentle kick, and the basil adds freshness. If basil and watermelon were on a color-wheel of flavor they would definitely be complimentary colors. They are the “Ken and Barbie” power-couple of the kitchen if you ask me. And a flavor duo that should be the anthem to your summer.

Vanilla Fig Balsamic sweetlemonmade.com

Let me pause for a minute to talk about the balsamic we used from “Our Best Bites”. It’s no ordinary balsamic (if you’re in a pinch you can definitely use regular balsamic, but it won’t be quite the same). Have you guys heard of these ladies? I’m sure you have. They have some go-to, no-fail great recipes on their blog and have expanded their brand with their own product line of oil and vinegar and other kitchen awesomeness. But guys, seriously. Their vinegar and oil line is so good and a perfect way to enhance simple flavors. The rosemary olive oil is one of my favorites (hmm, perhaps I’ll make it a sweet pick…). I put it on any vegetable I roast and it’s downright delightful. They also have a blood orange olive oil that will turn a boring leafy salad upside down and jalapeño olive oil to spice up any dish in a flash. Go check them out. They aren’t even paying me to say that, promise. 

Okay, now let’s make this salad!

Fresh Watermelon Salad with Basil and Fig Balsamic
Write a review
Print
Ingredients
  1. 4 cups watermelon, cubed
  2. 1/3 cup basil, cut in long, thin strips (chiffonade)
  3. 1/3 cup pine nuts, toasted
  4. 2 tablespoons extra virgin olive oil
  5. 1 tablespoon Our Best Bites Vanilla Fig Balsamic
  6. kosher salt, a few dashes to taste
  7. fresh cracked pepper, to taste
Instructions
  1. To start off you’re going to have to tame the watermelon beast and chop it up. I dread this process because it’s a juicy mess and my knife never seems sharp enough to battle the thick watermelon and rind. But alas, it must be done. So roll up your sleeves and let’s get to it. It will be worth it. A great tip I learned somewhere along the way (probably some Food Network show) is to cut your watermelon on a rimmed cookie sheet. It keeps the juice from flowing all over your countertop and onto the floor. It’s been a game-changer for me in the watermelon department.
  2. Next, chiffanode the basil. Chiffa-what? Chiffanode. It is a fancy word for cutting into long, thin strips and is actually quite easy. Stack all the basil leaves on top of each other and then roll up your leafy pile into a basil-like cigar. Take a sharp knife and start cutting the “cigar” into thin strips. When you’re done you’ll have long, thin pieces that unroll and are ready for the salad.
  3. Lastly, toast pine nuts on medium heat in a frying pan for a couple of minutes until light brown. Warning don’t try to multi-task at this point. It won’t work. They burn quickly! Keep your eyes on the prize here, people.
  4. To assemble place the watermelon into a large serving bowl and add basil, olive oil, vanilla fig balsamic, a good pinch of salt and a bit of fresh cracked pepper to taste. Mix all ingredients together. If you want it to look extra-awesome garnish the salad with a few additional pine nuts, a bit more basil, and a little more salt and pepper on top. Take a bite. Then take a picture. Duh. Doesn’t everyone take a picture after they make a culinary masterpiece?
Sweet Lemon Made http://sweetlemonmade.com/
 Watermelon and Basil Salad

Recipe adapted from A House in The Hills