Browsing Tag

food

Eats

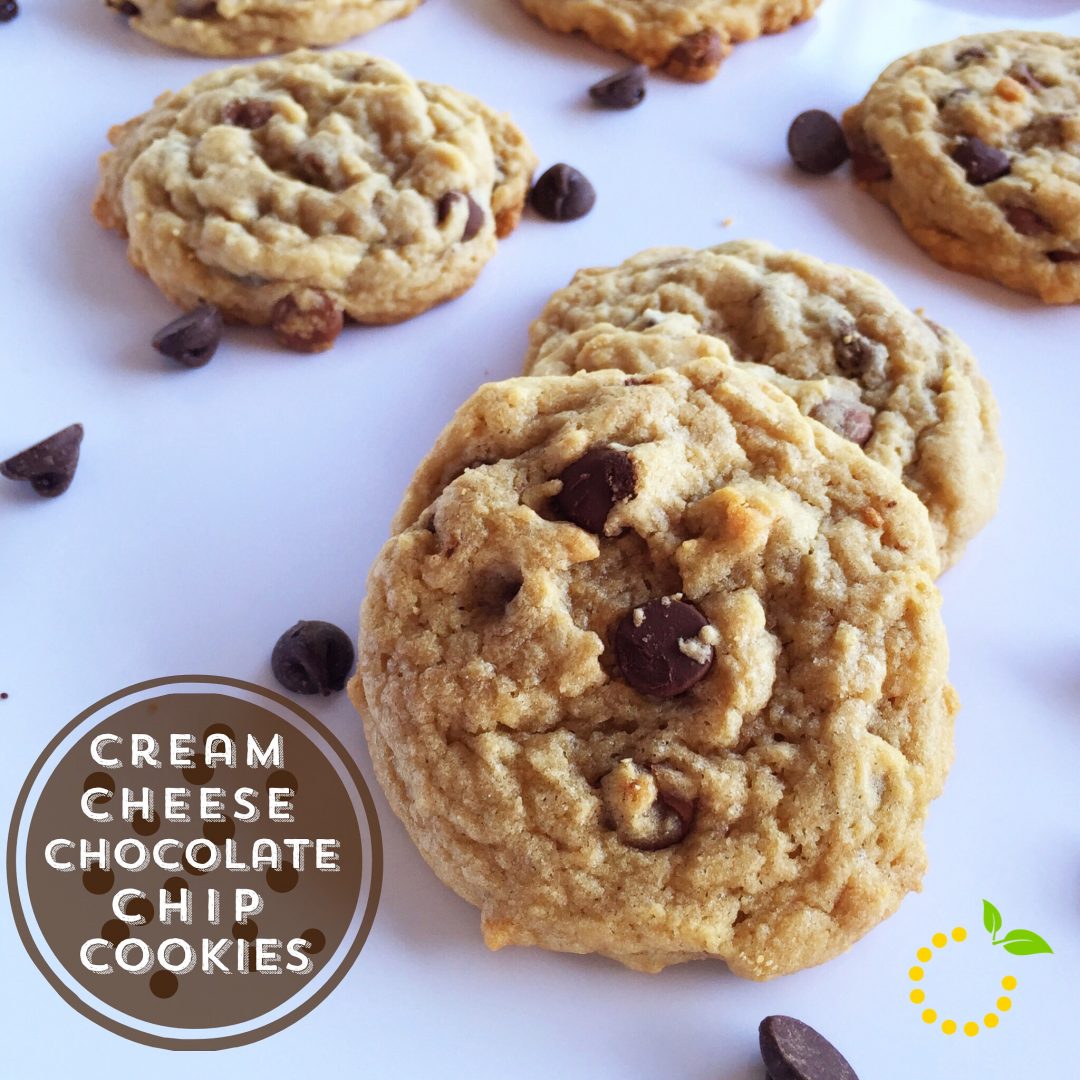
Cream Cheese Chocolate Chip Cookies

Happy National Chocolate Chip Day!! If you were looking for an excuse to make some chocolate chip cookies today, today is the day to have that cheat day because c’mon it’s a national holiday!  And any reason to make these soft cream cheese chocolate cookies is a good day in my book! These cream cheese chocolate chip cookies are so soft and moist with the addition of a little bit of cream cheese.

Would you believe me if I told you that the secret ingredients to these soft cookies is cream cheese and cornstarch?!? If you don’t believe me, give this recipe a try and tell us what you think. The other secret to thick soft cookies is to refrigerate the dough for up to 2 hours or overnight. I know some people hate recipes that require you to refrigerate your dough, but if your dough is warm your cookies will spread while baking and turn out thin.

I love how these cookies are thick without being cakey and the texture of these cookies are a bit chewy around the edges while the interior is soft, tender, and moist.

Cream Cheese Chocolate Chip Cookies
Write a review
Print
Ingredients
  1. 1/2 cup unsalted butter, softened
  2. 1/4 cup cream cheese, softened (don't use fat-free, light or whipped)
  3. 3/4 cup light brown sugar, packed
  4. 1/4 cup granulated sugar
  5. 1 large egg
  6. 2 teaspoons vanilla extract
  7. 2 1/4 cups all-purpose flour
  8. 2 teaspoons cornstarch
  9. 1 teaspoon baking soda
  10. 1/4 teaspoon salt
  11. 2 1/4 cups semi-sweet chocolate chips or chunks (I like to use 1 cup chips and 1 1/4 cups chunks)
Instructions
  1. To the bowl of a stand mixer fitted with the paddle attachment, combine the butter, cream cheese (to get an accurate measurement, put it into a 1/4-cup measure cup rather than using the marks on the outside package), sugars, egg, vanilla, and beat on medium-high speed until well-creamed, light and fluffy, about 5 minutes.
  2. Scrape down the sides of the bowl, and add the flour, cornstarch, baking soda, salt, and mix until just combined, about 1 minute.
  3. Add chocolate chips and chunks, and beat for just a minute to incorporate, or fold in by hand.
  4. Using a medium cookie scoop, form heaping mounds. Place on a large plate and flatten mounds slightly with your palm.
  5. Cover with plasticwrap, and refrigerate for at least 2 hours, or up to 5 days, before baking. Baking with warm dough causes cookies to spread and bake thinner and flatter.
  6. Preheat oven to 350F and line a baking sheet with parchment paper or a Silpat Non-Stick Baking Mat and place dough on baking sheet, spaced at least 2 inches apart. Bake for 8 to 9 minutes, or until edges have set and tops are just beginning to set. They will look slightly under cooked, pale and glossy in the center. Rotate pans after 4 minutes and do not bake longer than 10 minutes as cookies will firm up as they cool. (If dough is refrigerated overnight, allow dough to come to room temp for 15 minutes before baking).
  7. Allow cookies to cool on the baking sheet for 5 minutes before removing and transferring to a rack to finish cooling.
Sweet Lemon Made http://sweetlemonmade.com/

IMG_2280

Eats

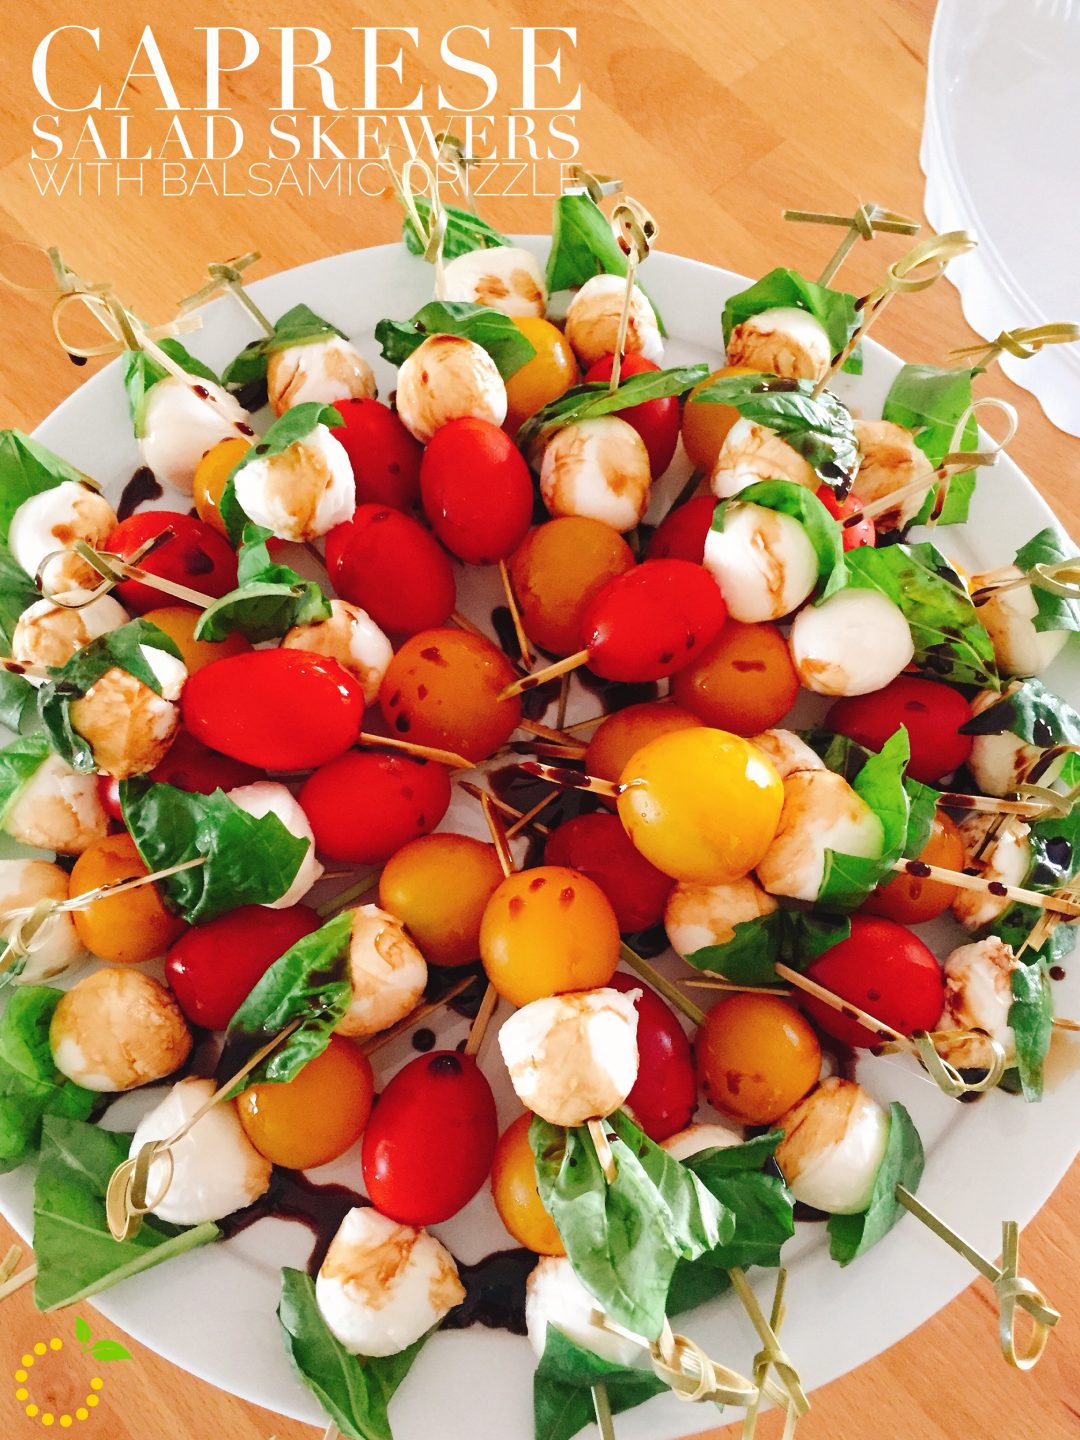
Caprese Salad Skewers with Balsamic Drizzle

Even though we had a winter day in May here in Utah, it’s starting to feel like summer. And that means BBQ grillin’ time and summer foods! These Caprese salad skewers are perfect bites of freshness and assembly is as easy as 1…2…3!

  1. Basil
  2. Mozzarella ball
  3. Tomato

Made with fresh mini mozzarella balls, skewered with tender basil leaves and juicy tomatoes and drizzled with balsamic vinegar. Tip: You can use a plain balsamic vinegar or try our secret ingredient–pomegranate balsamic vinegar from a local Ogden restaurant called Hearth on 25th! You can also find it online here

This stuff is delicious! This simple appetizer will have people coming back for more and I know they won’t be able to eat just one!

Caprese Salad Skewers with Balsamic Drizzle
Write a review
Print
Ingredients
  1. Fresh mini mozzarella balls
  2. Cherry or grape tomatoes
  3. Fresh basil leaves, cut if large
  4. Balsamic vinegar or our favorite pomegranate balsamic vinegar
  5. Toothpicks or bamboo skewers
Instructions
  1. Drain mozzarella balls.
  2. Wash and dry tomatoes and basil leaves.
  3. Cut basil leaves if too large.
  4. Assemble skewers--basil, mozzarella ball, and then tomato.
  5. Plate and drizzle with balsamic vinegar.
  6. Serve and enjoy!
Notes
  1. Tip: If you would like to make the balsamic into a glaze here are the instructions.
  2. 1.Over high heat, bring balsamic vinegar to a boil in a saucepan. Lower heat to medium and simmer for about ten minutes, or until it has slightly thickened.
  3. 2.Remove from heat and let cool.
Sweet Lemon Made http://sweetlemonmade.com/


Eats

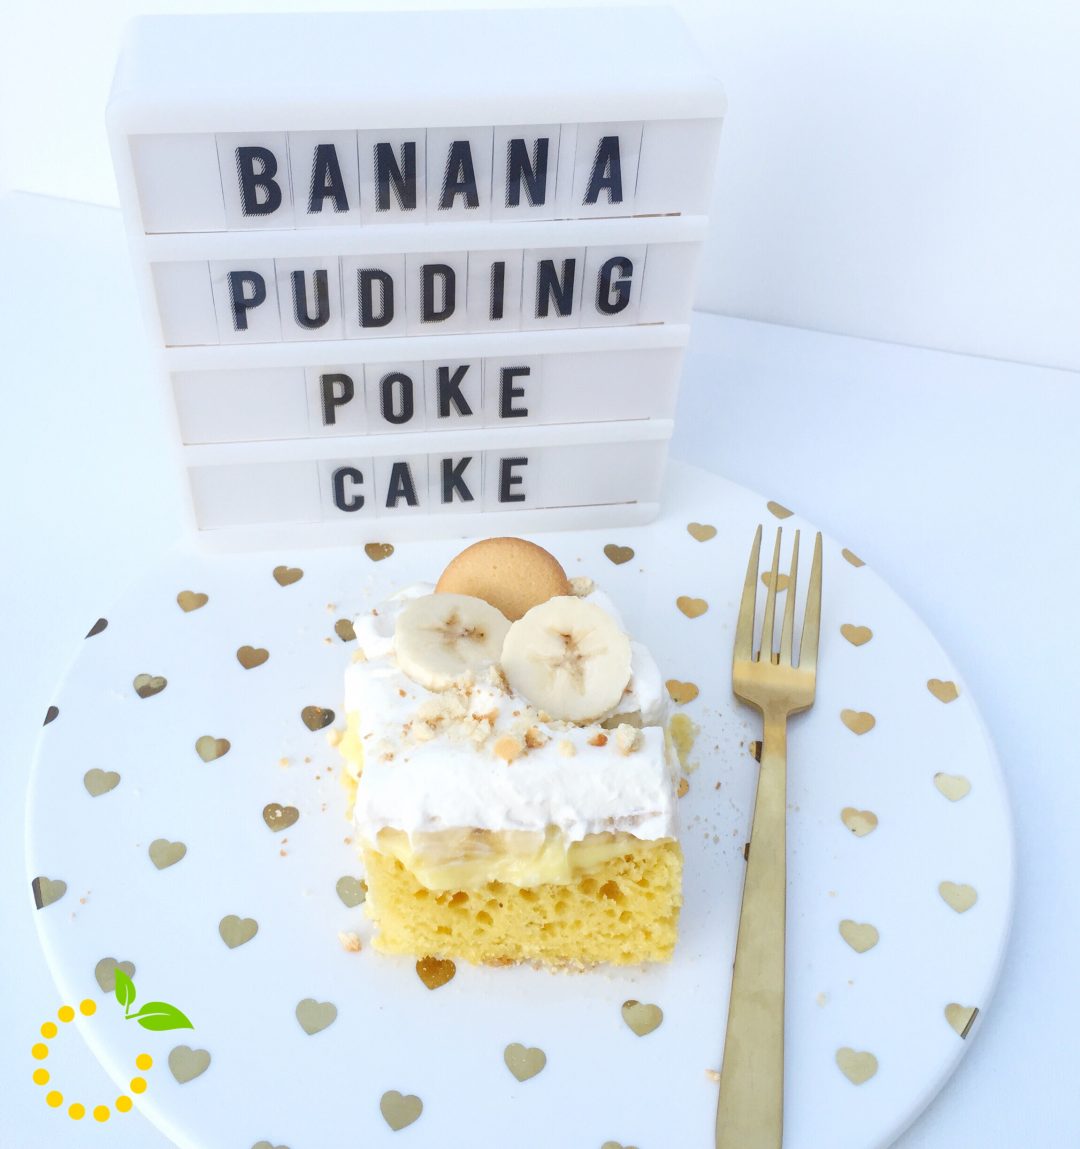
Banana Pudding Poke Cake

Grab yourself a cake mix and once it’s done and cooled down, grab your wooden spoon and start poking those holes!
IMG_0786

Next, whip up your banana pudding and pour it all over the cake and spread evenly making sure to get it into all of the holes.

IMG_0788

Then slice your bananas and layer them on top of the pudding in a single layer.

IMG_0790

Then, top the cake with cool whip.

IMG_0792

Refrigerate for 1-2 hours or overnight if possible. It taste so much better the next day! Right before serving sprinkle crushed Nilla Wafers on top. Garnish with banana slices and a whole Nilla Wafer and ENJOY!

IMG_0800

Banana Pudding Poke Cake
Write a review
Print
Ingredients
  1. 1 box yellow cake mix
  2. ingredients to make the cake: eggs, oil, water
  3. 2 (3.4 oz) packages of instant banana pudding
  4. 4 cups milk
  5. 1 (8 oz) tub of Cool Whip
  6. 20 Nilla Wafers, crushed
  7. 3-4 bananas
Instructions
  1. Prepare cake mix according to package for 9x13 pan.
  2. Once cake is done and comes out of the oven, allow it to cool for about 10-15 minutes.
  3. Then, with a wooden spoon poke holes in the cake making sure the holes are big enough for the pudding to get down into the cake.
  4. In a bowl, whisk together the pudding and the milk until smooth and begins to thicken.
  5. Pour pudding all over the cake and getting it into the holes. Using the back of a spoon or an off set spatula, spread the pudding out and gently pressing pudding into the holes.
  6. Slice bananas and top cake with a single layer of bananas.
  7. Top with cool whip and place in fridge for at least 1-2 hours before serving.
  8. Crush Nilla Wafers and sprinkle on top before serving.
  9. Garnish with banana slices and whole Nilla Wafers.
Sweet Lemon Made http://sweetlemonmade.com/
Do you know a banana lover? Or maybe it’s you? Either way, you or the banana lover in your life are going to go bananas over this banana pudding poke cake! Not only is it yummy, it’s super easy and simple to make, and you can make it ahead of time. And when I say super easy, I mean it. All you need is a box cake, pudding, bananas, Cool Whip, and Nilla Wafers!

Create

Easy Dip Dyed Marshmallows

Want to skip the hassle of boiling eggs this Easter? We have a super-easy DIY dip dyed marshmallow project for you! This DIY is a perfect activity for the little ones. All you need is JUMBO marshmallows, water and some food coloring. No need to wait around for eggs to boil or worry about cracked eggs. The kids (and even the adults) will have fun with all the different color combos and designs!

IMG_0384

IMG_0341

Eats

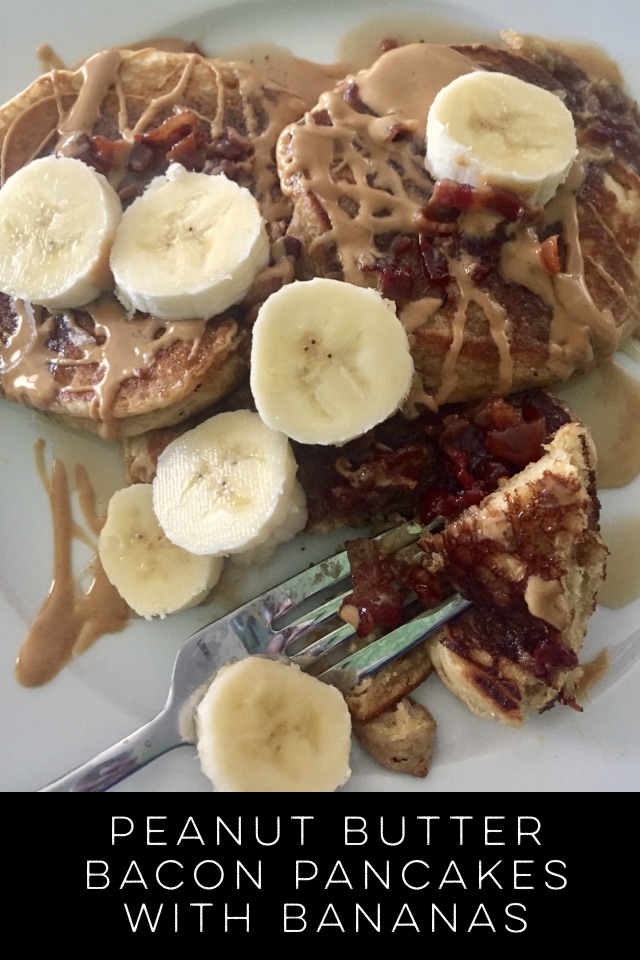
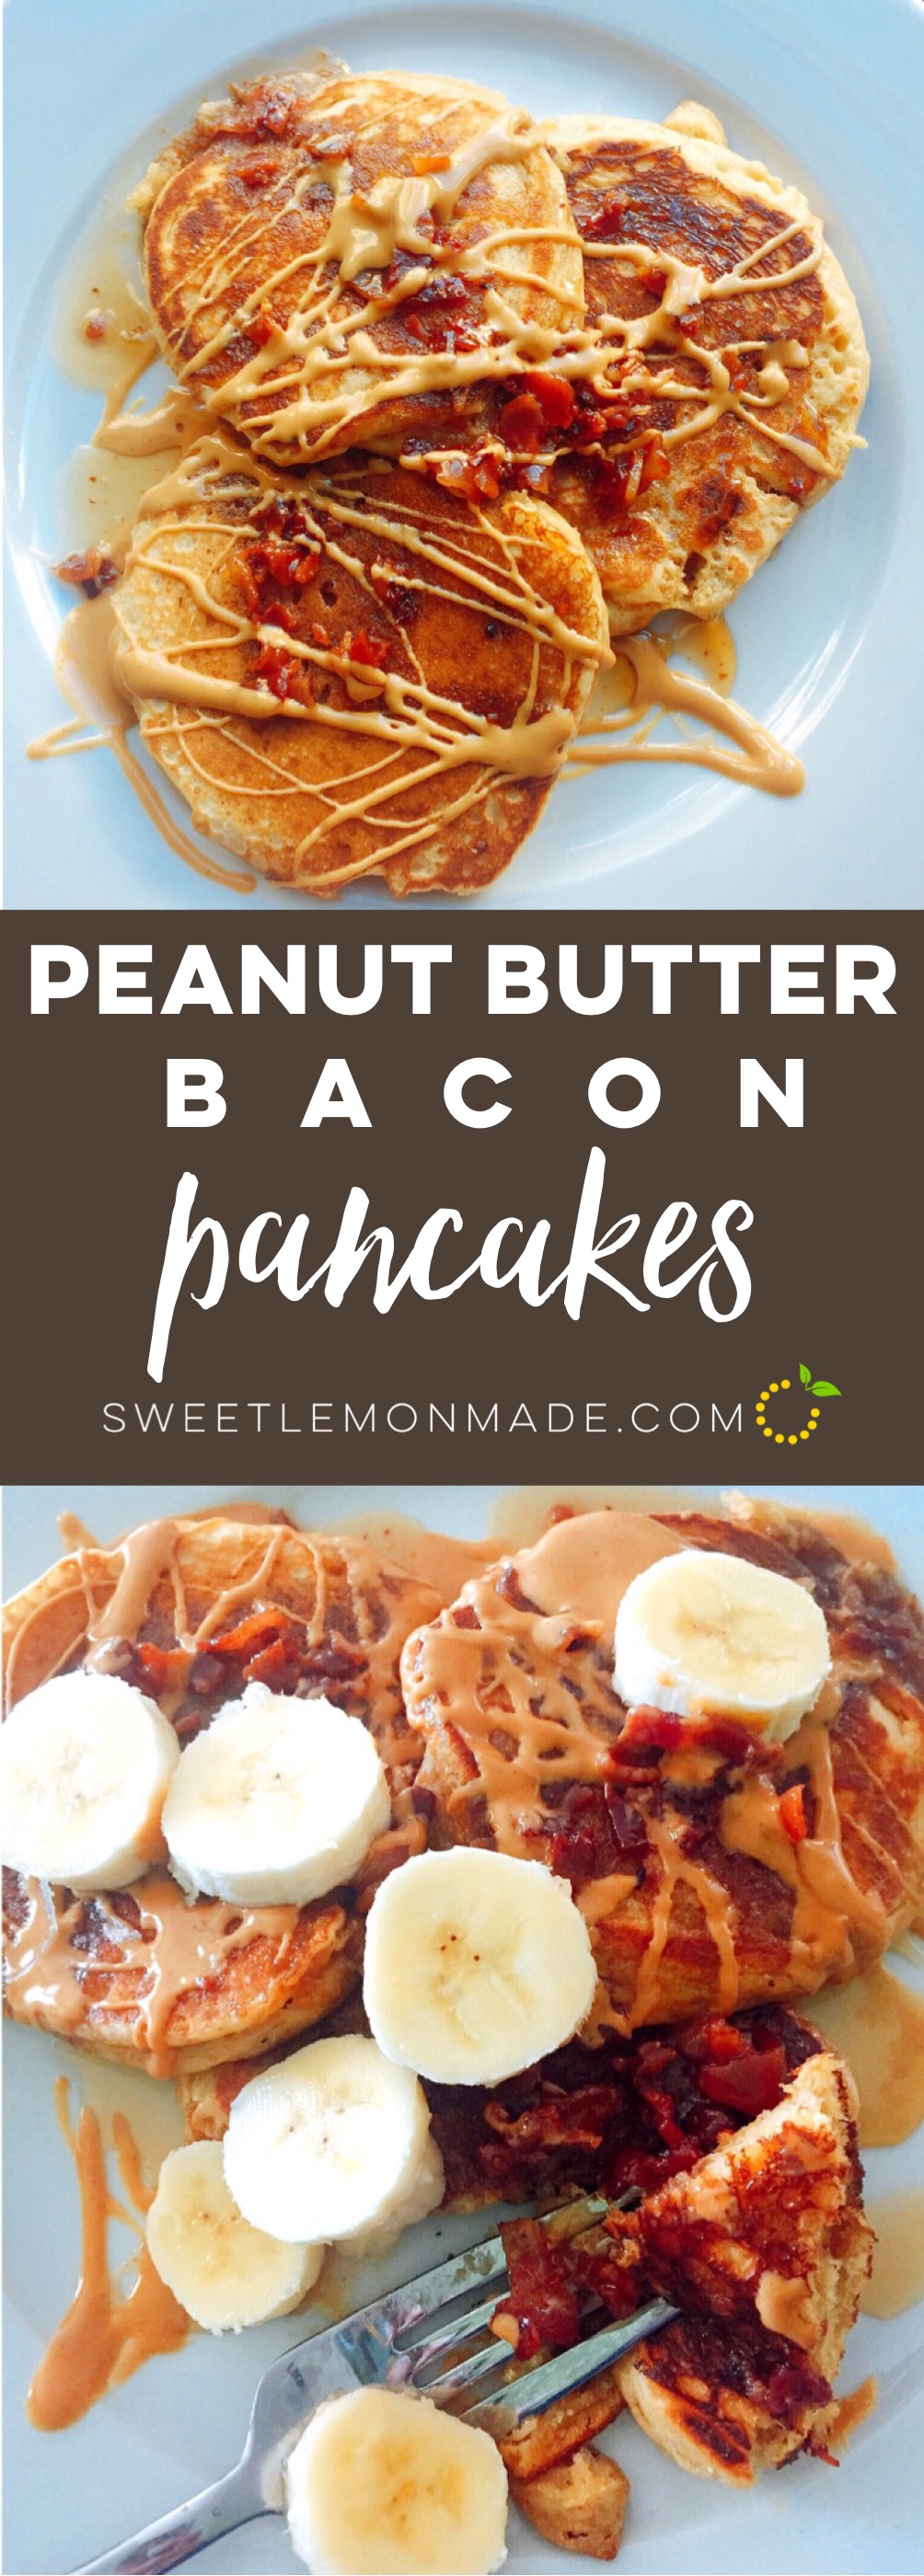
Peanut Butter Bacon Pancakes

Peanut Butter Bacon Pancakes sweetlemonmade.com

I first fell in love with bacon pancakes when I was living in Dallas. Dallas has some amazing food, especially brunch, and one of my favorite spots, home to the most delicious bacon pancakes ever, was a place called “Breadwinners.”  Everytime we went there someone had to get the bacon pancakes and there may have been a time or two where we couldn’t decide so we ordered  them “for the table.”  Now, if you’re the kind of person that orders an extra entree for the table so that you can be sure to try all the awesomeness on the menu, we should be friends. If you’re confused by that concept then you should probably just skip to the recipe portion of this post because I’m about to go on and on about my deep love for complex flavors and that would probably just bore you. 😉

Back to the pancakes, so years later while perusing the website of one of my favorites, Joy the Baker, I found this recipe for PEANUT BUTTER and BACON pancakes. Hold the phone! Peanut butter and bacon are one of my favorite flavor combinations, and she put them together in a pancake and topped it with maple syrup??! Be still my soul. Heavenly. This is what I’m talking about–complex flavors! The savory saltiness of the bacon is enhanced by the creaminess of the peanut butter and then rounded out by the sweetness of the maple syrup. Oh, it’s amazing. Then I got even crazier and added some bananas. Because who doesn’t love bananas and peanut butter? The bananas added a freshness to the rich combination and really sealed the deal. You’ve gotta try these! They are pretty straightforward, don’t require crazy ingredients, and can be whipped up easily on a Sunday morning. So go get that bacon out of the fridge and get cooking!

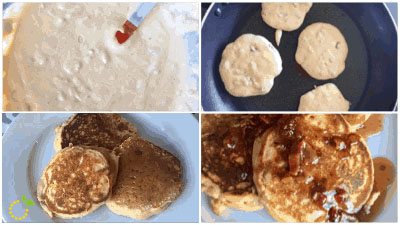
peanut butter pancakes sweetlemonmade.com
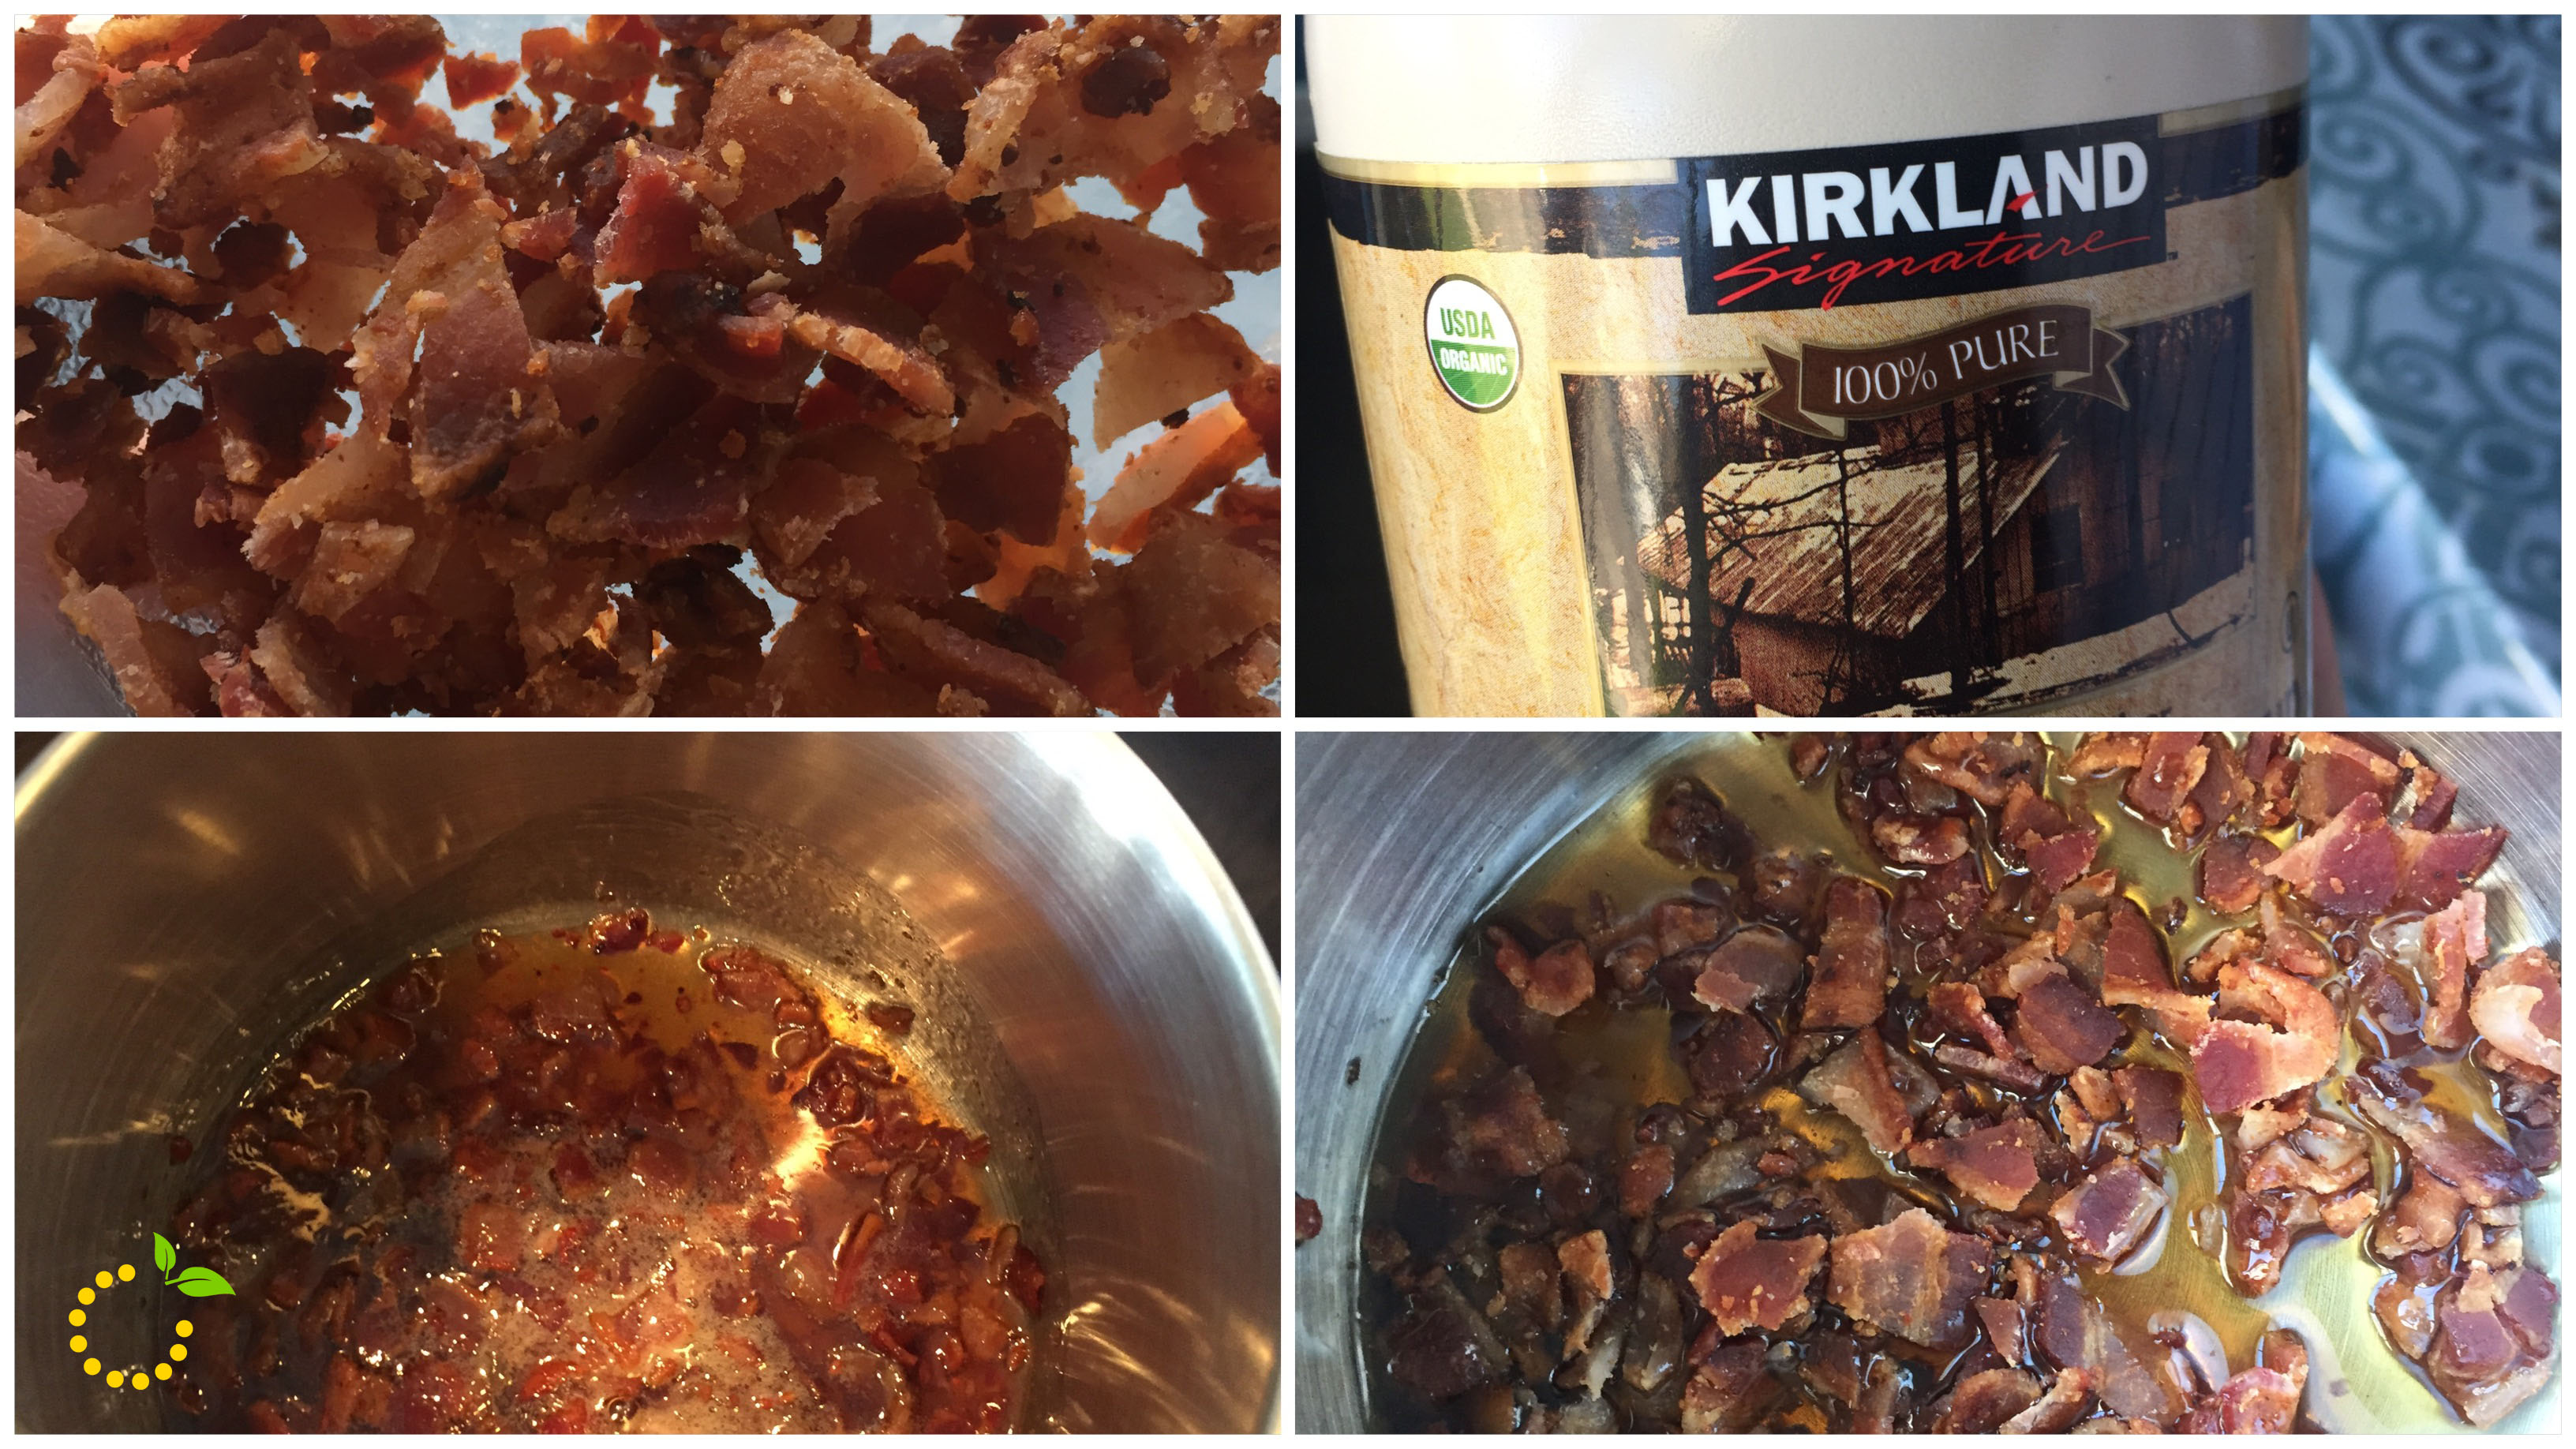
Bacon Maple Syrup sweetlemonmade.com

Peanut Butter Bacon Pancakes
Write a review
Print
Ingredients
  1. PANCAKES
  2. 1 large egg
  3. 2 tablespoons unsalted butter, melted
  4. 2 tablespoons all-natural peanut butter
  5. 1 cup buttermilk
  6. 1 teaspoon pure vanilla extract
  7. 1 cup all-purpose flour
  8. 2 tablespoon brown sugar
  9. 1 teaspoon baking powder
  10. 1/2 teaspoon baking soda
  11. 1/2 teaspoon salt
  12. 5 slices crisp bacon, cooled and cut into small pieces
  13. butter or oil for cooking pancakes
  14. BACON MAPLE SYRUP
  15. 5 pieces of bacon
  16. 1 cup real maple syrup
Instructions
  1. PANCAKES
  2. In a medium bowl beat together eggs, butter, peanut butter, buttermilk, and vanilla. Add flour, sugar, baking powder, baking soda, and salt. Mix well until mostly smooth. Fold in bacon pieces and let batter set for a few minutes.
  3. Heat a nonstick pan over medium-low heat. Add a teaspoon of oil or butter to the pan, or spray with cooking spray.
  4. Pour 2 Tablespoons of batter onto the griddle. Cook on the first side until bubbles that form start to pop. You can also gently lift up the pancake to make sure the bottom is not overcooking, if it is the pan may be too hot and you will need to adjust the heat. Flip the pancake over with a spatula and cook until golden brown. Repeat until all the batter is gone. Let cooked pancakes rest on a heat proof plate in a 200 degree F oven until ready to serve.
  5. BACON MAPLE SYRUP
  6. Cook bacon until crisp.Drain on plate with paper towel. Reserve 1 tablespoon of bacon drippings for syrup.
  7. Crumble or chop bacon to small pieces and place in small saucepan. Add maple syrup and bacon drippings.
  8. Bring to a quick boil and then simmer on low for 5-10 minutes so the bacon and maple flavors can meld together. Then you're ready to jazz up your pancakes.
  9. PEANUT BUTTER DRIZZLE
  10. melt 3-4 tablespoons of peanut butter in the microwave for 10 second increments until smooth and creamy.
  11. Drizzle on top of pancakes and bacon syrup.
  12. Lastly, if you're feeling crazy, slice a banana and place a few slice atop the pancake.
Notes
  1. Make a note for the buttermilk… “If you don’t have buttermilk you can make your own by adding 1 tablespoon of vinegar or lemon juice to 1 cup of milk. Let it sit for a few minutes and then add to the mix in place of buttermilk.
Sweet Lemon Made http://sweetlemonmade.com/

Image-1 (4)

Image-1 (5)